School website service training and support logo

School website service training and support

School website service training and support

Linking to a document or a URL

Use this guide to learn how to add your PDF or document to a page by linking to it. 

Add your PDF or document to assets before starting

  • The first step is to upload your PDF or document to Assets. Follow our guide to upload your documents
  • PDFs and documents that are uploaded to your assets do not automatically appear on your website. 

Video guide

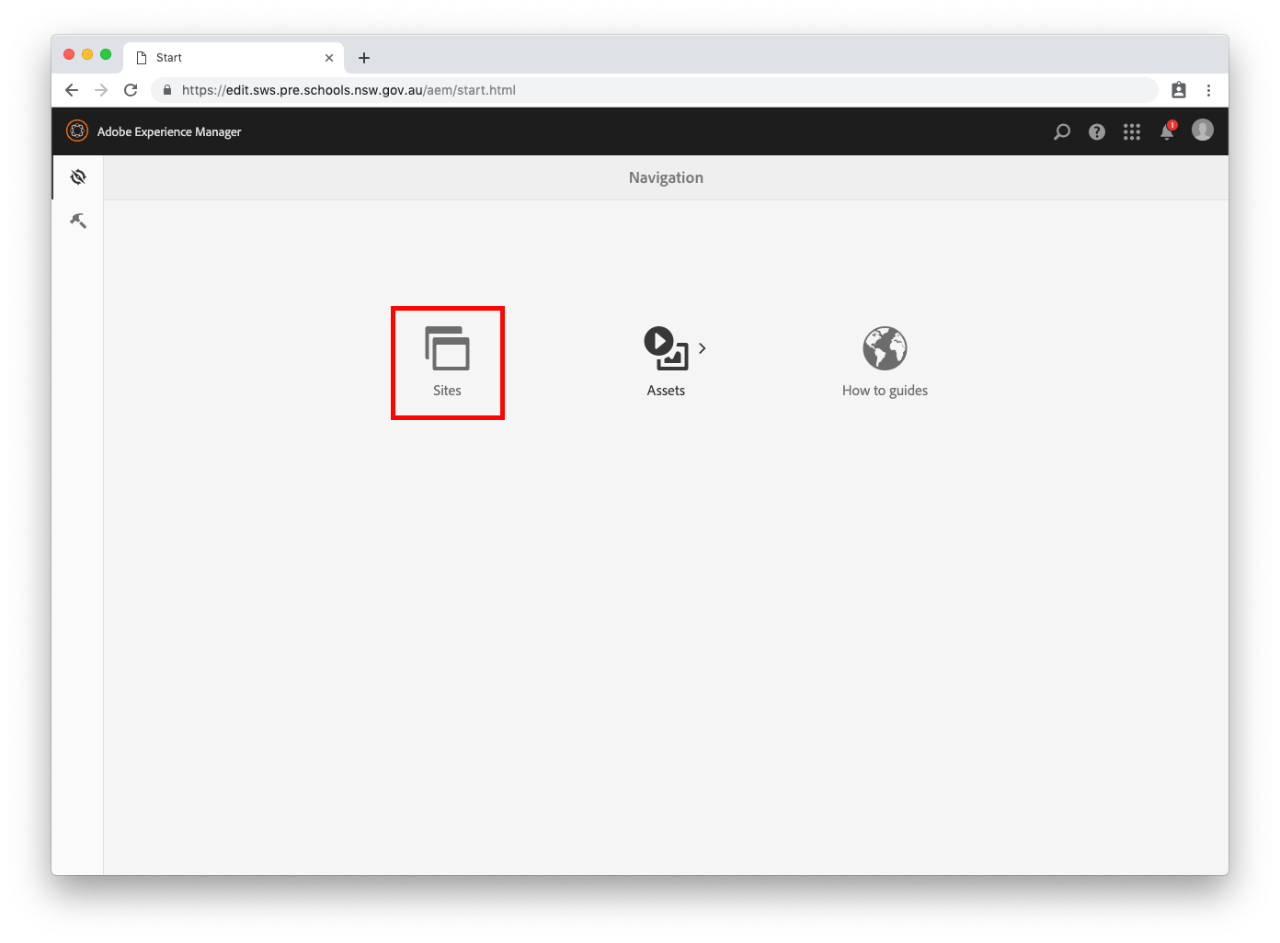
Step 1: Navigate to Home

  • Your school's home page will already be selected.

Step 2: Find the page you want to edit

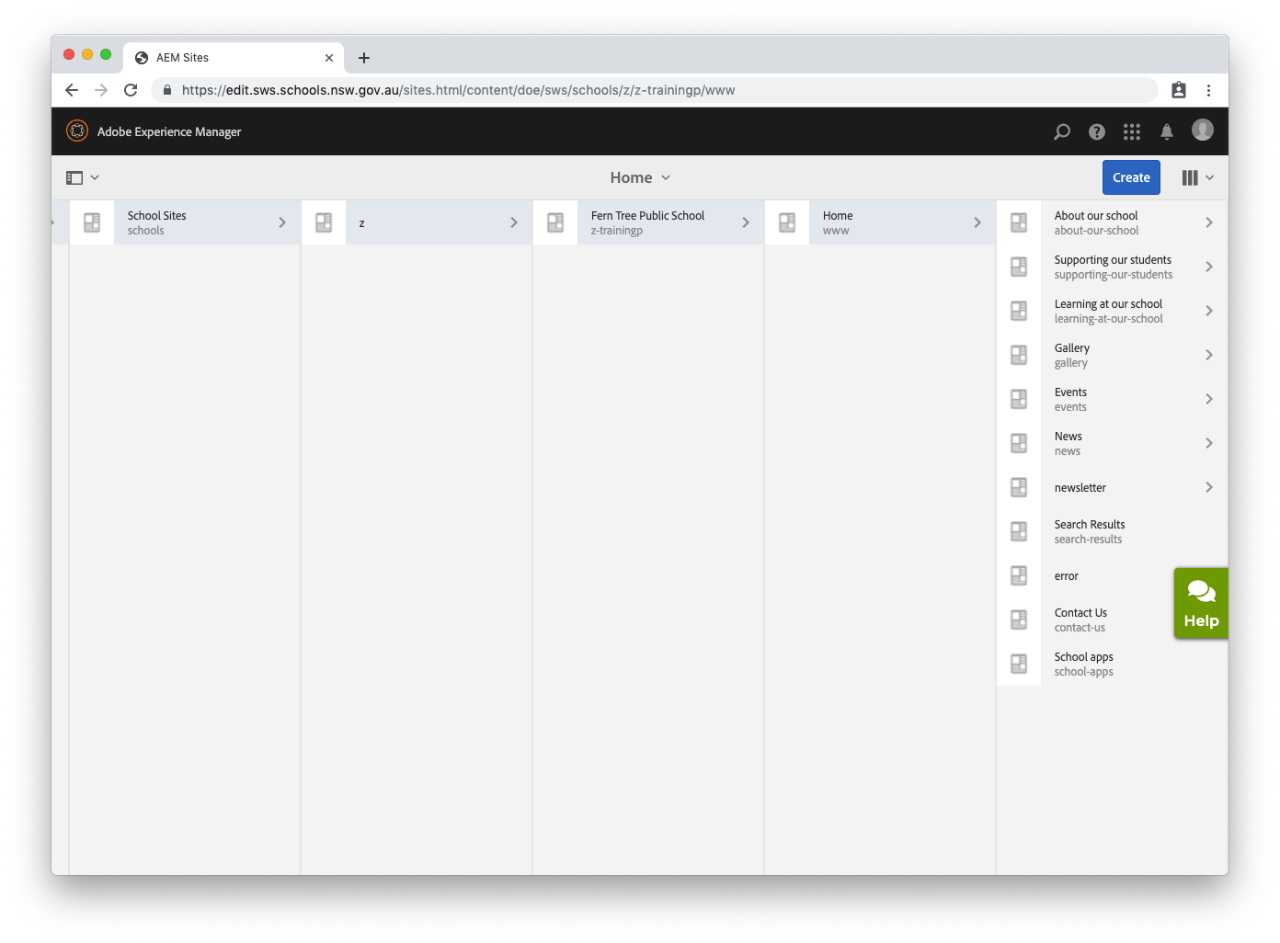
  • Navigate through your web pages to the page you want to edit. 
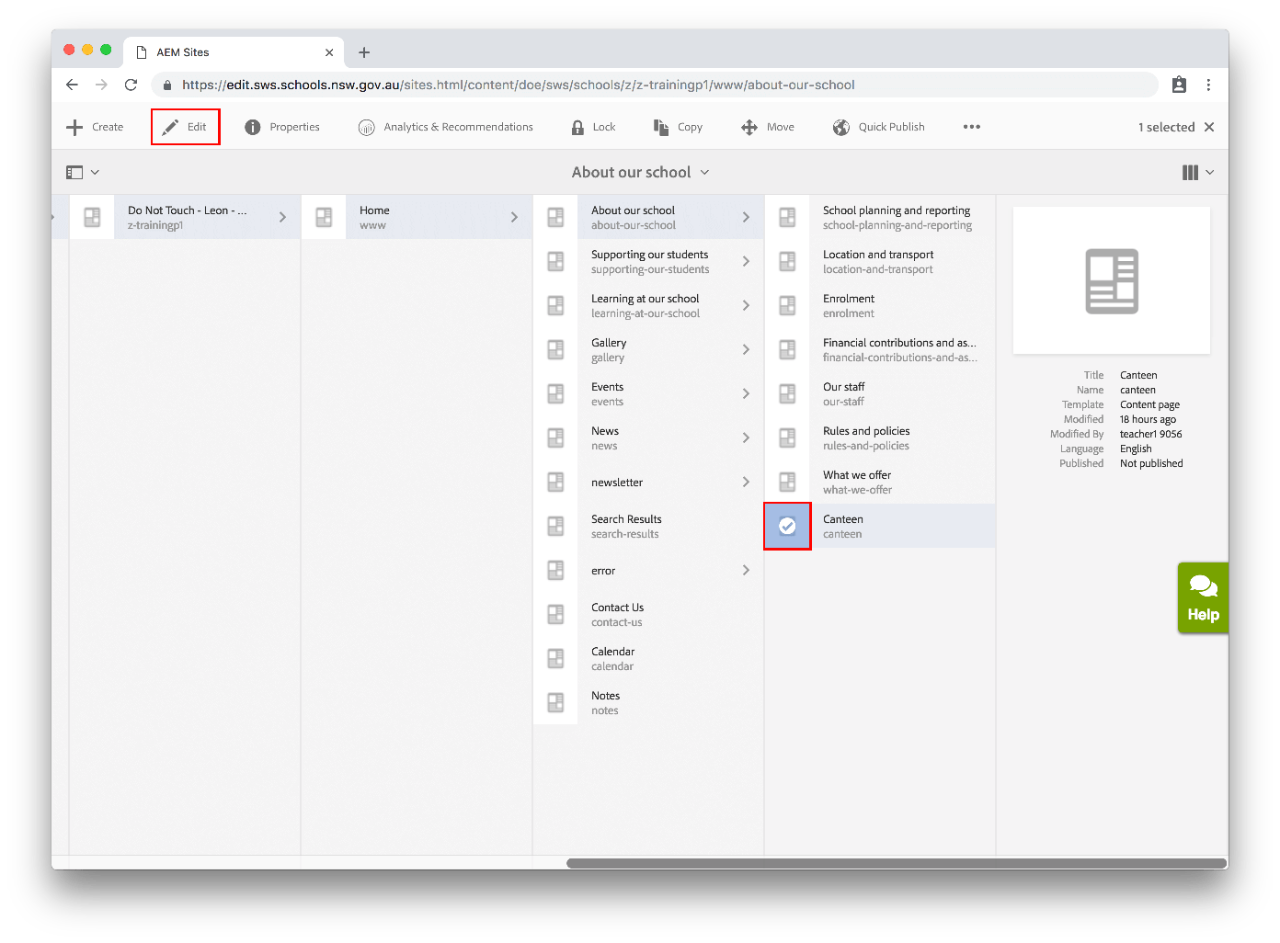
  • Once you have found your page, select the icon to the left of the page. The tick will appear and your selection will turn blue.
  • Select Edit in the actions toolbar that appears across the top of your browser.

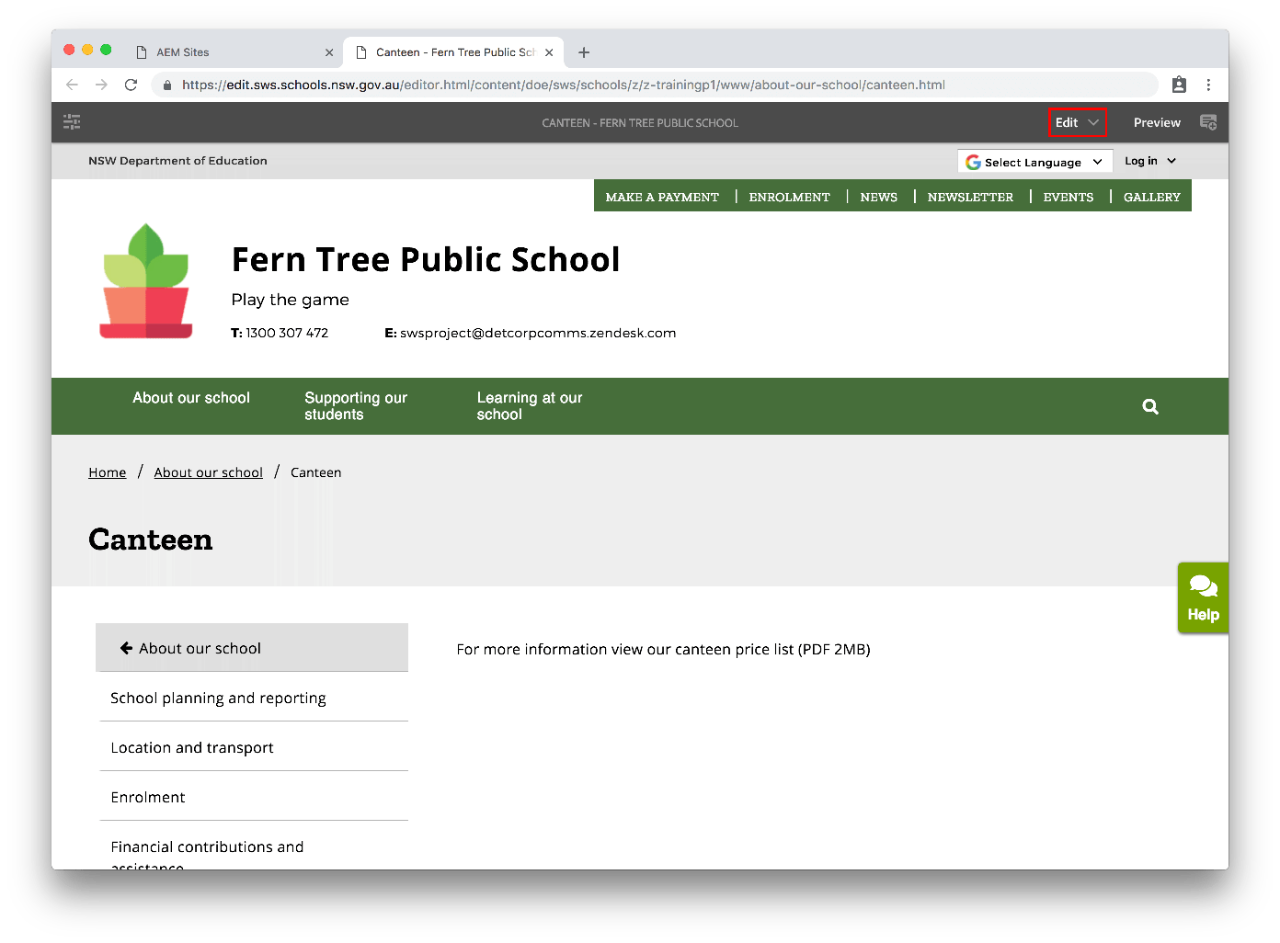
  • Select Edit in the top right of the page. This button is next to Preview

Step 3: Add or find the existing text component

  • You must add a link to your PDF or document using the Rich text editor component. This allows your community to see and access the PDF or document on your website. 
  • Add a Rich text editor to your page or find the existing component you would like to edit. 
  • If you can't edit a component, it might be global content added by the department. See our global content guide for more. 
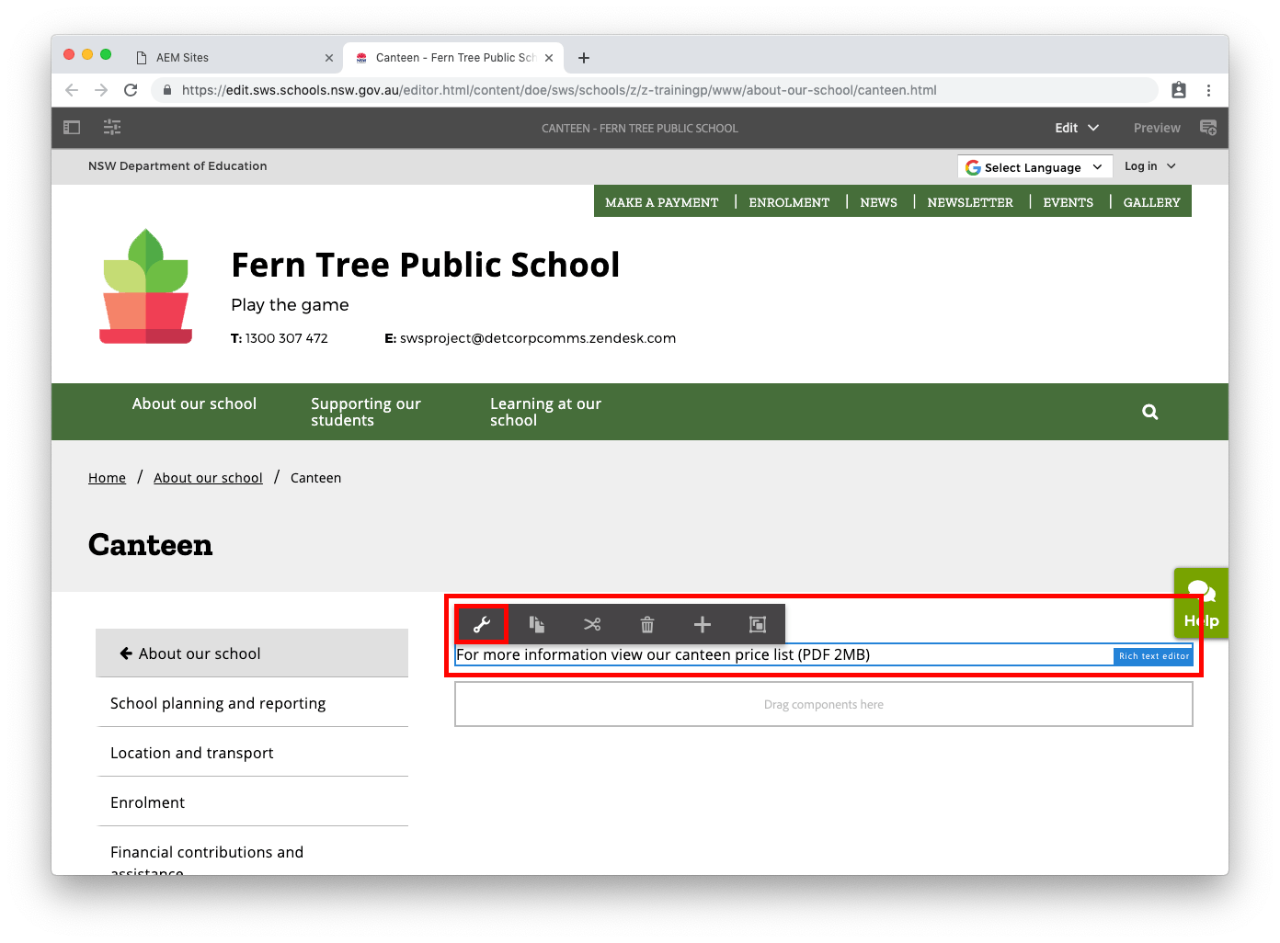
  • Select the Rich Text Editor component.
  • Select the spanner icon to edit the text. This is the Configure button. 

Step 4a: Link a document in your page 

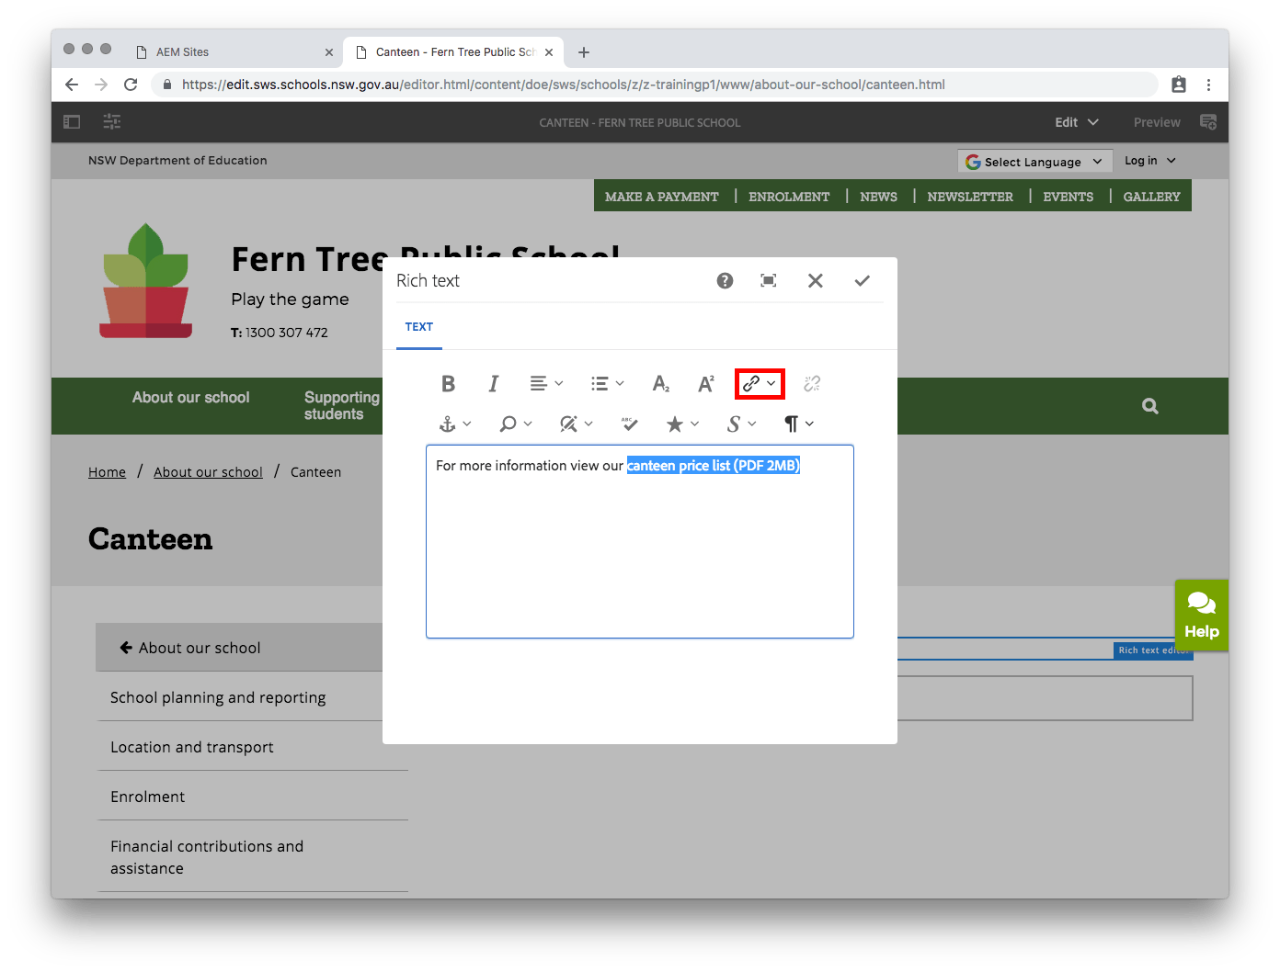
  • Write or find the text you want to add your link to. 
  • Highlight the text and select the chain icon from the toolbar. This is the Hyperlink button.

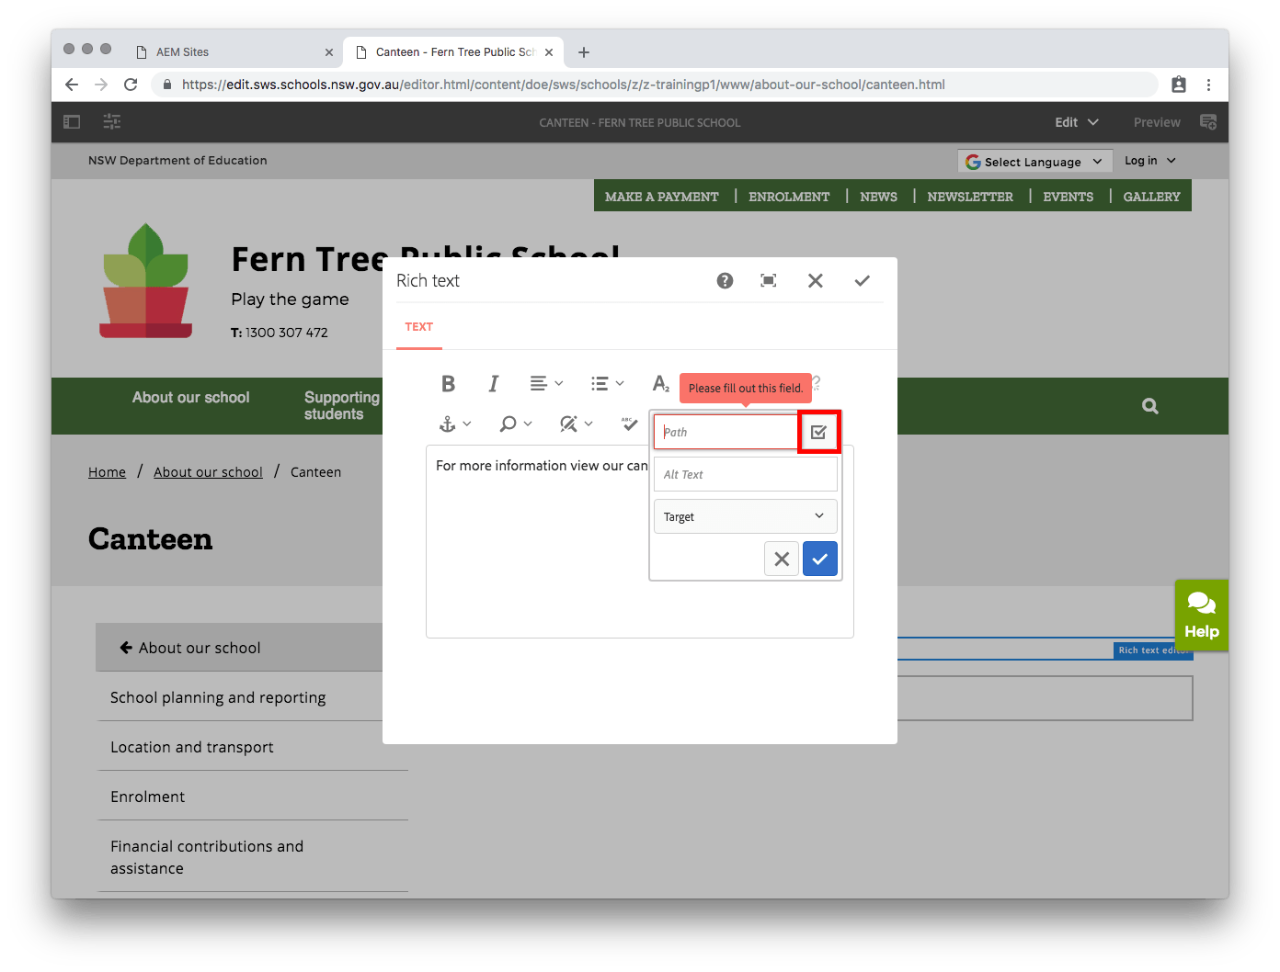
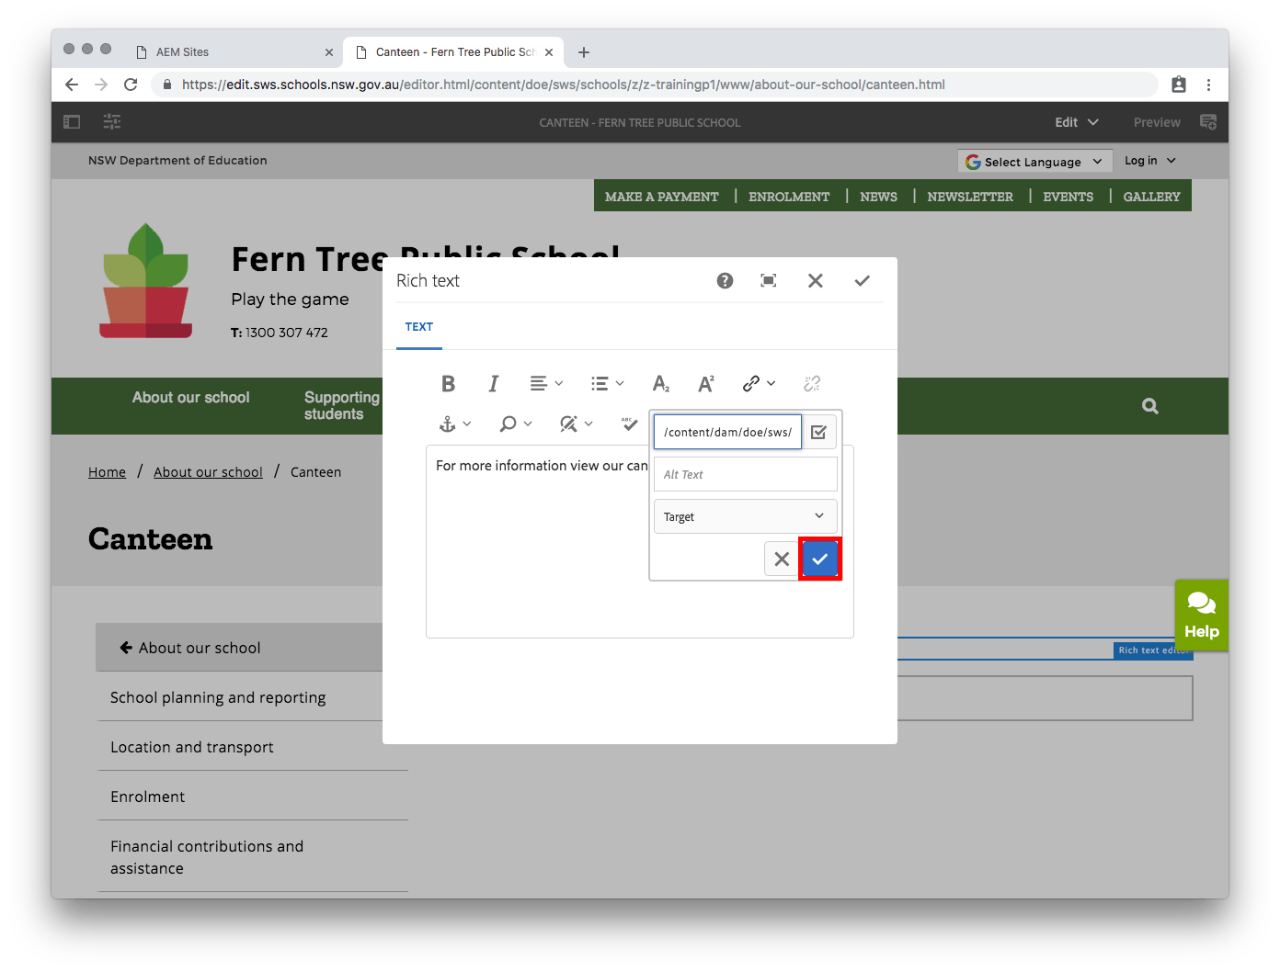
  • In the Path field, select the tick icon to navigate through your assets to your school's folder where you have previously uploaded your PDF or document.

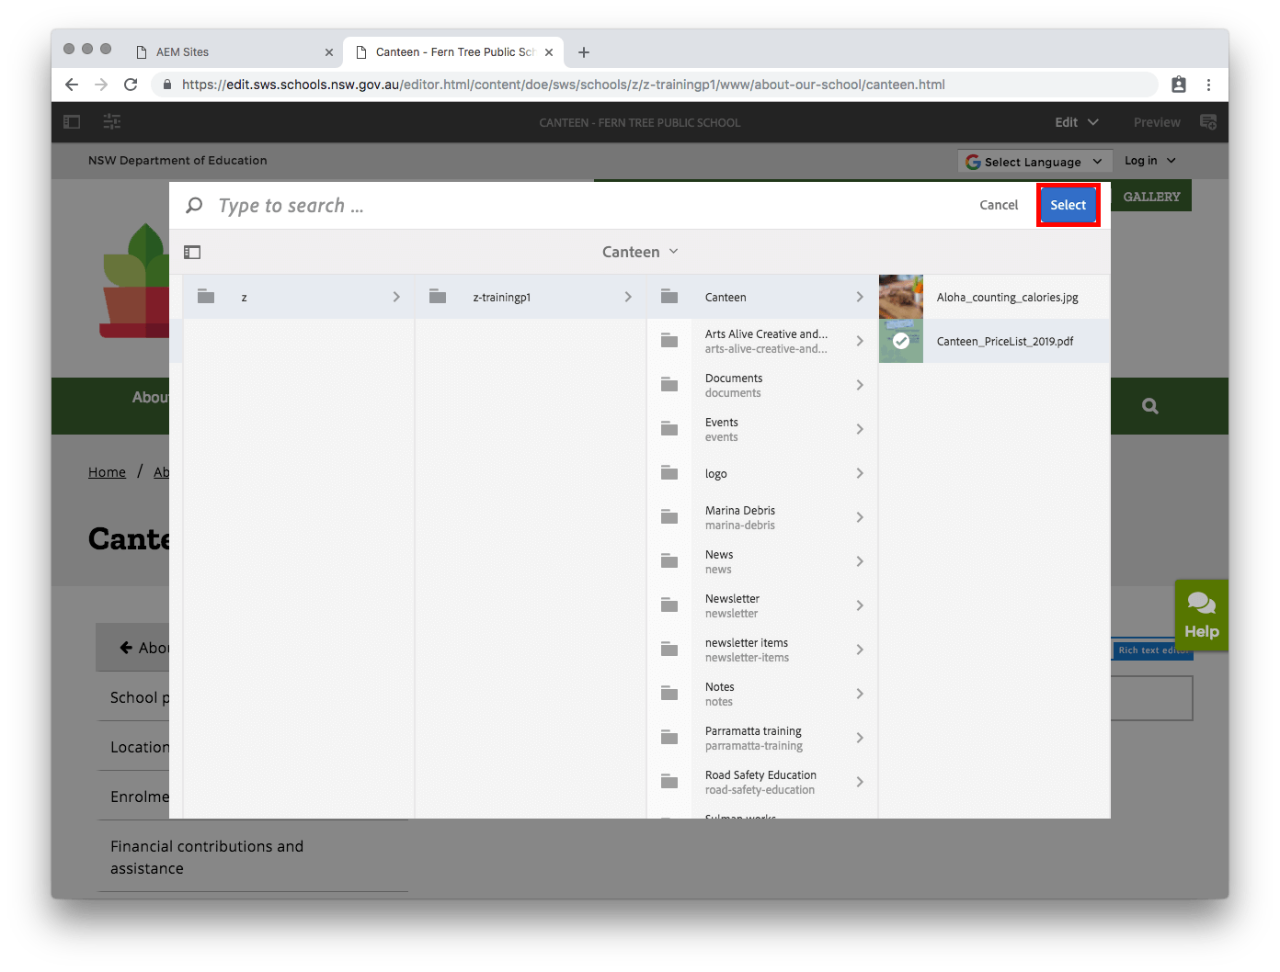
  • Once you have found your document, select the icon to the left of the file name. A tick will appear and your selection will turn blue.
  • Select the Select button in the top right. 

  • Select the blue tick in the bottom right of the pop-up to confirm. 

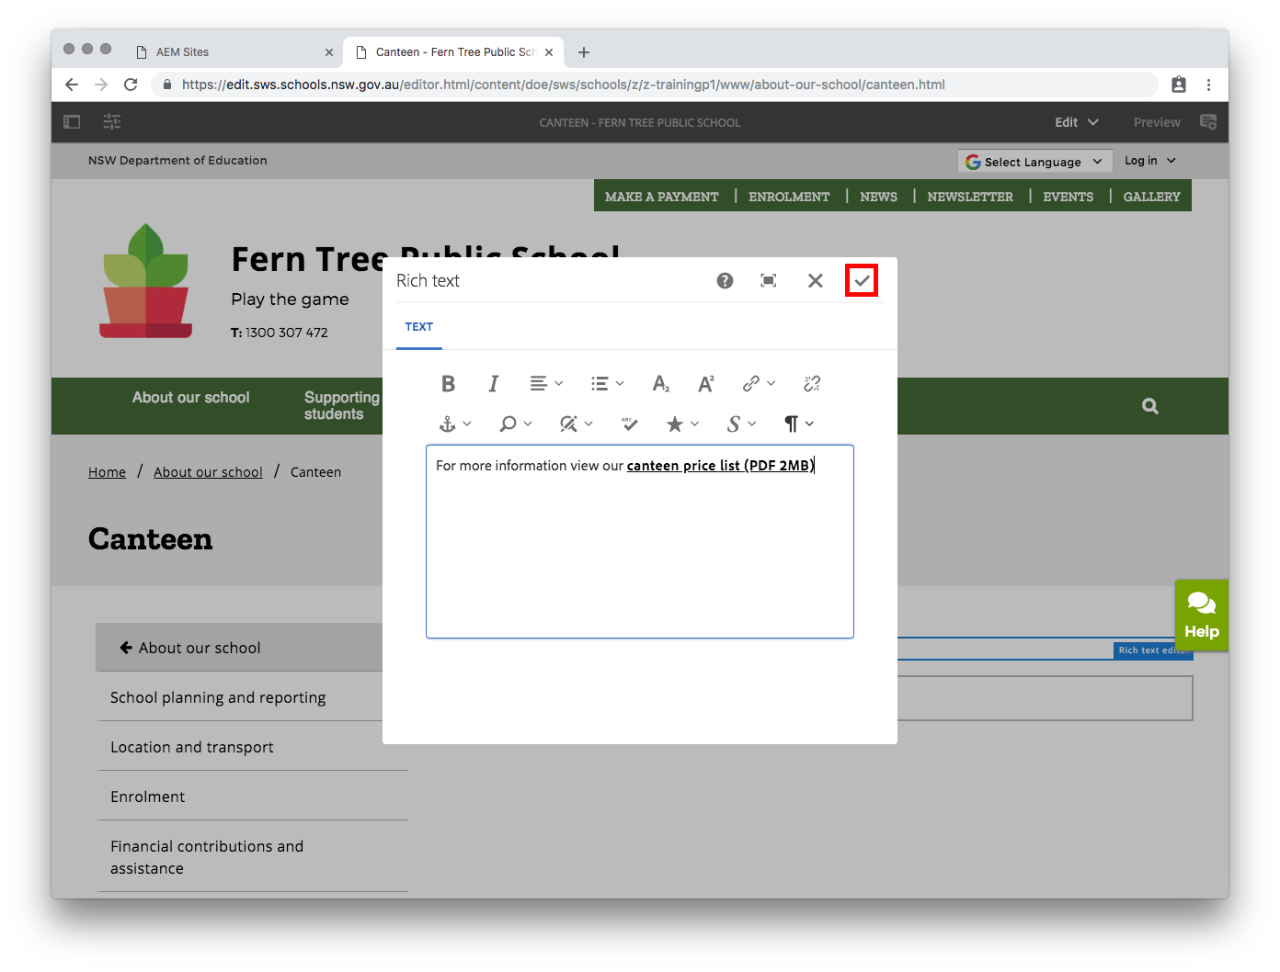
  • Select the tick in the top right of the Rich text editor to confirm changes. 

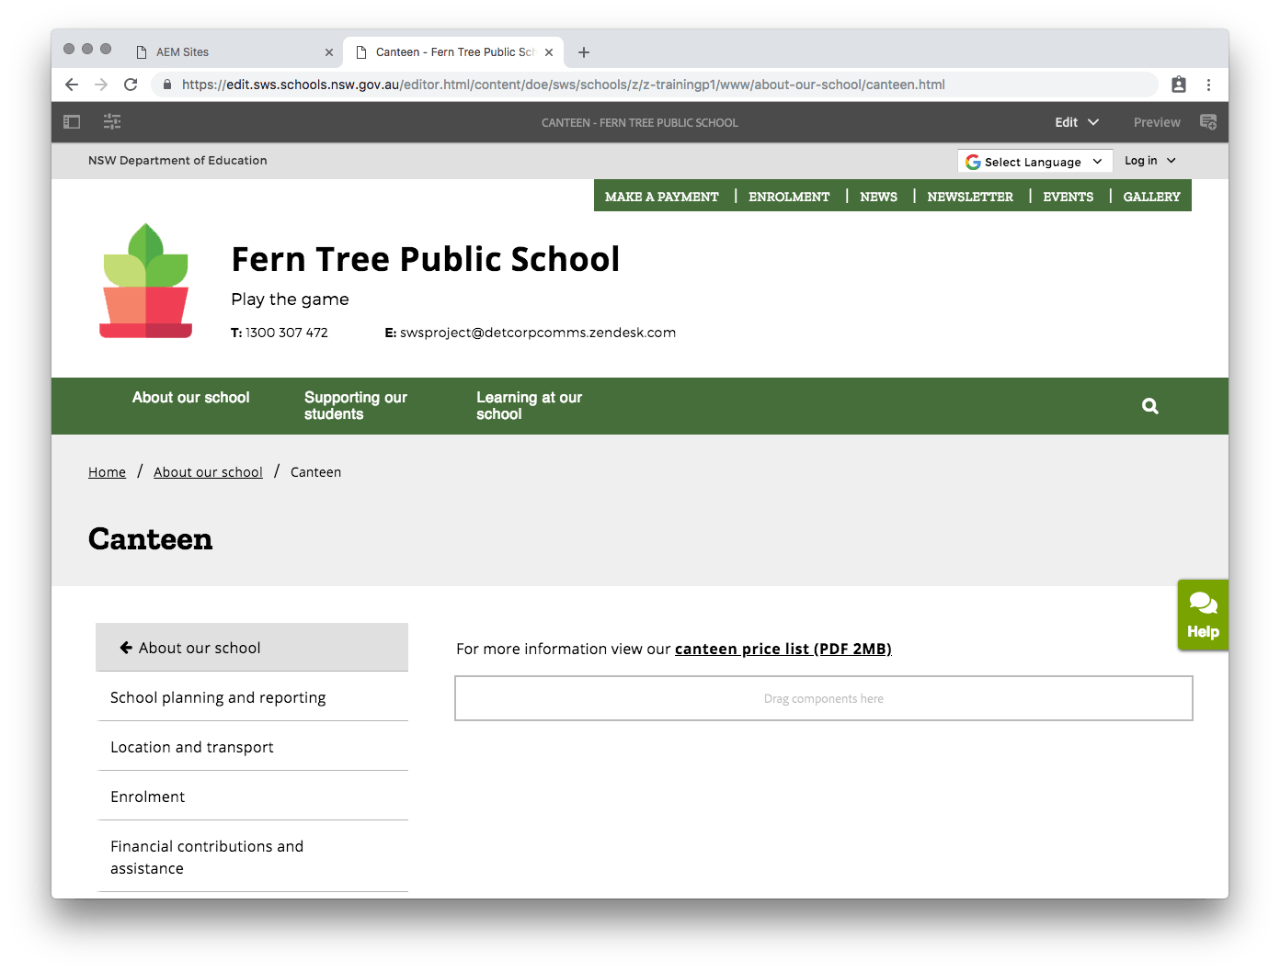
  • Your document is now linked in the page.

Step 4b: Link the text to a URL

  • Write or find the text you want to add your link to. 
  • Highlight the text and select the chain icon from the toolbar. This is the Hyperlink button.
  • In the Path field, type or paste in the URL of the website you would like to link the text to.
  • Select the tick in the top right of the Rich text editor to confirm changes.

Step 5: Publish your page

  • For changes to be updated on your live school website you will need to publish the page.
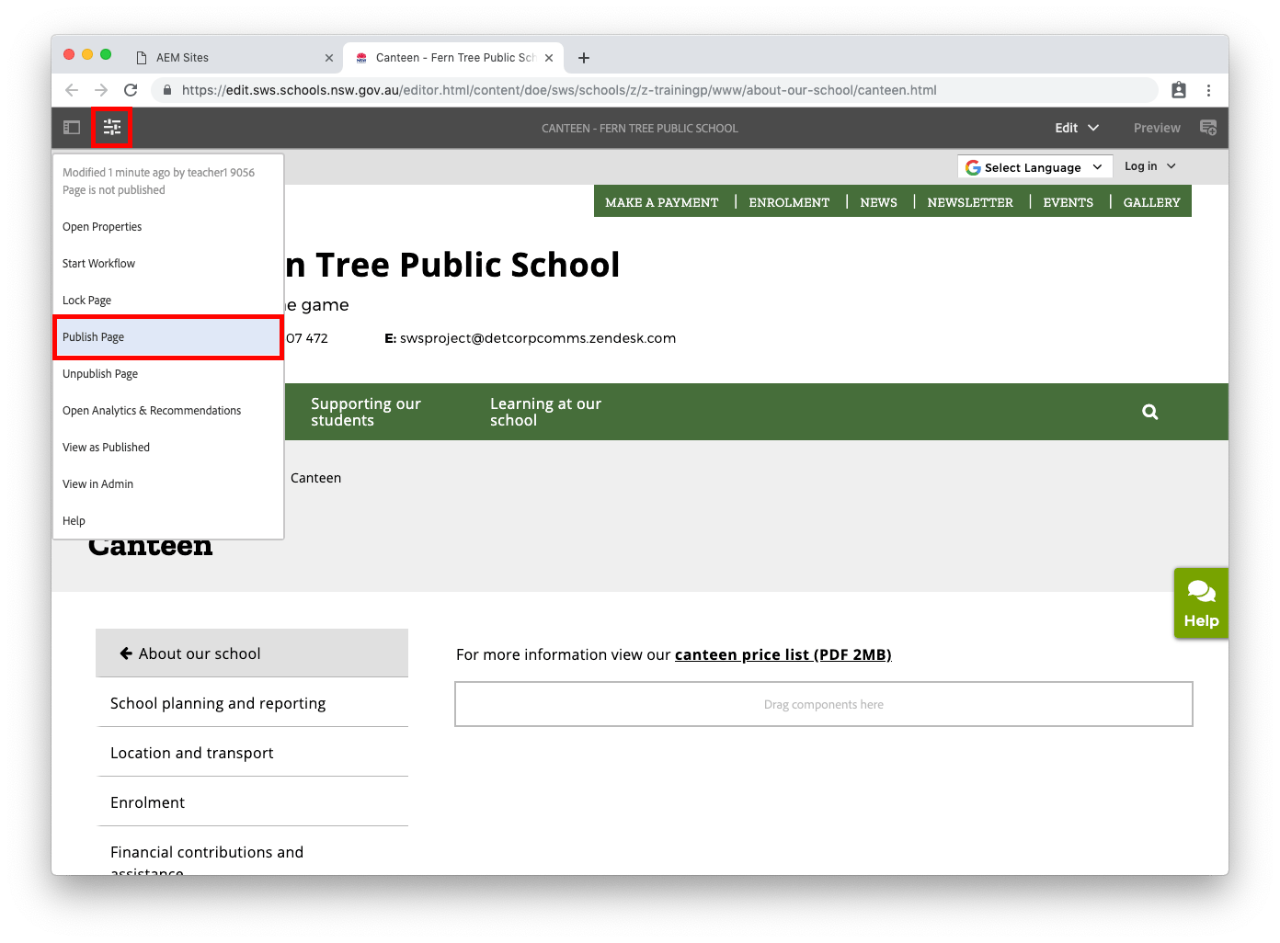
  • Select the slider icon in the top left corner. This is the Page Information button.
  • Select Publish Page from the drop-down. 
  • If you don't see Publish Page you are an Author and will need to select Start Workflow instead. Go to our Author publish a page for more information.


You may also find useful: