School website service training and support

Upload a PDF or other document to Assets

Use this guide to learn how to upload a PDF or other document to your Assets. 

Make sure you add your PDF or document to a page so your community can see it

  • PDFs and documents that are uploaded to your assets do not automatically appear on your website. 
  • The first step is to upload your PDF or document to Assets. We will guide you through this process on this page. 
  • The second step is to add your PDF or document to a page on your website in Sites by linking to it using the Rich text editor component. Follow our guide to link your PDF or document to a page. 

PDF guidelines

See our PDF guidelines to make sure your PDFs are easy for you and your community to find and use. 

Before you start

Before you add a document to your website, it is important that you add document properties. These properties will display basic information about the document: title, author, subject and keywords. This information is important for accessibility and search.

Find out how to add document properties to a PDF or a Microsoft Office program file

Video guide

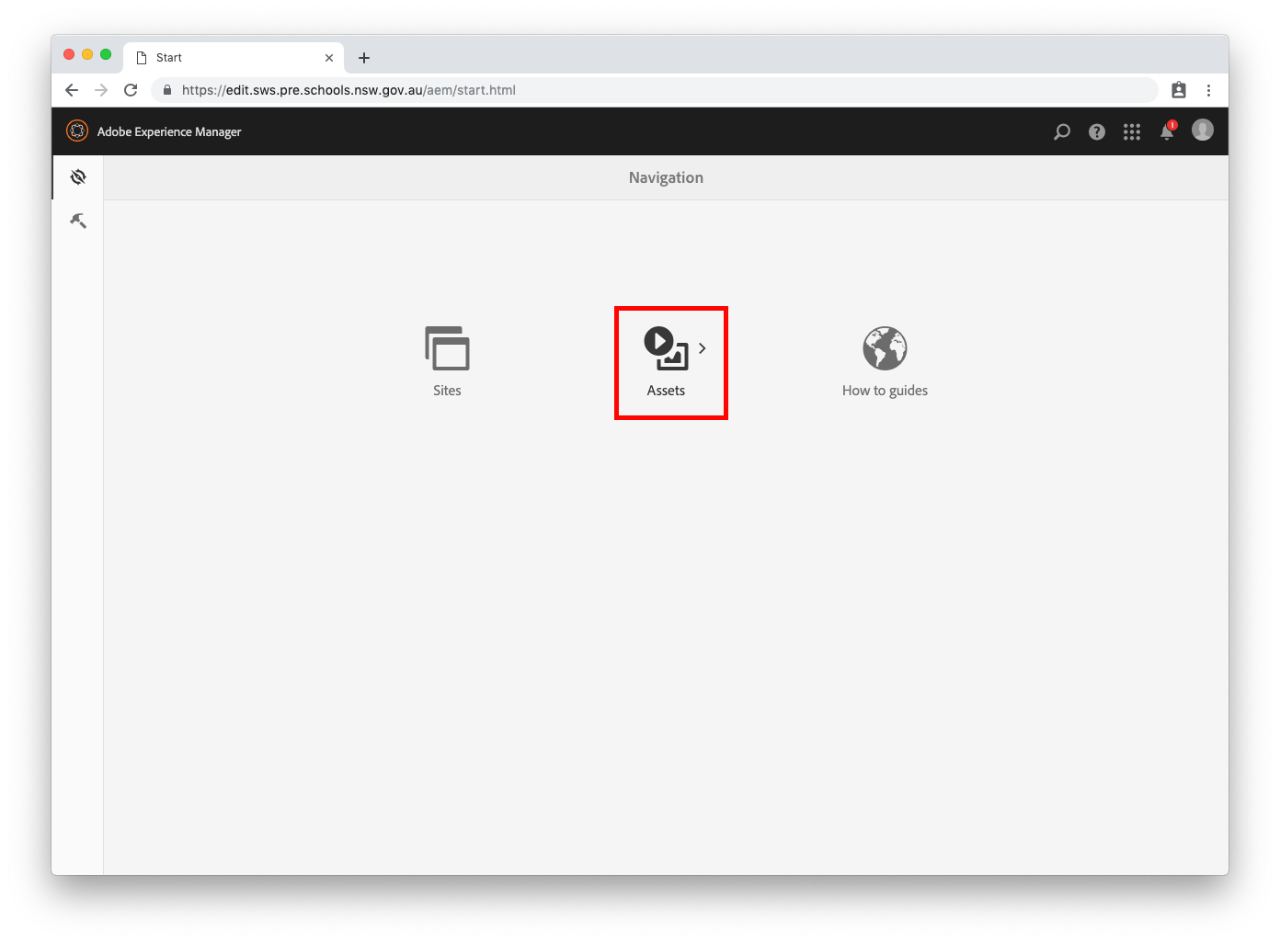
Step 1: Navigate to Assets

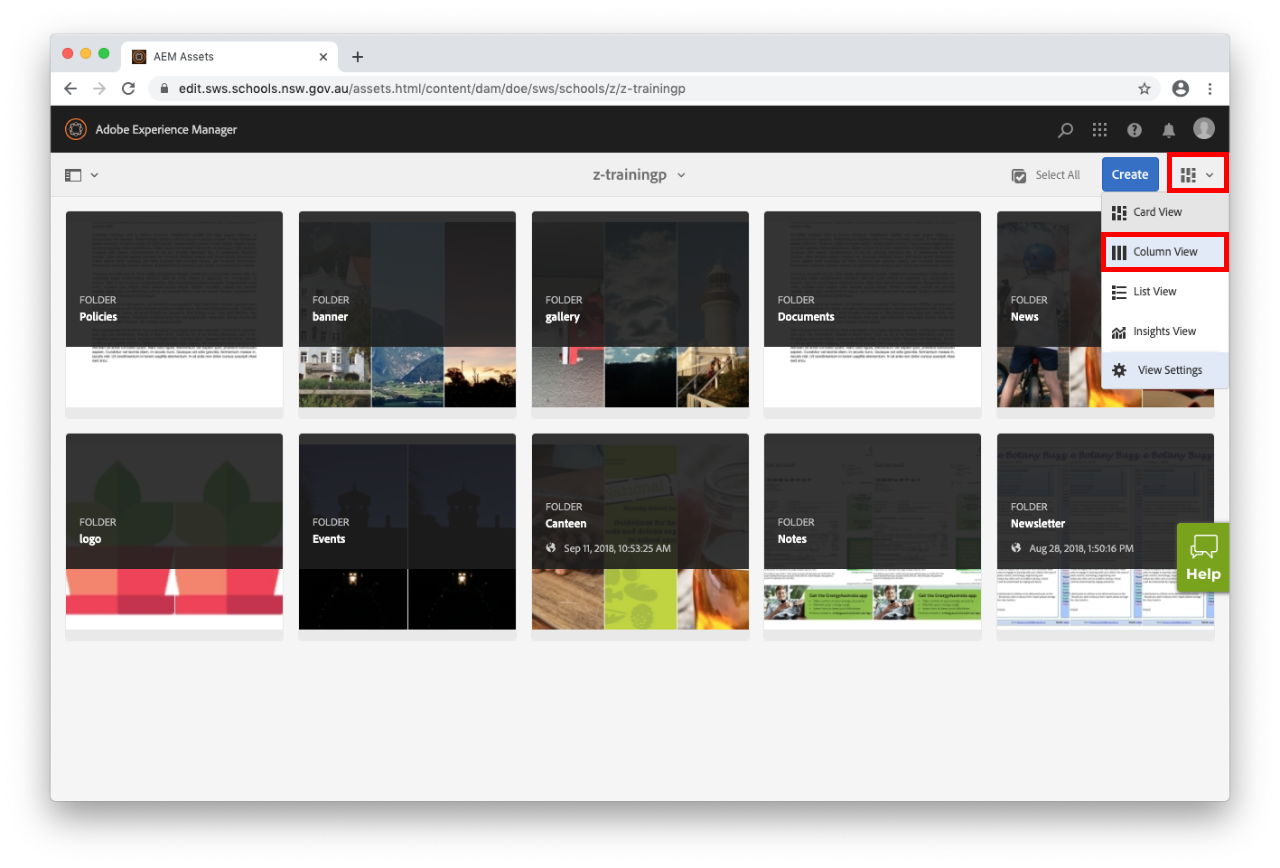
Step 2: Change to column view

  • If your assets open in Card View, you can change this by selecting the View icon in the top right, below your User icon. Select Column View from the drop-down as this is easiest to use. See our guide on Views for more. 

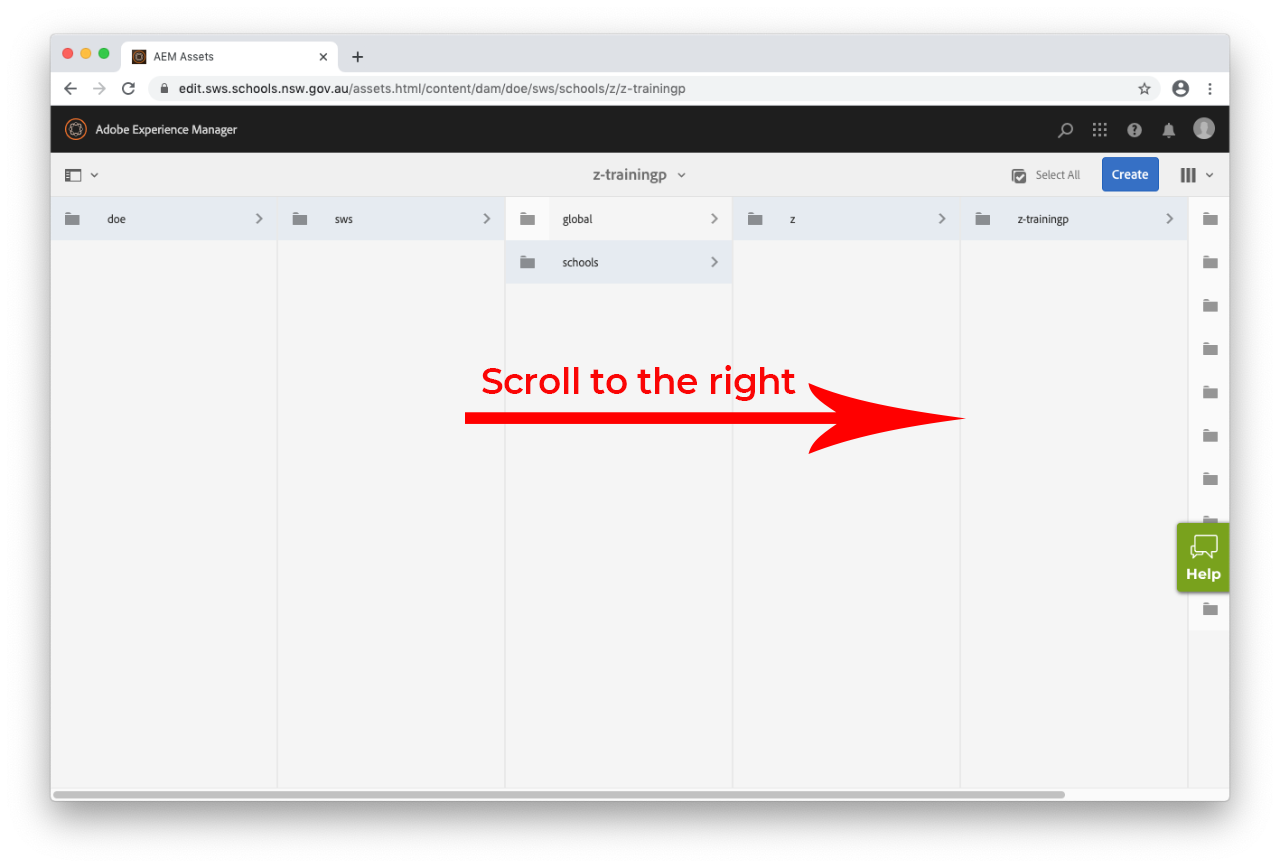
  • Your school's folder will already be selected.
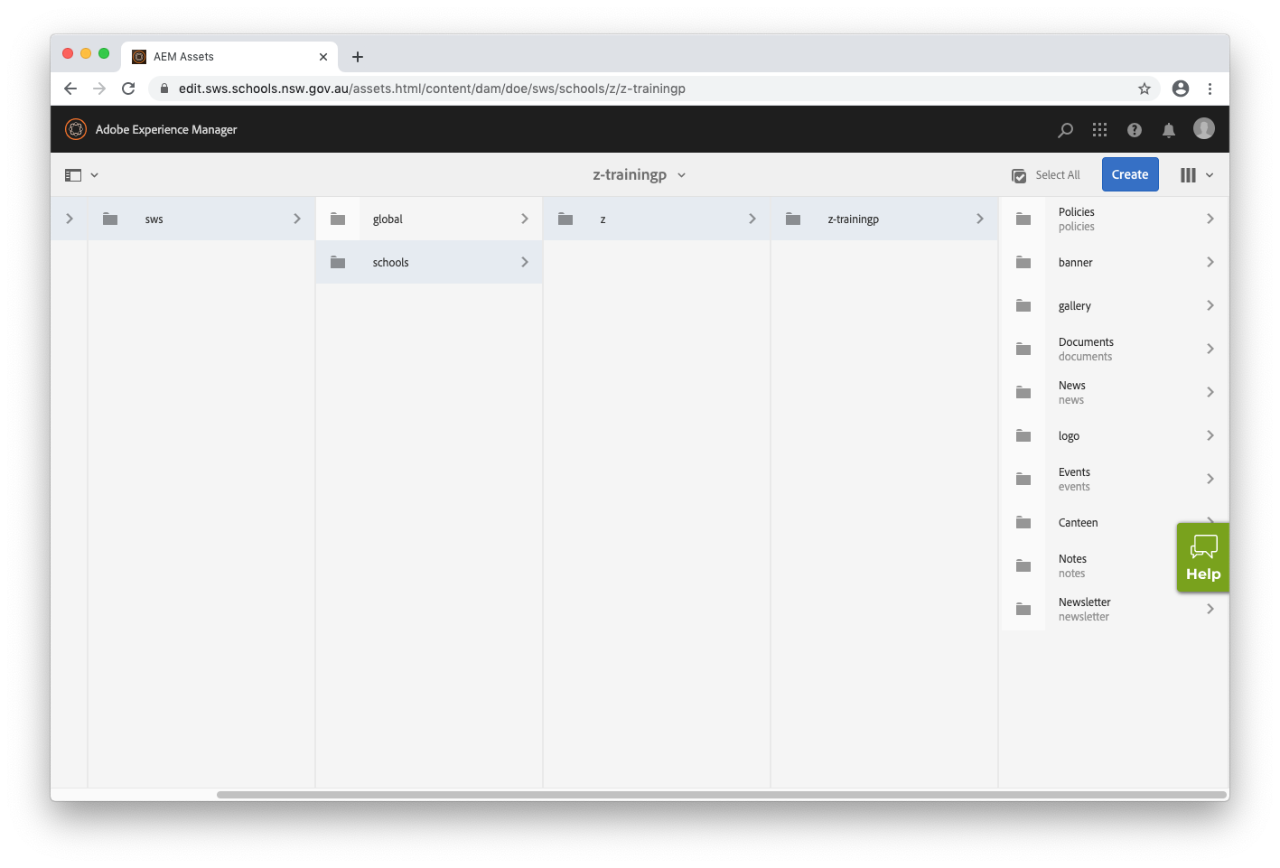
  • Scroll to the right to see your assets.

  • Select the folder wherein you want to save your PDF or document.

Create a new folder – if required

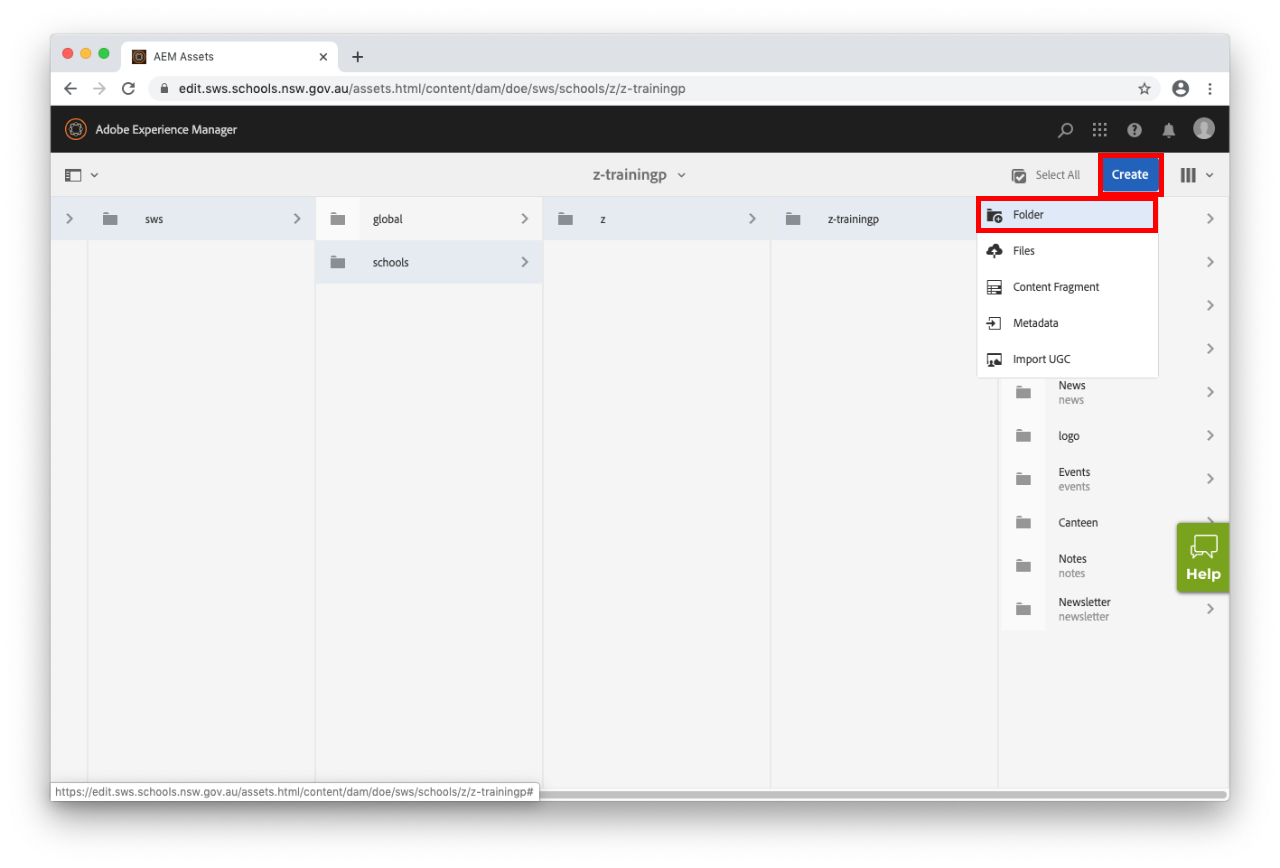
  • If you want to create a new folder select the blue Create button in the top right hand corner. 
  • Select Folder from the drop-down menu. 

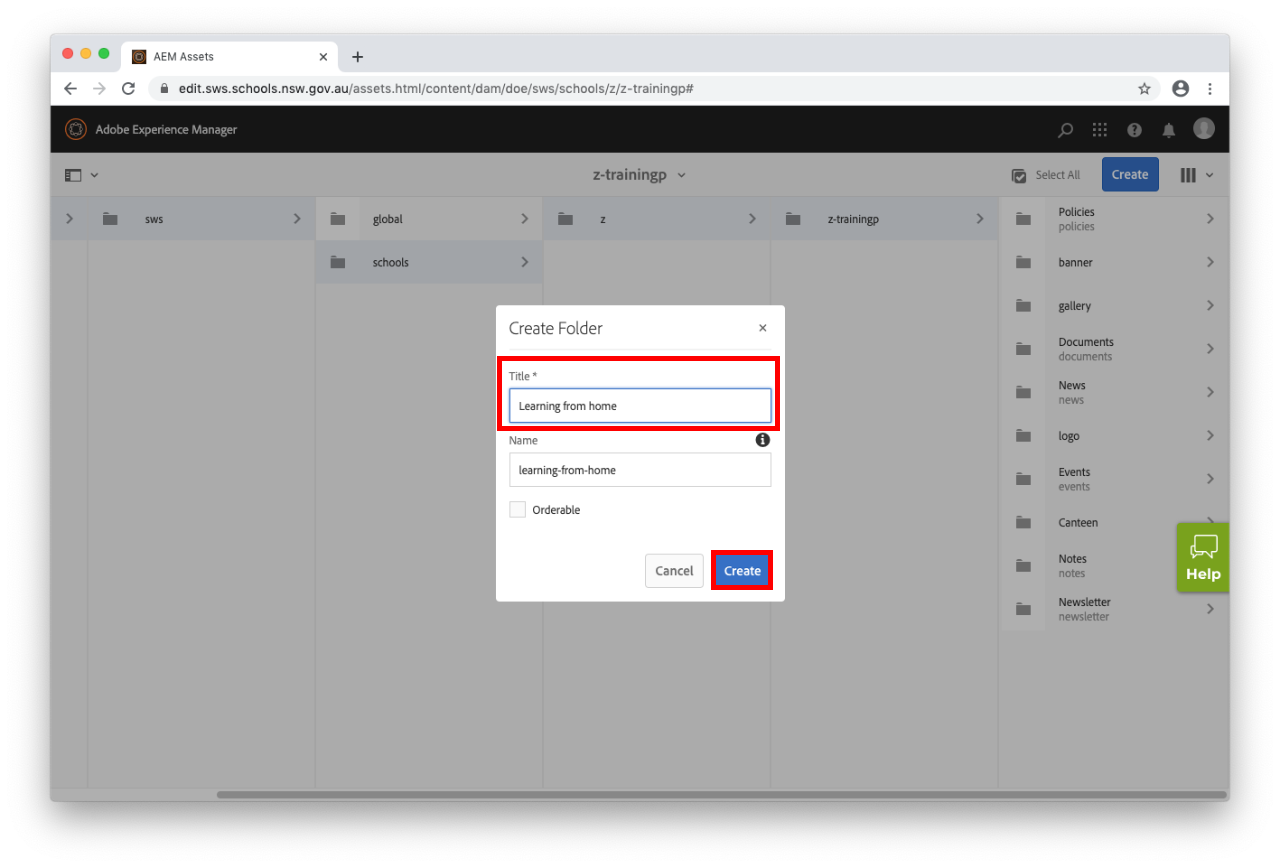
  • Enter the name of the folder in the Title field.
  • Select Create.
  • Your folder will be created. 

Step 3: Upload your document

  • Ensure your desired folder is selected.
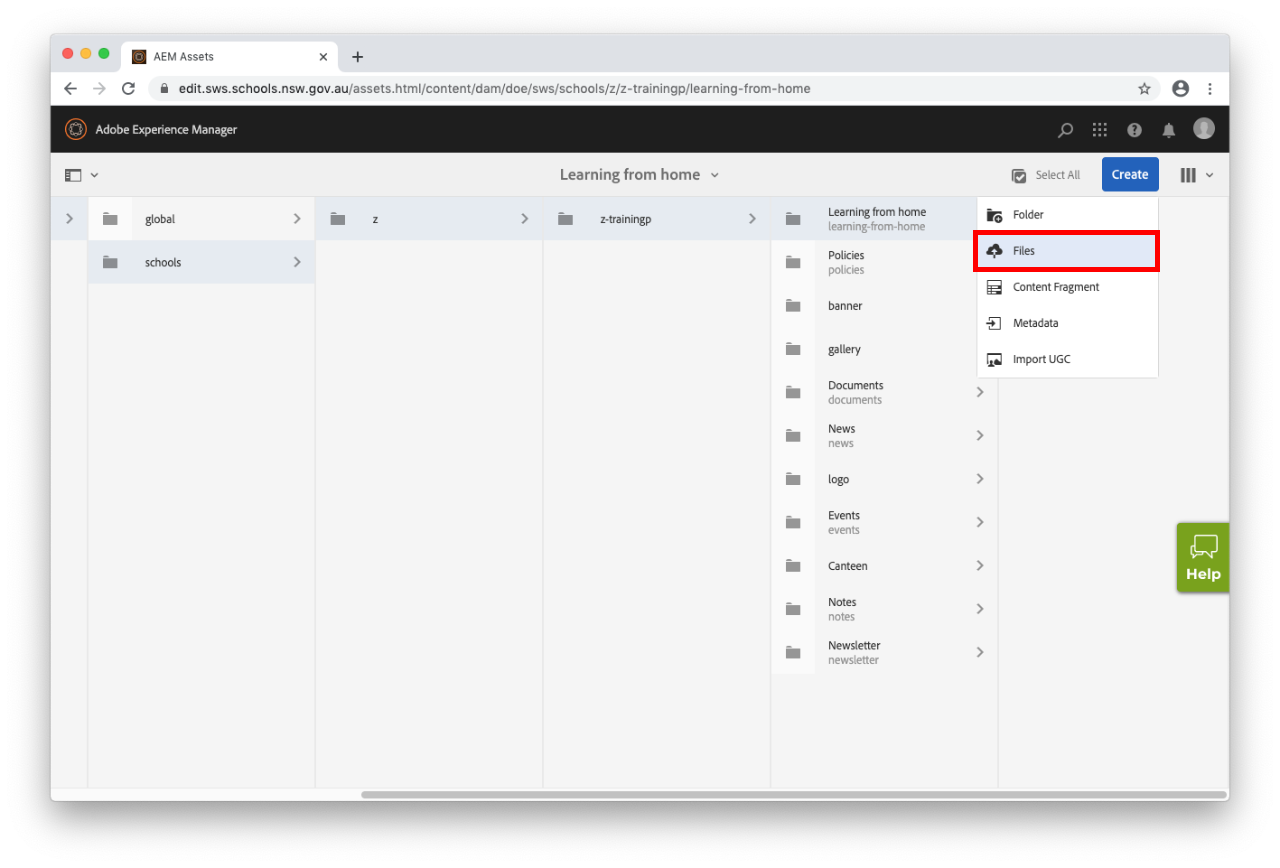
  • Select the blue Create button again from the top right hand corner.
  • Select Files from the drop-down menu.

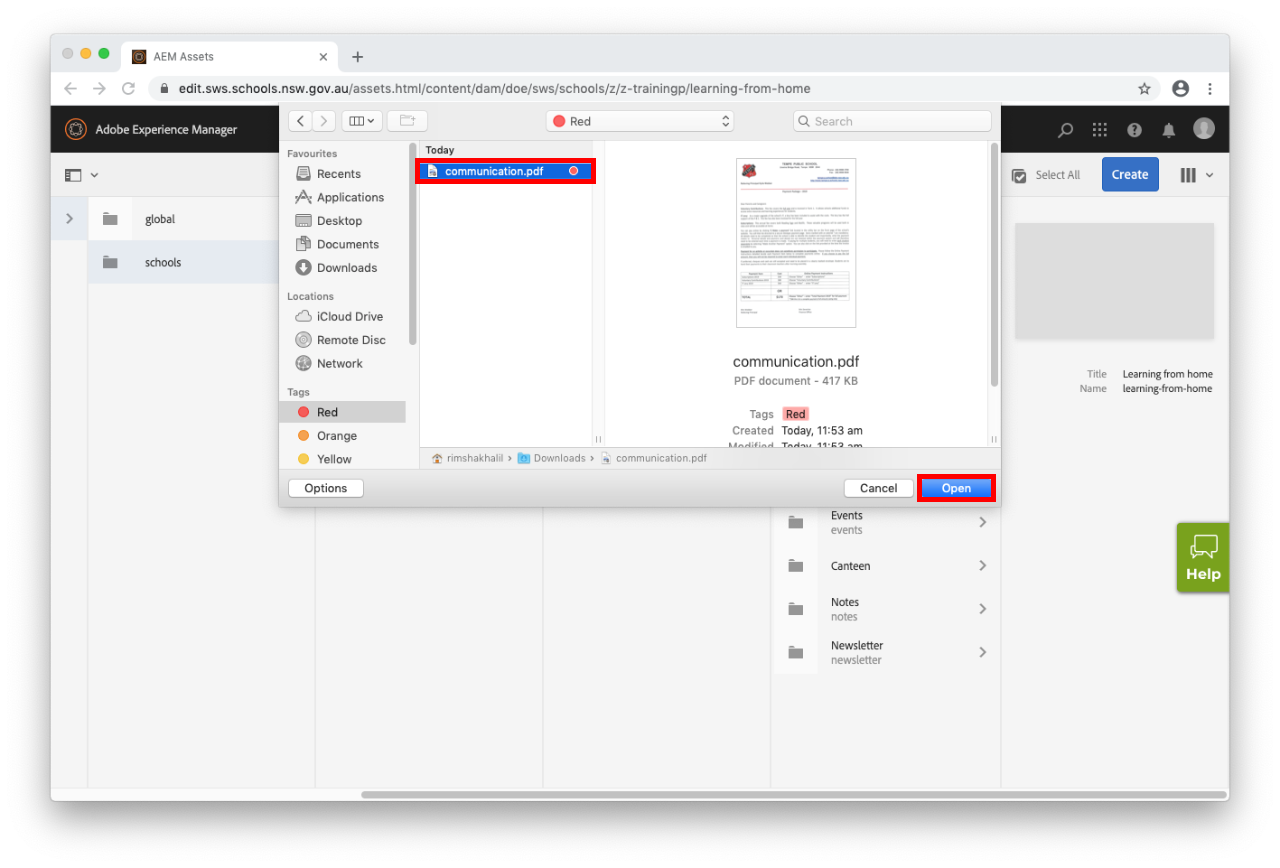
  • Select the document you want to upload to your Assets and then select Open.

  • If you receive an error it could be because the file name is incorrect. Use the PDF guidelines to check your PDF name is correct before uploading.
  • Special characters and symbols are not accepted by AEM file naming convention. 

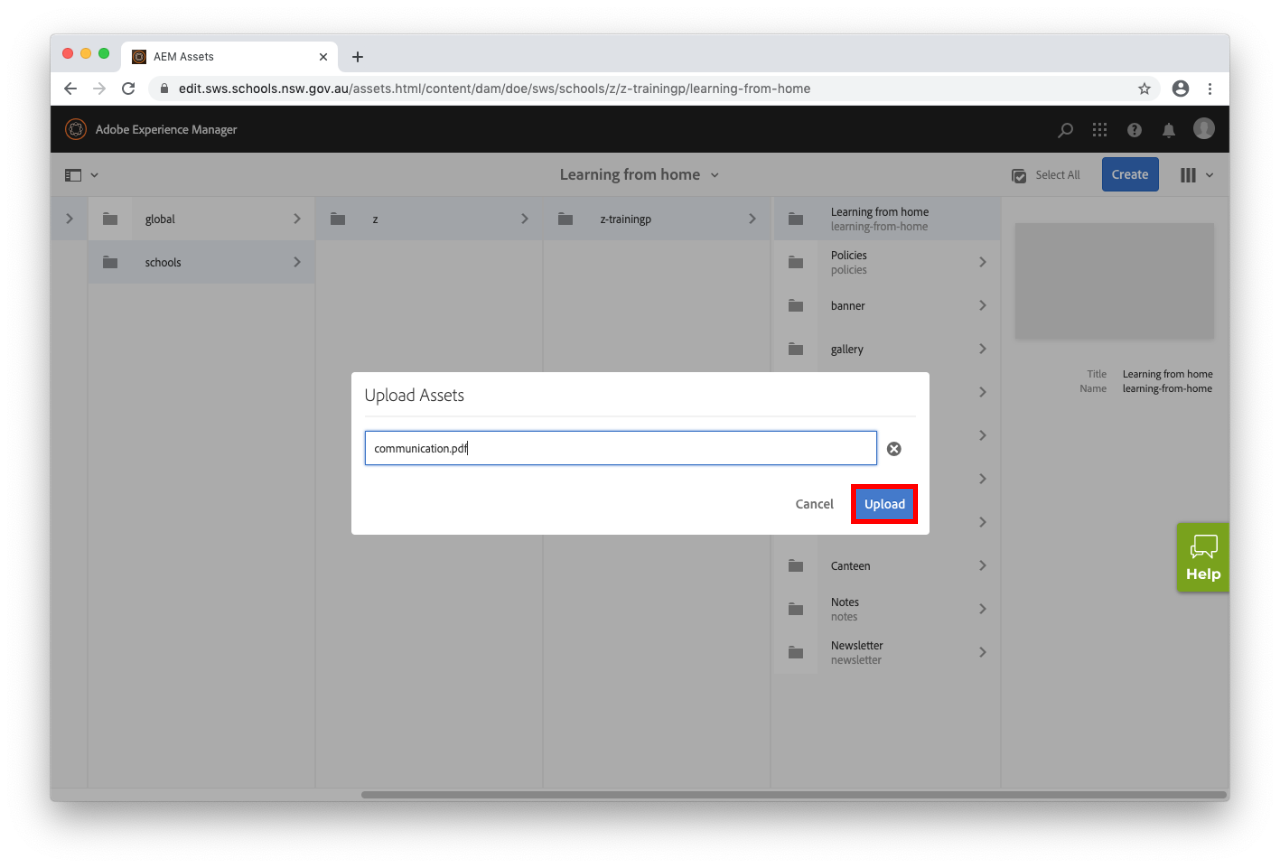
Step 4: Upload your document

  • Select Upload
  • If you need to you can replace an existing document. This is an optional step. 
  • Your document is now ready to be used on a page. 

Step 5: Add your document to a page in Sites

  • Documents that are uploaded to your Assets do not automatically appear on your website. 
  • You must now add the document or PDF to a page in Sites so that your community can see the document you just uploaded to your private Assets
  • First, return to the main navigation to access Sites. To do this, select Adobe Experience Manager from the top left of the screen and then select Sites. 
  • Now follow our guide to link your PDF or document to a page.