School website service training and support

Social links

Use this guide to add or change the social media platforms that you link to your school's website.

Links to your social media will automatically appear in the footer once you have added them to your properties. 

After you have followed this guide and integrated the social media platforms with your website, you can then add a Social media component and a Social links component to your homepage. 

Features

We currently support 5 social media platforms:

  • YouTube
  • Vimeo
  • Facebook
  • Instagram
  • Twitter

Example of Social links in the School footer: 

Go to our Social media guide to make adjustments to the way this component displays your school's social media posts.

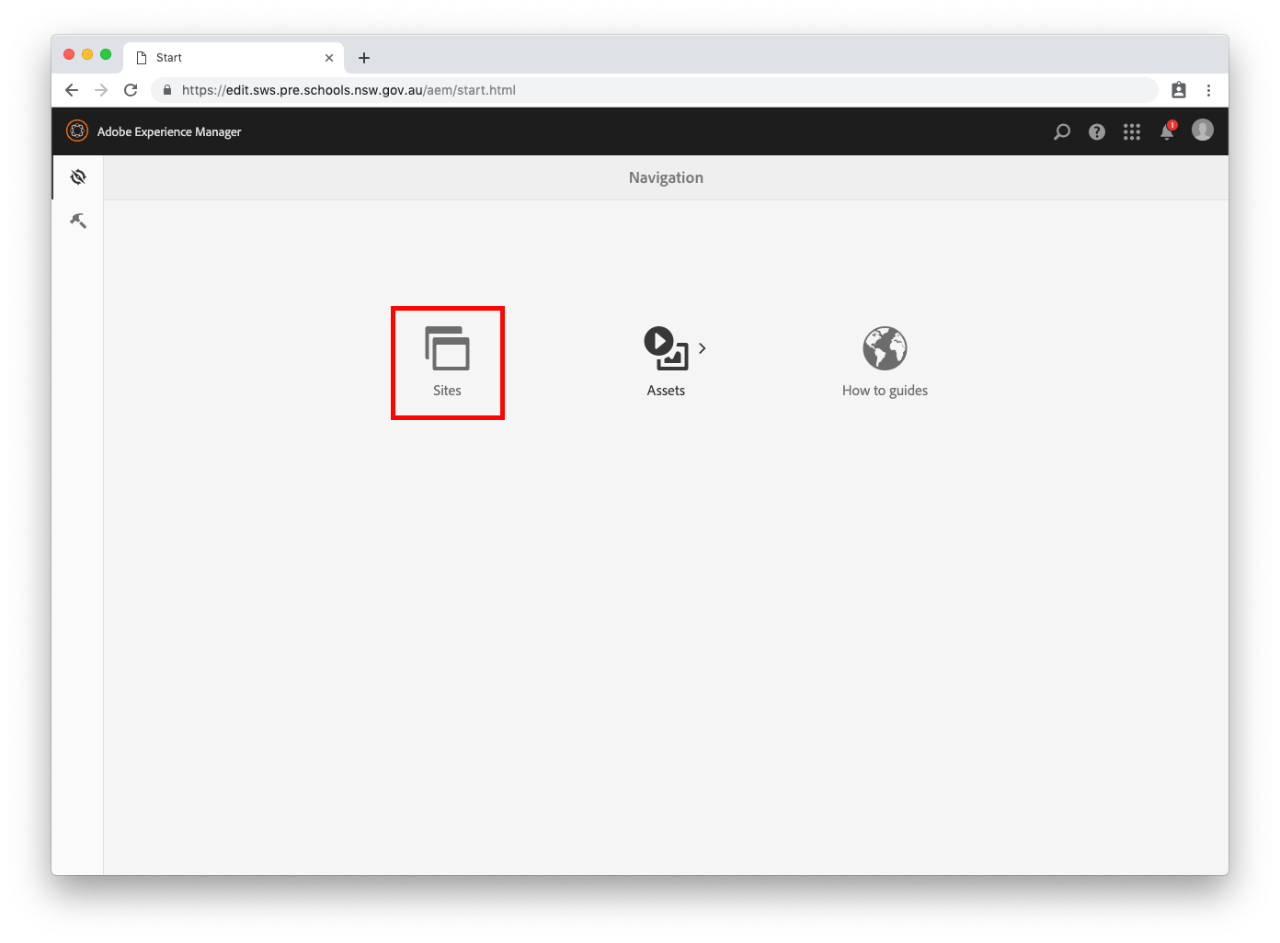
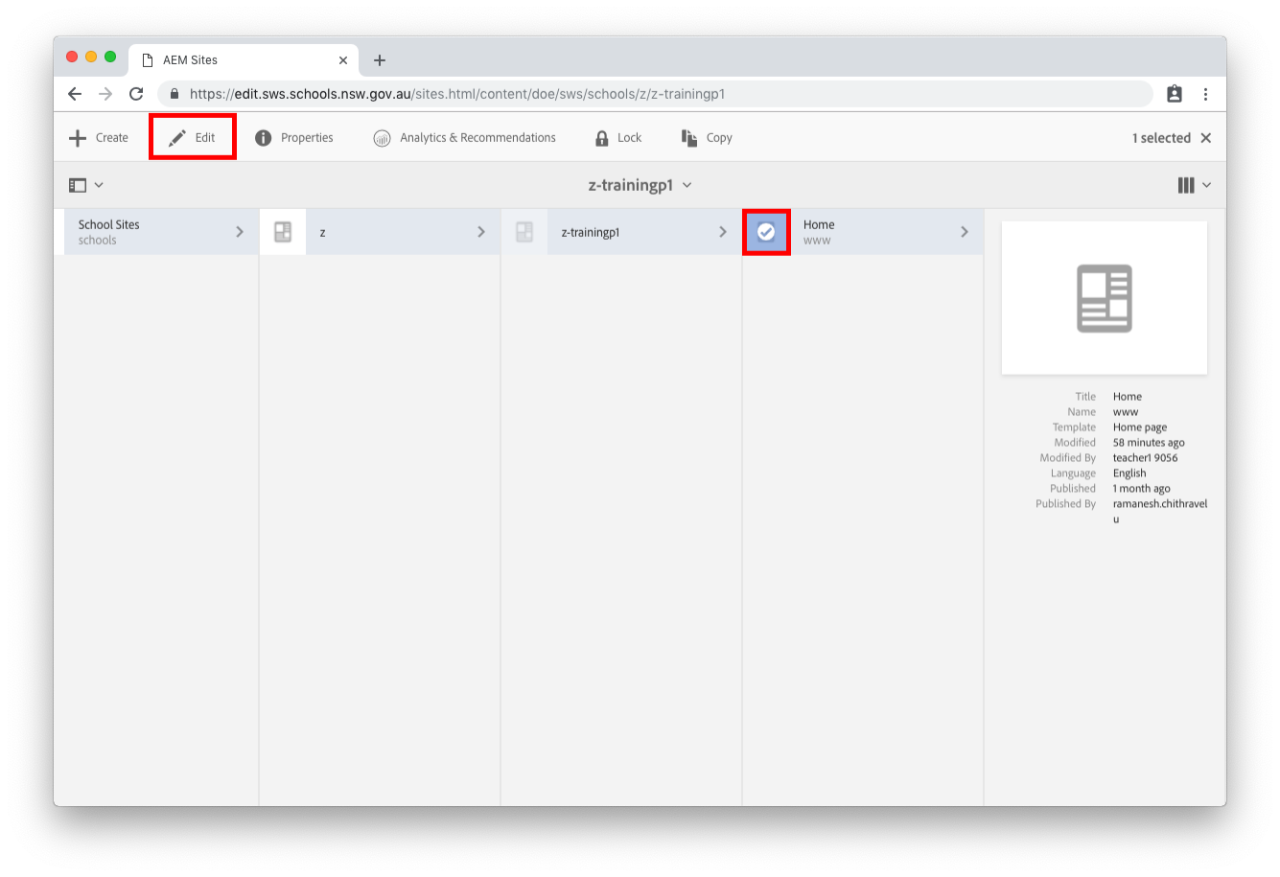
Step 1: Navigate to the homepage

  • Your school's home page will already be selected.
  • Select the icon to the left of Home. The tick will appear and your selection will turn blue.
  • Select Edit in the menu bar that appears across the top of the screen. 

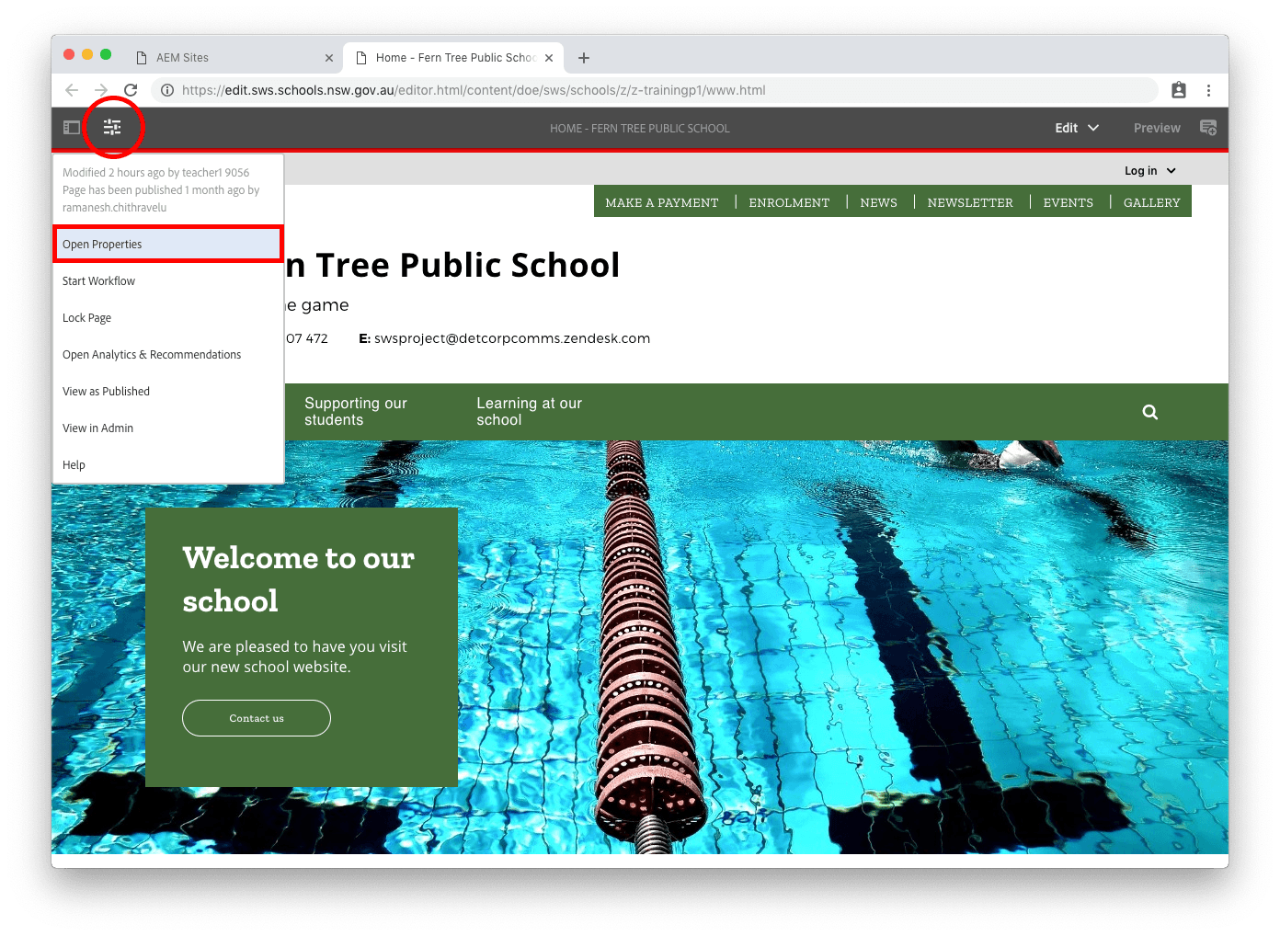
Step 2: Open the properties of the homepage

  • Look to the dark grey bar across the top of your page.
  • Select the slider icon in the top left corner. This is the Page Information button.
  • Select Open Properties from the drop down. 

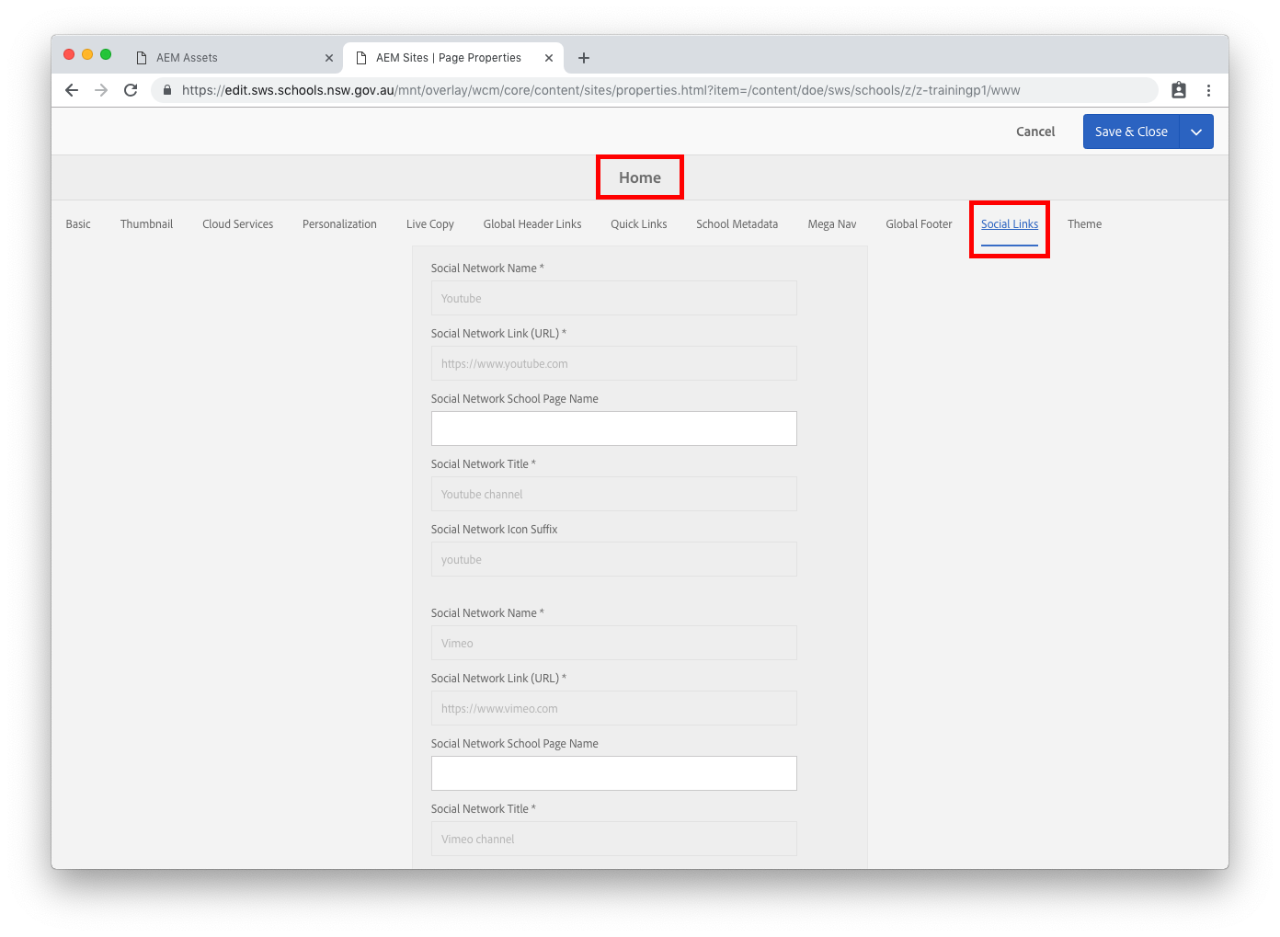
Step 3: Update Social media platform linking

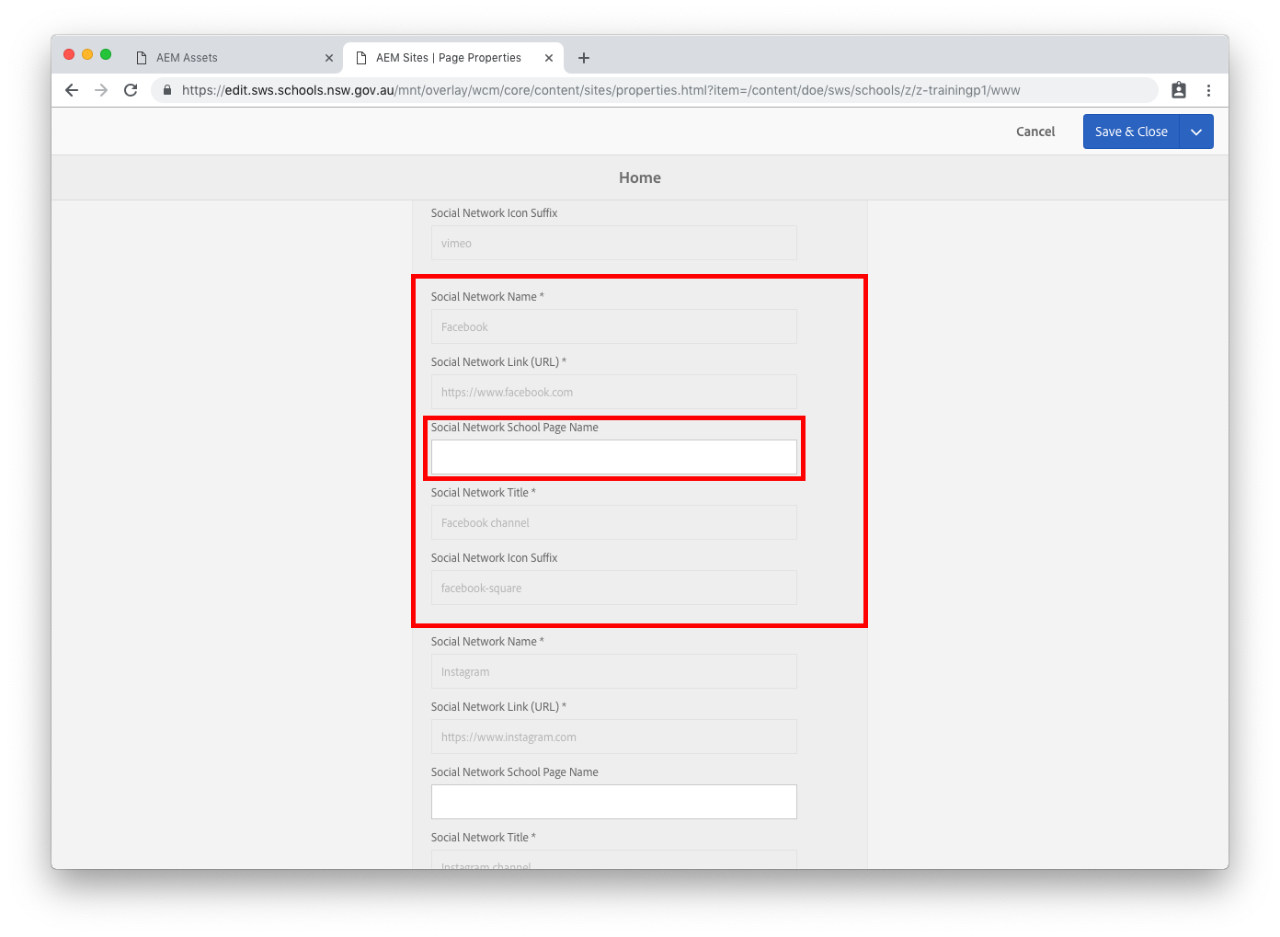
  • Select Social Links tab to update social media platforms your school uses.
  • Scroll down to the desired social media platform

Step 4: Update individual platform

  • In the following steps we will use Facebook as the example. You can follow these steps for any of the 5 social media platforms we support. 
  • Find the Social Network Name that matches the platform you want to add. In this example it is Facebook.

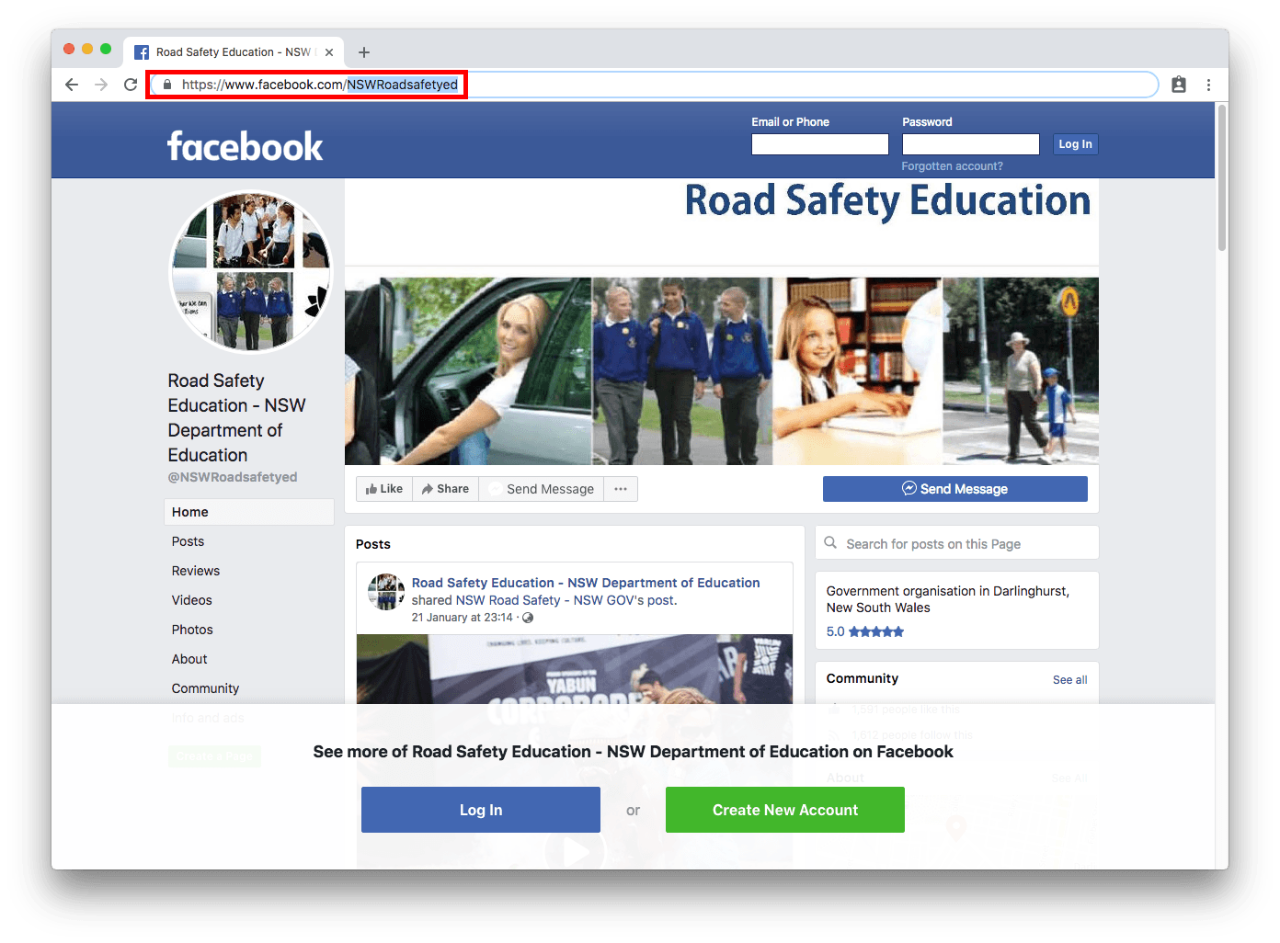
Step 5: Find the link to your social media page

  • Open a new Tab in your web browser.
  • Navigate to your social media page.
  • Copy the link in the address bar. Only copy the text that comes after the ".com/" and before the next "/"
  • In this example we don't copy: https://www.facebook.com/
  • We only copy: NSWRoadsafetyed
  • Do not copy the forward slash before or after the page name.

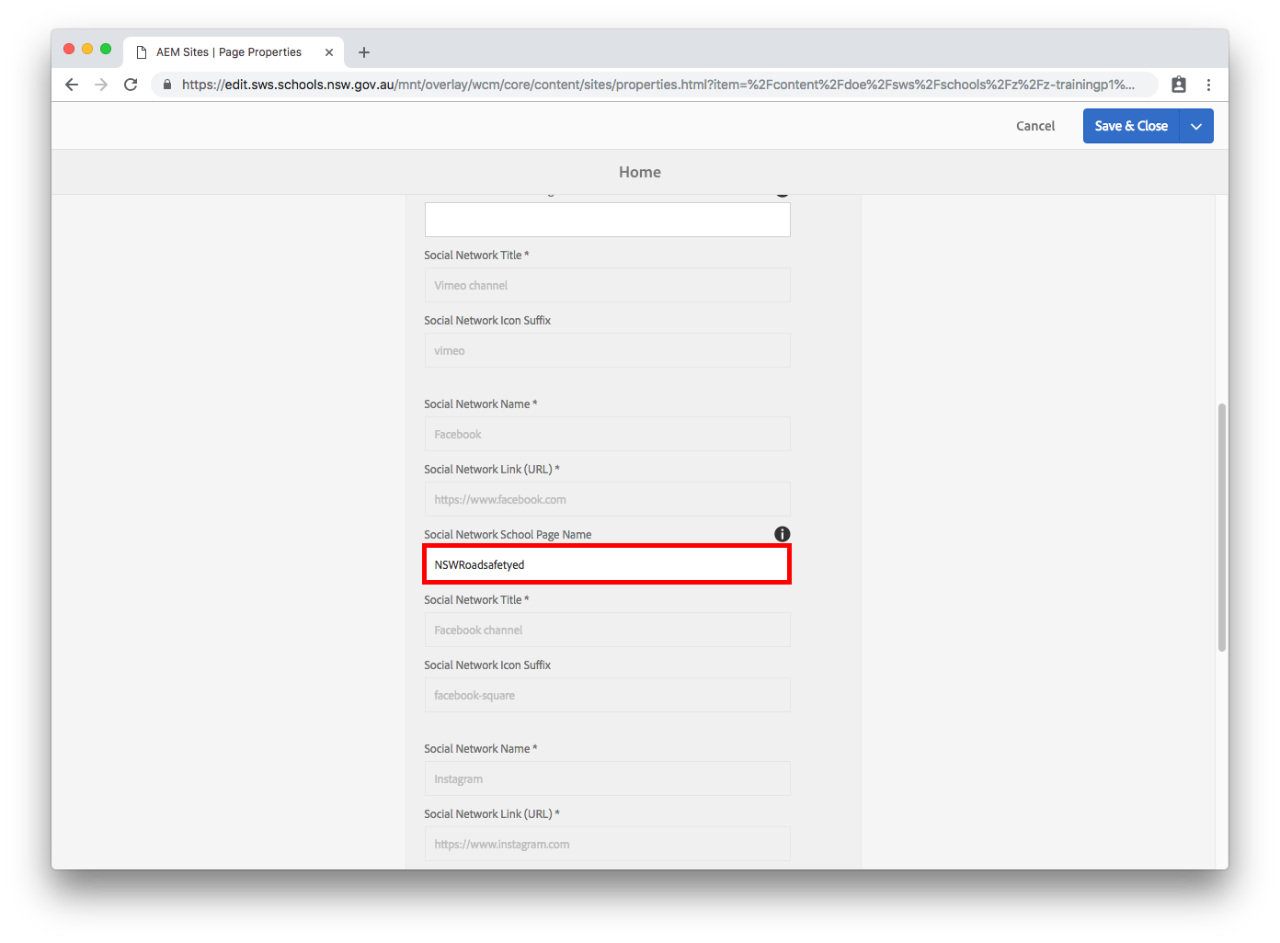
Step 6: Paste the link

  • Paste the copied section of the link into the Social Network School Page Name field.
  • Select Save & Close to save and view your changes.

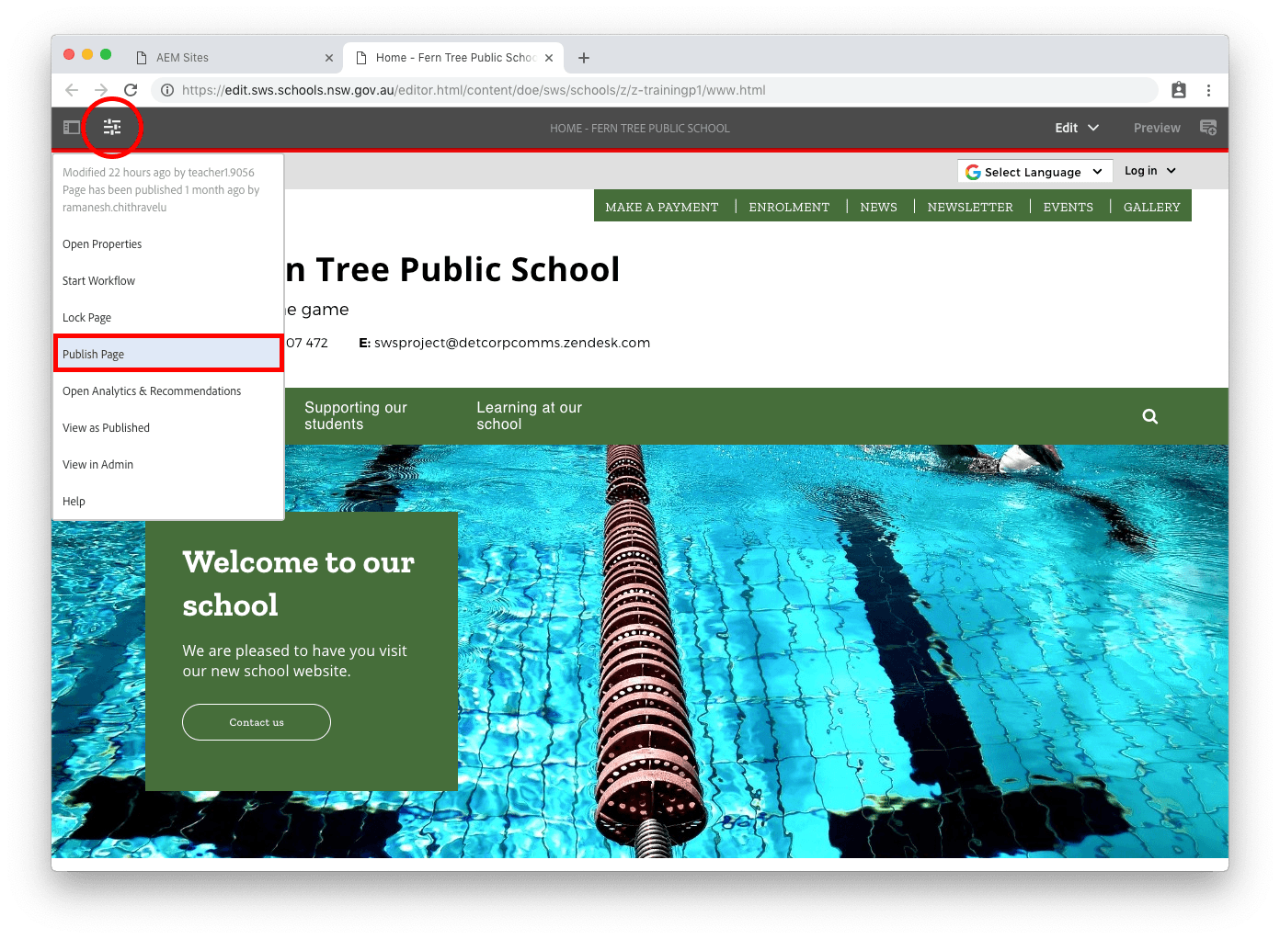
Step 7: Publish the home page

  • For changes to be updated on your live school website you will need to publish the page.
  • Select the slider icon in the top left corner. This is the Page Information button.
  • Select Publish Page from the drop-down. 
  • If you don't see Publish Page you are an Author and will need to select Start Workflow instead. Go to Author publish a page for more information.