School website service training and support

Delete a document or image

Use this guide to delete a document or image from Assets. Before you start, please ensure you have deleted the document from the page in Sites. 

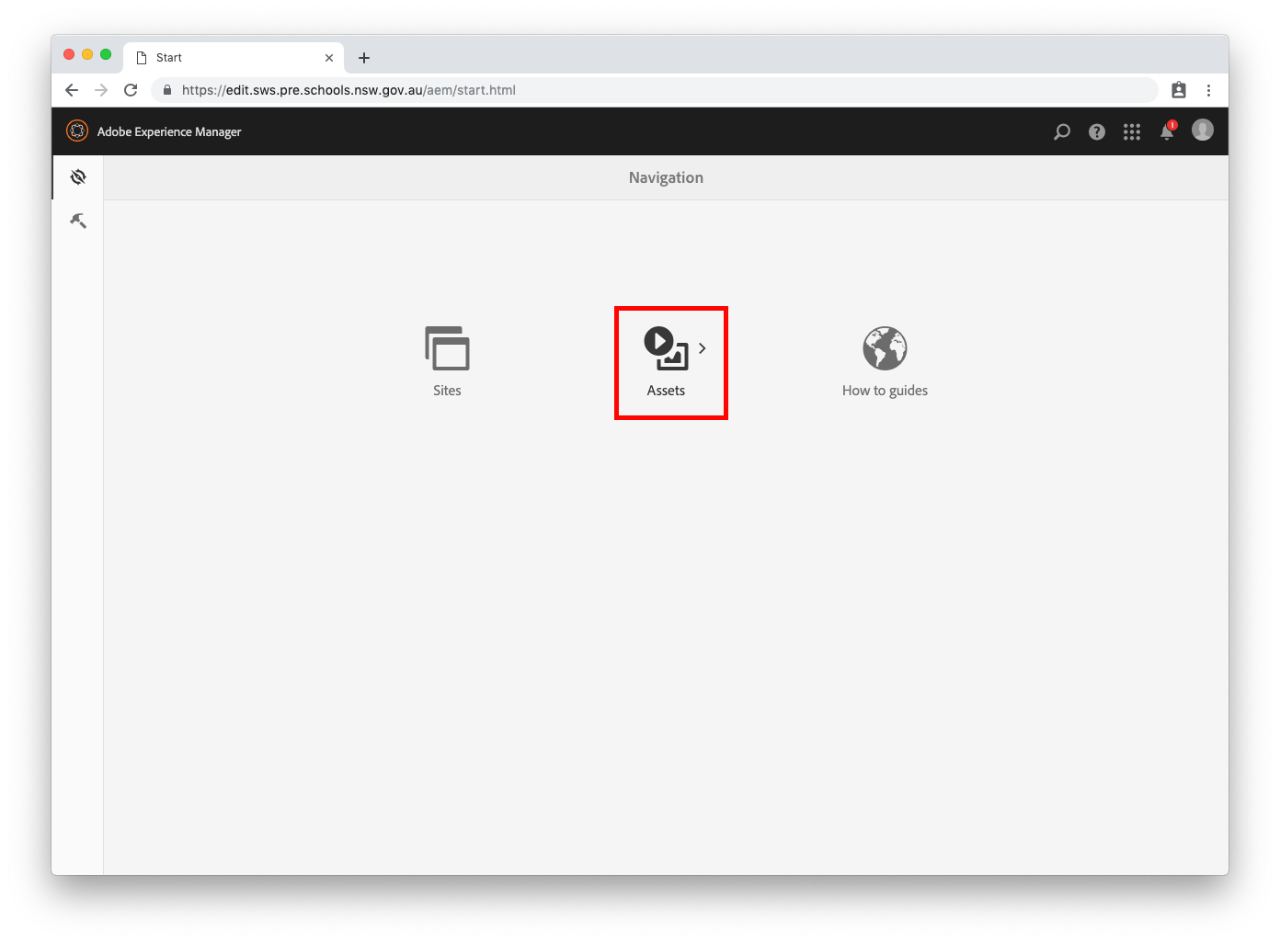
Step 1: Navigate to Assets

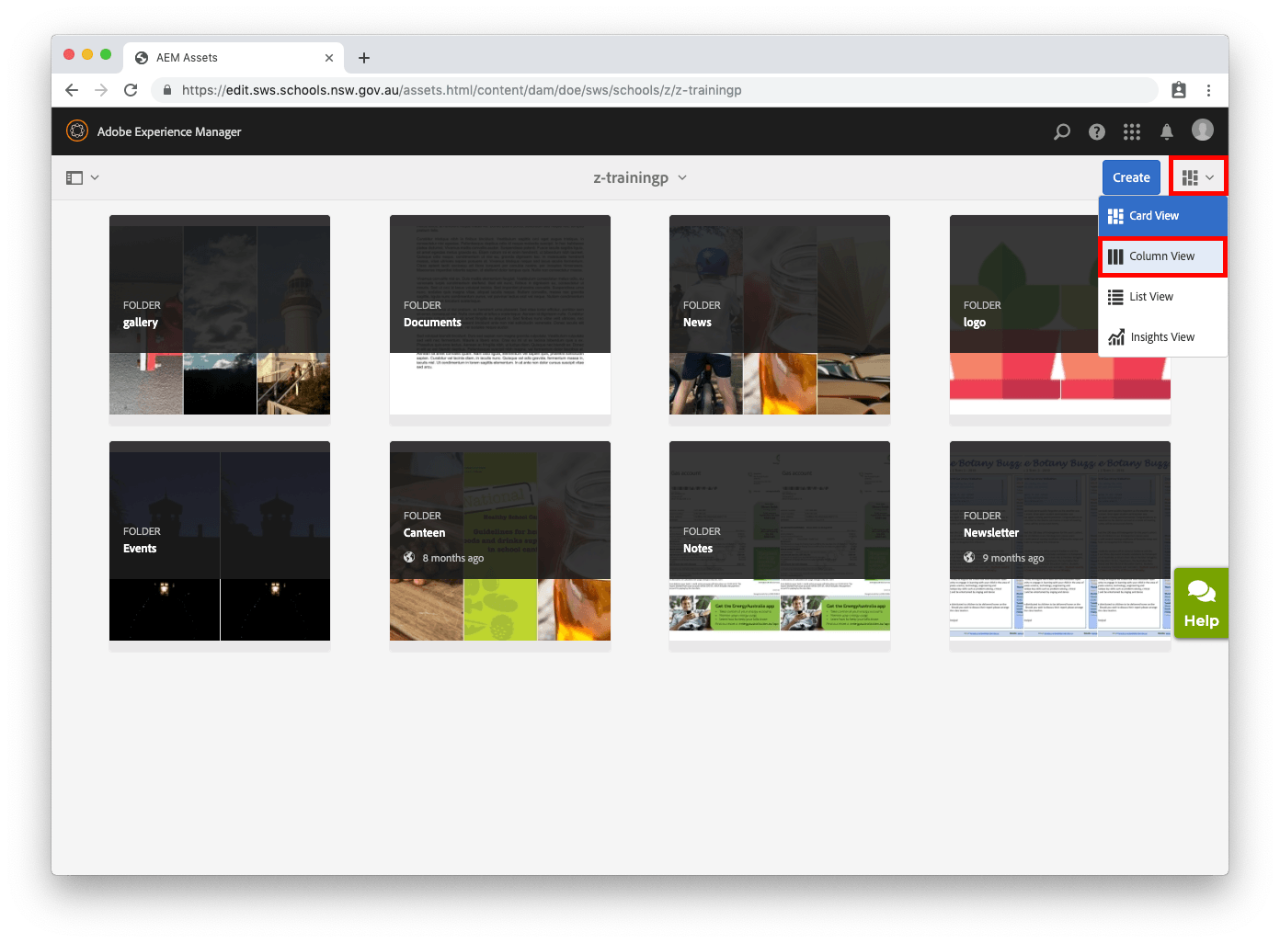
Step 2: Change to column view

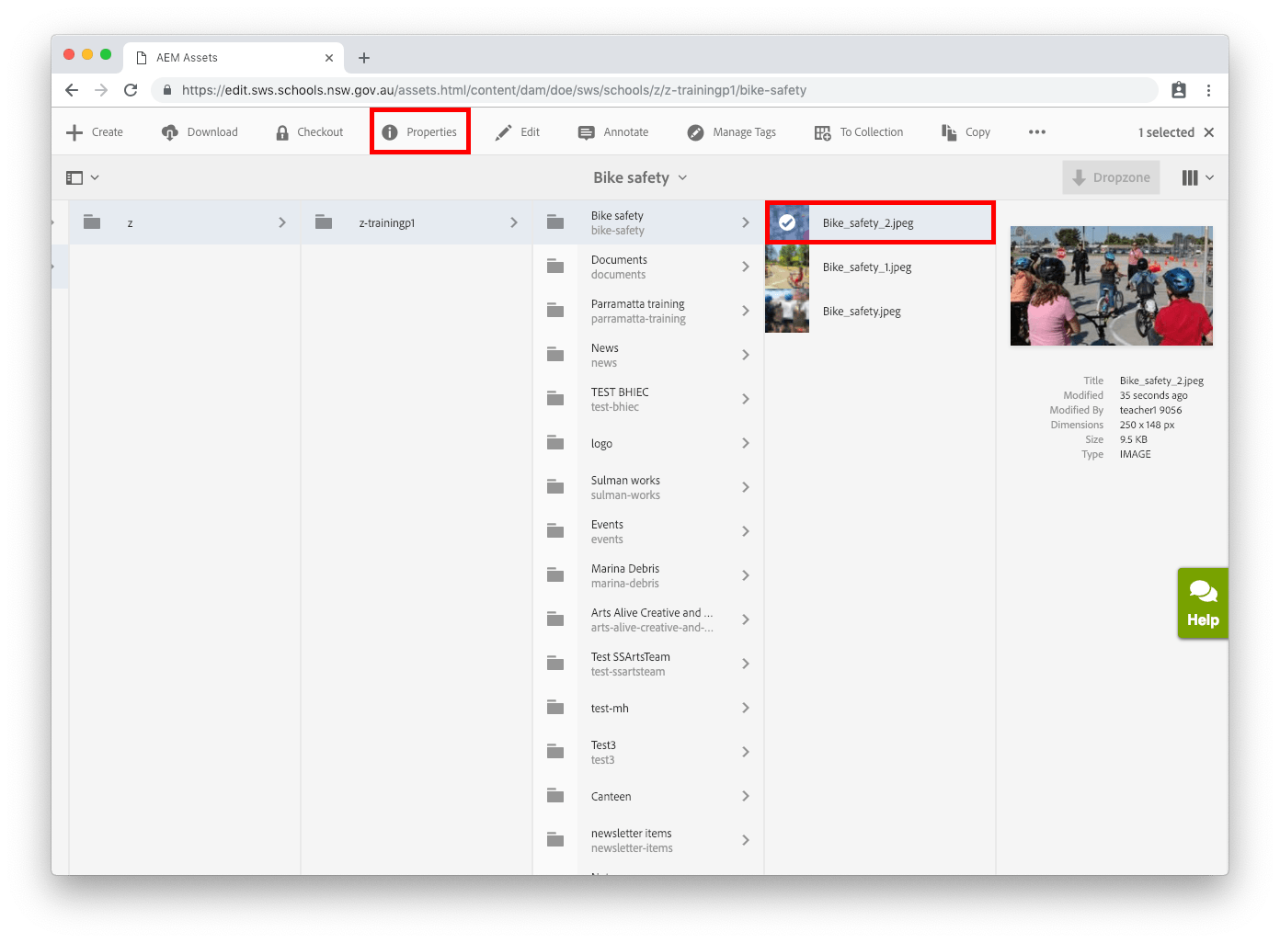
  • If your assets open in Card View, you can change this by selecting the View icon in the top right, below your User icon. Select Column View from the drop-down as this is easiest to use. See our guide on Views for more. 

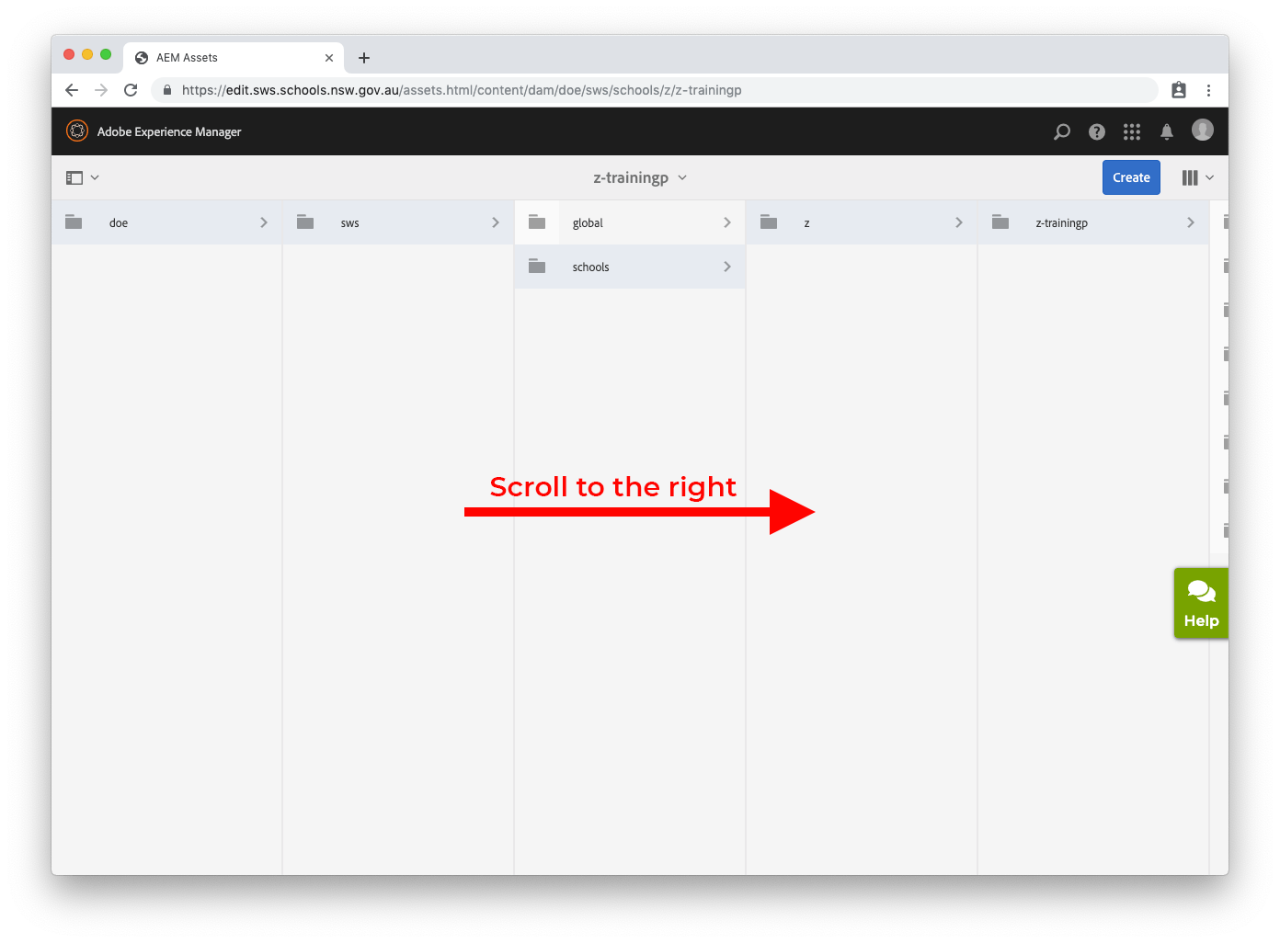
  • Your school's folder will already be selected.
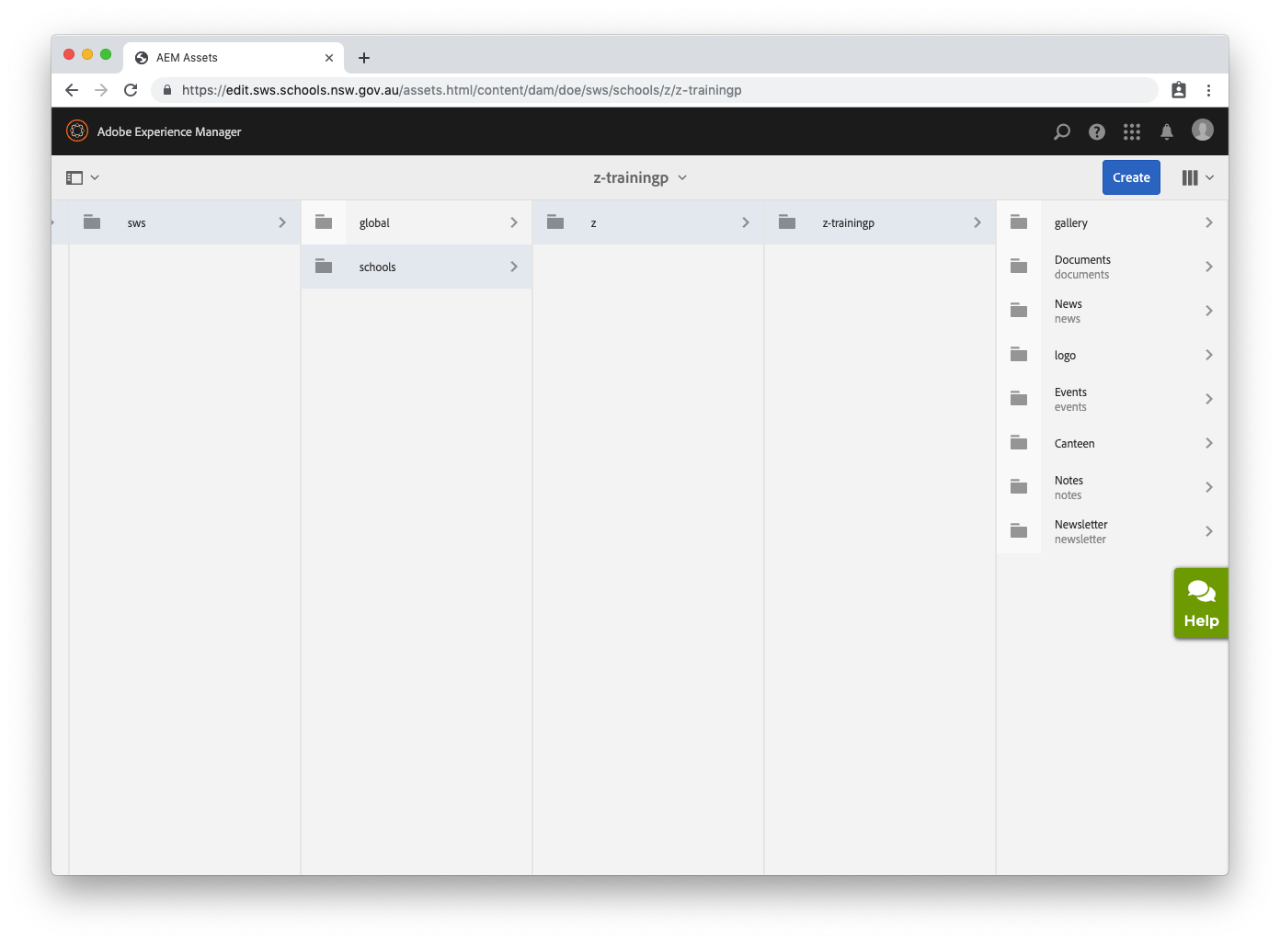
  • Scroll to the right to see your assets.

  • Select the folder in which your document or image is stored.

Step 3: Identify any pages that currently use your document or image 

  • Once you have found your document or image, select the icon to the left of the file name. The tick will appear and your selection will turn blue.
  • Select Properties.

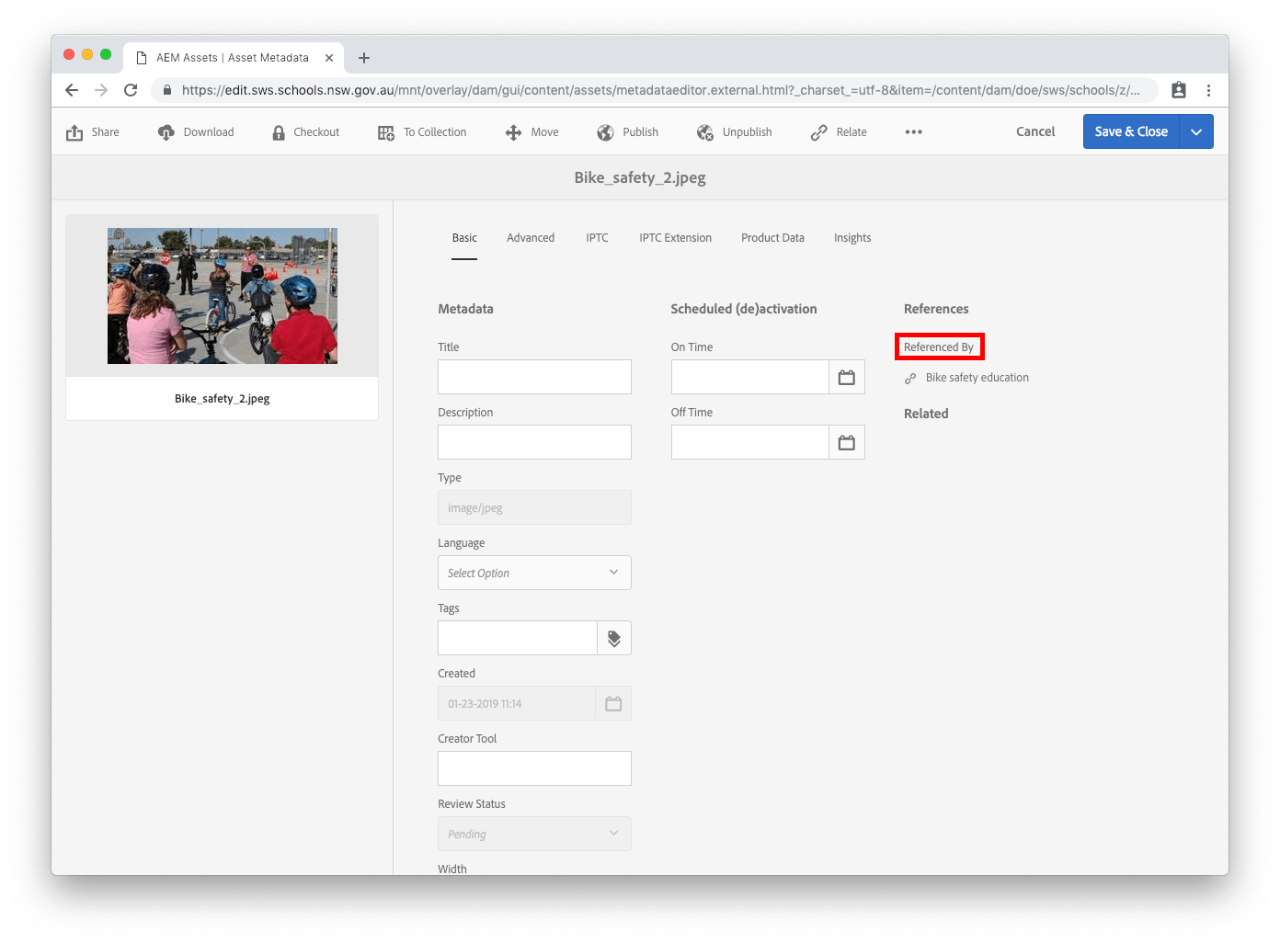
  • On the right side of your screen, you will see the References heading. 
  • Under the Referenced by subheading, you can see a list of the pages that currently link to this document or image. 

Step 4: Unlink or remove the document or image from any pages

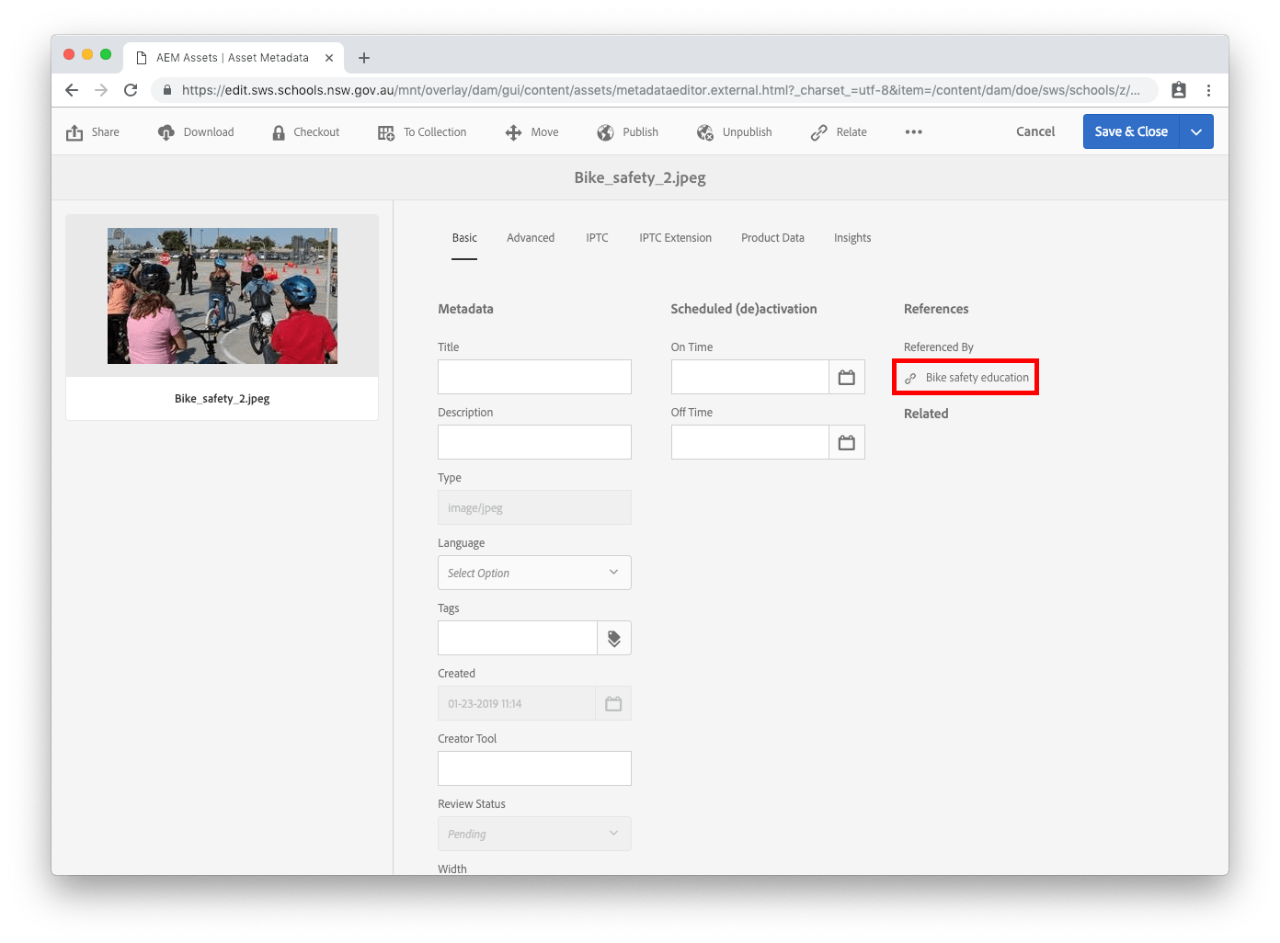
  • Select the link icon next to each of the pages listed under Referenced by
  • If there are no pages listed under this heading you can skip to step 8 to immediately delete the document or image. 

Step 5: Remove the image or document 

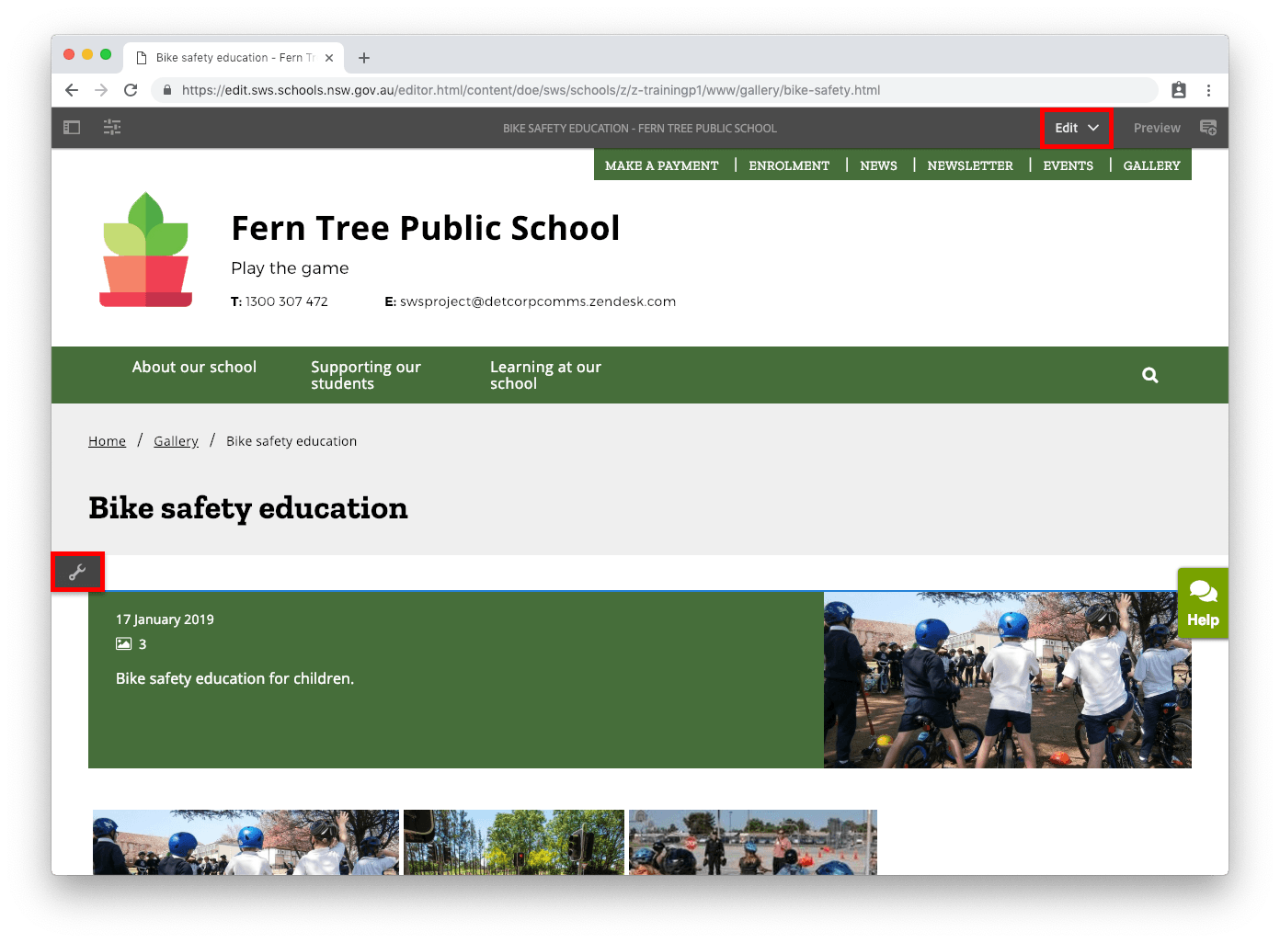
  • Select Edit in the top right of the page. This button is next to Preview. 

Image

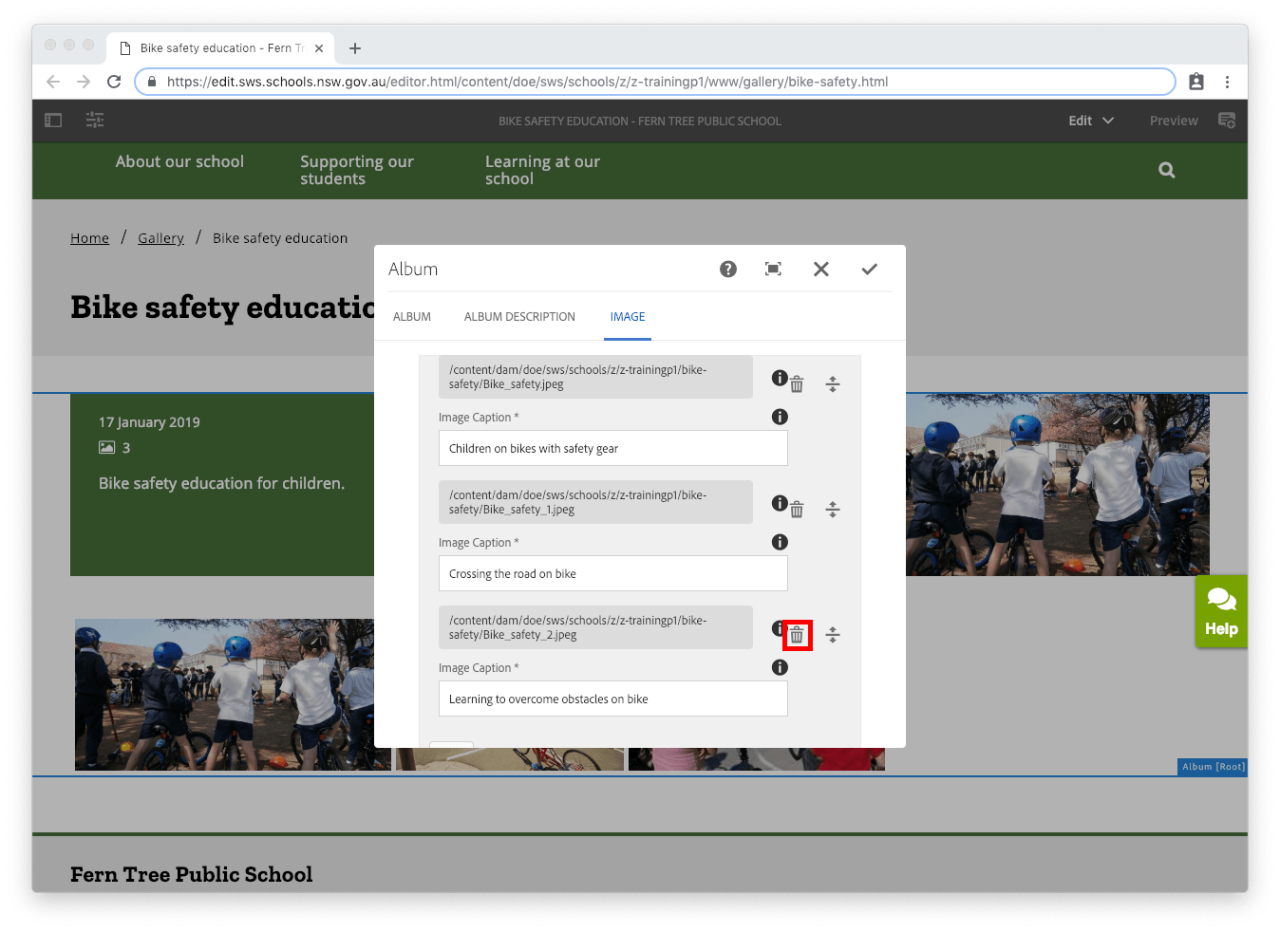
  • Find the image component you need to remove. 
  • Select the bin icon to delete the image. 

Document

  • Navigate to the text component you need to edit. 
  • Select the spanner icon to edit the component. This is the Configure button. 
  • Delete the text that contains a hyperlink to the document. 
  • If you need to check what link the text is linking to, select the text and then select the hyperlink icon. 

Step 6: Publish the page you have updated 

  • For changes to be updated on your live school website you will need to publish the page.
  • Select the slider icon in the top left corner. This is the Page Information button.
  • Select Publish Page from the drop-down. 
  • If you don't see Publish Page you are an Author and will need to select Start Workflow instead. Go to our Author publish a page for more information.

Step 7: Delete the document or image

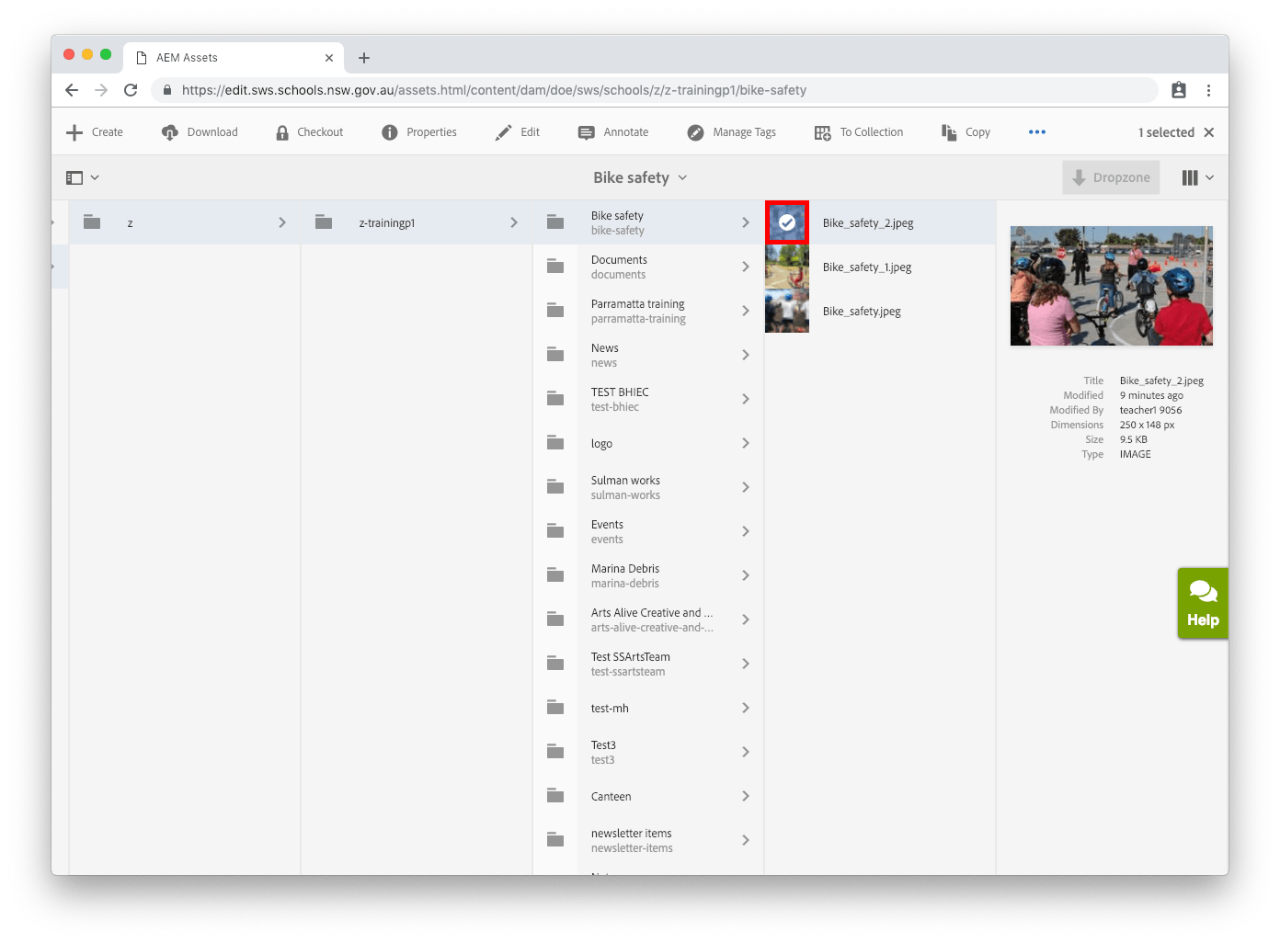
  • In assets, select the folder in which you have previously saved your document or image. 
  • Once you have found your document or image, select the icon to the left of the file name. The tick will appear and your selection will turn blue.

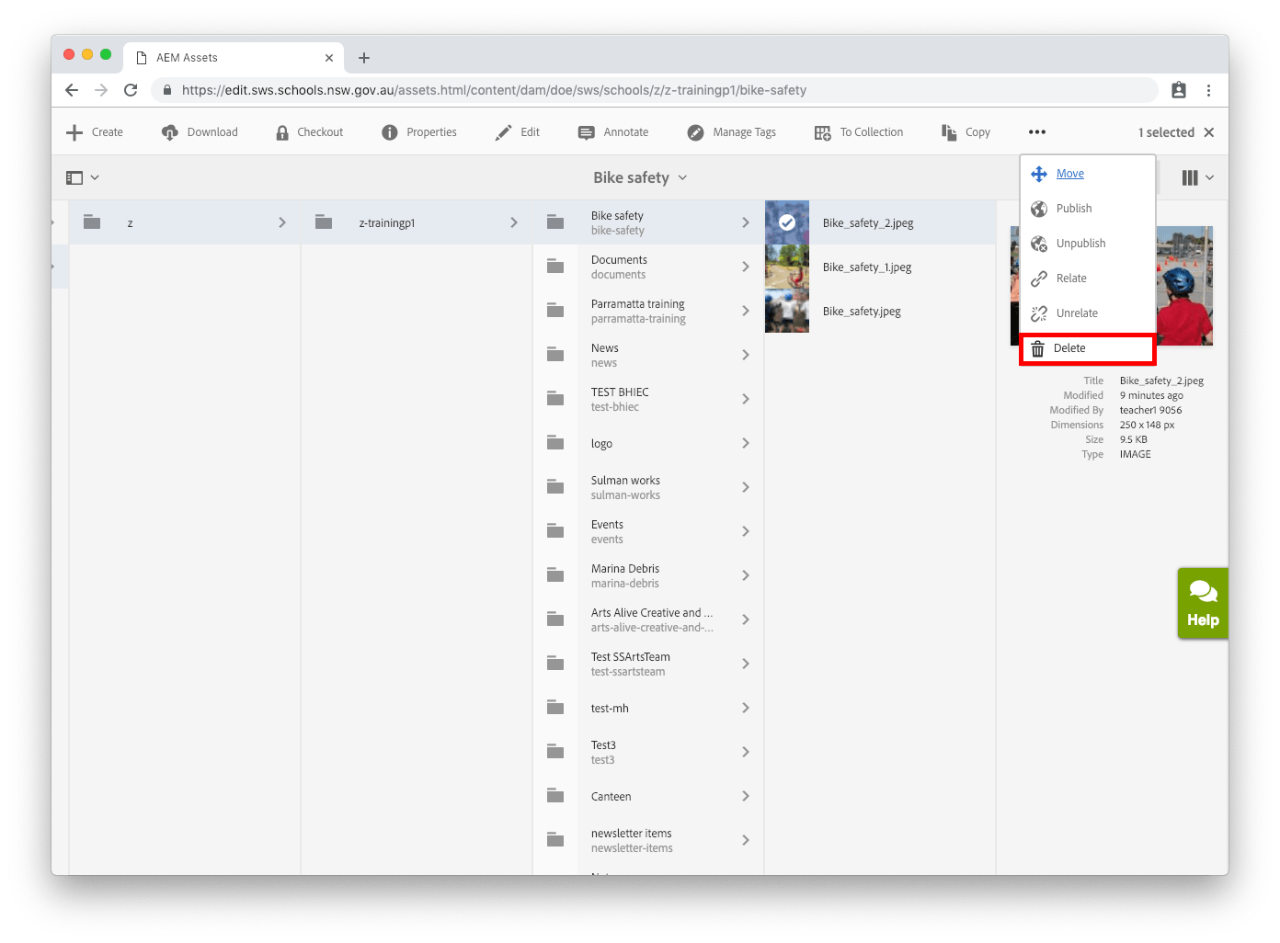
  • Select Delete in the menu bar that appears across the top of the screen.
  • If you don't see Delete, select the ellipsis in the menu bar. Select Delete from the drop-down option. 
  • If you still don't see Delete it is because you are an Author. You will need to request the page to be unpublished by an approver.

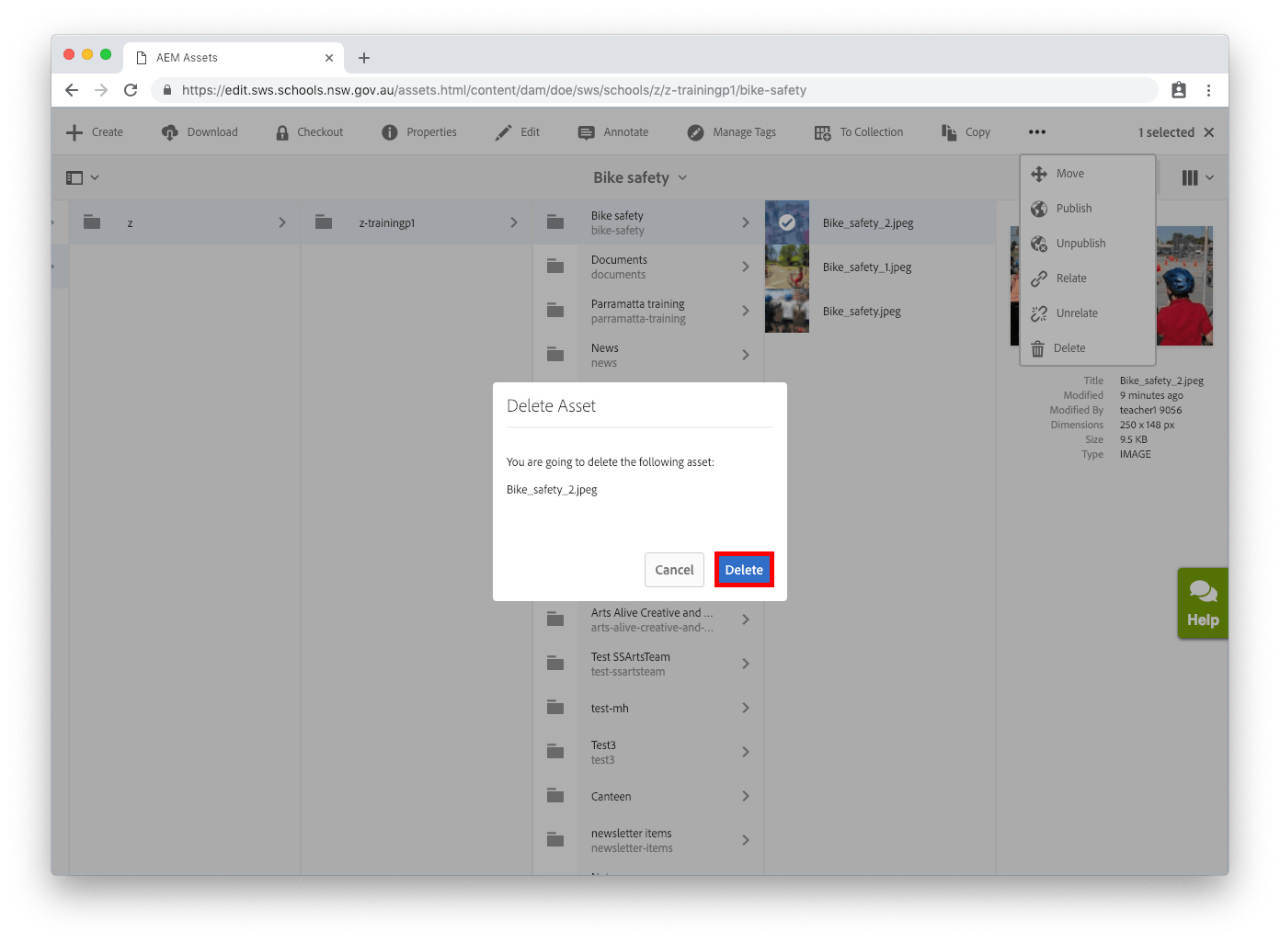
  • Select Delete in the pop-up to confirm you want to delete the page. This operation cannot be undone. Deleting is a permanent operation.