School website service training and support logo

School website service training and support

School website service training and support

Create a news article

Use this guide to learn how to add news articles to your school's website. 

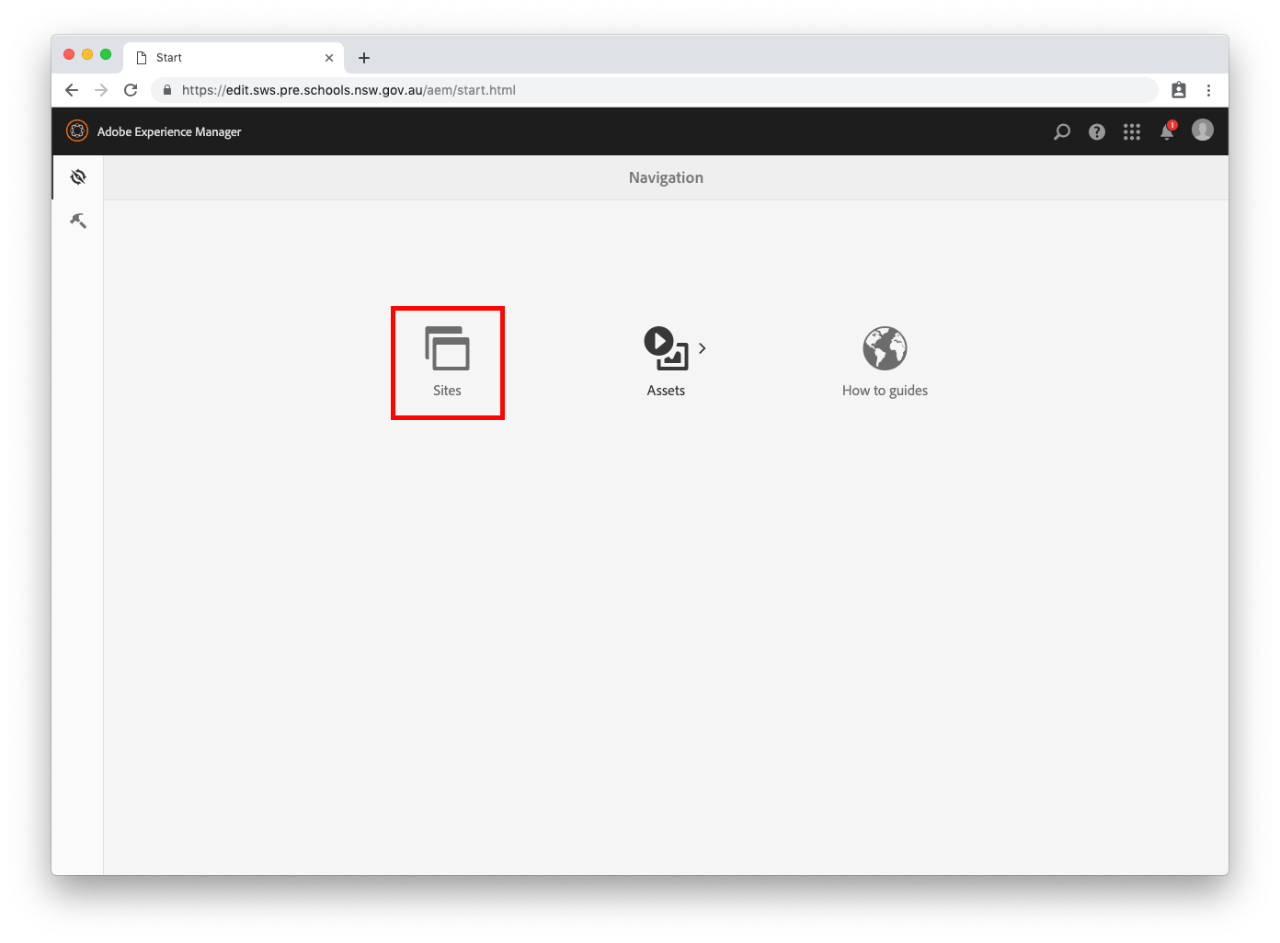
Step 1: Navigate to Home

Step 2: Create a news article

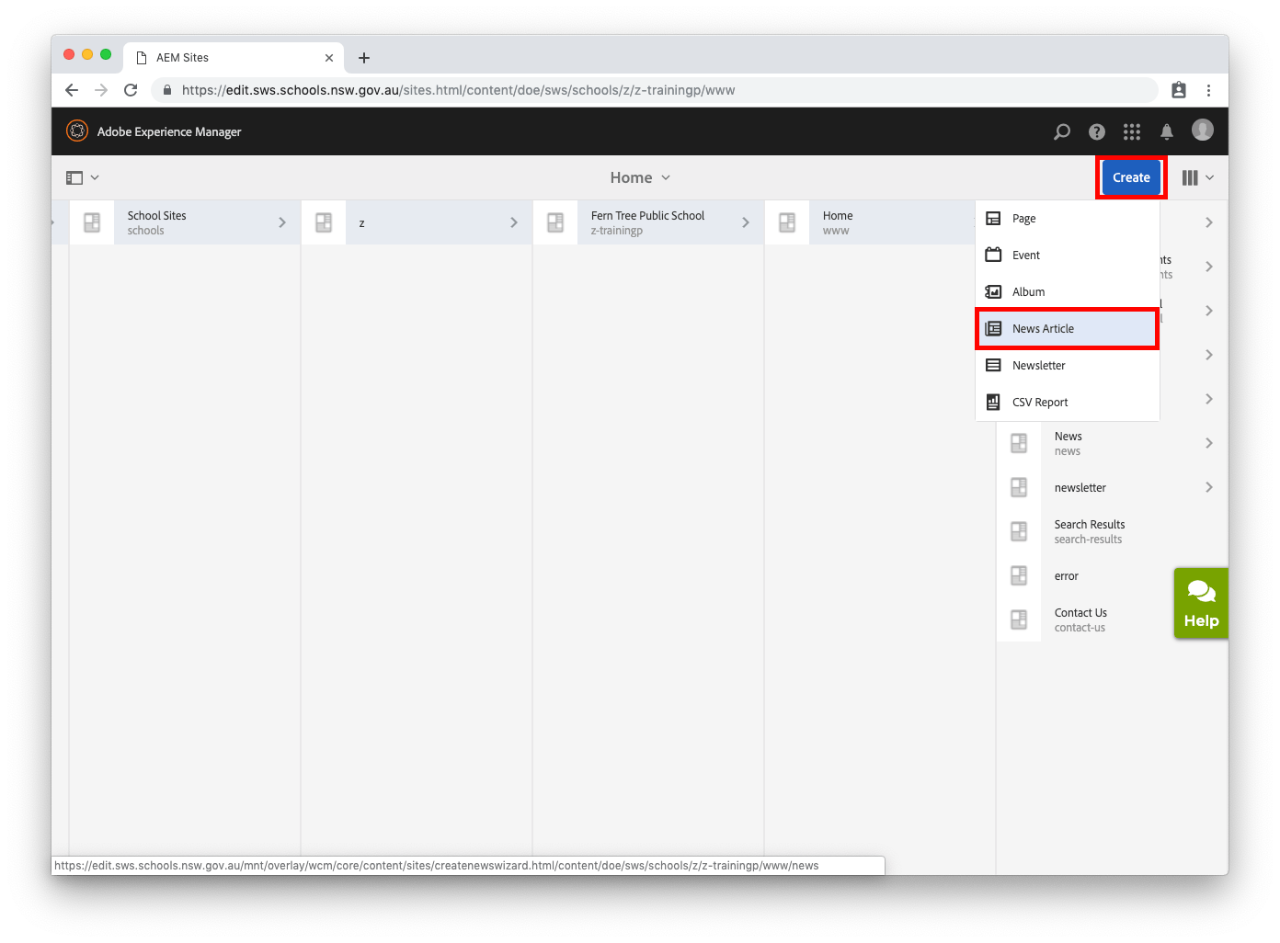
  • Select Create in the top right-hand corner.
  • The Create drop-down menu will display.
  • Select News Article.

Step 3: Enter the news article title 

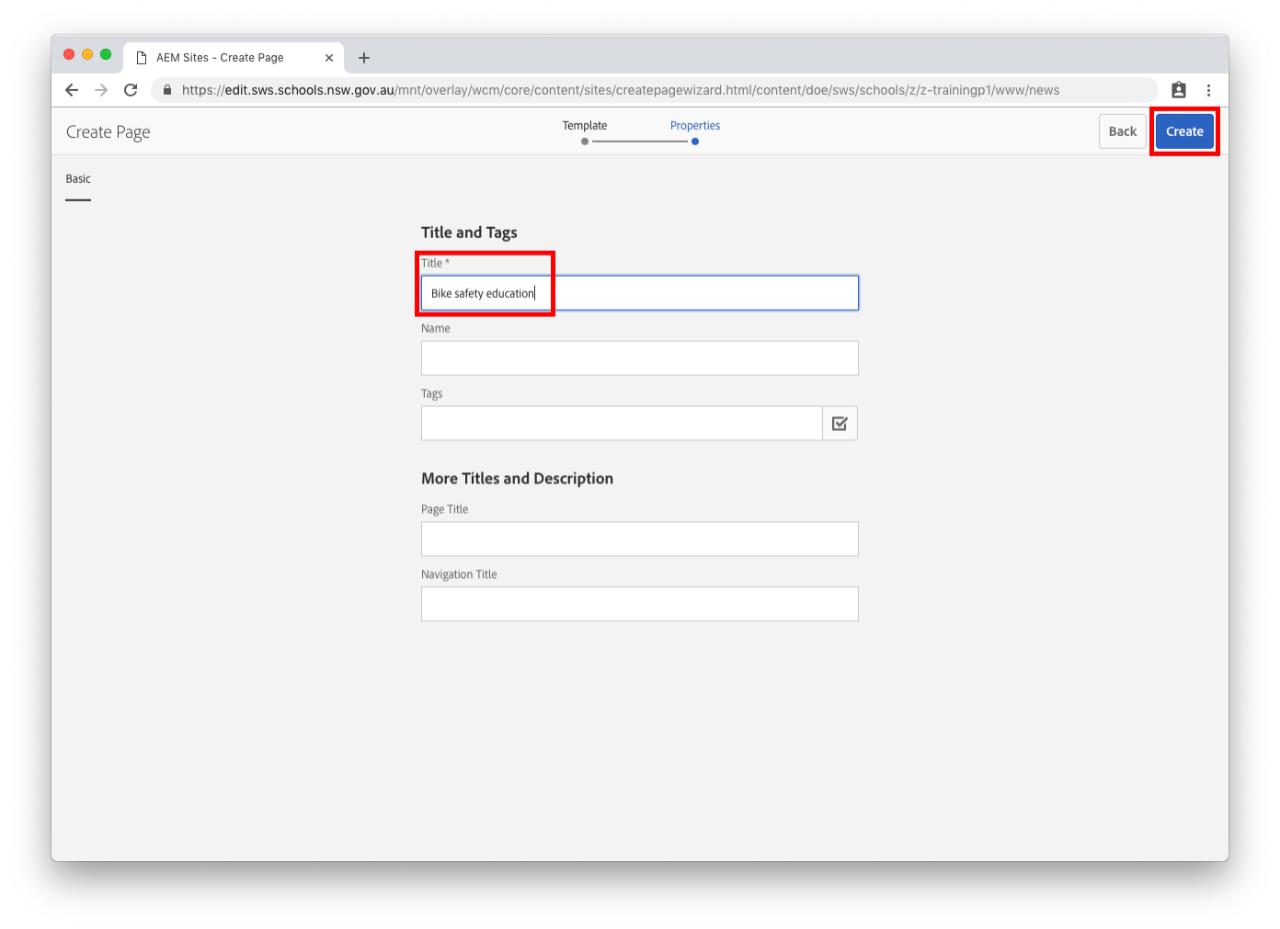
  • Enter the Title of your news article. For example: Bike safety education.
  • Do not fill out any of the other fields.
  • Select Create.

Step 4: Open your news article page

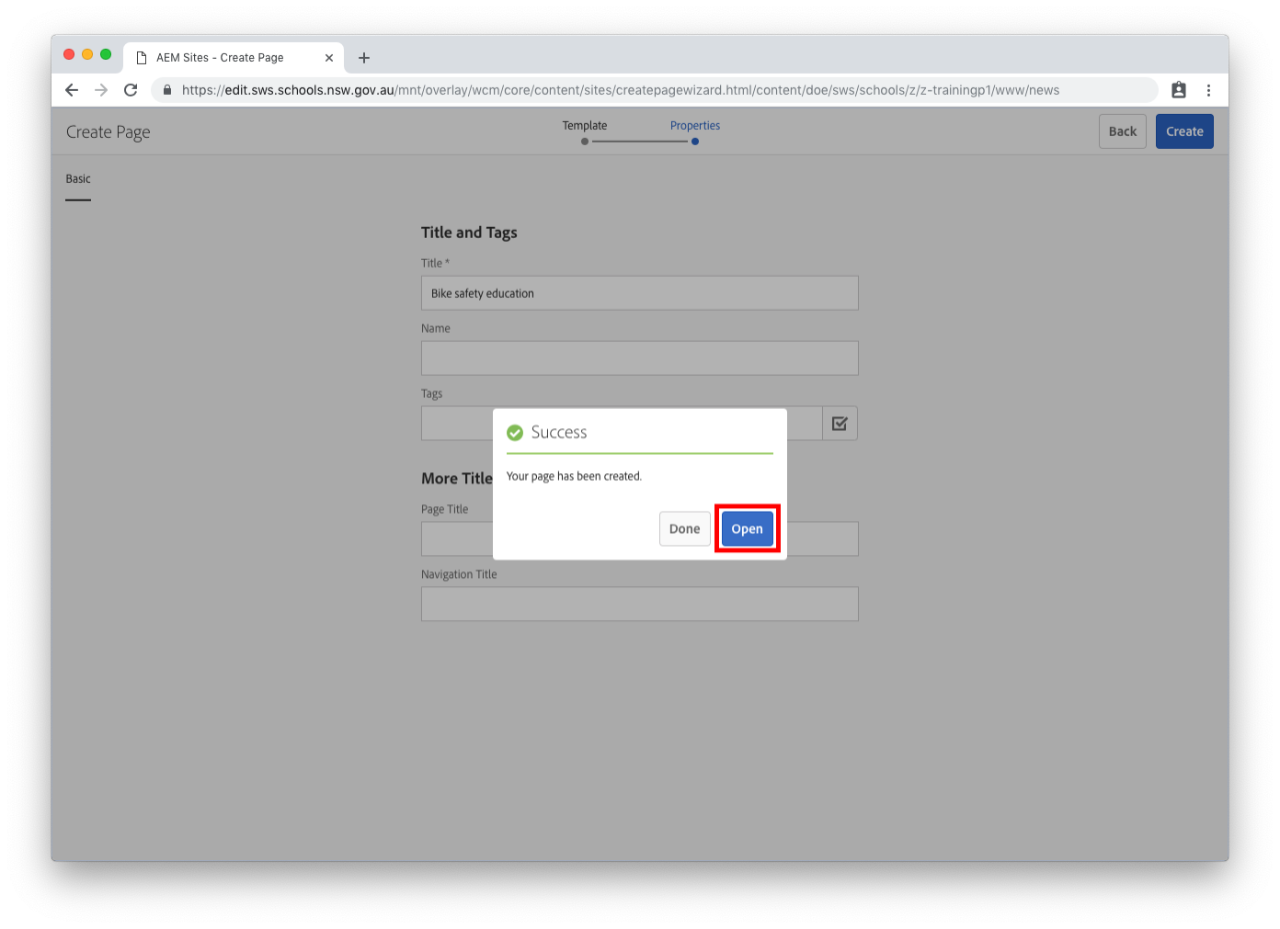
  • A success message will appear once the news article is created.
  • Select Open to edit the news article.
  • If you select Done you will need to edit your news article later.

Step 5: Edit your news article 

  • Select Edit in the top right of the page. This button is next to Preview
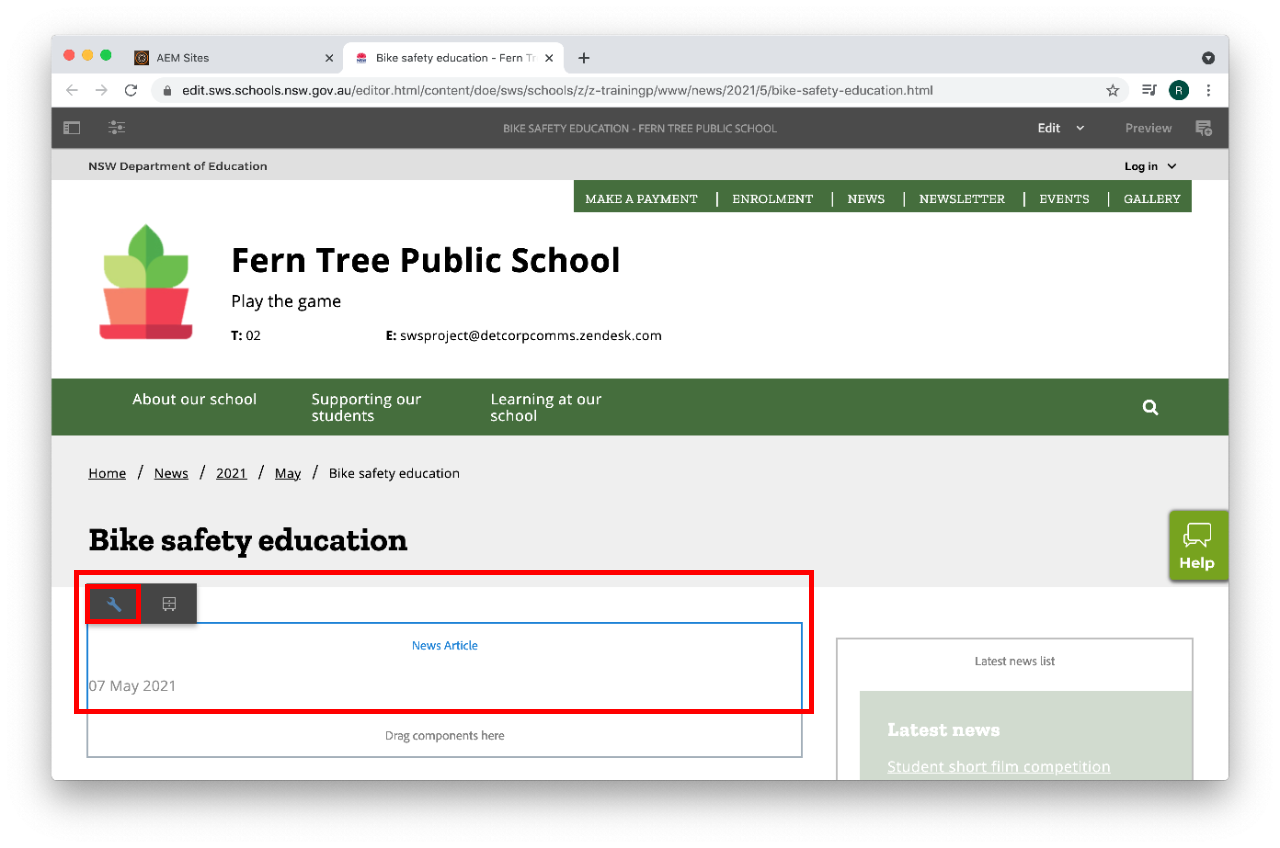
  • Select the date to activate the news article component.
  • Select the spanner icon to edit your news article page. This is the Configure button. 

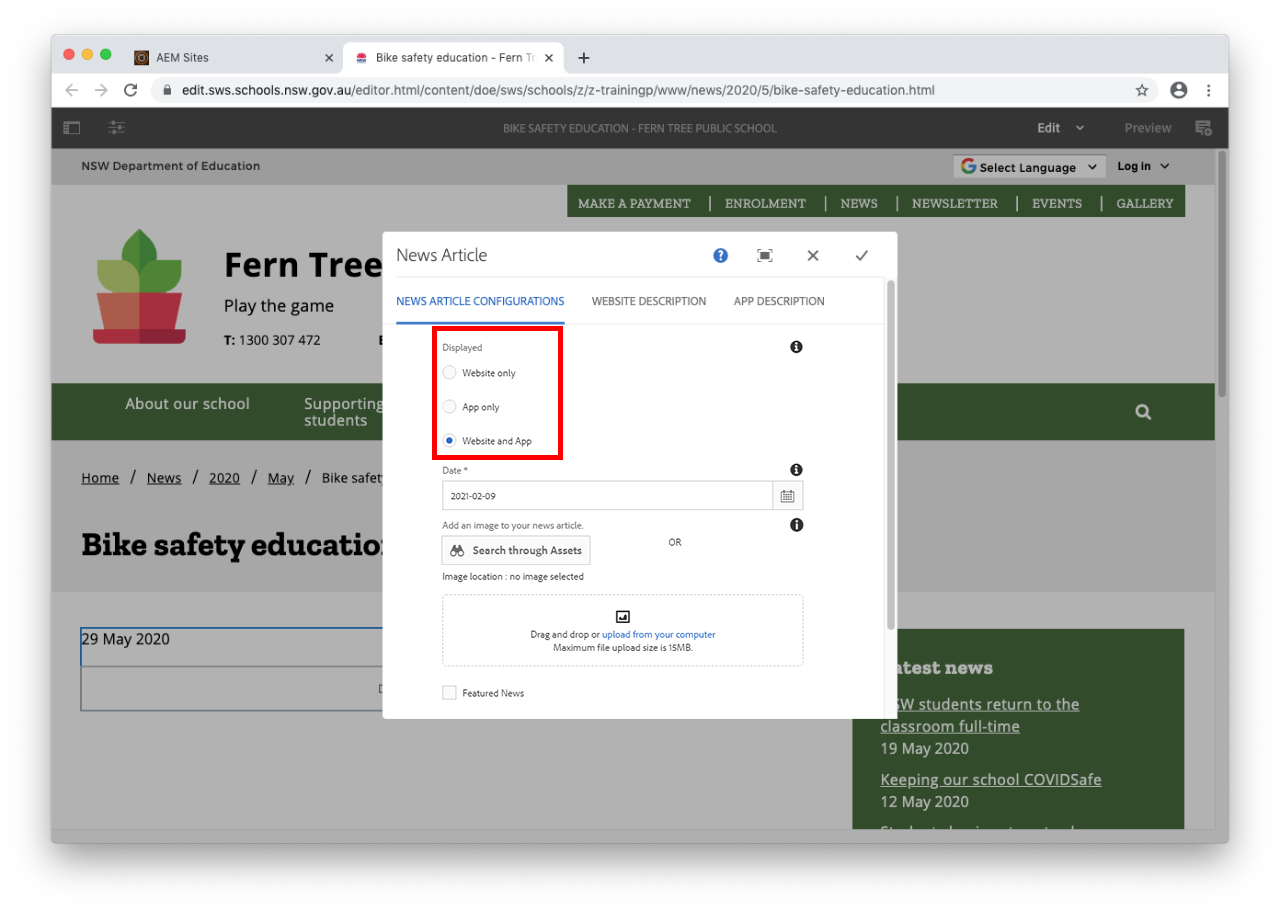
Step 6: Select News Article display

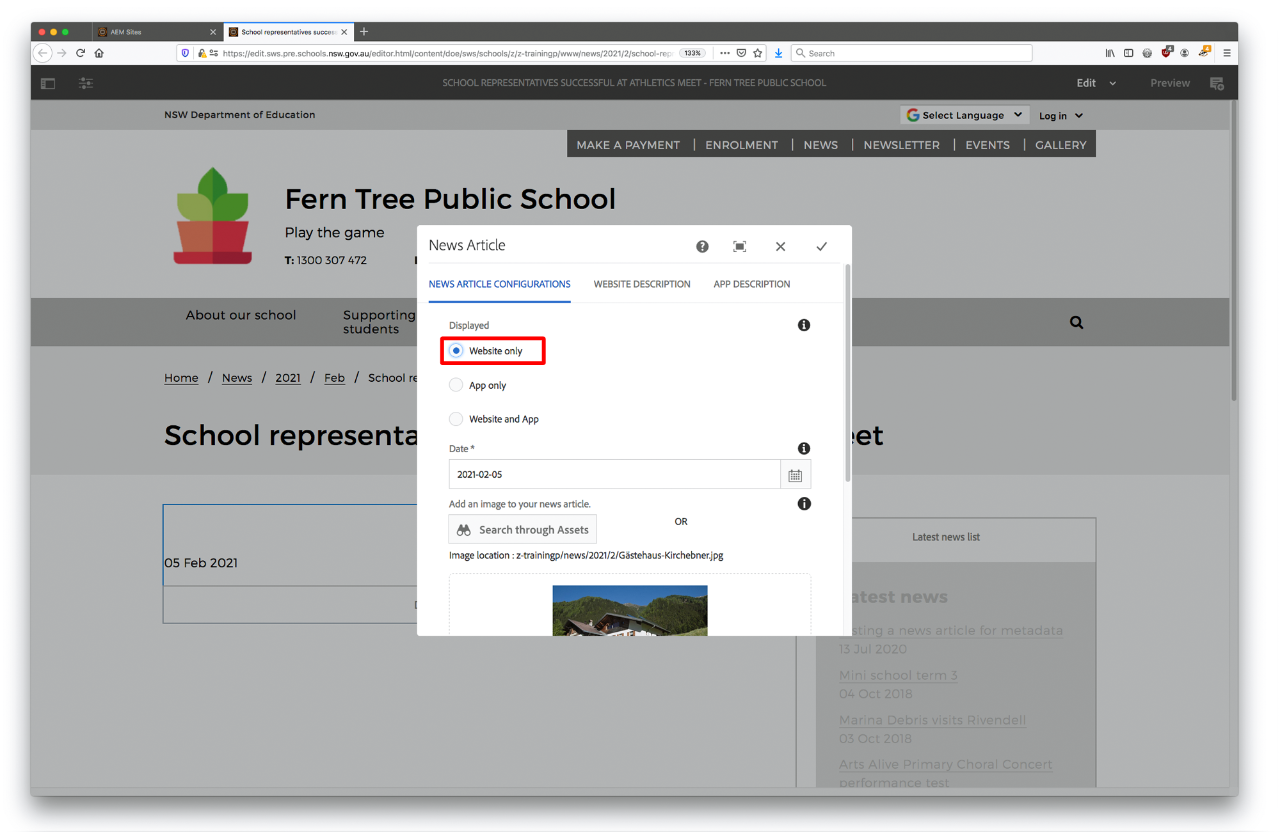
Displayed

Allows you to choose where the event will be displayed once published. 

  • Website and App - event will display on both your school website and companion app.
  • App only - event will display on companion app.
  • Website only - event will display on your school website only.

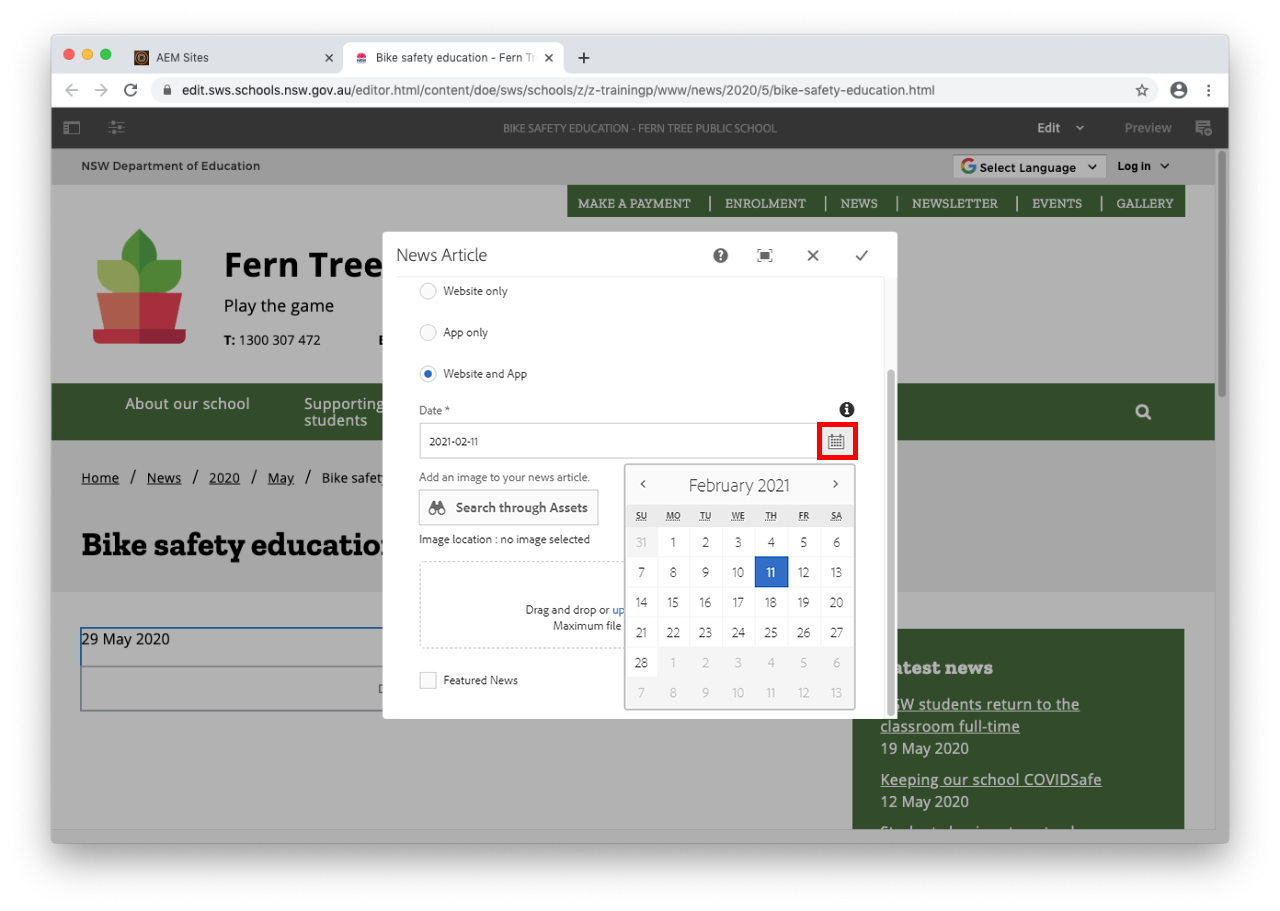
Step 7: Select a date for your news article

  • Select the date for your news article. This will affect the order it appears on the news page. 
  • If you set the date to a day in the future the news article will be hidden from navigation and the homepage until the selected date occurs.

Step 8: Add a featured image to your news article 

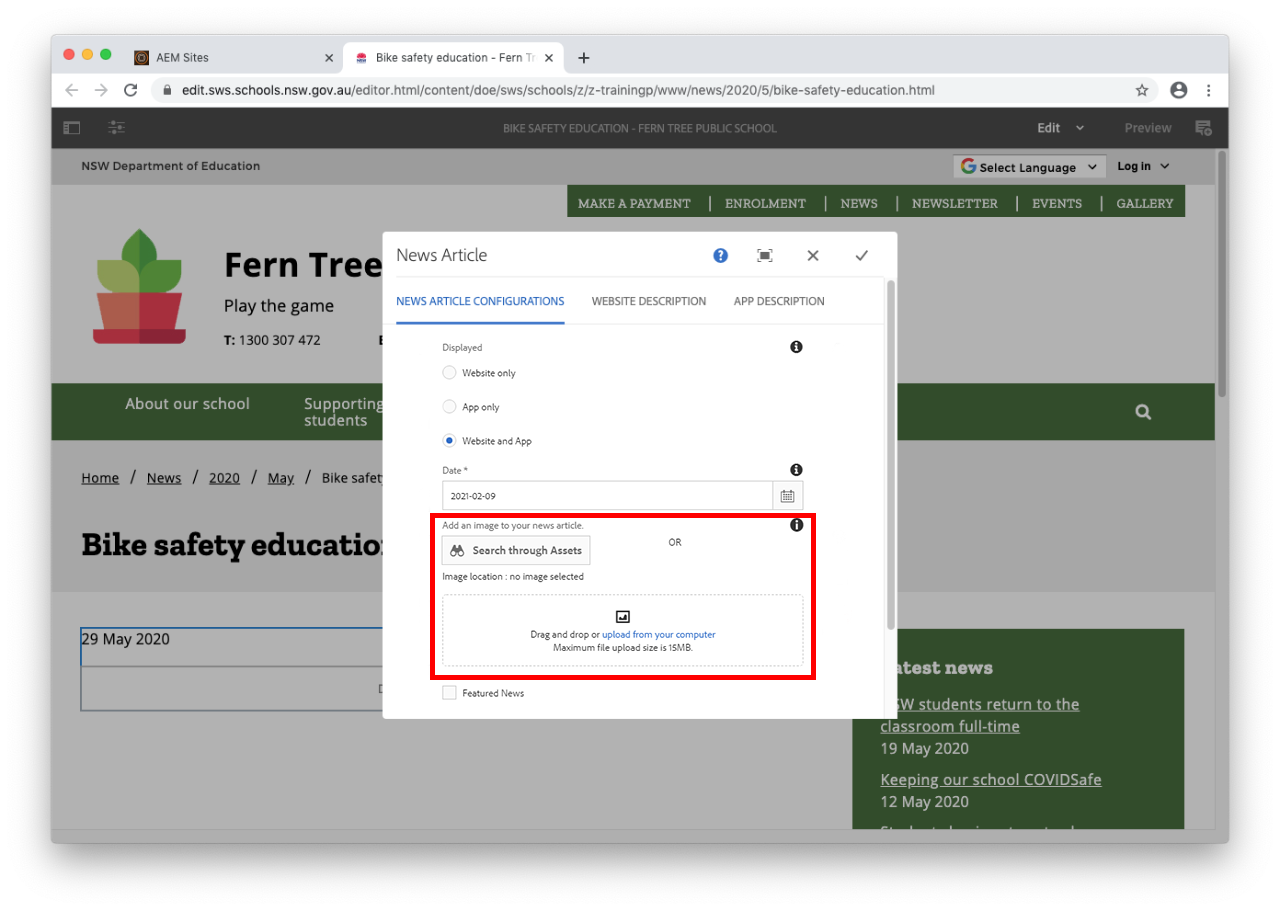
  • If you add a feature image to your news article it will display as a thumbnail on the home page and the news page. There are now two ways to do this.

    You can navigate through assets if you have already uploaded your image previously, or you can upload it directly from your computer through the News Article component by dragging and dropping the image or selecting the upload from your computer link and browsing through your computer.
  • The optimal size for the news article feature image size is listed on the image dimensions page.
  • Option 1: Drag and drop the image from your computer into the drag-and-drop area on the component, or select upload from your computer link if you prefer to browse through the files on your computer.
    • A progress indicator may appear and then your image will be shown in the upload area. Once this has happened you can proceed.

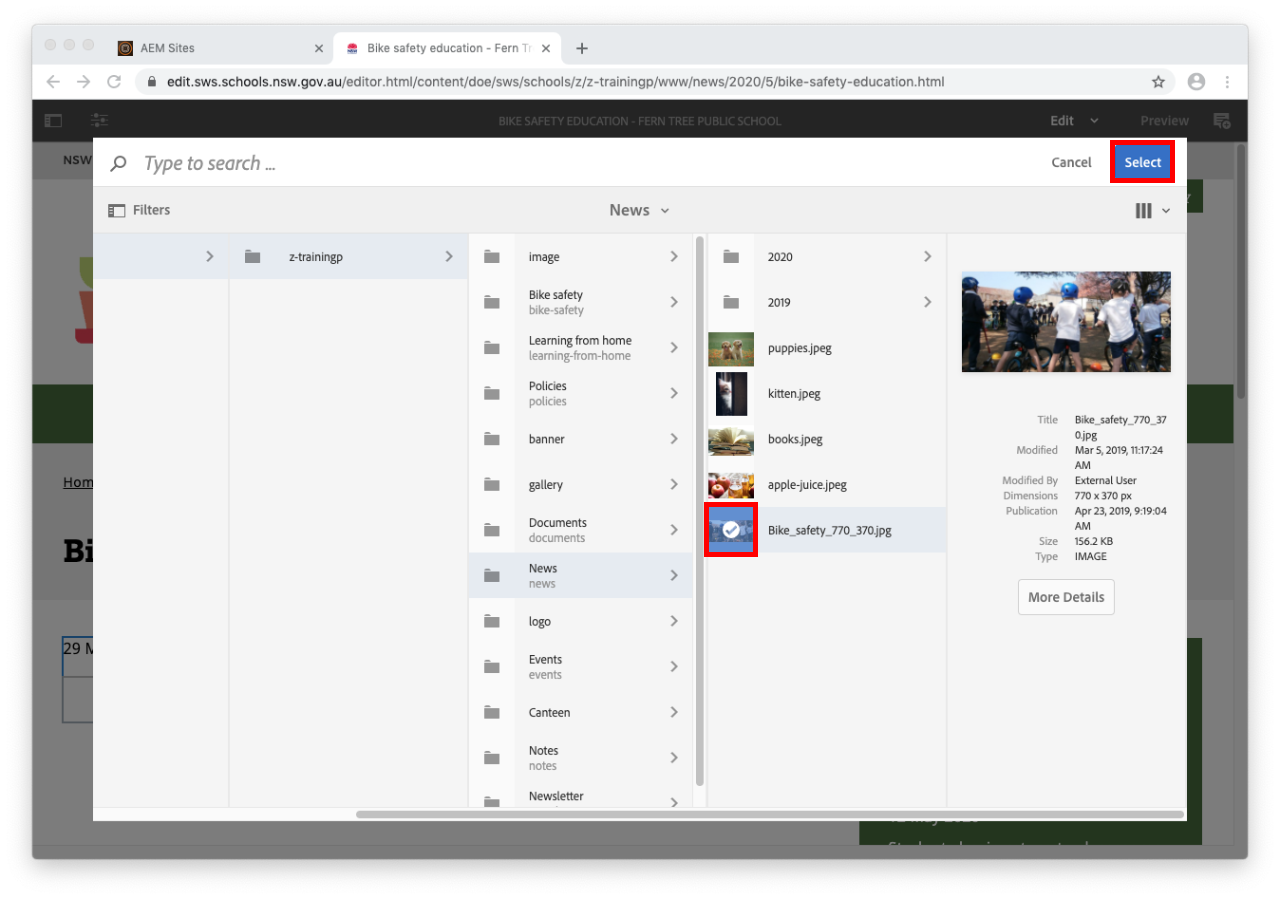
  • Option 2: In the image area, select the Search through assets button to navigate through your image and document assets to where you have previously saved your image.
    • Once you have found your image, select the icon to the left of the image name. The tick will appear and your selection will turn blue.
    • Select the Select button in the top right.

  • The pop-up will disappear and your link will appear in the Image path field.
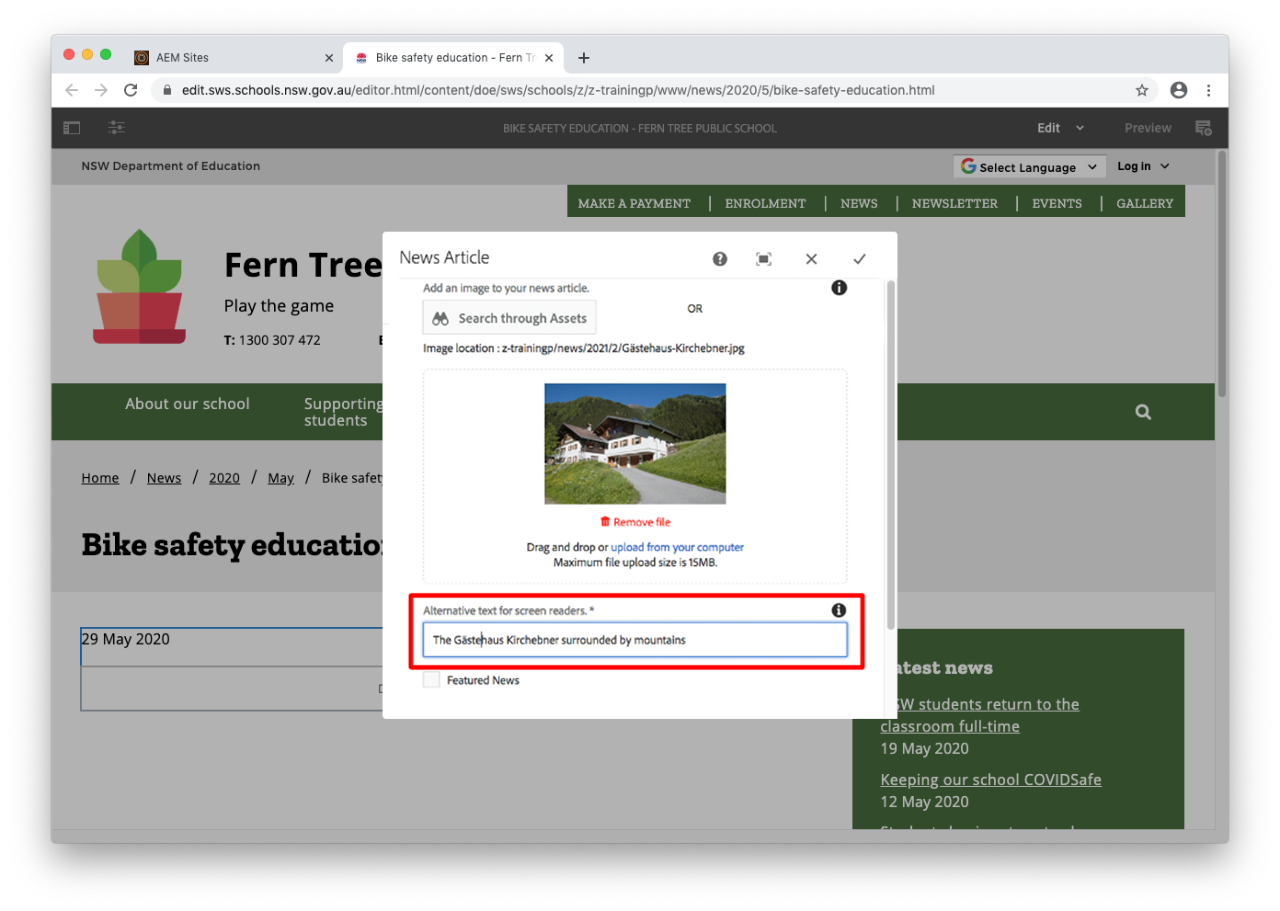
  • Enter the alternative text for your image into the Alt text field.
  • See the image guidelines for more information on alt text.

Step 9: Featured News – optional

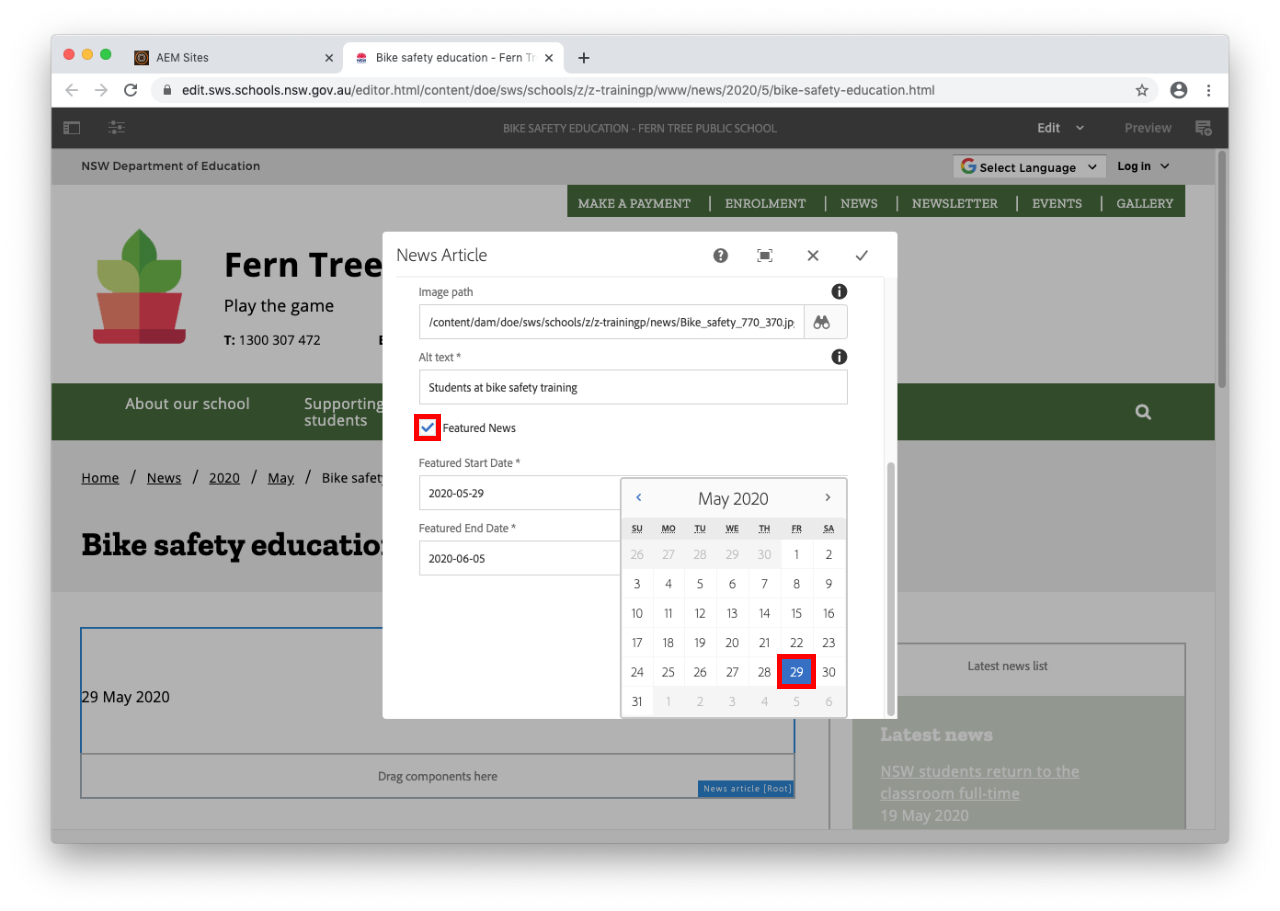
  • Select Featured News checkbox if you would like to make this article featured news. Featured news appears at the top of your news index page. 
  • Select a Featured Start Date. This is the date your news article will start appearing as a feature news article.
  • Select a Featured End Date. This is the date your news article will stop appearing as a featured news article. It will still appear on the news index page in chronological order. 

Step 10: Write your news article

For displaying your news articles you have three options;

Option 1 - Website and app

  • Select Website and app tab, if you chose Website and app option under Displayed heading in News article configurations. 
  • Enter your news article content under both Website description and App description tabs. 
  • Select the tick on the top right of the pop-up to save the news article settings.
  • You can use the rich text editor to format your article. See our Rich text editor guide to learn how to use this. 
  • Keyboard shortcuts;
    • Select all: ctrl+a
    • Copy: ctrl+c
    • Paste: ctrl+v

Option 2 - App only

  • Select App description tab, if you chose App only option under Displayed heading in News article configurations. 
  • Enter your news article content. 
  • Select the tick on the top right of the pop-up to save the news article settings.
  • You can use the rich text editor to format your article. See our Rich text editor guide to learn how to use this. 

Option 3 - Website only

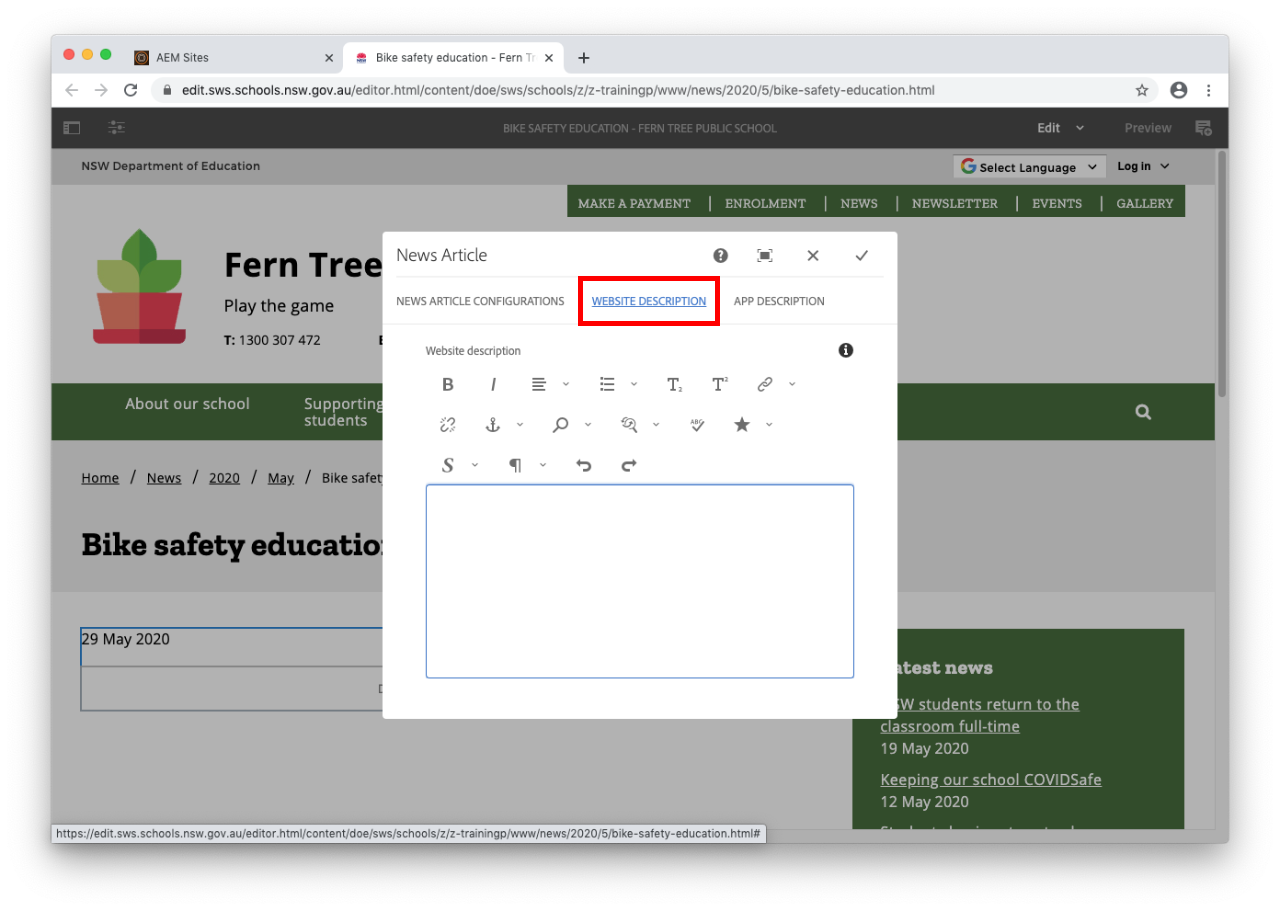
  • Select Website description tab, if you chose Website only option under Displayed heading in News article configurations. 
  • Enter your news article content. 
  • Select the tick on the top right of the pop-up to save the news article settings.
  • You can use the rich text editor to format your article. See our Rich text editor guide to learn how to use this. 

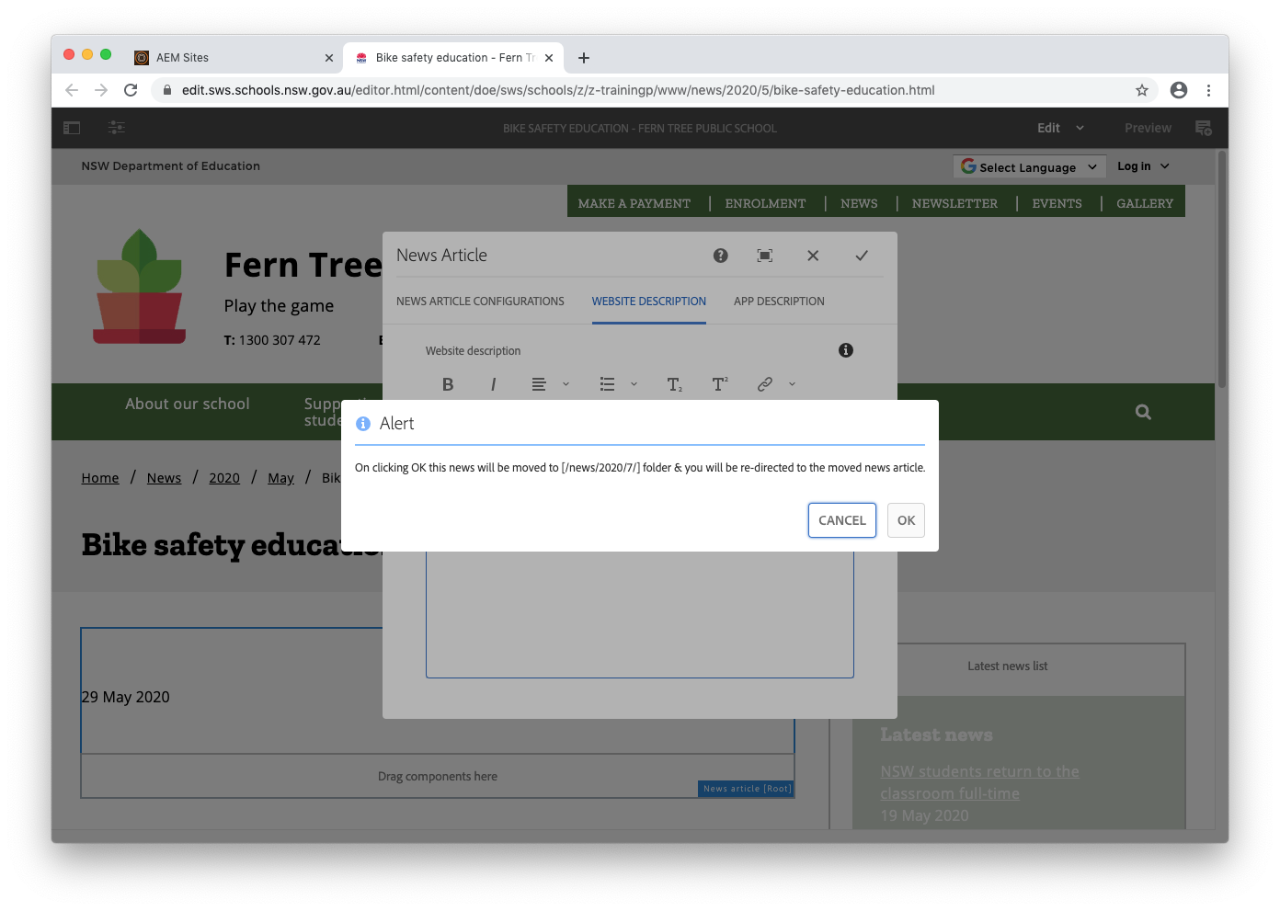
  • The Alert below will appear if you have set your news article to publish in a future month.  The system will automatically move the page to the correct month and year. 
  • Select OK.

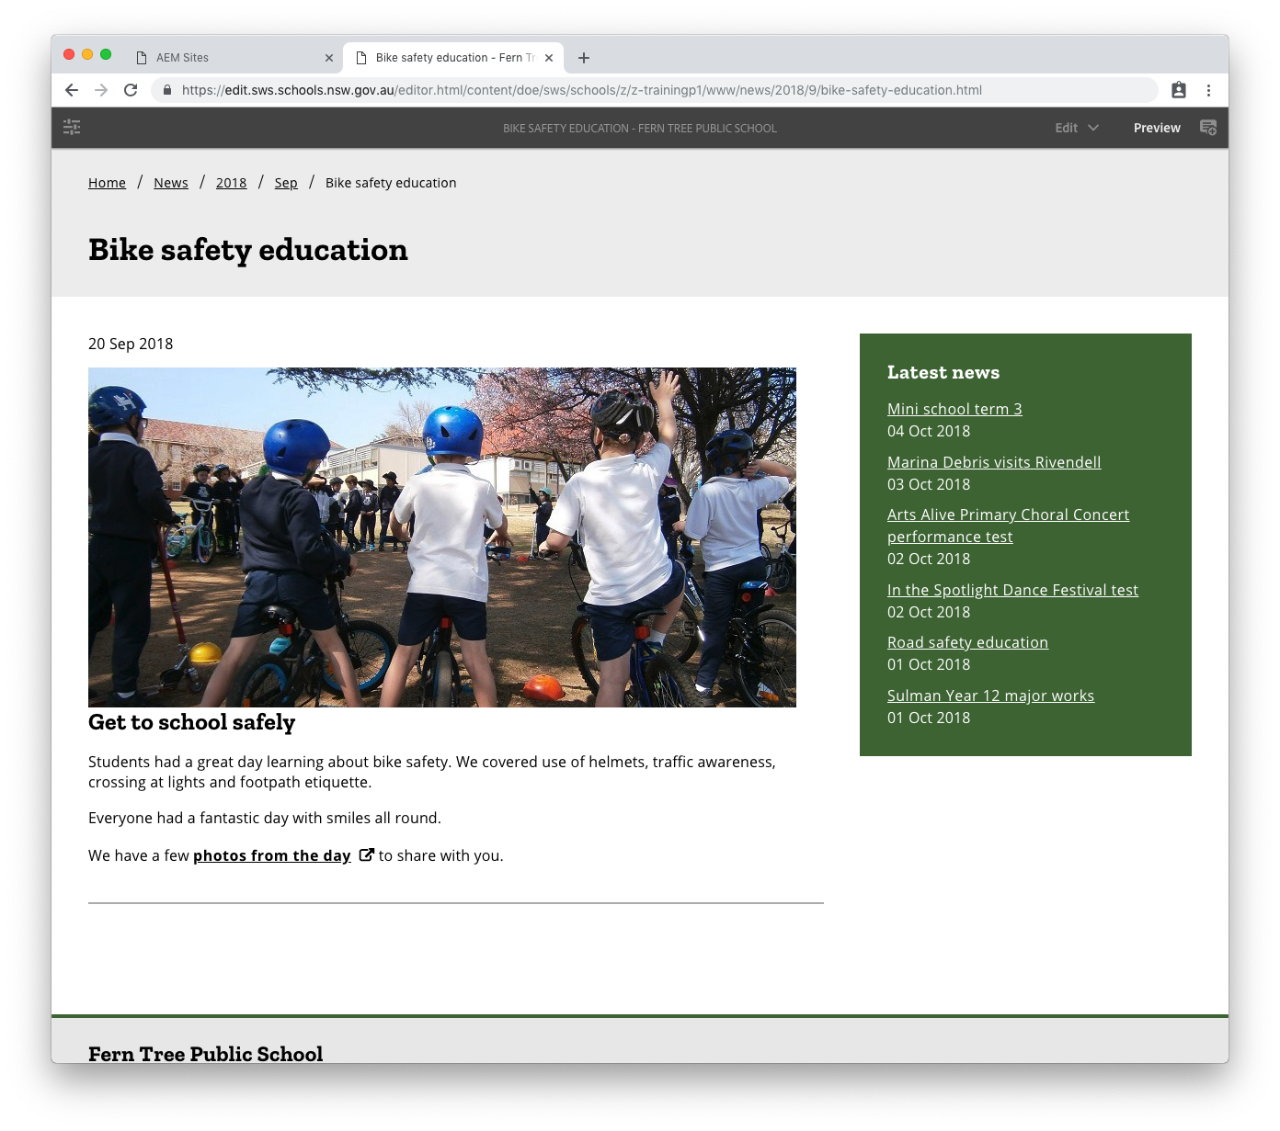
  • Your news article is now ready to be published. 

Step 11: Publish your news article page

  • For changes to be updated on your live school website you will need to publish the page and the year and month folders. 
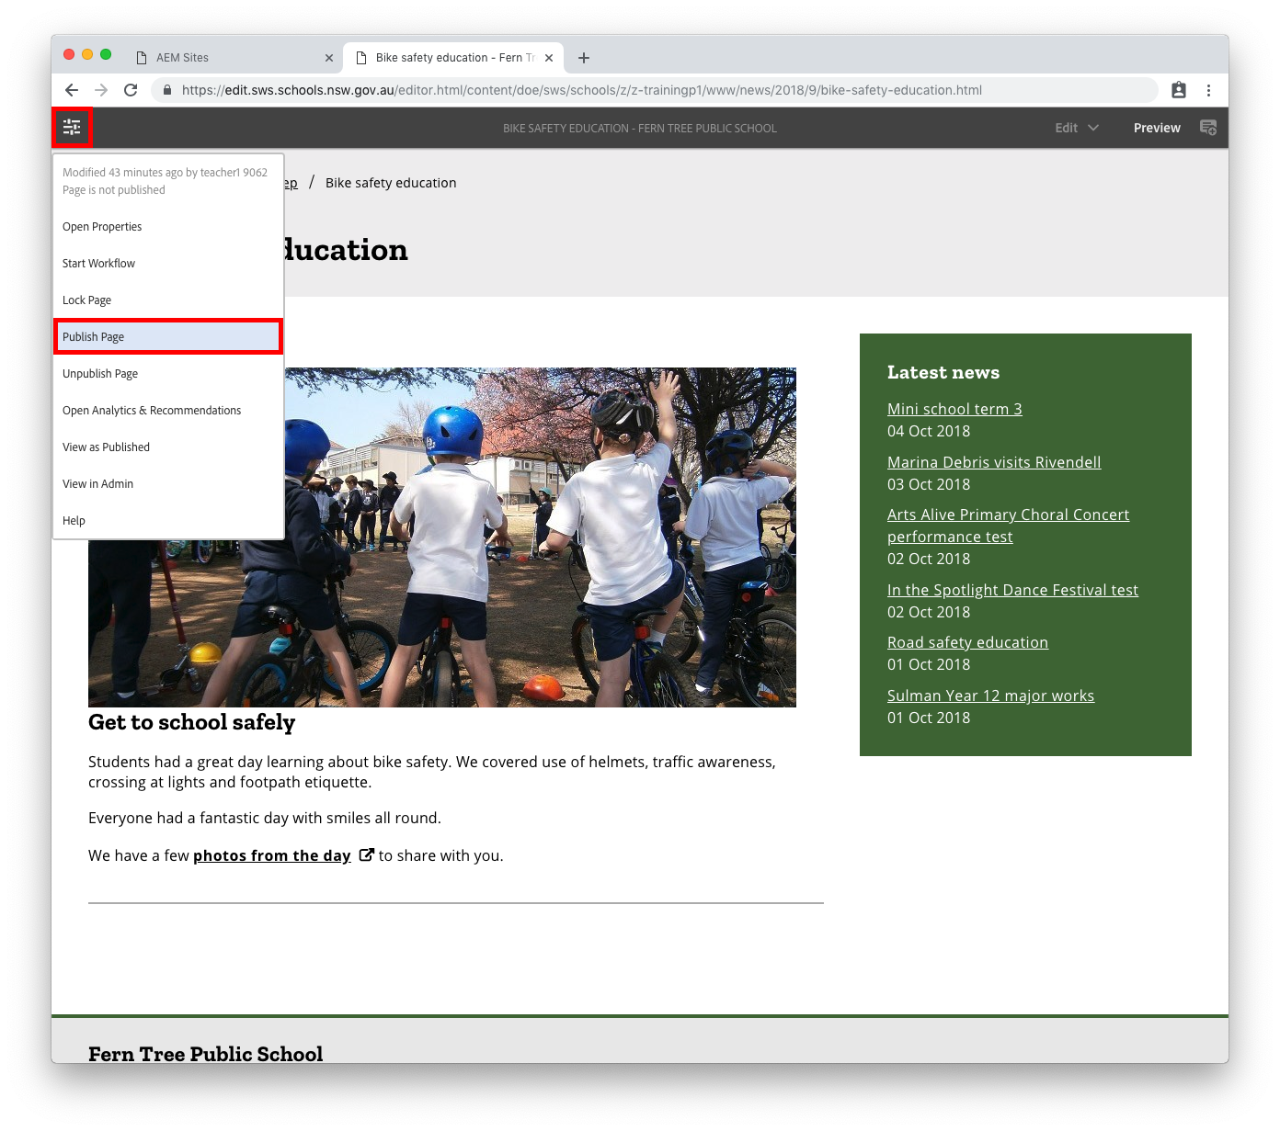
  • Select the slider icon in the top left corner. This is the Page Information button.
  • Select Publish Page from the drop-down. 
  • If you don't see Publish Page you are an Author and will need to select Start Workflow instead. Go to our Author publish a page for more information.

Published news article

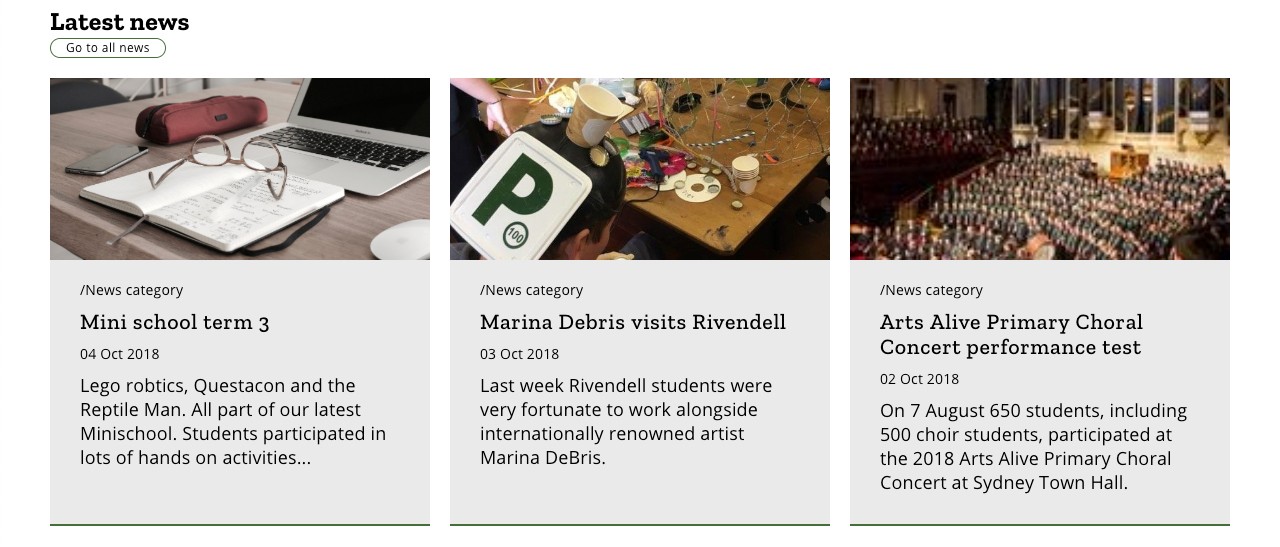
Example of the updated Latest news section with news articles that have images:

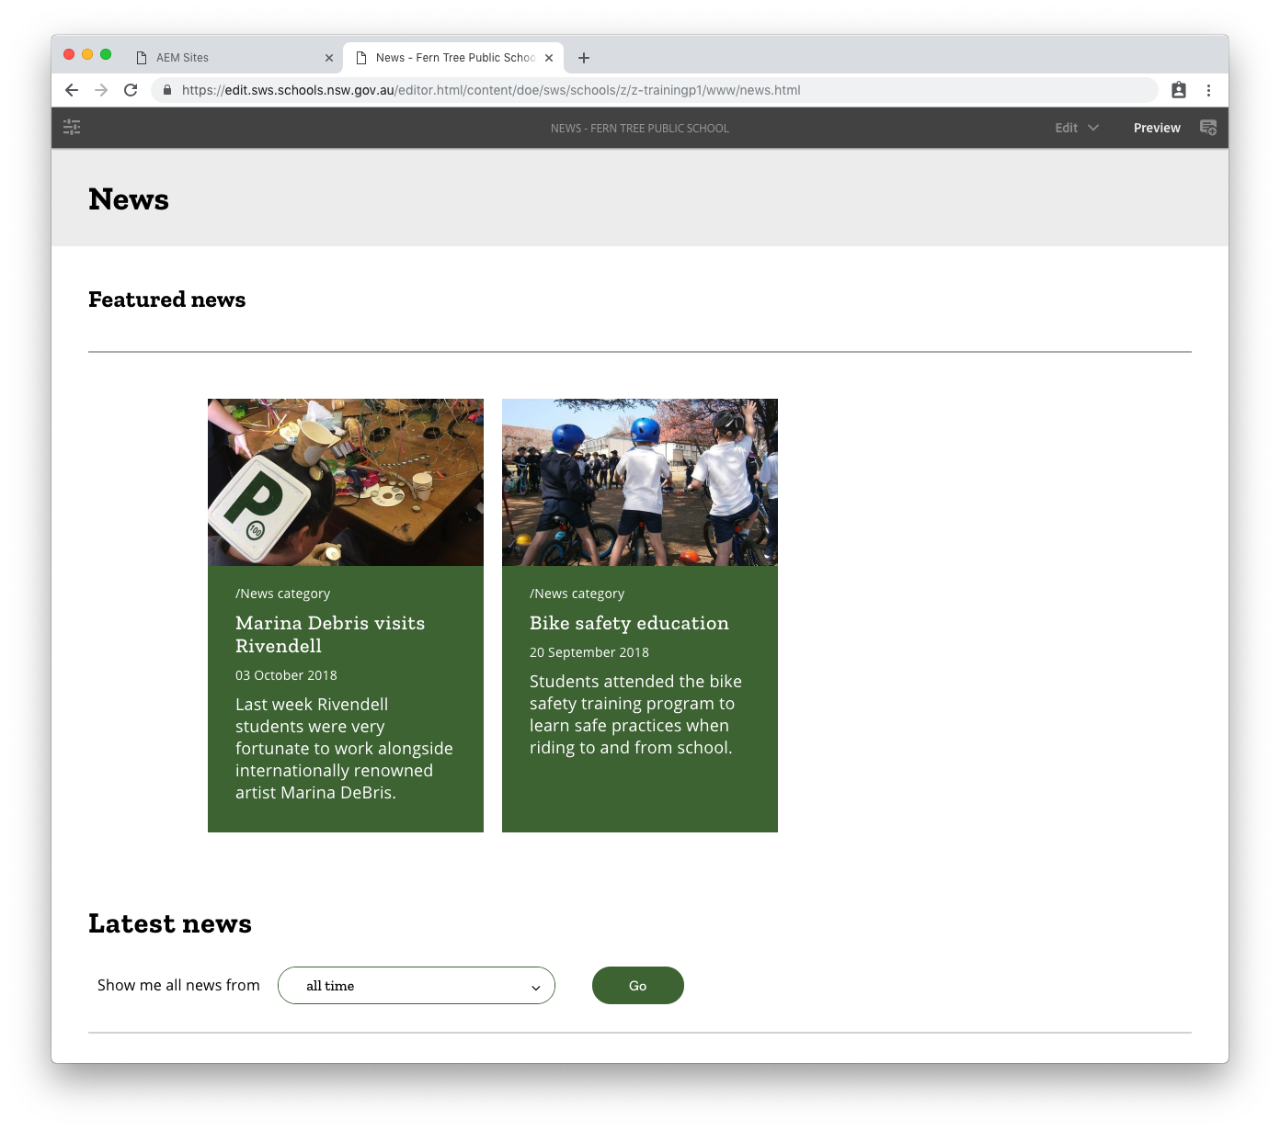
Example of a news page showing all current featured news and regular news articles in chronological order: