School website service training and support

Edit a newsletter

Use this guide to learn how to edit your school newsletter. 

Before you start

If your existing newsletter is a PDF document and you simply need to replace the PDF document you do not need to follow these instructions. Instead use the replace a document or image guide.

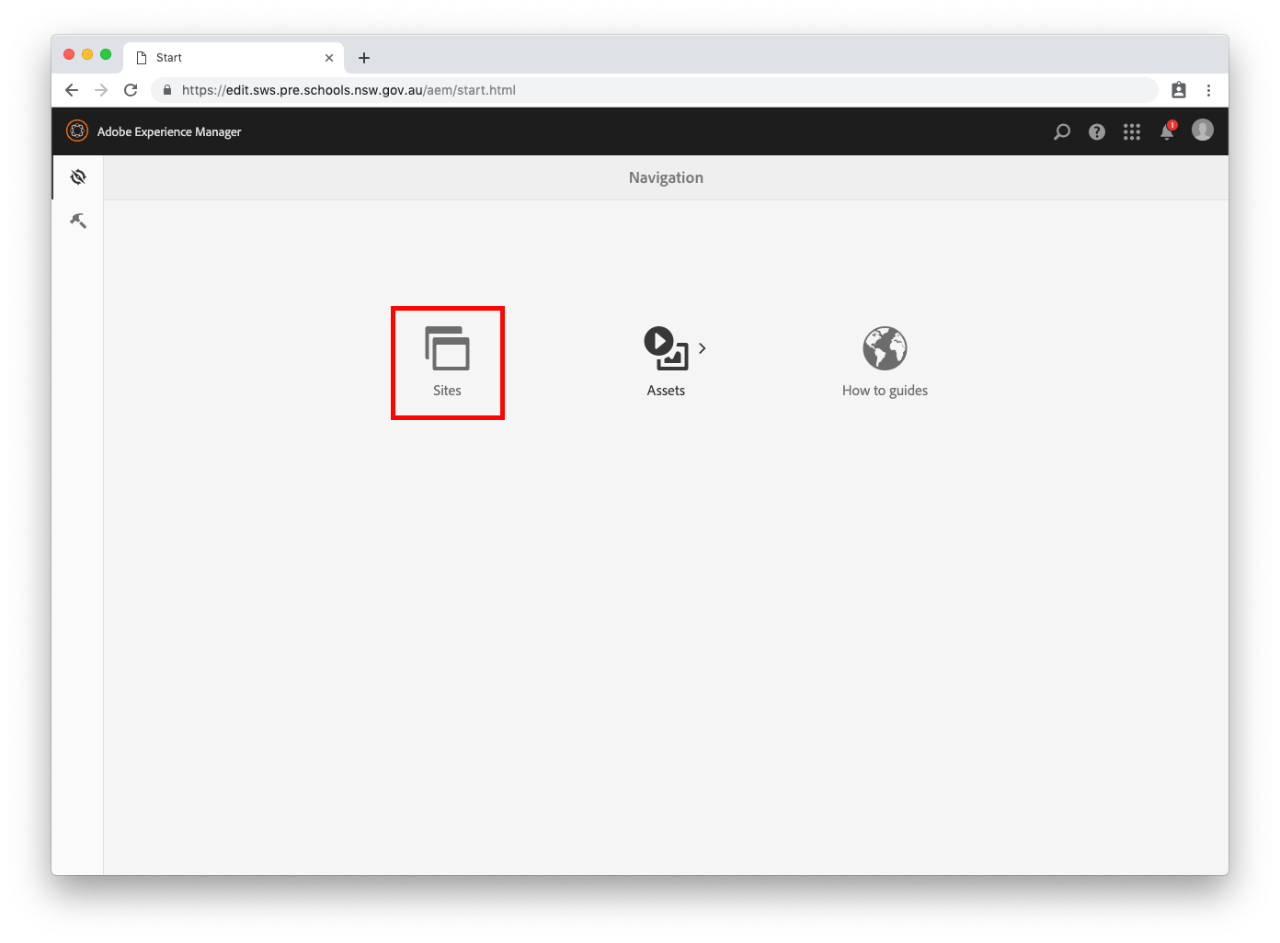
Step 1: Navigate to Home

  • Your school's home page will already be selected.

Step 2: Edit the newsletter page

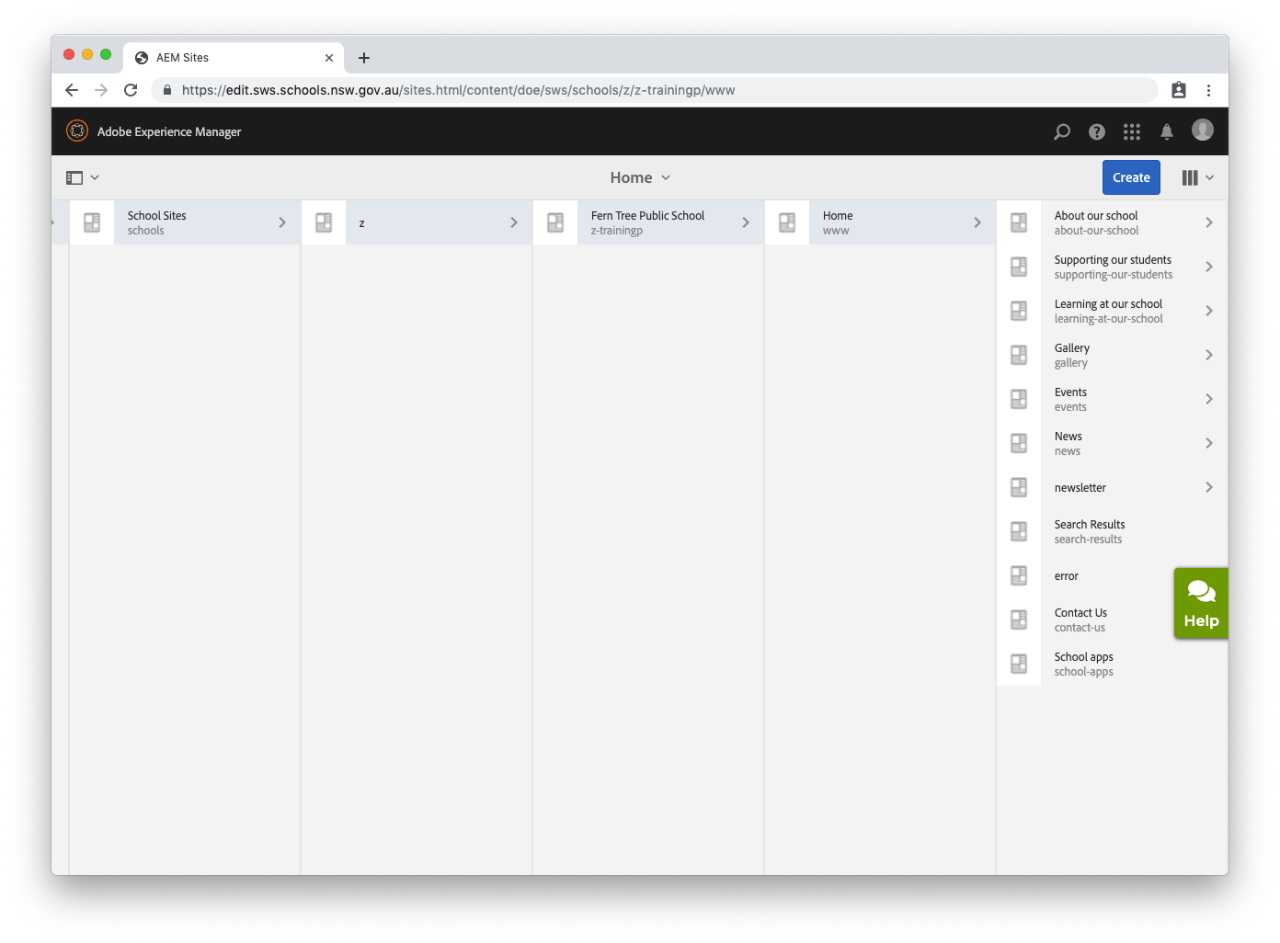
  • Select newsletter.
  • Select the year of the newsletter.
  • Select the month of the newsletter.
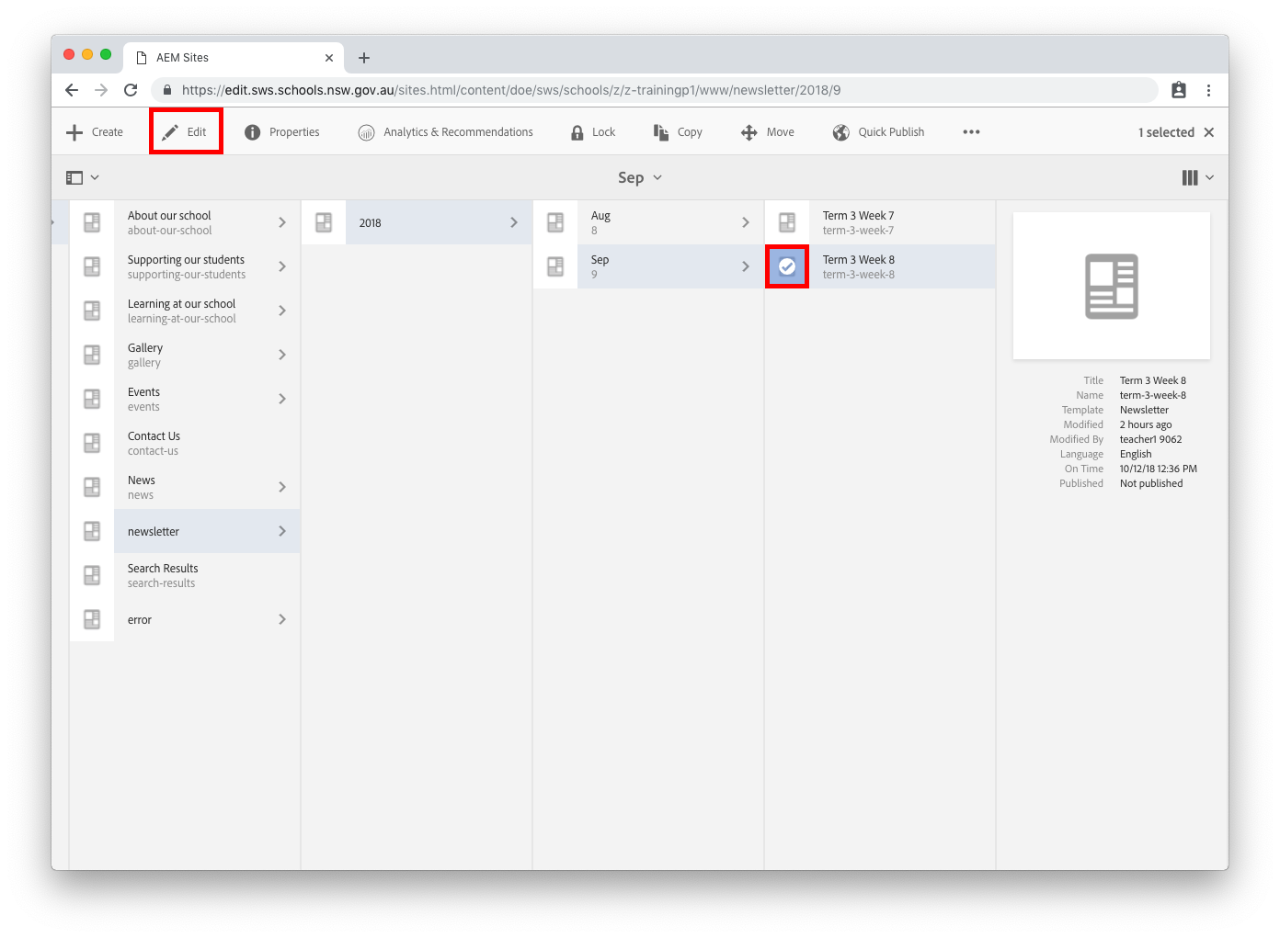
  • Once you have found your newsletter issue, select the icon to the left of the page name. For example, Term 3 Week 8. The tick will appear and your selection will turn blue. 
  • Select Edit in the menu bar that appears across the top of the screen.

Step 3: Edit your newsletter 

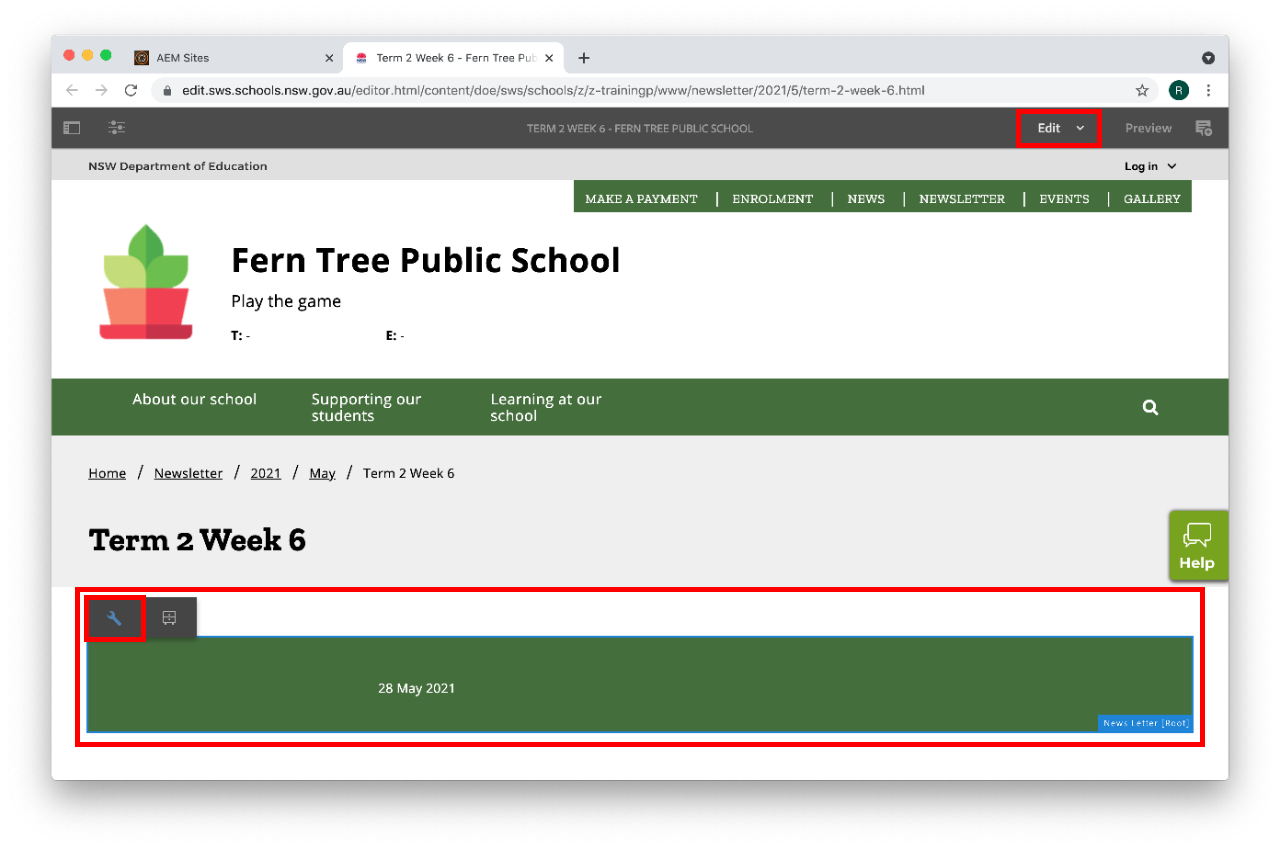
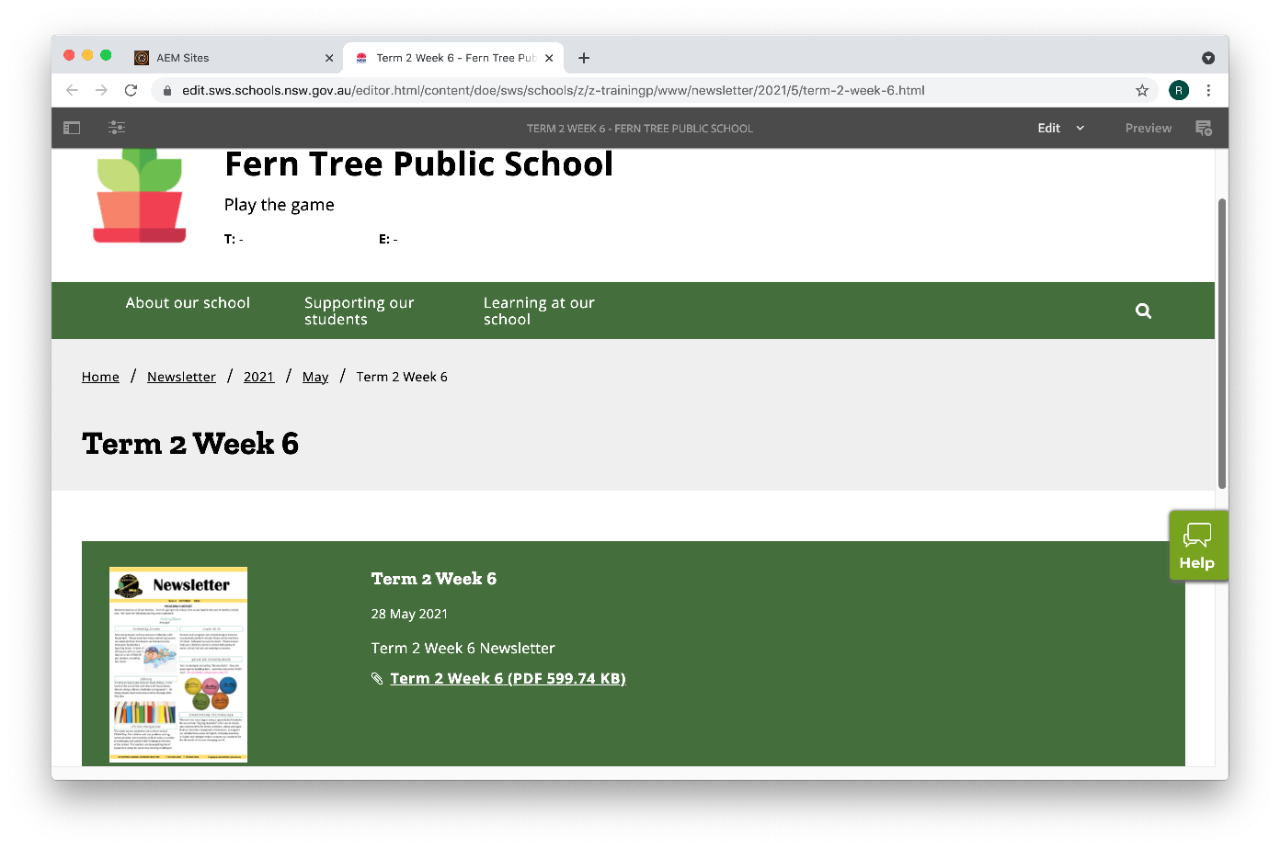
  • Select Edit in the top right of the page. This button is next to Preview
  • Select the date to activate the newsletter component.
  • Select the spanner icon to edit your newsletter page. This is the Configure button. 

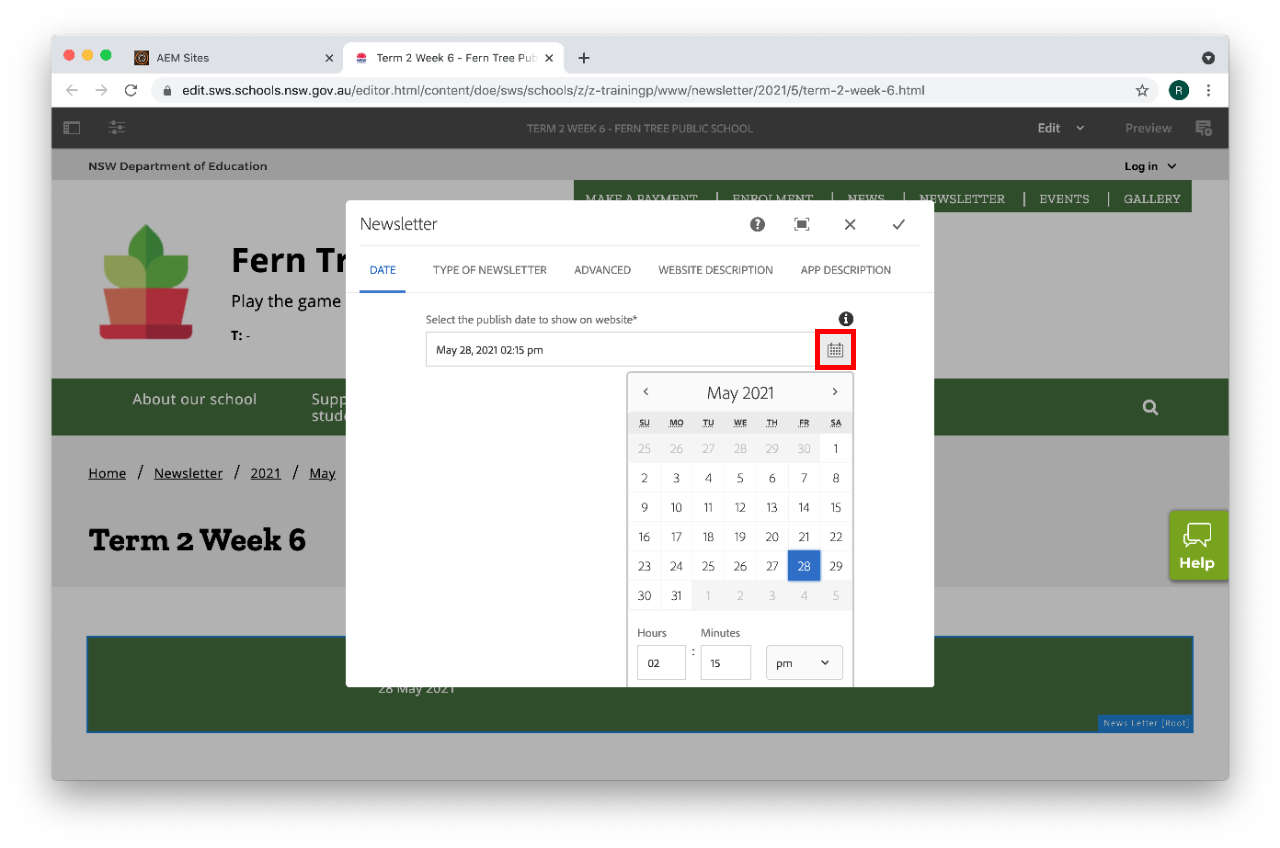
Step 4: Change the date for your newsletter - optional

  • Select the date for your newsletter. This will affect the order it appears on the newsletter page.
  • If you set the date to a day in the future the newsletter will be hidden from navigation and the home page until the selected date occurs.

Step 5: Change the medium for displaying your newsletter

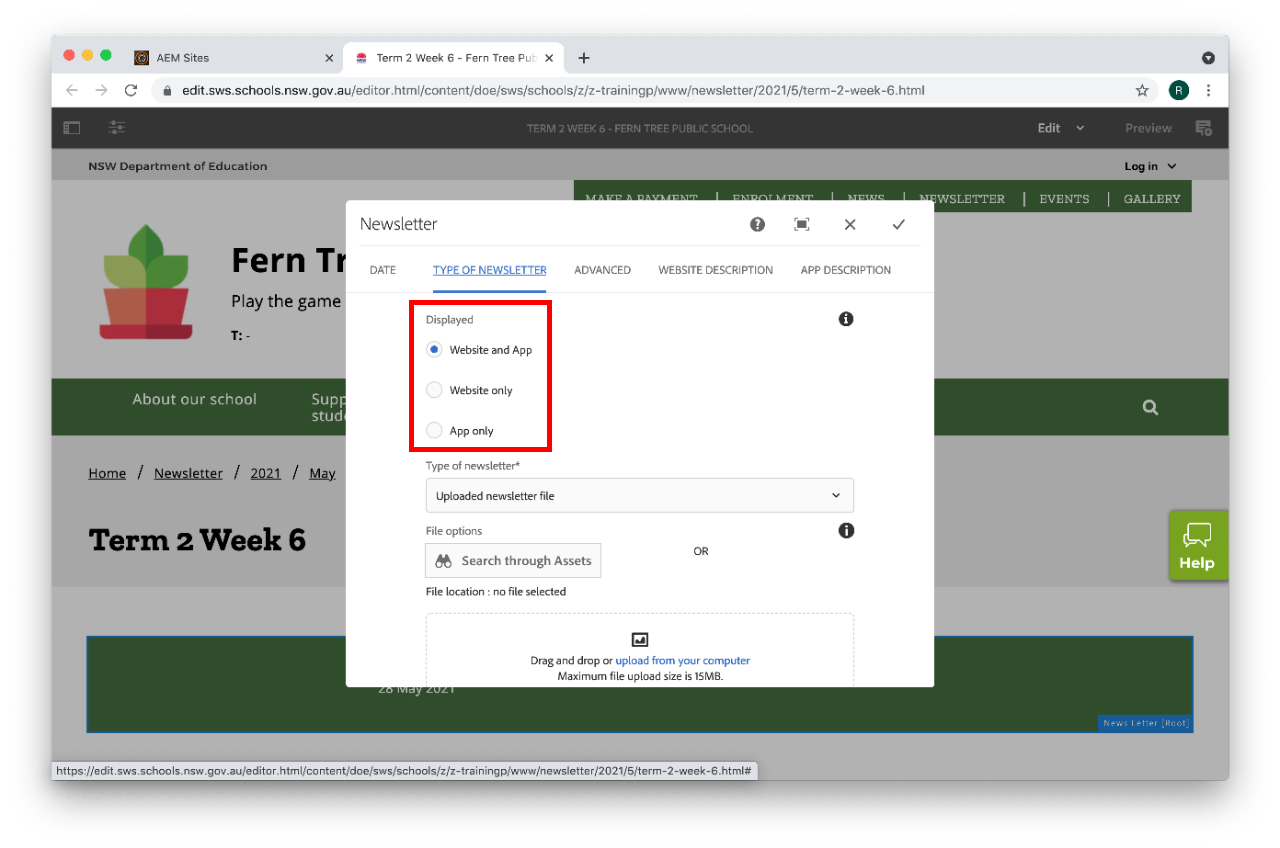
  • Select the TYPE OF NEWSLETTER tab.

Displayed

Allows you to choose where the newsletter will be displayed once published. 

  • Website and App - newsletter will display on both your school website and companion app.
  • Website only - newsletter will display on your school website only.
  • App only - newsletter will display on companion app.
You can select any of the three options to display the newsletter. Website and app is selected by default. 

Step 6: Update your newsletter in the newsletter page – PDF, Link or text on a page

There are 3 options for adding a newsletter to your website.
Choose only one option and complete the steps before moving to step 6:

Option 1: Upload your PDF direct from your computer

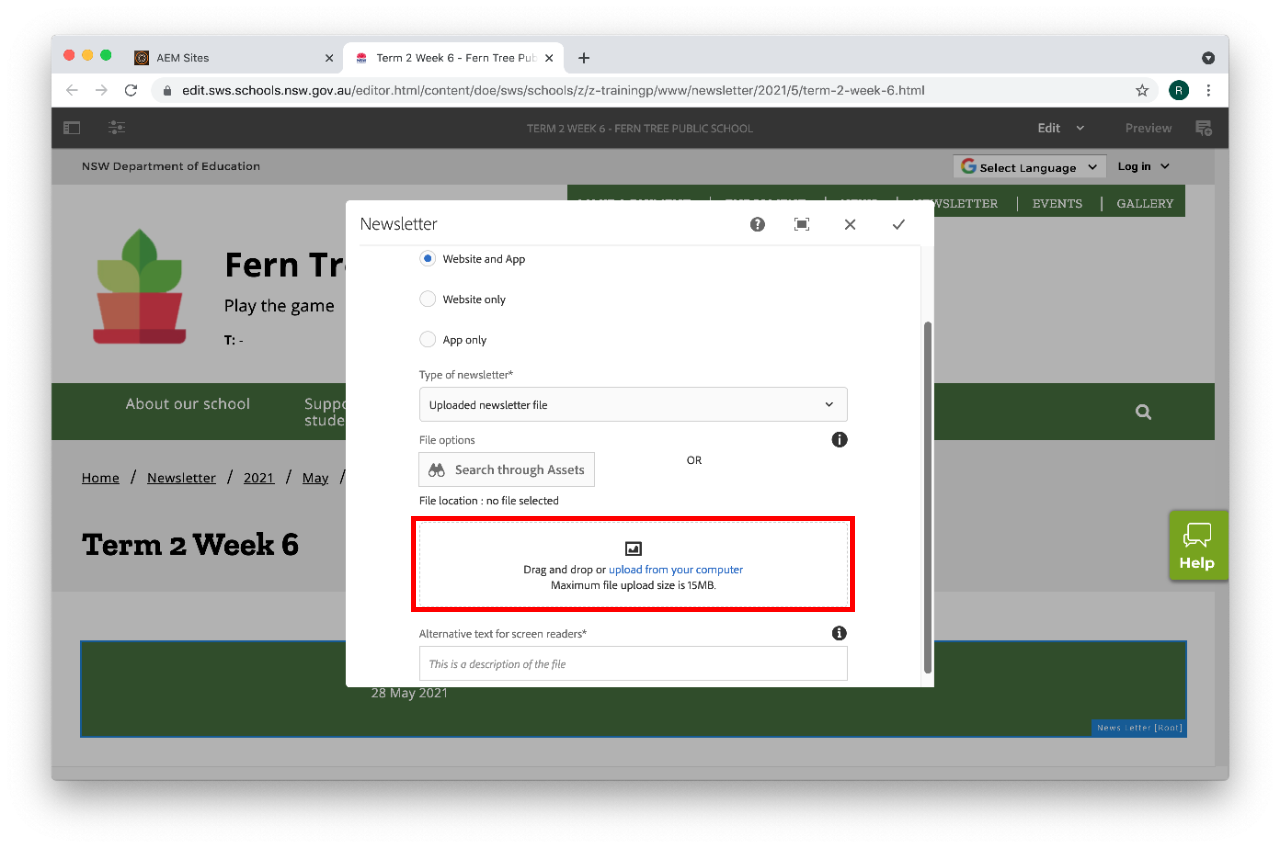
  • Select Uploaded newsletter file from the Type of newsletter file drop-down option.
  • Drag and drop the file into the rectangle or select upload from your computer to navigate through your computer to find your school's newsletter PDF.

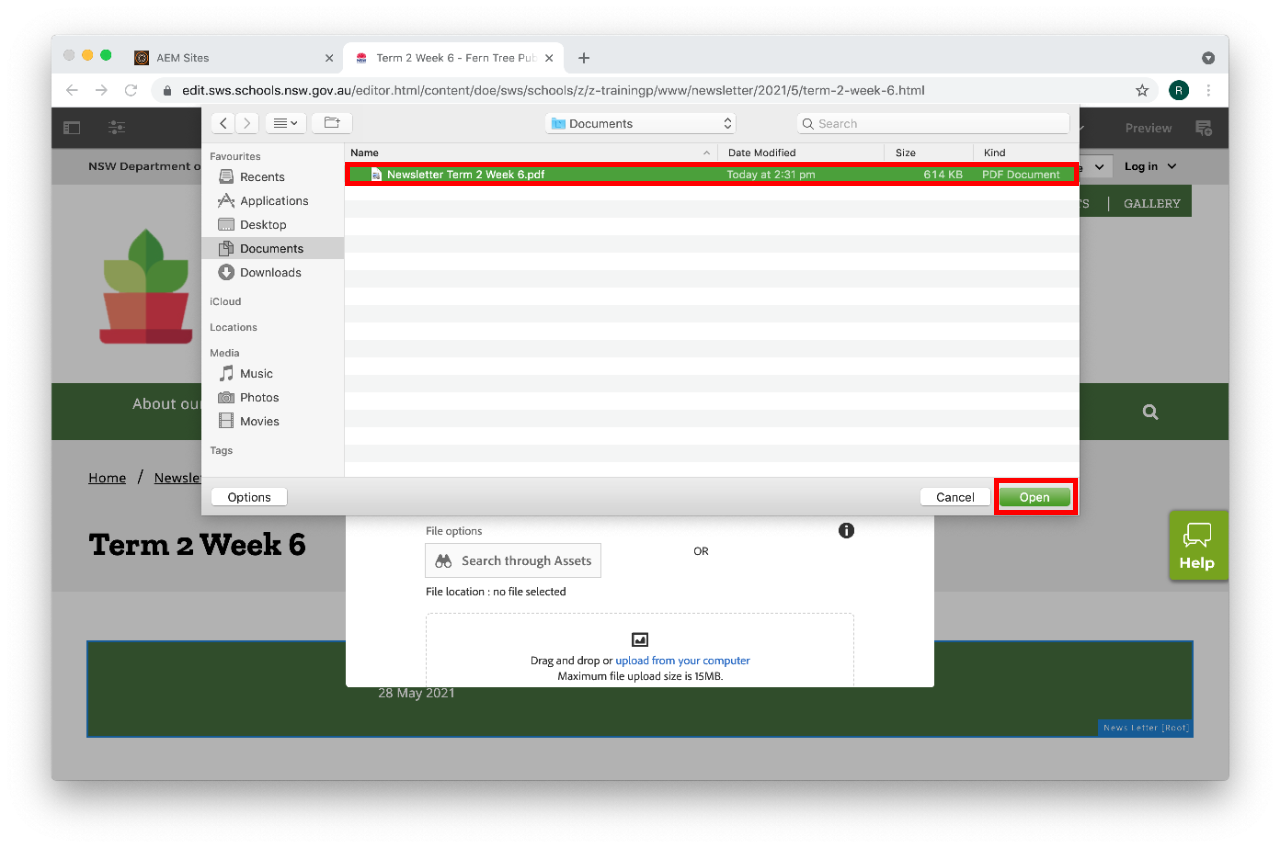
  • Once you have found your PDF, select it
  • Select the Open button in the bottom right. 

  • The pop-up will disappear and your file will appear in the Select file to upload area.
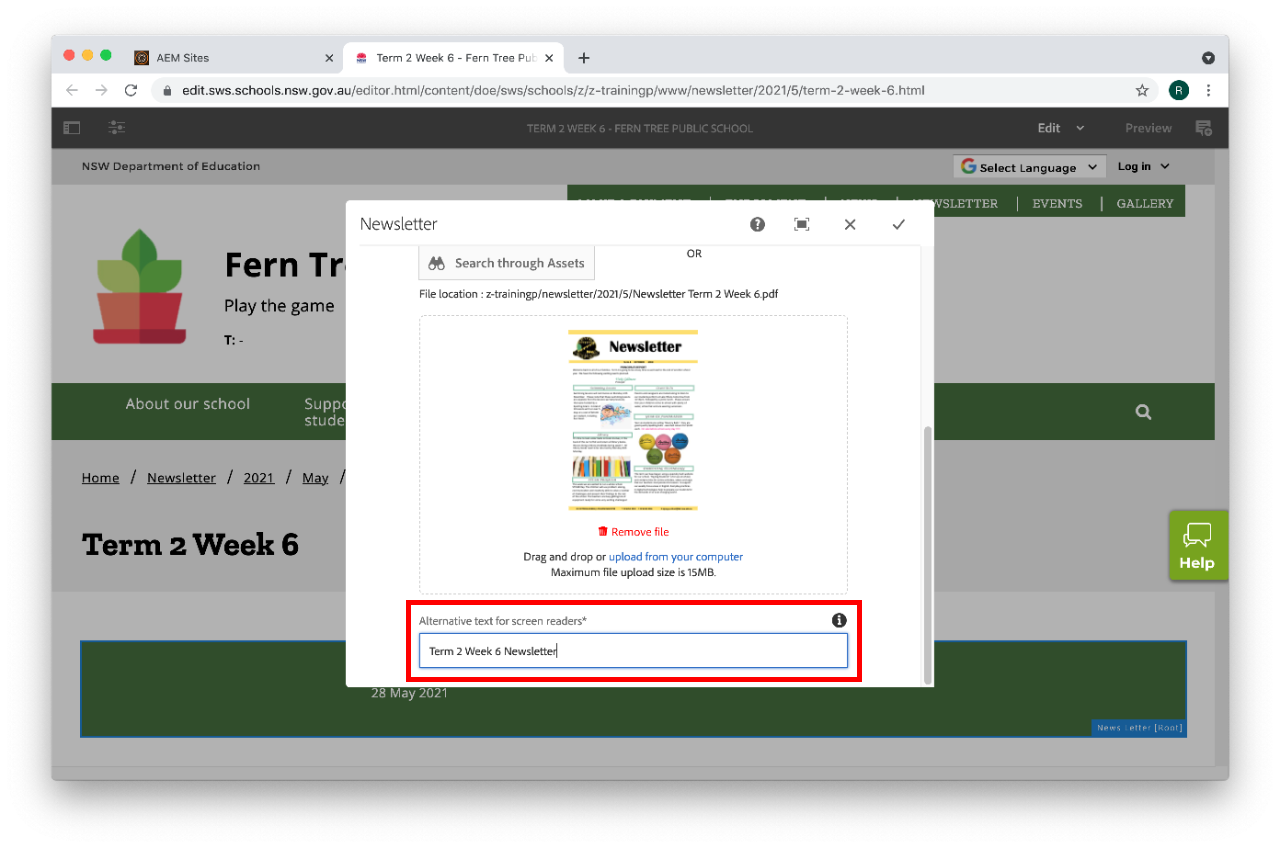
  • You will need to add an Alternative text for screen readers.
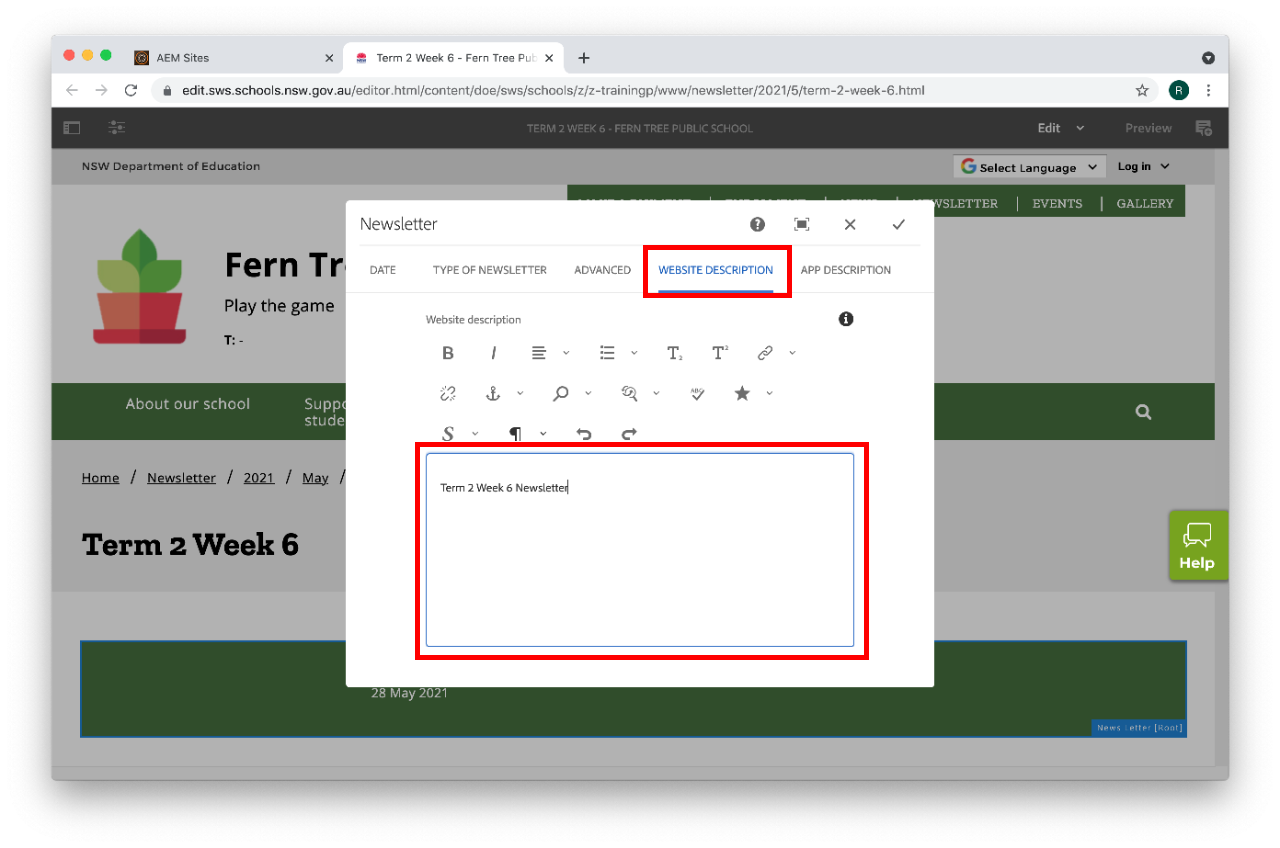
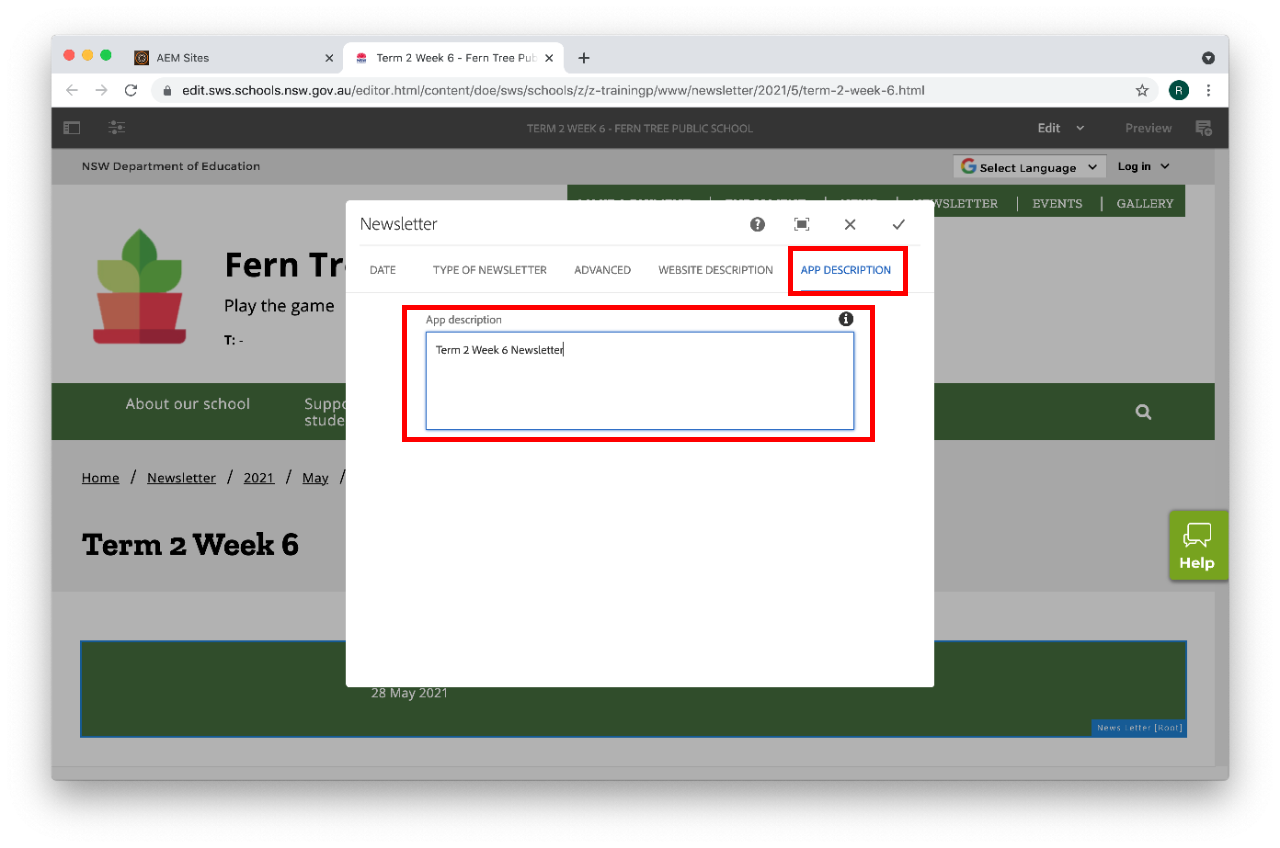
  • Next, you will need to populate details in Website description and App description tabs. 
  • If you receive an error it could be because the file name is incorrect. Use the PDF guidelines to check your PDF name is correct before uploading.
  • Go to Step 7.

Option 2: Upload your PDF from Assets

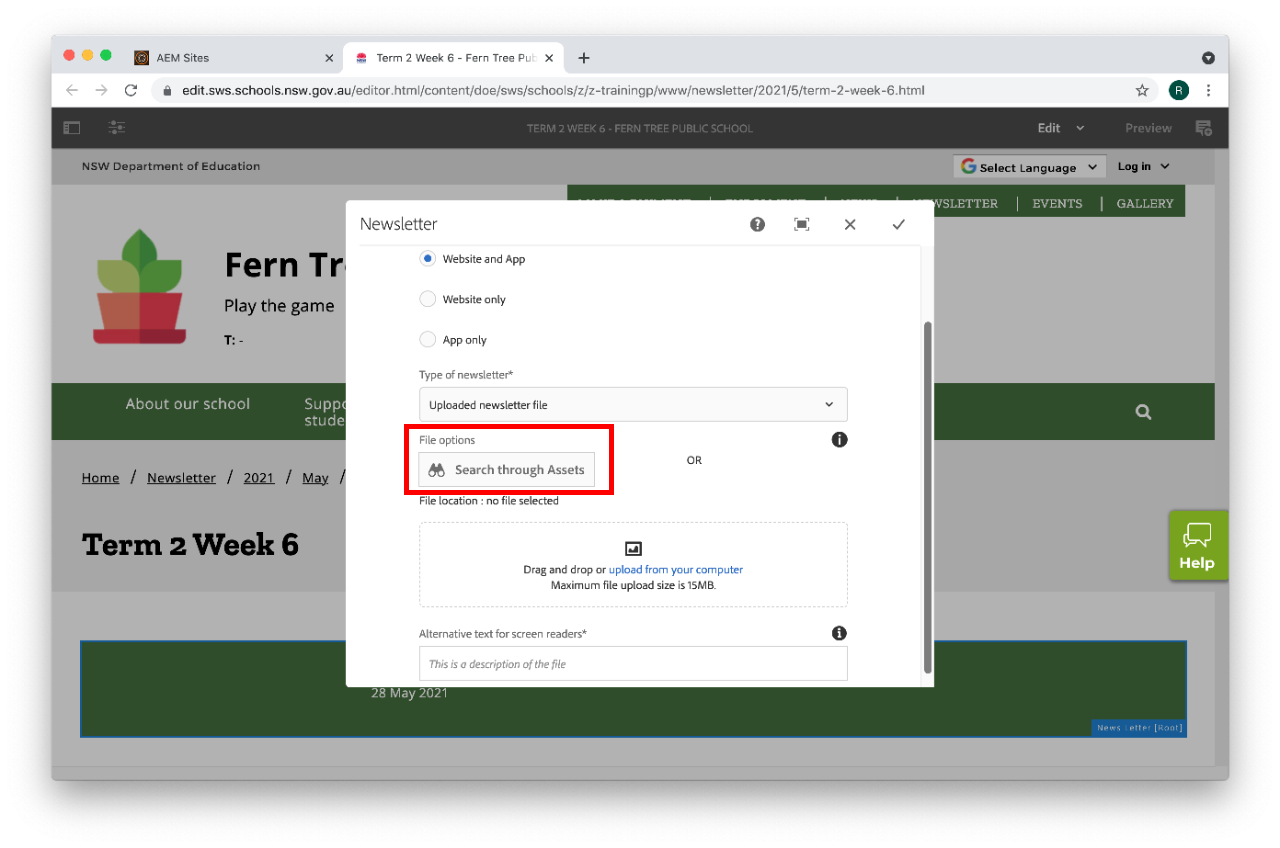
  • Select Uploaded newsletter file from the Type of newsletter file drop-down option.
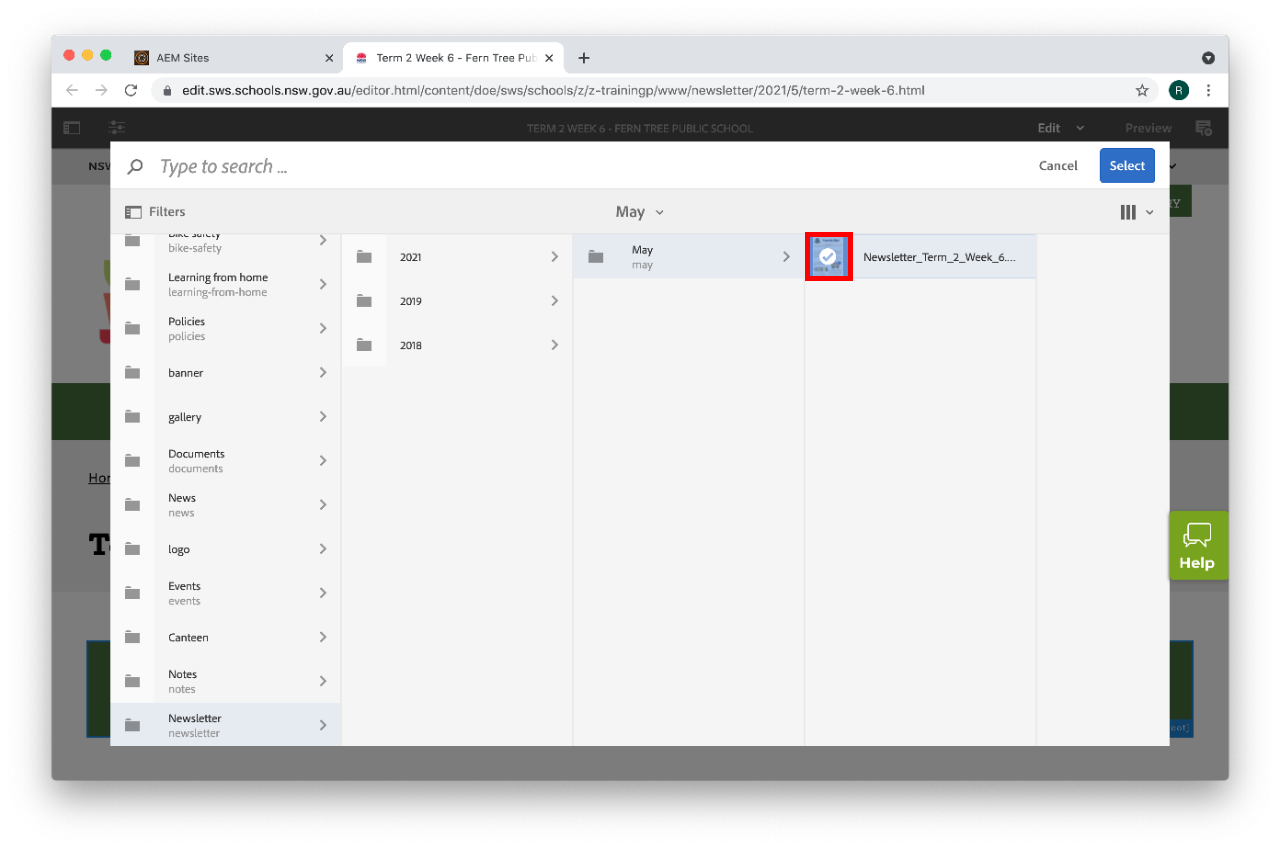
  • Select Search through Assets to navigate through your assets to your school's newsletter folder where you have previously saved your newsletter PDF.

  • Once you have found your PDF,  select the icon to the left of the file name. The tick will appear and your selection will turn blue.
  • Select the Select button in the top right. 

  • The pop-up will disappear and your link will appear in the File field.
  • You will need to add an Alternative text for screen readers.
  • Next, you will need to populate details in Website description and App description tabs. 
  • Go to Step 7.

Option 3: Link to your newsletter

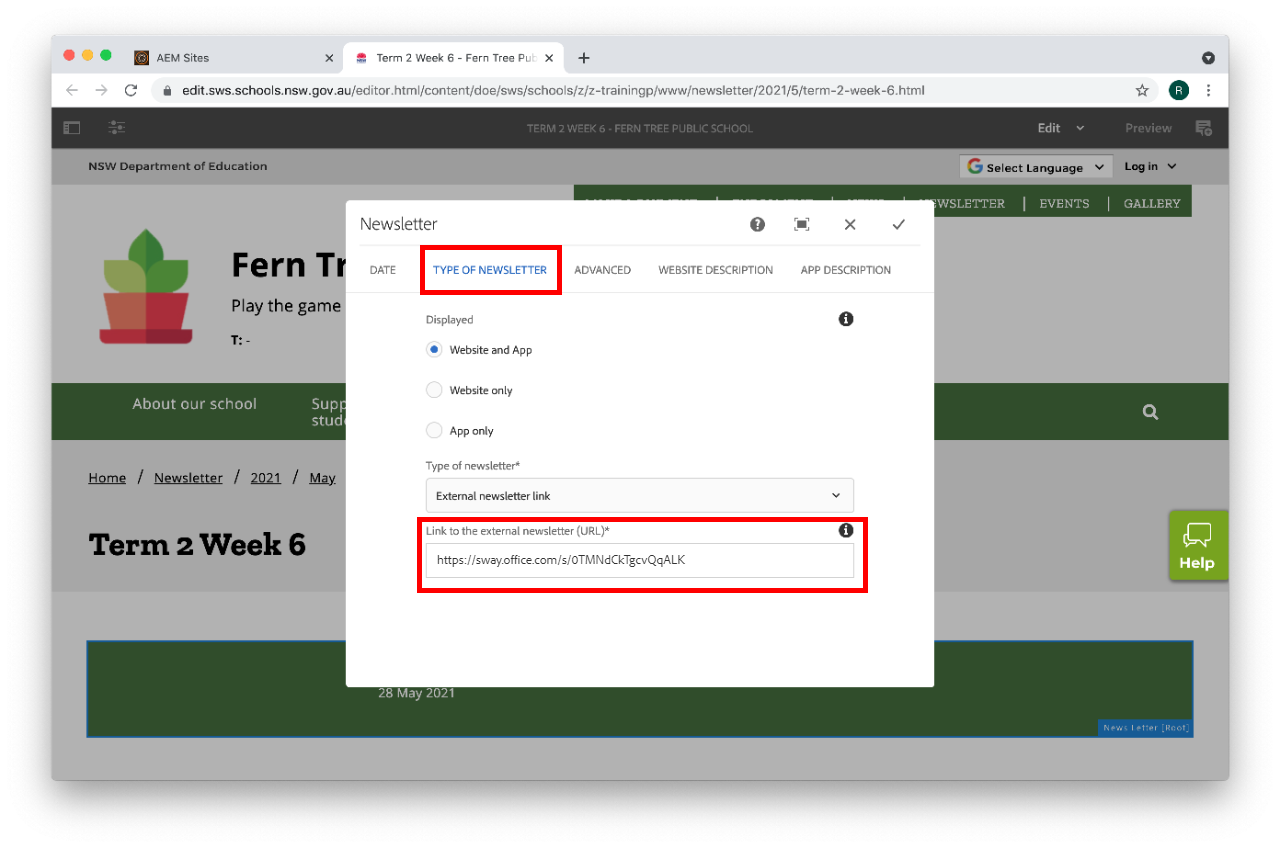
  • Select the TYPE OF NEWSLETTER tab.
  • Select External newsletter link from the Type of newsletter drop-down option.
  • Copy and paste your newsletter's URL into the Link to the external newsletter (URL) field.  
  • Next, you will need to populate details in Website description and App description tabs. 
  • Go to Step 7.

Step 7: Advanced – optional

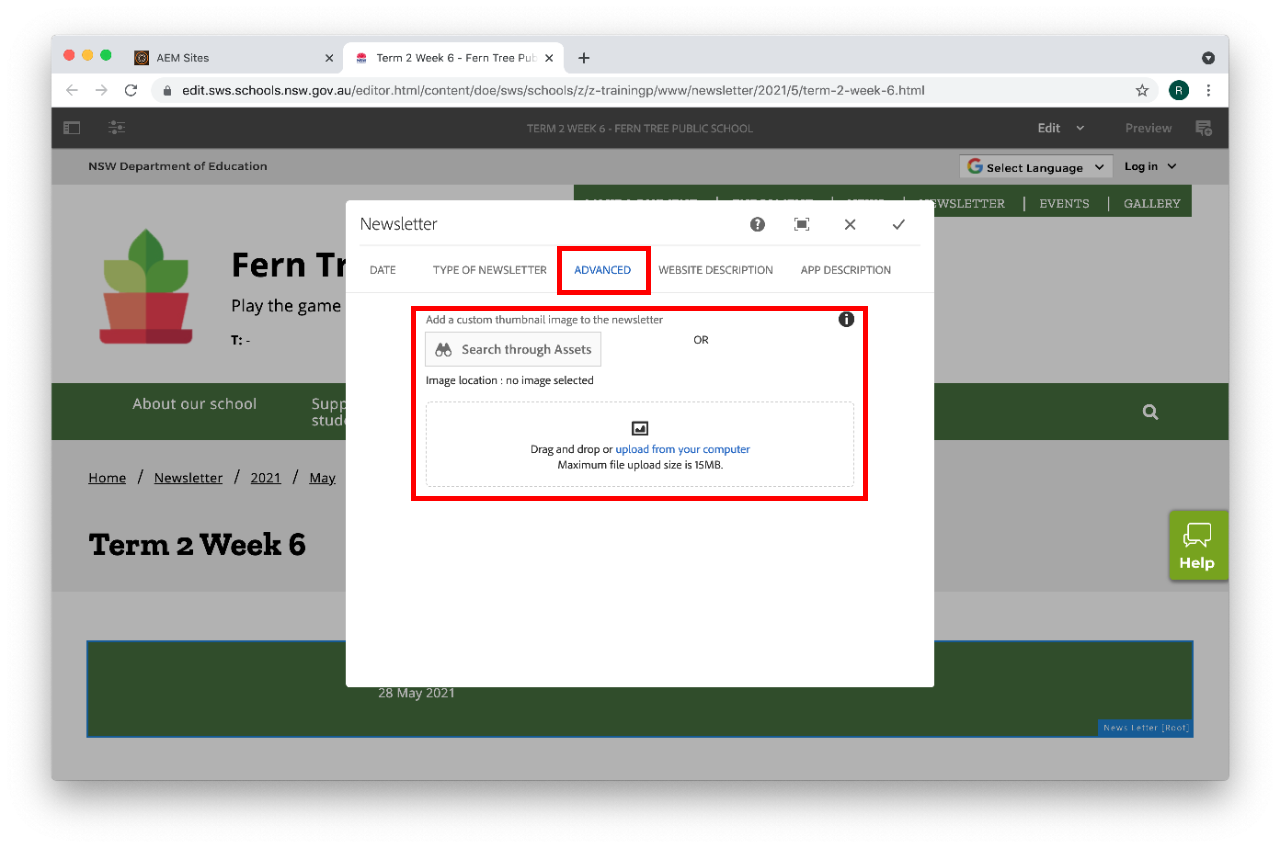
  • Select the ADVANCED tab.

  • If you would like to add a thumbnail to display your newsletter, you can add a newsletter thumbnail image to the newsletter page.
    Use the fields in Add a custom thumbnail image to the newsletter to add a custom thumbnail.
    PDF newsletters automatically generate their own thumbnails for you. This is an optional step.

  • Select the tick on the top right of the pop-up to save the newsletter settings.

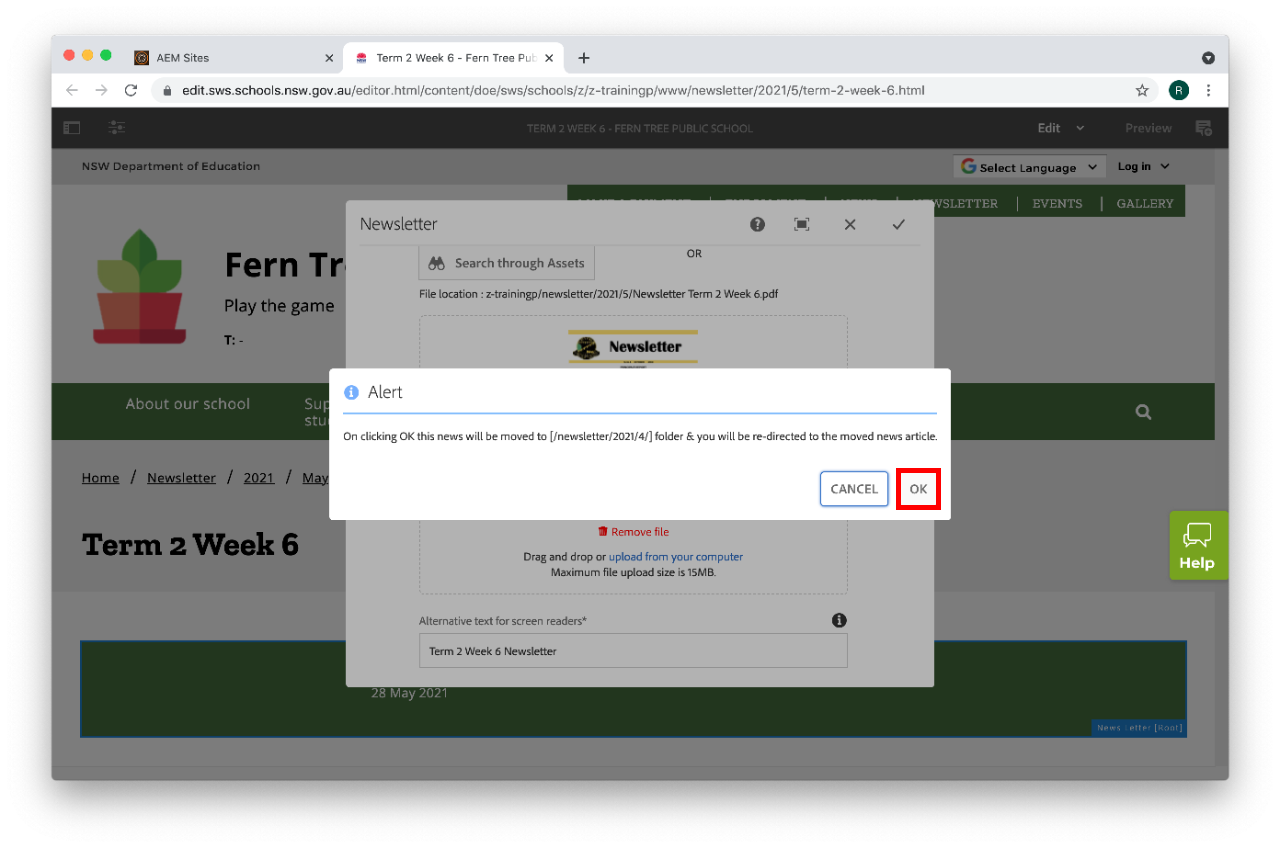
  • The Alert below will appear if you have set your newsletter to publish in a future month.  The system will automatically move the page to the correct month and year. 
  • Select OK.

  • Your newsletter is now ready to be published. 

Step 8: Publish your newsletter page

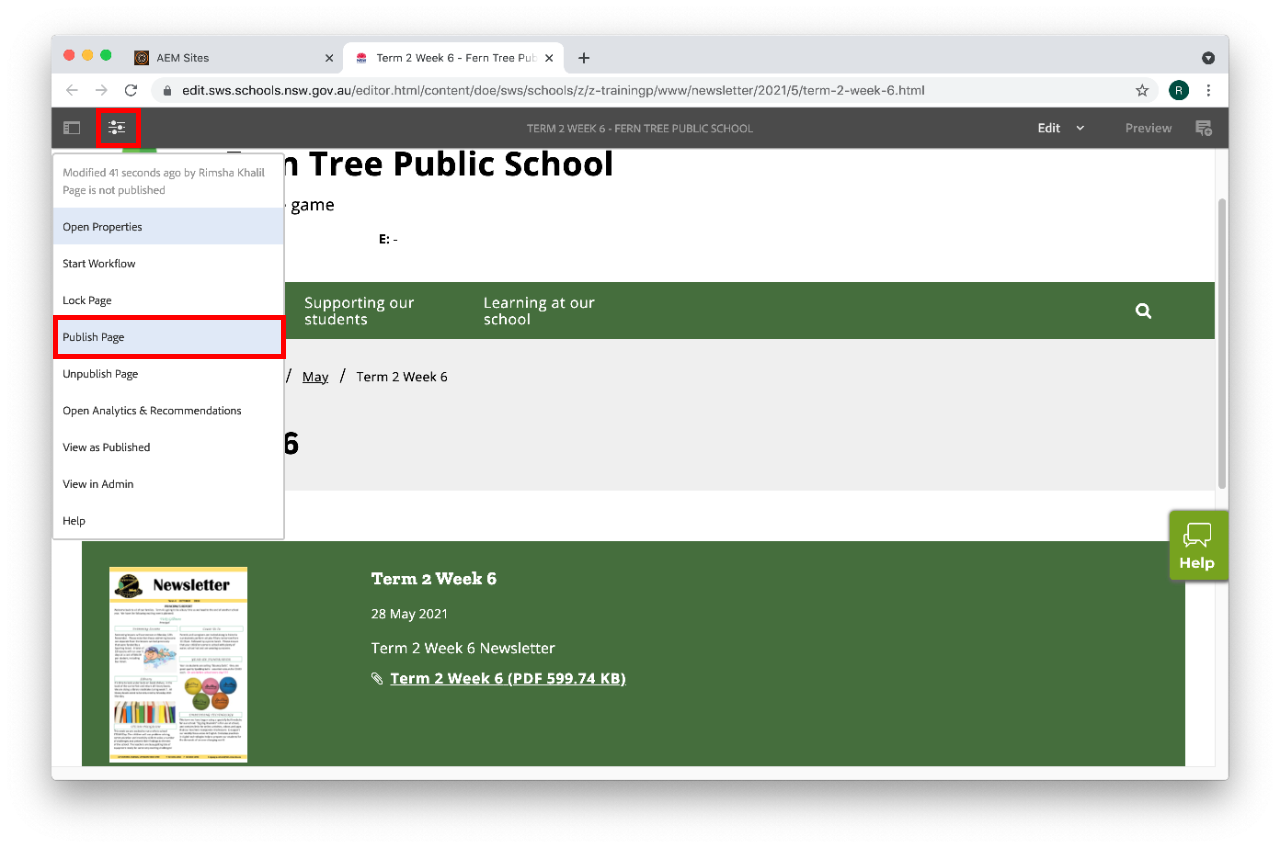
  • For changes to be updated on your live school website you will need to publish the page.
  • Select the slider icon in the top left corner. This is the Page Information button.
  • Select Publish Page from the drop-down. 
  • If you don't see Publish Page you are an Author and will need to select Start Workflow instead. Go to our Author publish a page for more information.

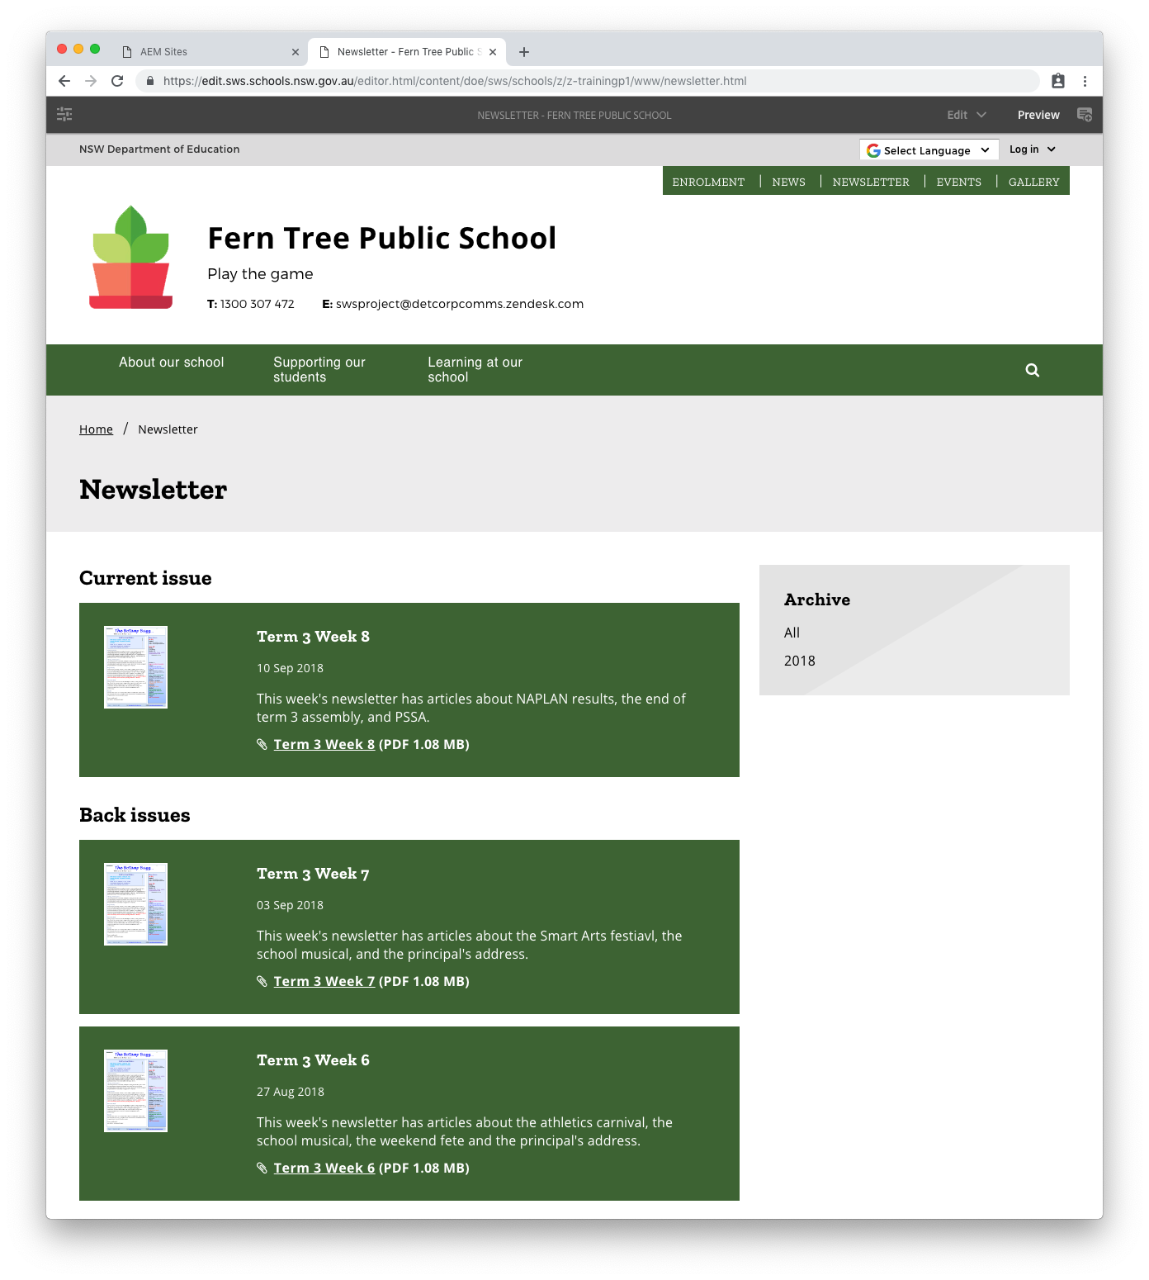
Published newsletter

Example of the updated latest newsletter link on your homepage:

Example of a newsletter page showing the current and back issues in chronological order: