School website service training and support logo

School website service training and support

School website service training and support

Download box

Use this guide to learn how to add documents to your pages quickly.

Features

  • The download box allows you to drag and drop any document and the component will display them as links on your page with the file type and size. Learn more about file type and size
  • You do not need to upload the file to assets first.
  • The download box is a great way to upload your anti-bullying plan to your school website.

Step 1: Create a page or edit an existing one

Step 2: Add the component to your page

  • Select the component from the Insert New Component list.

Step 3: Edit the download box component

  • Select the Download box component.
  • Select the spanner icon to edit the accordion. This is the Configure button.

Step 4: Edit the download box component

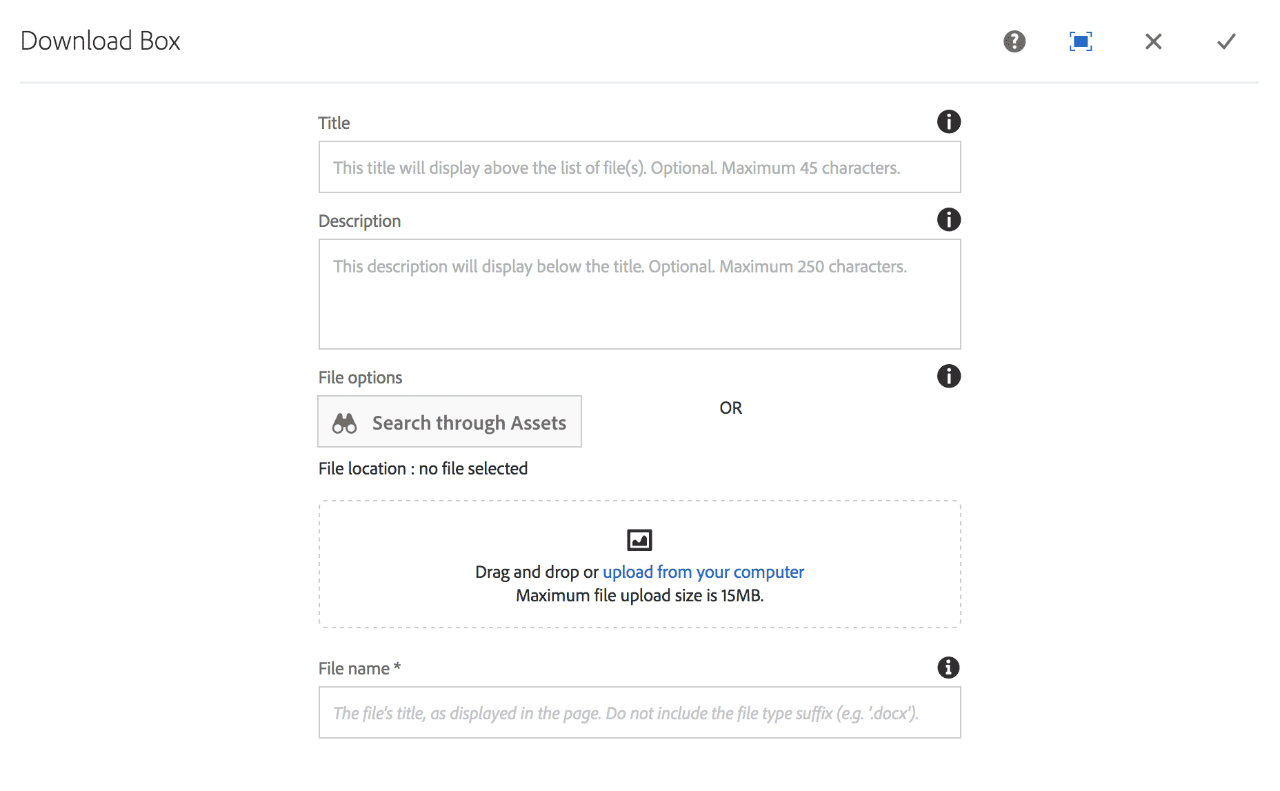
  • Add a title for the download box. The title is optional and will appear in Heading 2 format. This is useful for the first download in a list. The title has a maximum length of 45 characters.
  • Add a description for download. The description is optional and can be used to describe the download, or a group of downloads if there are more files being linked. The description can be up to 250 characters.
  • Drag and drop a file from your computer or browse for it by selecting the link upload from your computer. The maximum file size is 15mb. If you've already uploaded the file you can find it by using search through assets. Your file name should contain only normal alpha-numeric characters and not have special characters such as the apostrophe or brackets.
  • Give the file a name. This is what will be shown on the page. You don't need to include the file type or size, the component will provide these for you.
  • Select the tick when you are done.

  • Add more downloads by adding more download box components and follow the steps above.
  • Please note: You can use one download box component for one document only. You cannot place multiple documents in one component. 

Step 5: Changing the order of downloads on your page

 
If you need to re-arrange the documents on your page, you can drag them up and down as needed.
  • Select the download box you want to move.
  • Drag and drop the component into its new location within the page structure. Once you see a blue arrow in a semi circle appearing where you want it to move you can drop it.

Step 6: Publish your page

  • For changes to be updated on your live school website you will need to publish the page.
  • Select the slider icon in the top left corner. This is the Page Information button.
  • Select Publish Page from the drop-down. 
  • If you don't see Publish Page you are an Author and will need to select Start Workflow instead. Go to our Author publish a page for more information.


You may also find useful: