School website service training and support logo

School website service training and support

School website service training and support

Create a page

Use this guide to create a standard page for your website. 

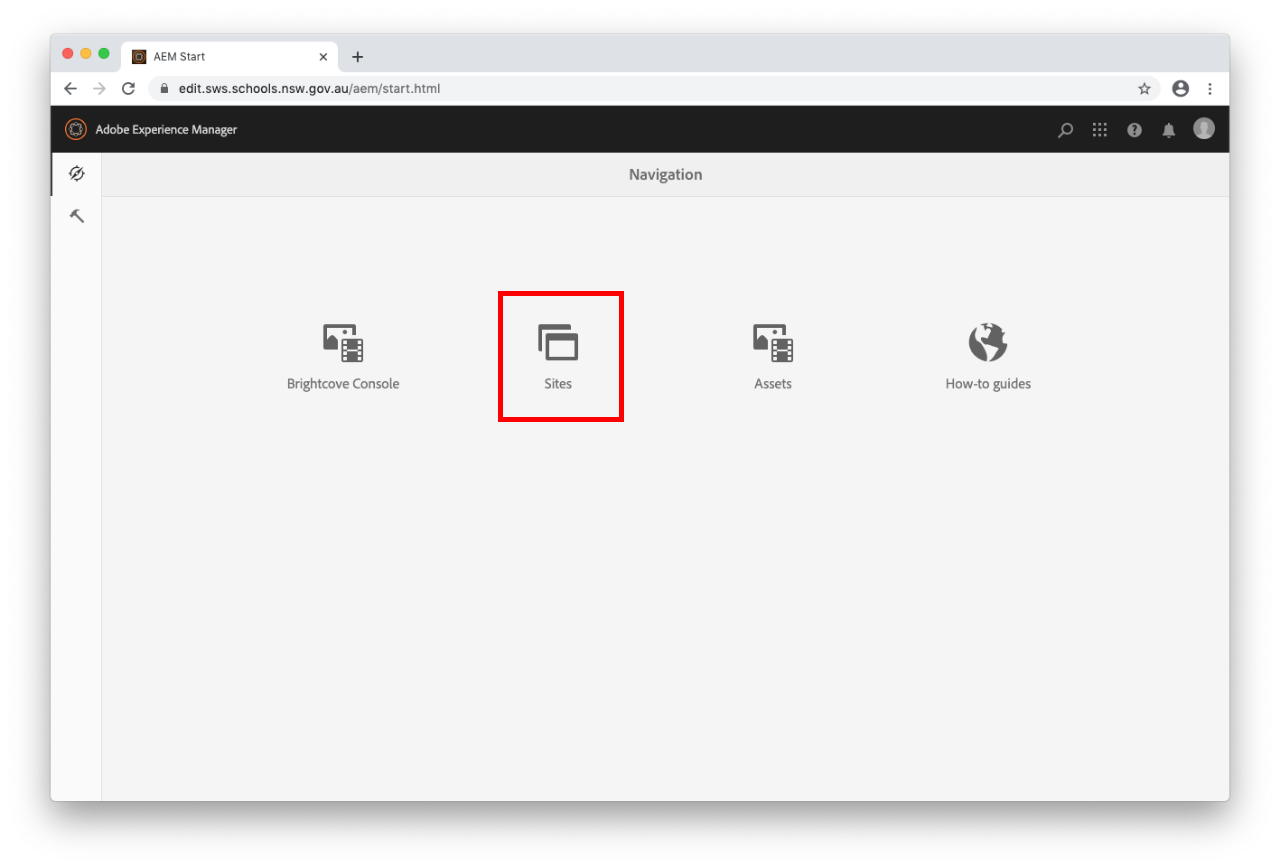
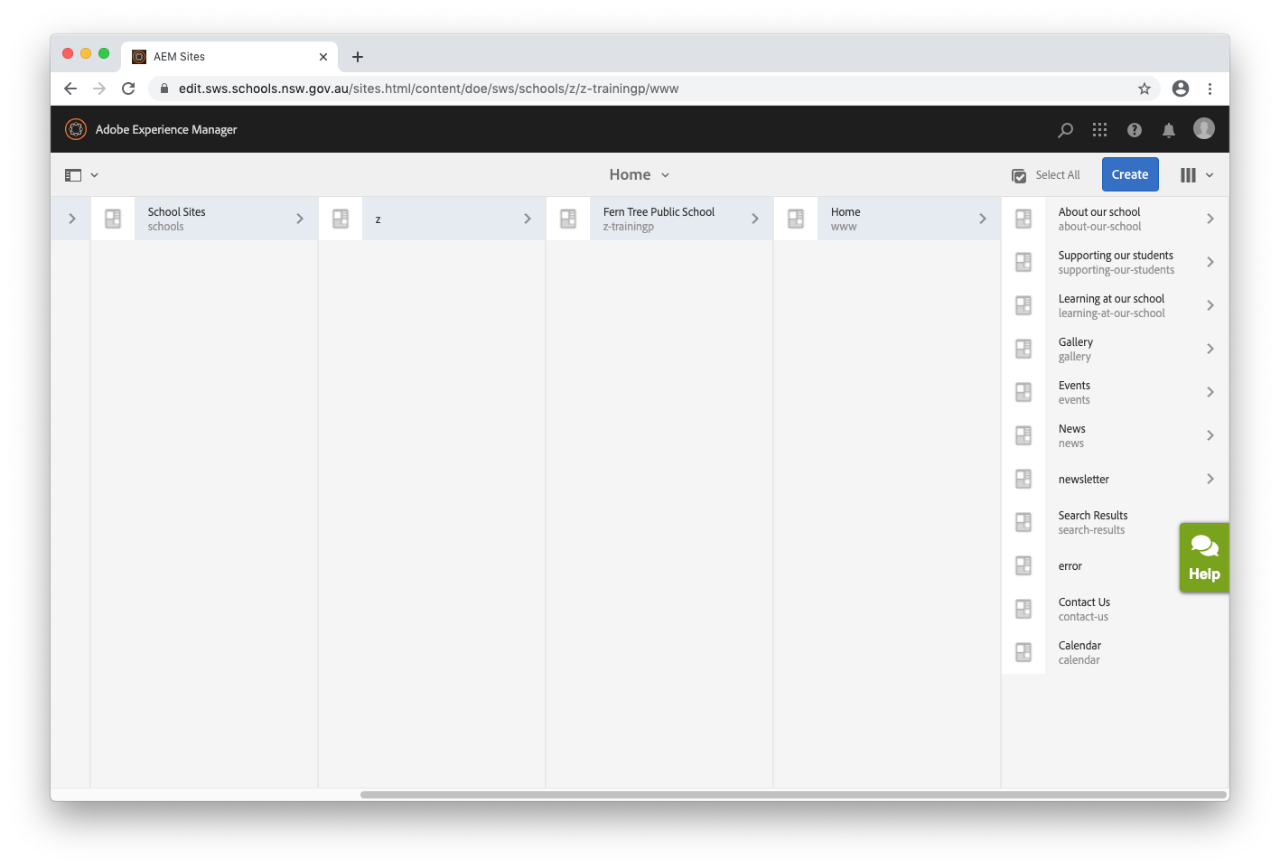
Step 1: Navigate to Home

  • Your school's home page will already be selected.

Step 2: Create a new page

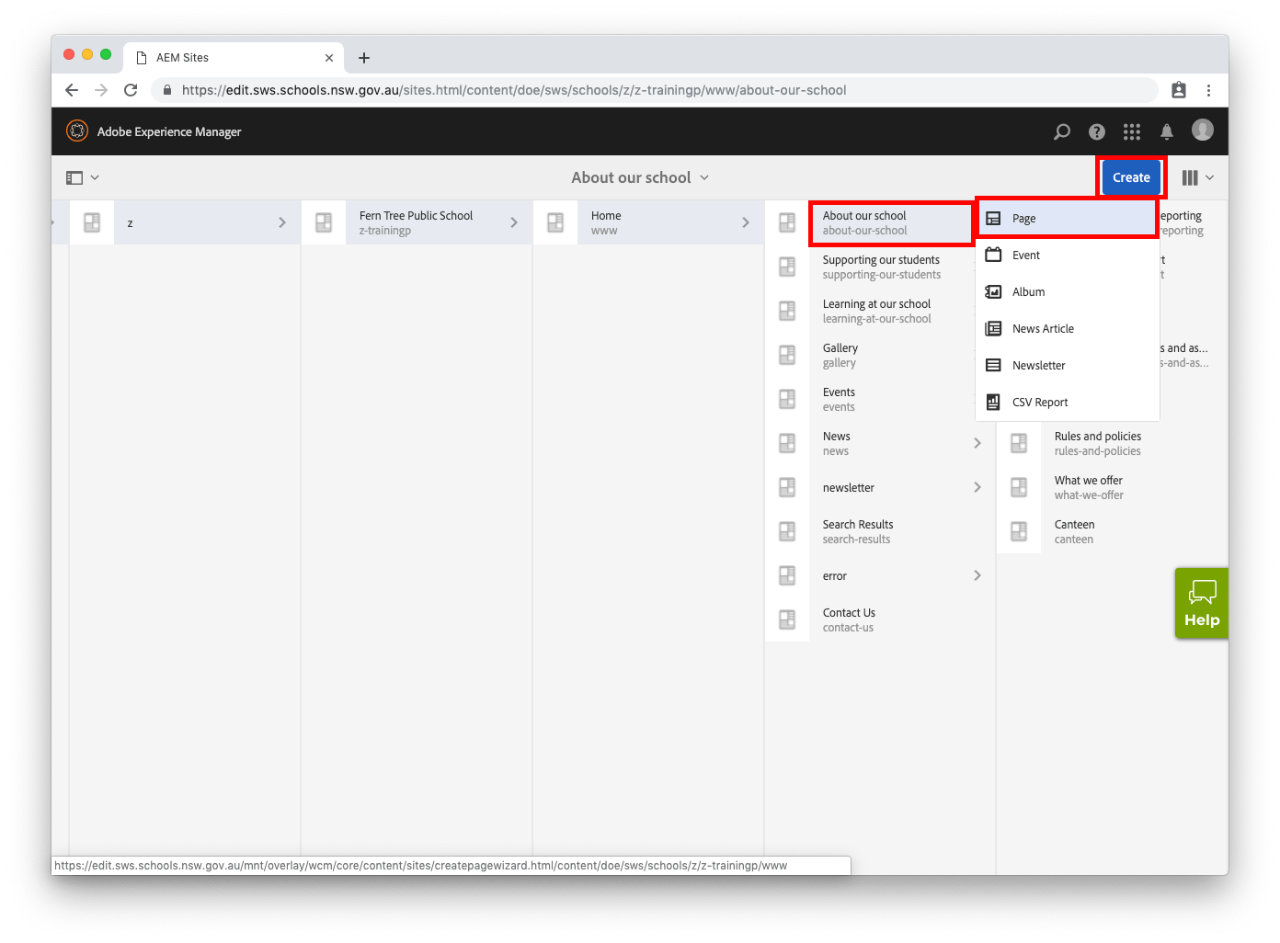
  • Select the existing page you would like your new page to sit below. Do not select the icon next to the page with the tick. For example: This new page will be a child page of About our school.
  • Select Create in the top right-hand corner.
  • The Create drop-down menu will display.
  • Select Page.

Step 3: Choose a template

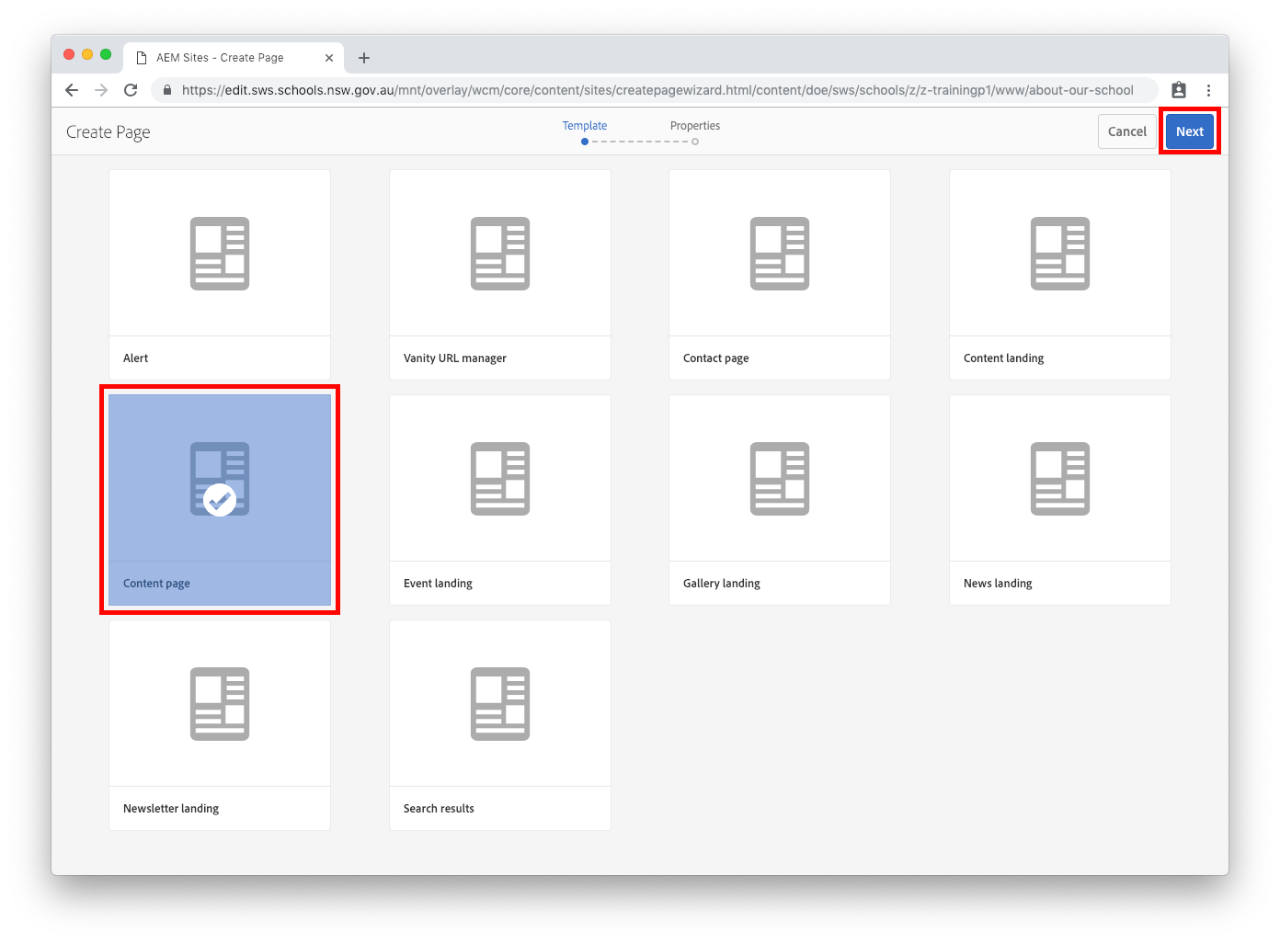
  • Select Content page template. Content page would ideally be fifth template in the list.
  • Select the blue Next button on the top right corner.

Step 4: Enter the page title 

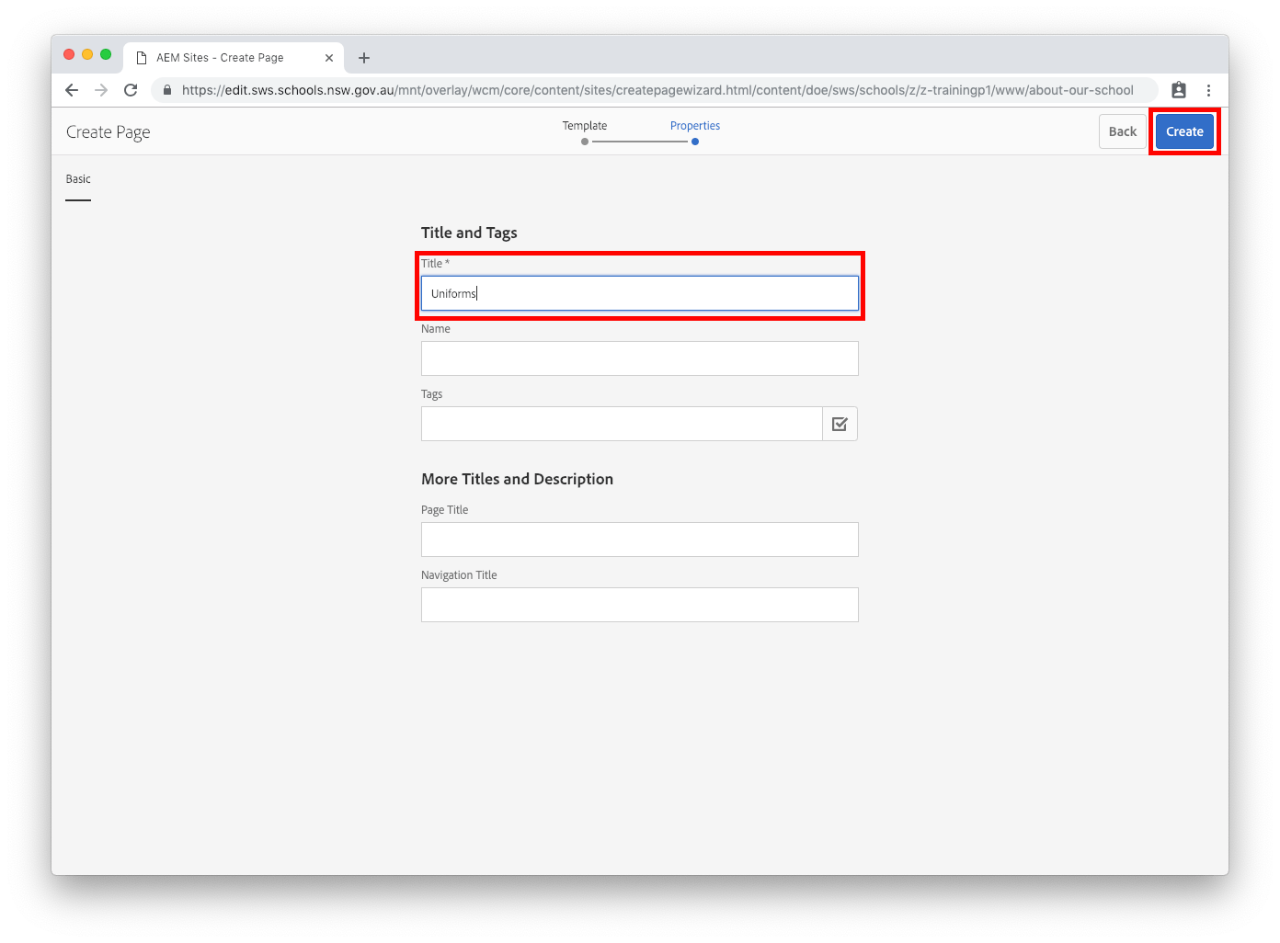
  • Enter the Title of your new page. This title will be used on the page, in the URL and in the navigation menu. For example: Uniforms.
  • Do not fill out any of the other fields.
  • Select the blue Create button on the top right corner.

Step 5: Open your page

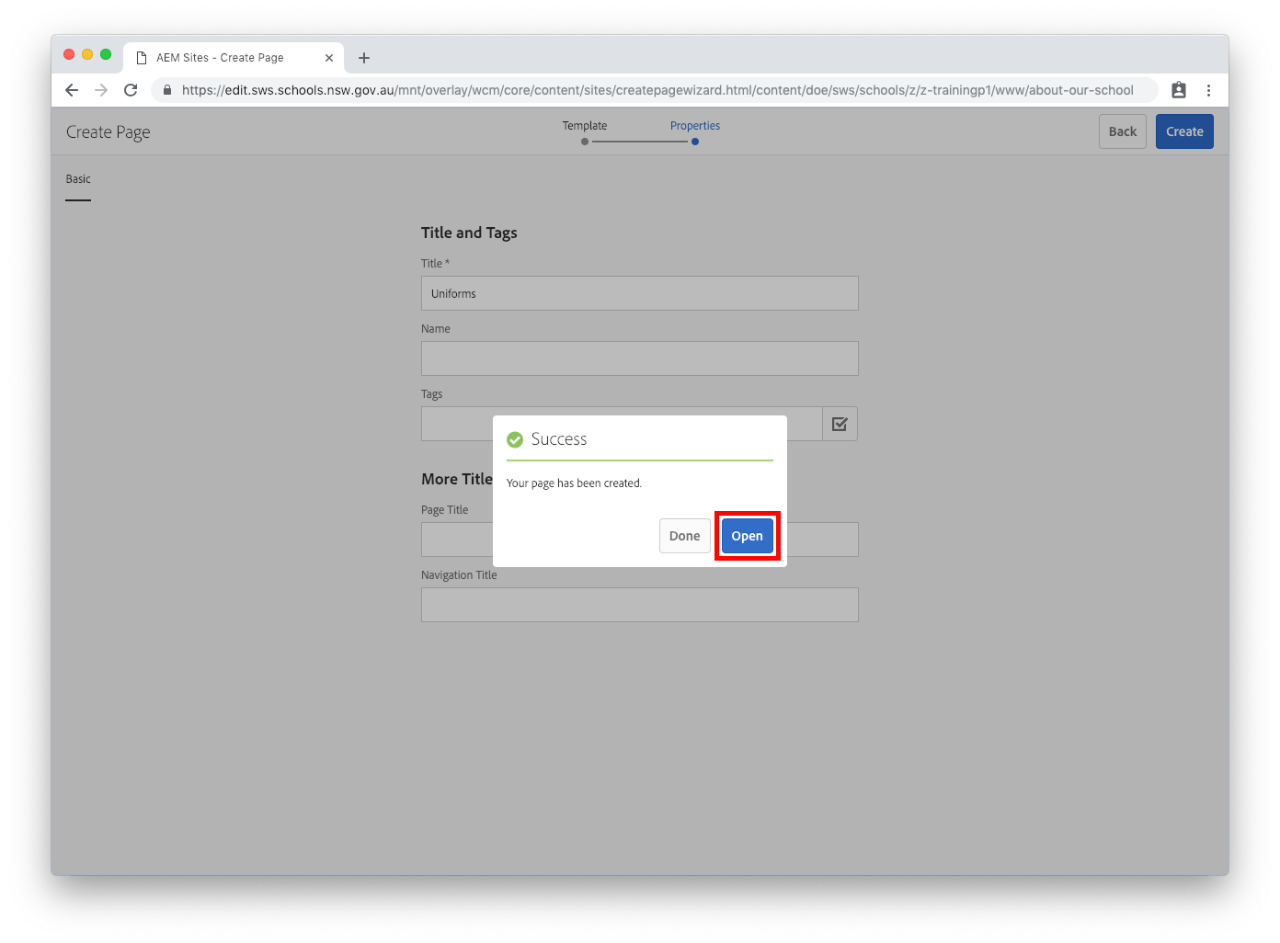
  • A success message will appear once the page is created.
  • Select Open to edit the page. 
  • If you select Done you will need to edit your page later.

Step 6: Edit your page

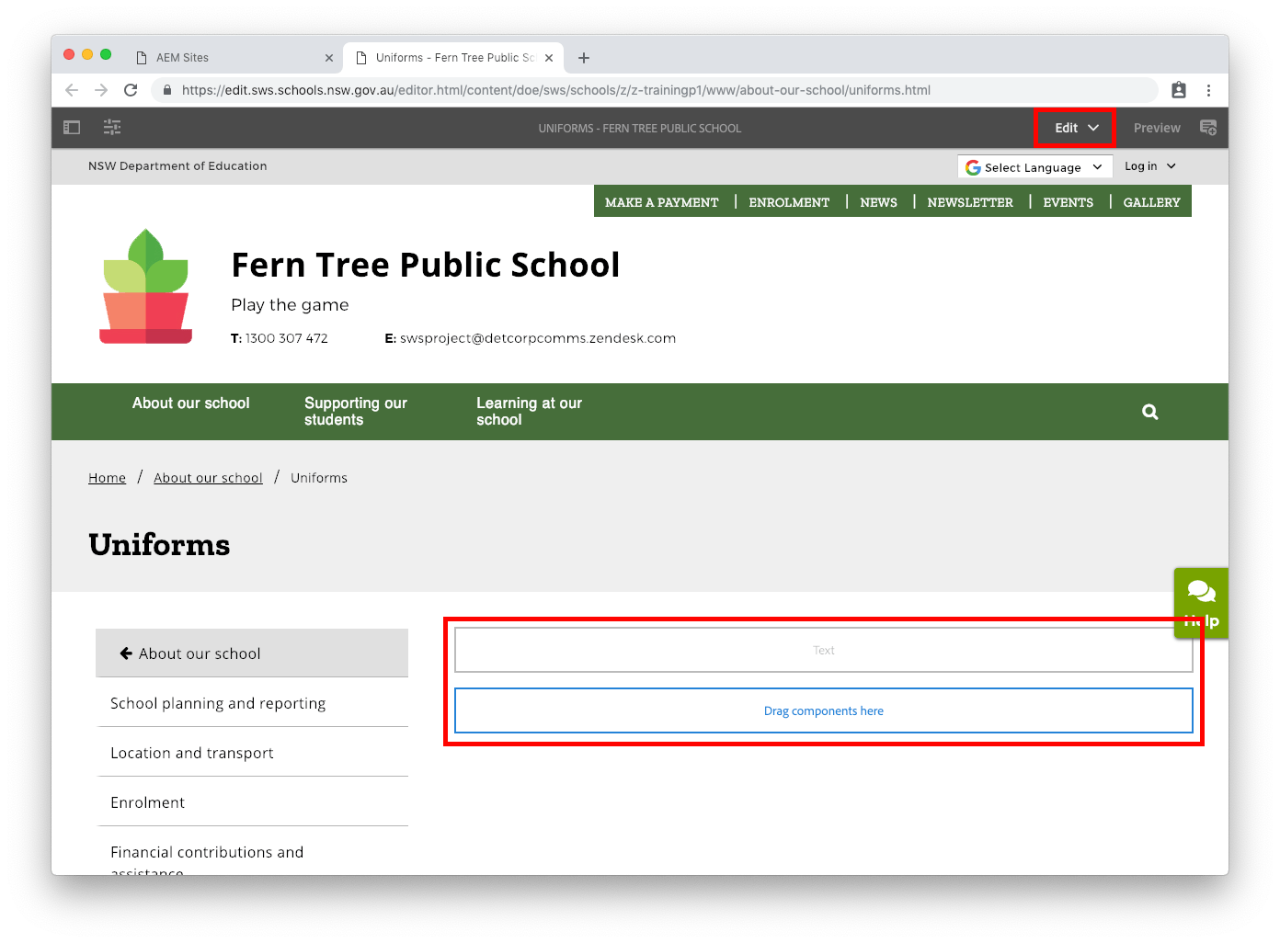
  • Select Edit in the top right of the page. This button is next to Preview
  • Add components to your page, like text and images. See our component guides to learn more. 
  • We encourage you to add metadata to every page you create.

Step 7: Publish your page

  • For changes to be updated on your live school website you will need to publish the page.
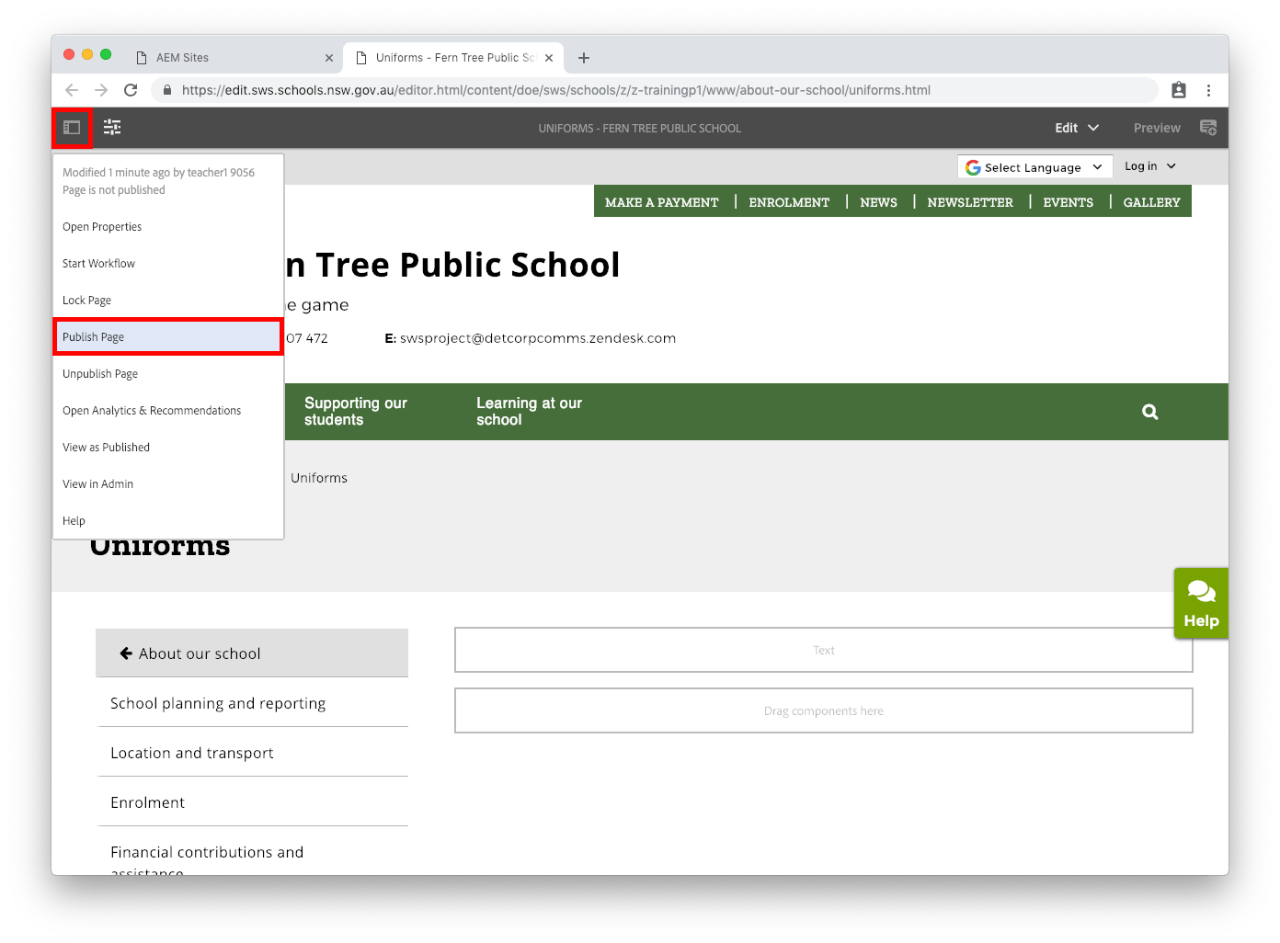
  • Select the slider icon in the top left corner. This is the Page Information button.
  • Select Publish Page from the drop-down. 
  • If you don't see Publish Page you are an Author and will need to select Start Workflow instead. Go to our Author publish a page for more information.

Frequently Asked Questions