School website service training and support

Create an alert

Use this guide to learn how to add an alert to your school's website. 

If there is an emergency at your school such as a fire or flood or you need to temporarily cease operations, it is important to create an alert on your website.

Alerts must only be used for emergencies and major health announcements.

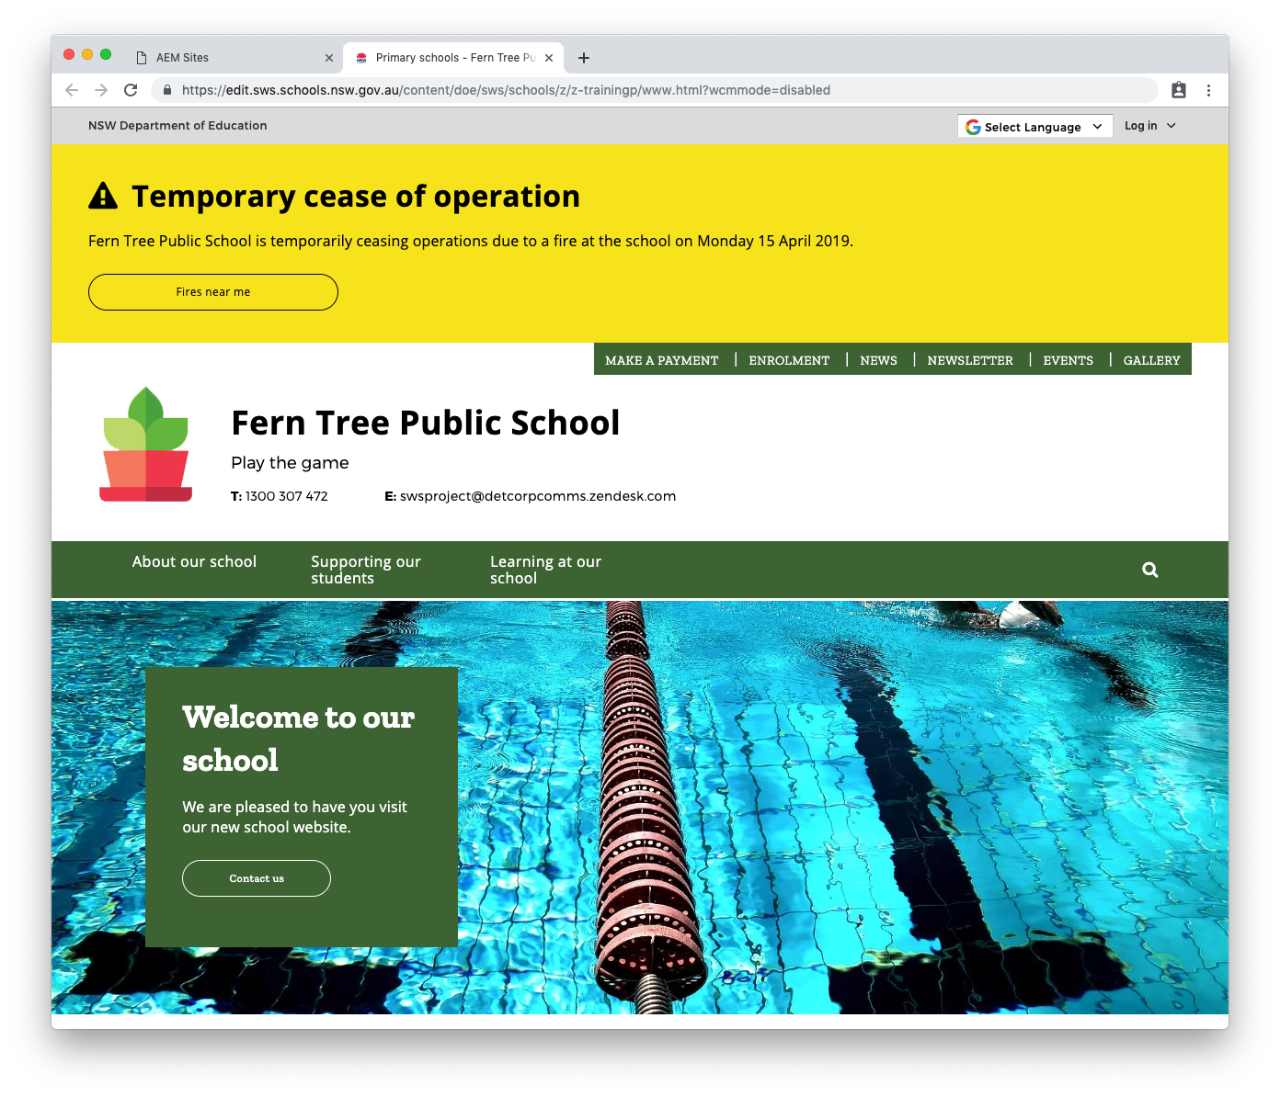
The alert will appear as a yellow banner across the top of your homepage.  

Important to note

Alert will only work if the URL has the word 'alert' without any numbers. If you have more than one Alert in Sites, please delete them and then proceed with creating a new alert. If the URL has 'alert0' or 'alert1', Alert will not show up on your live website after publishing. 

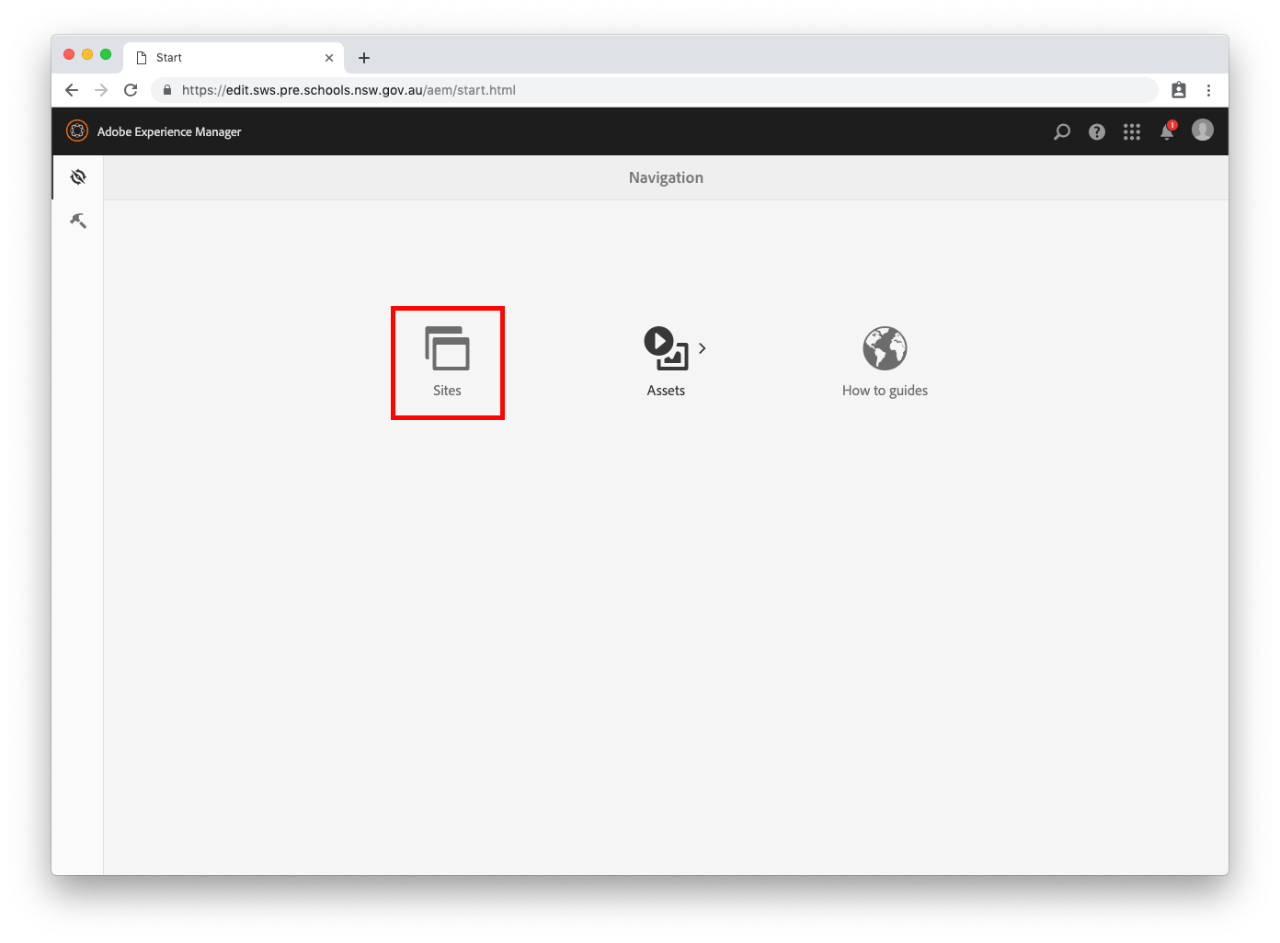
Step 1: Navigate to Home

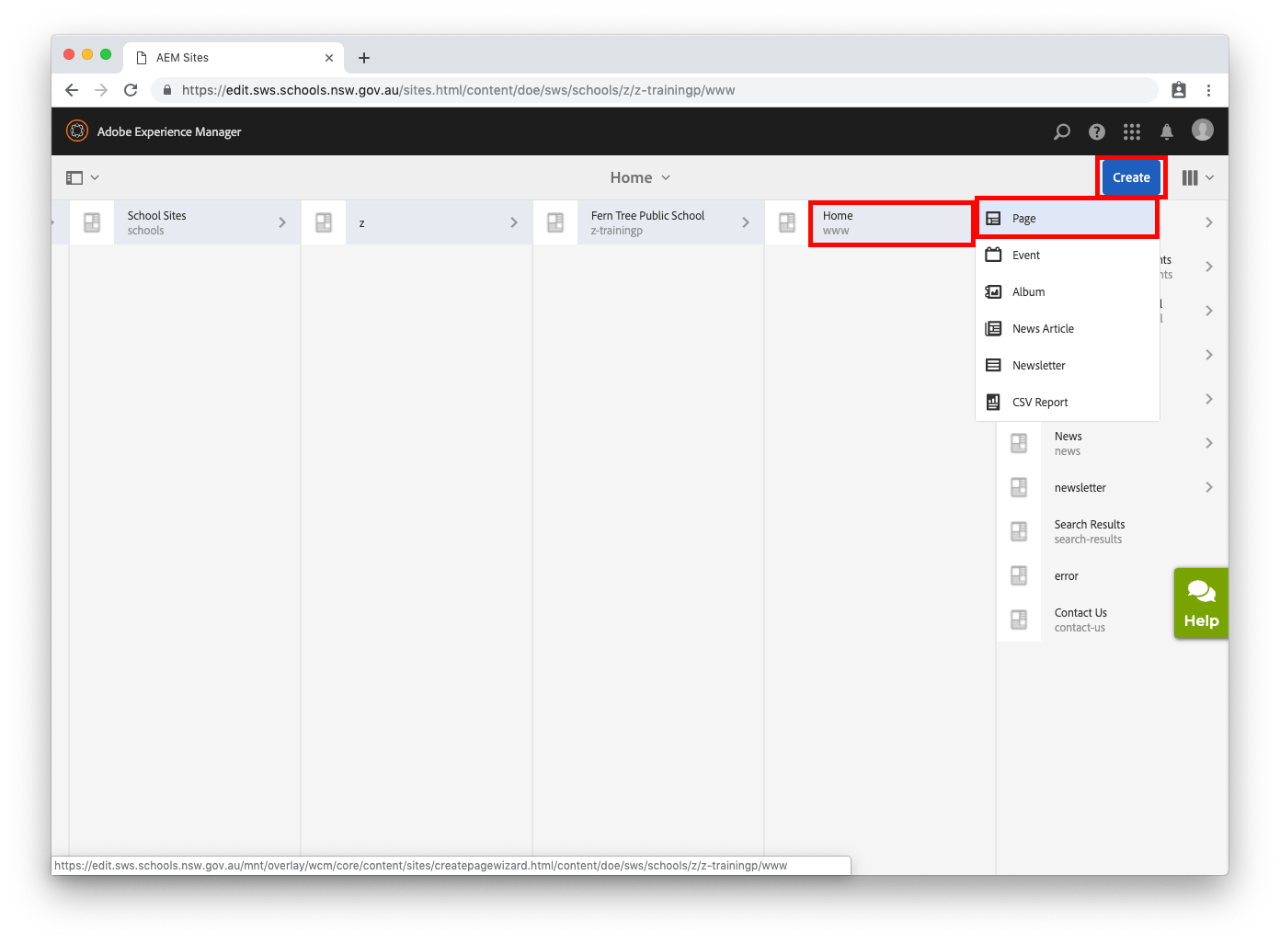
Step 2: Create a new page

  • Select Home. Do not select the icon next to Home with the tick. 
  • Select Create in the top right-hand corner.
  • The Create drop-down menu will display.
  • Select Page.

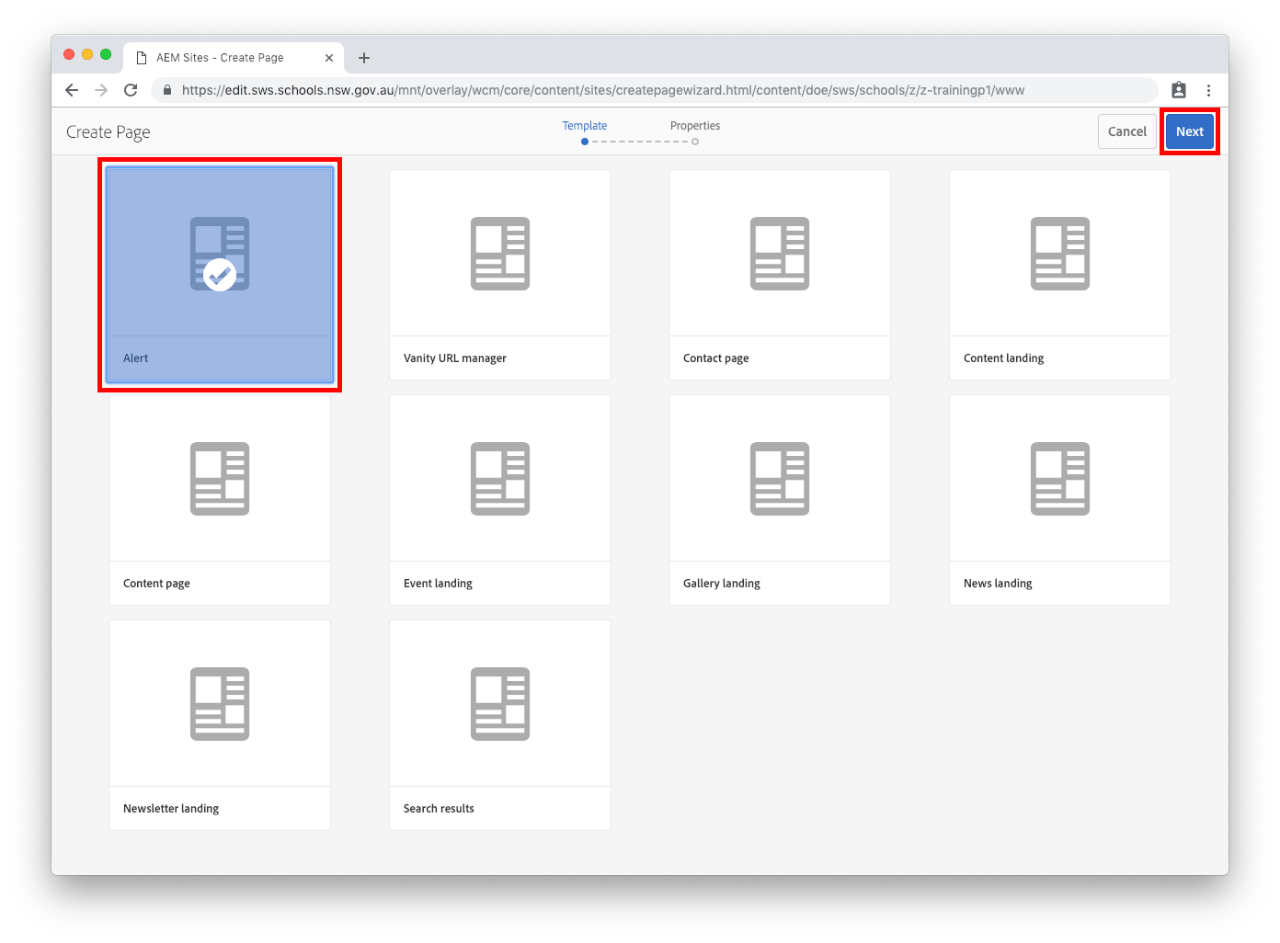
Step 3: Choose a template

  • Select Alert template.
  • Select Next.

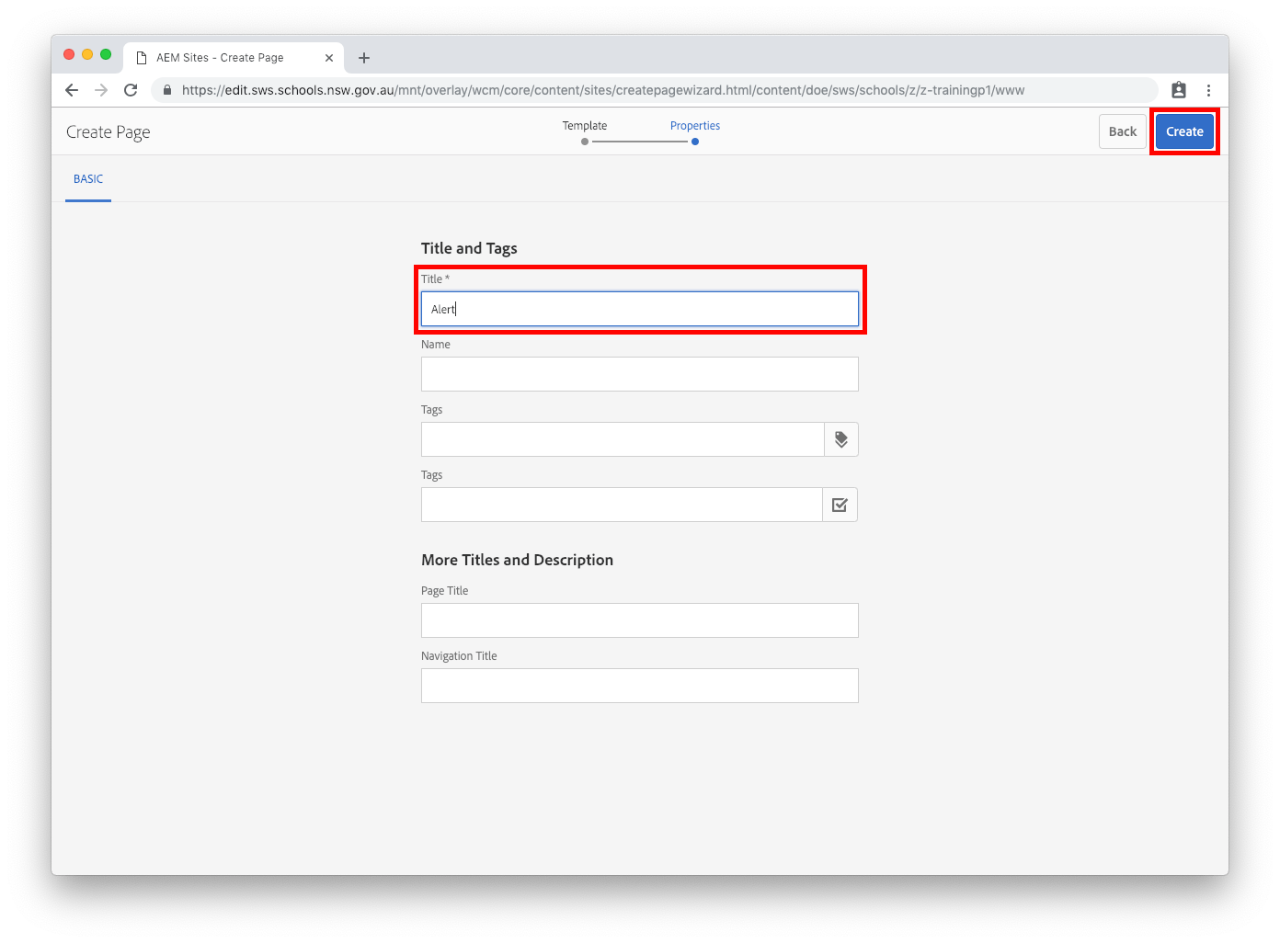
Step 4: Enter the alert title 

  • Enter Alert as the Title for your alert. 
  • Please note: Title must be Alert else it will not show up on the school website.
  • Do not fill out any of the other fields.
  • Select Create.

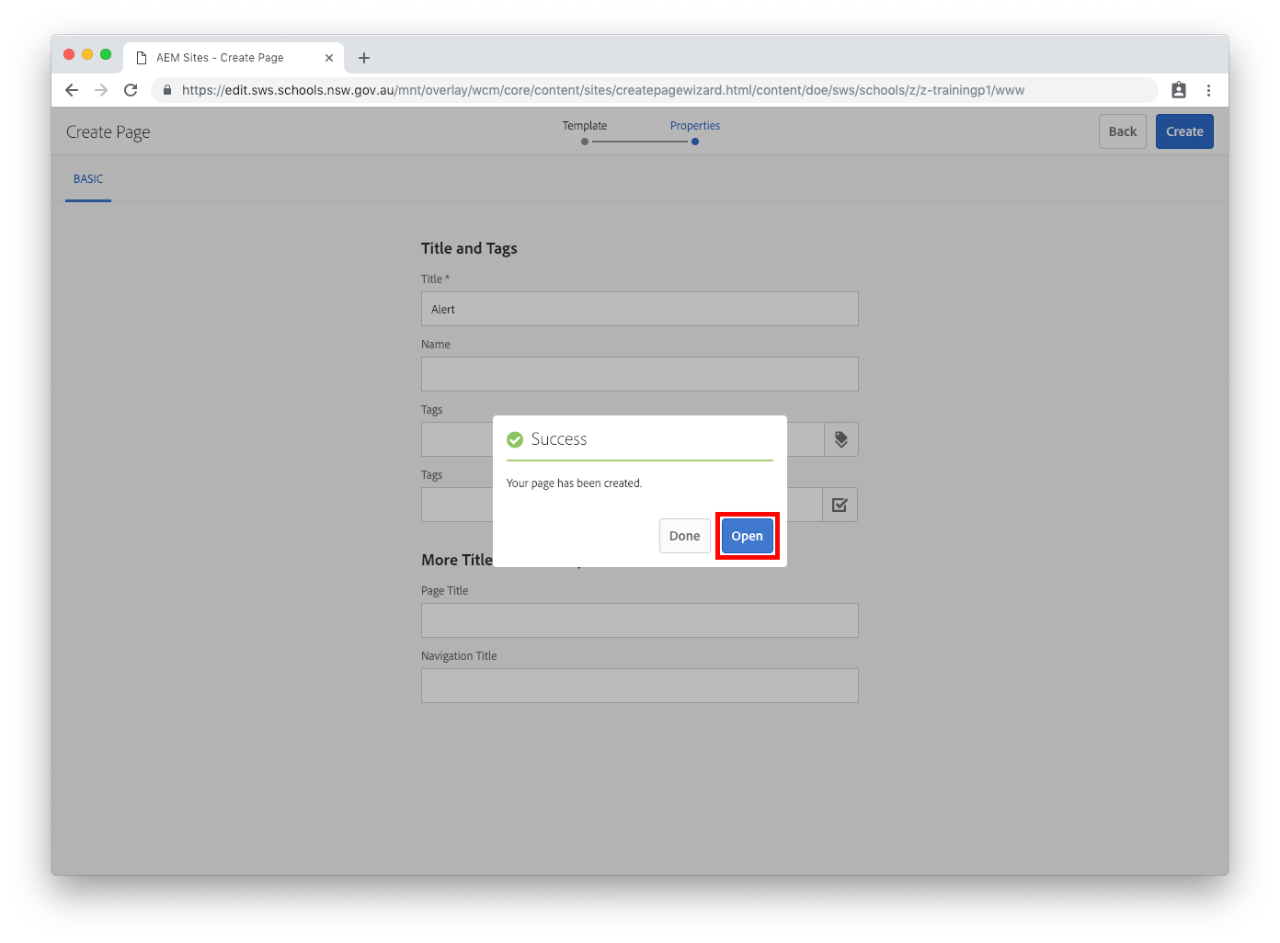
Step 5: Open your alert page

  • A success message will appear once the alert is created.
  • Select Open to edit the alert.
  • If you select Done you will need to edit your alert later.

Step 6: Edit your alert 

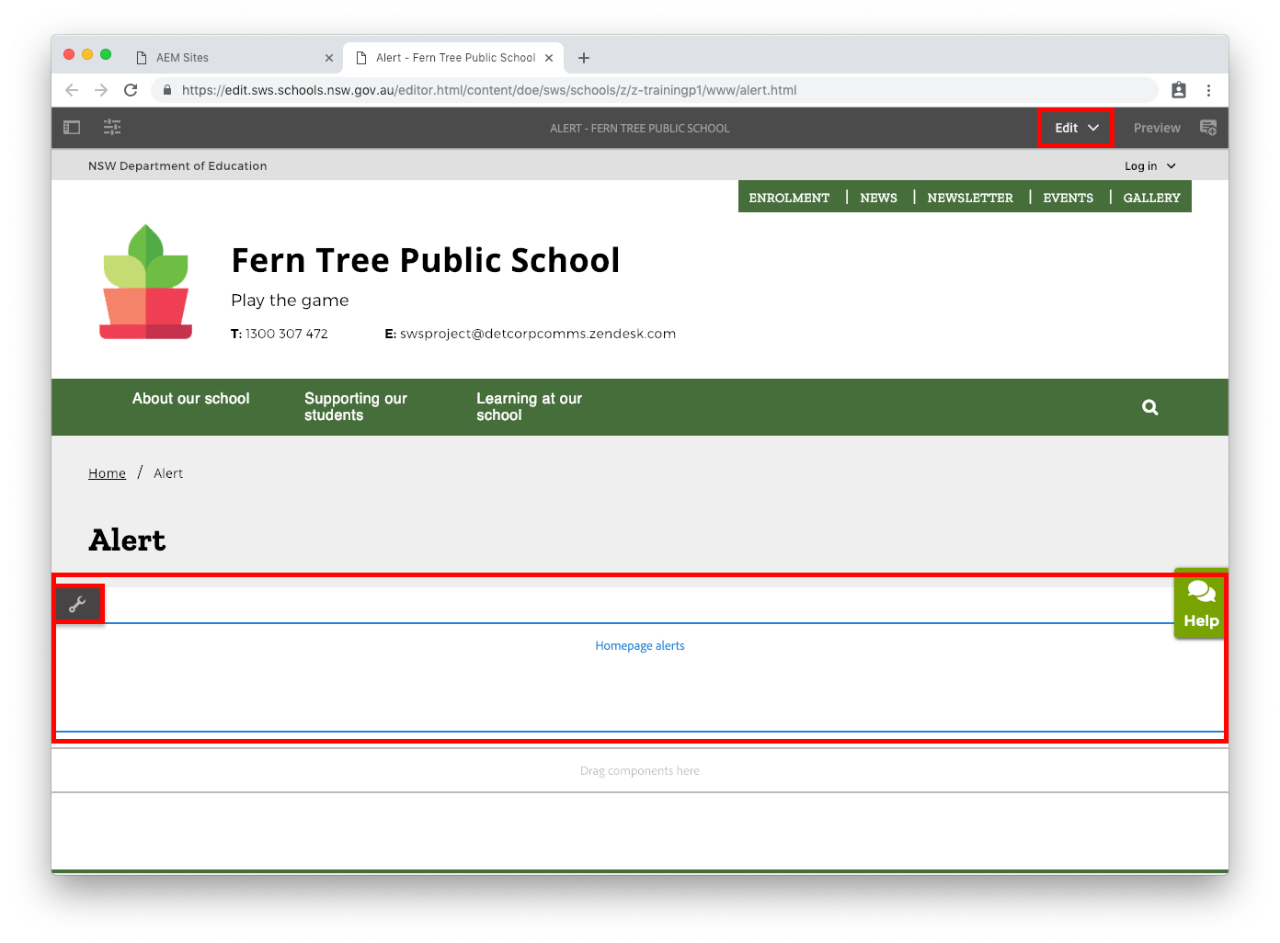
  • Select Edit in the top right of the page. This button is next to Preview
  • Select the words Homepage alerts to activate the alert component.
  • Select the spanner icon to edit your alert page. This is the Configure button. 

Step 7: Edit your alert properties

Your alert must include a heading, description and a start and end date and time. 

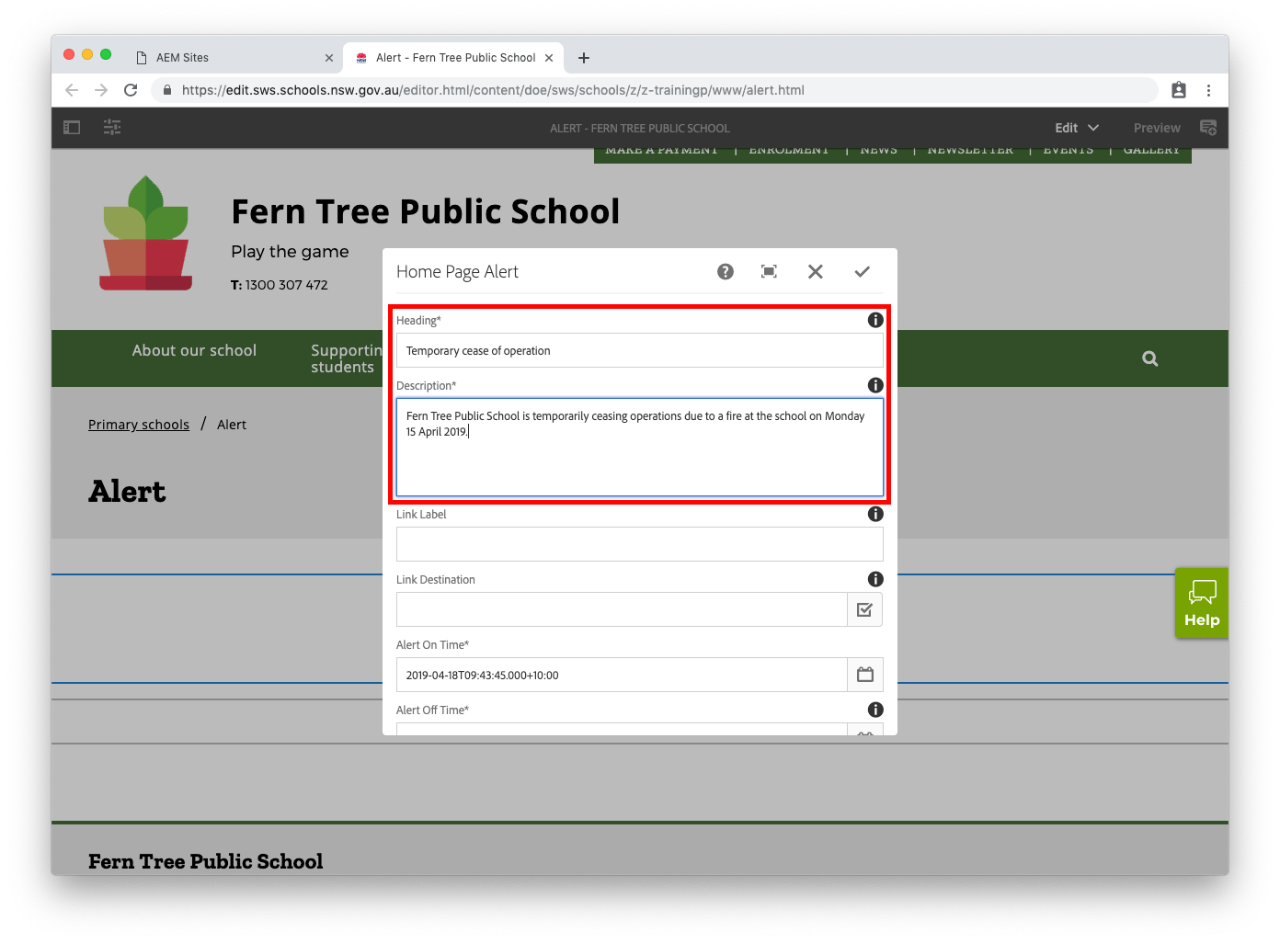
Heading

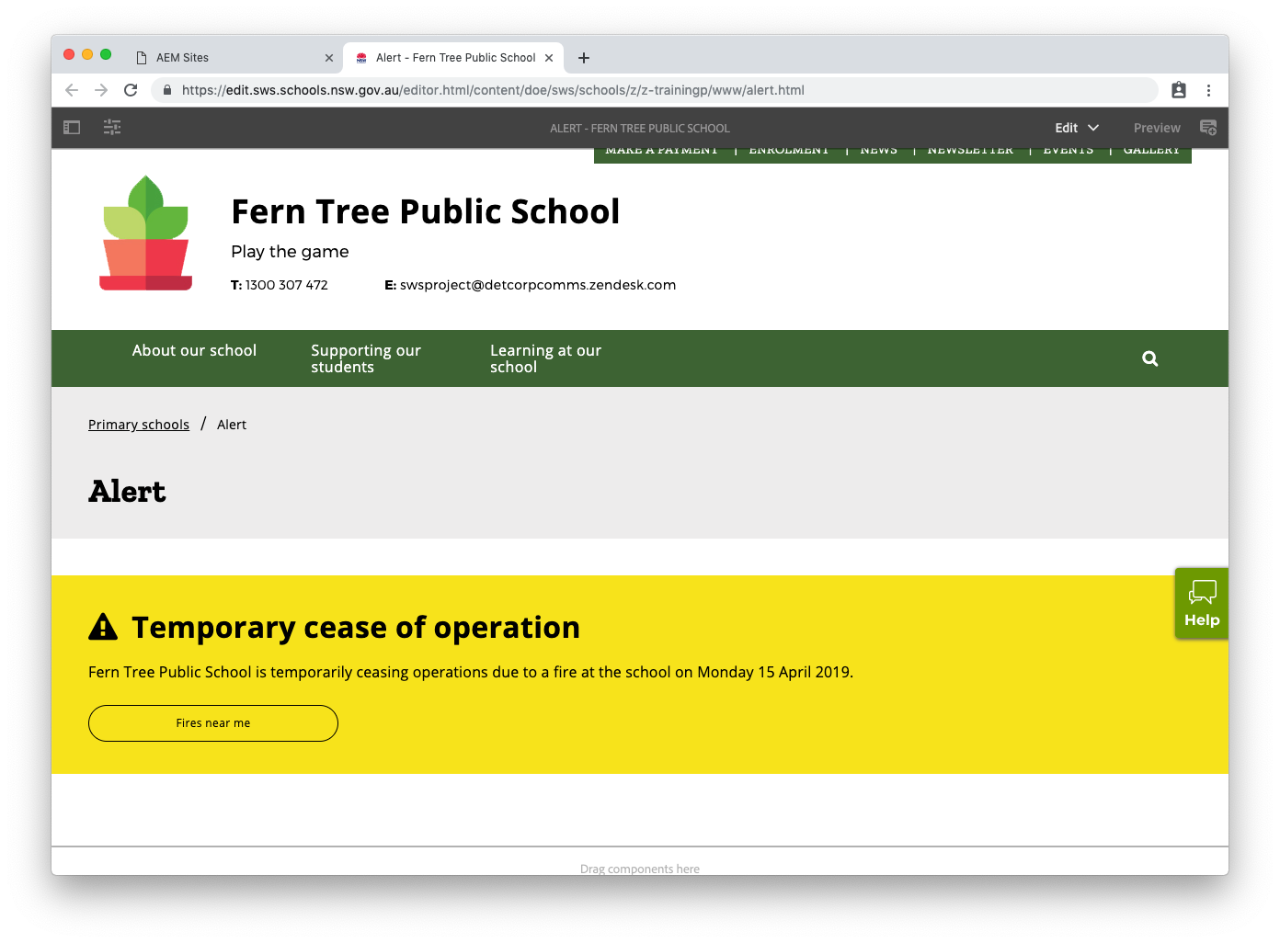
  • Enter the Heading for your alert. This will appear in bold next to the alert icon on your homepage. 
  • For example: Temporary cease of operation.

Description

  • Enter a Description for your alert. 
  • The description must follow approved language for example: School is temporarily ceasing operations due to a fire at the school on the morning of 7th January 2019. We will post updates as soon as possible.

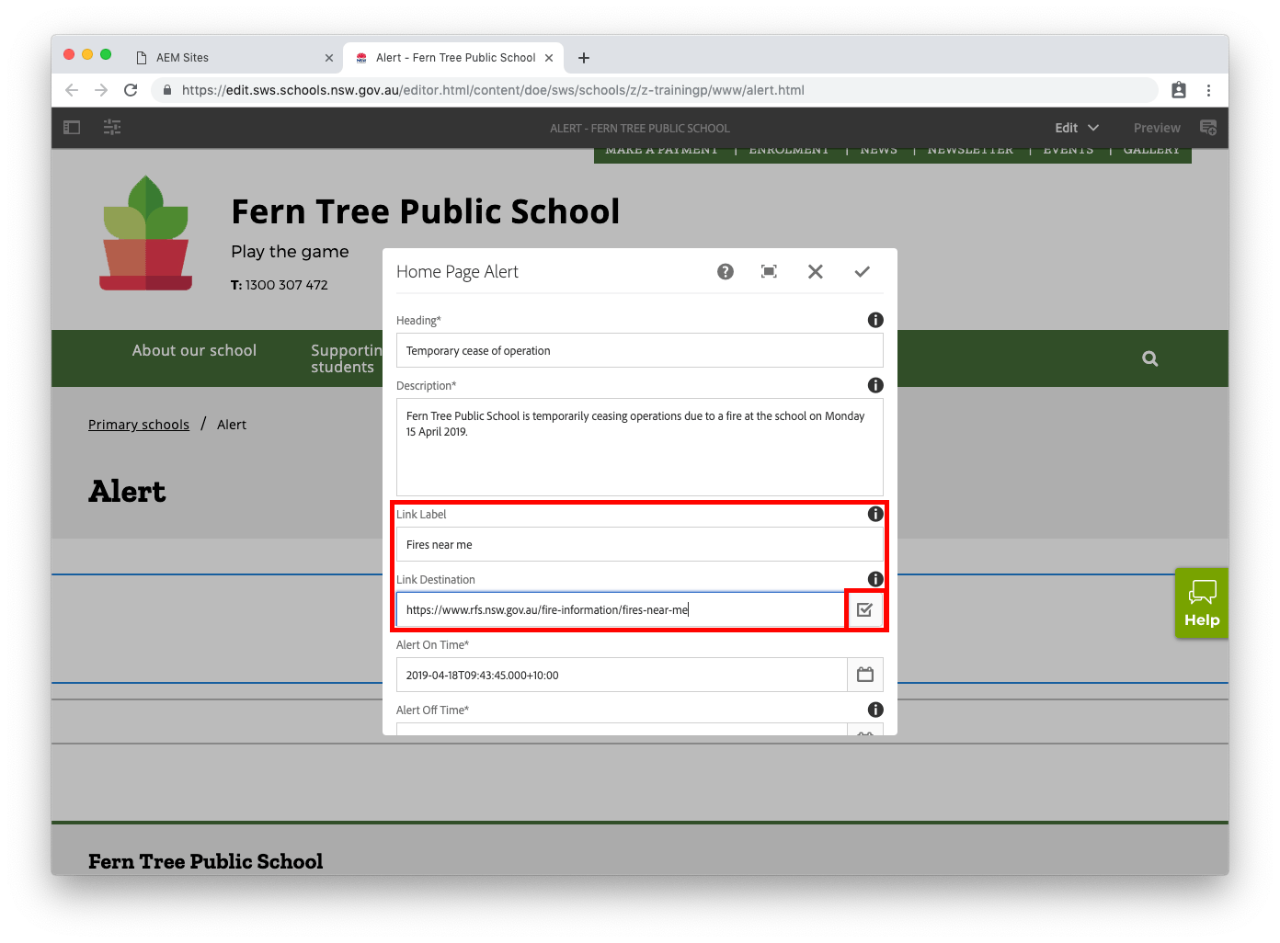
Link Label

  • Enter a Link Label. The Link Label describes the link location. For example: Fires near me.

Link Destination

  • Enter a URL in Link Destination to link to. For example: https://www.rfs.nsw.gov.au/fire-information/fires-near-me
  • Or you can select the tick icon to navigate through and link to an existing page in your website.

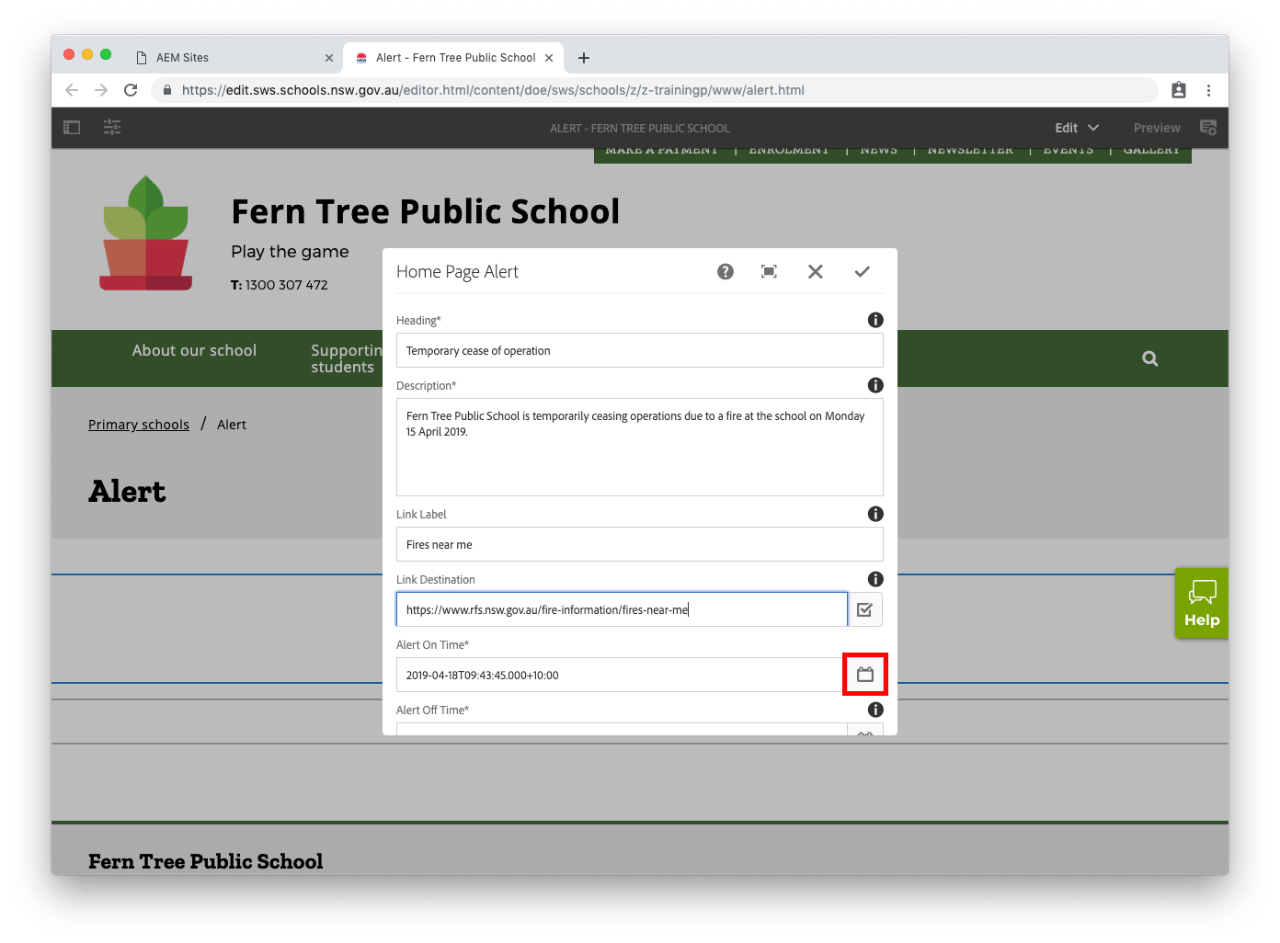
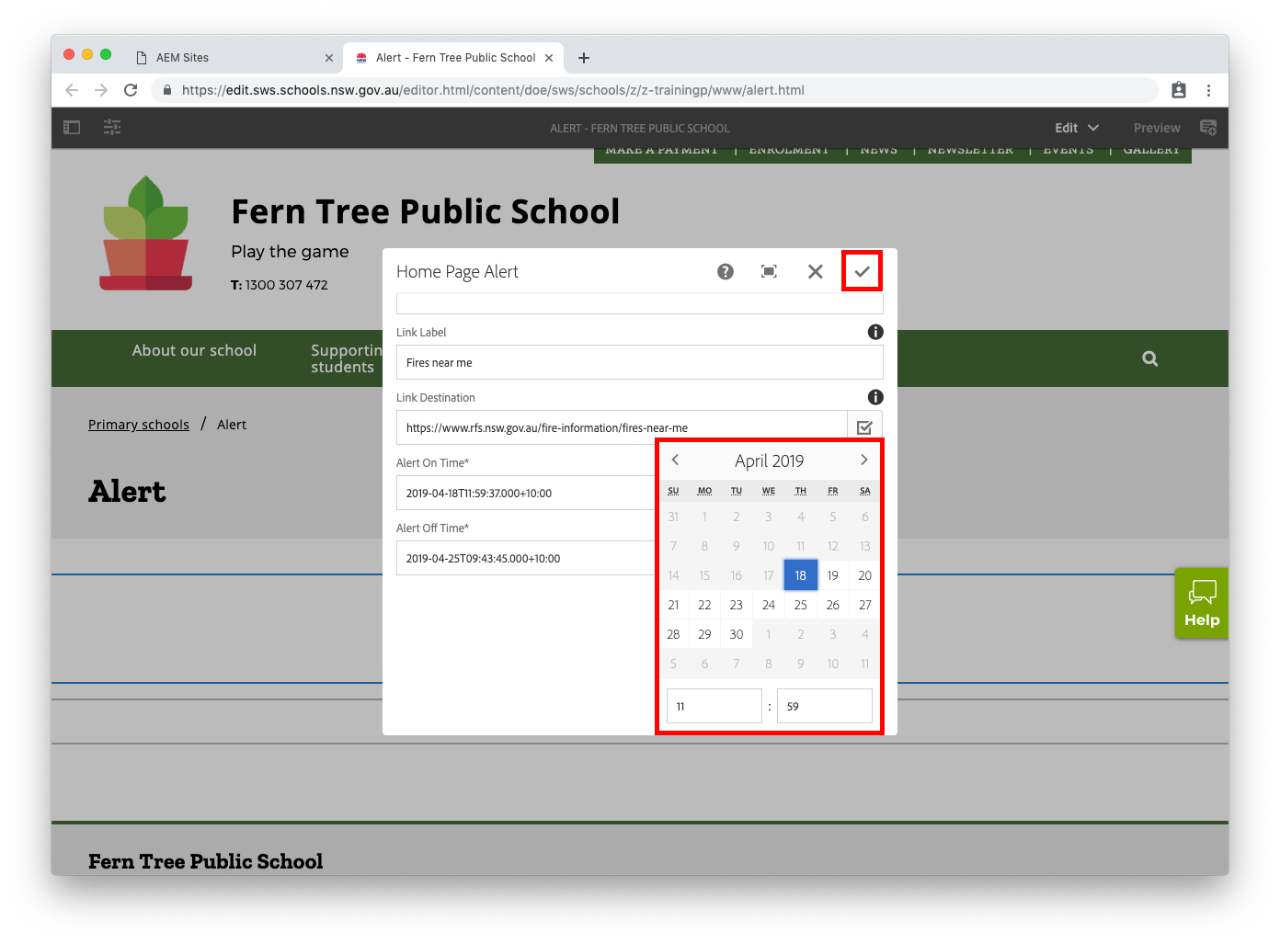
Alert On and Off Time

  • Select an On Time and Off Time for the alert.
  • The On Time must not be in the past or the current time. Set the time to at least one minute in the future.
  • The Off Time cannot be more than one week after the On Time. The Off time will be set automatically to one week after the time entered in On Time.

  • Select the tick on the top right of the pop-up to save the alert settings.

  • Your alert is now ready to be published. 

Step 8: Publish your alert page

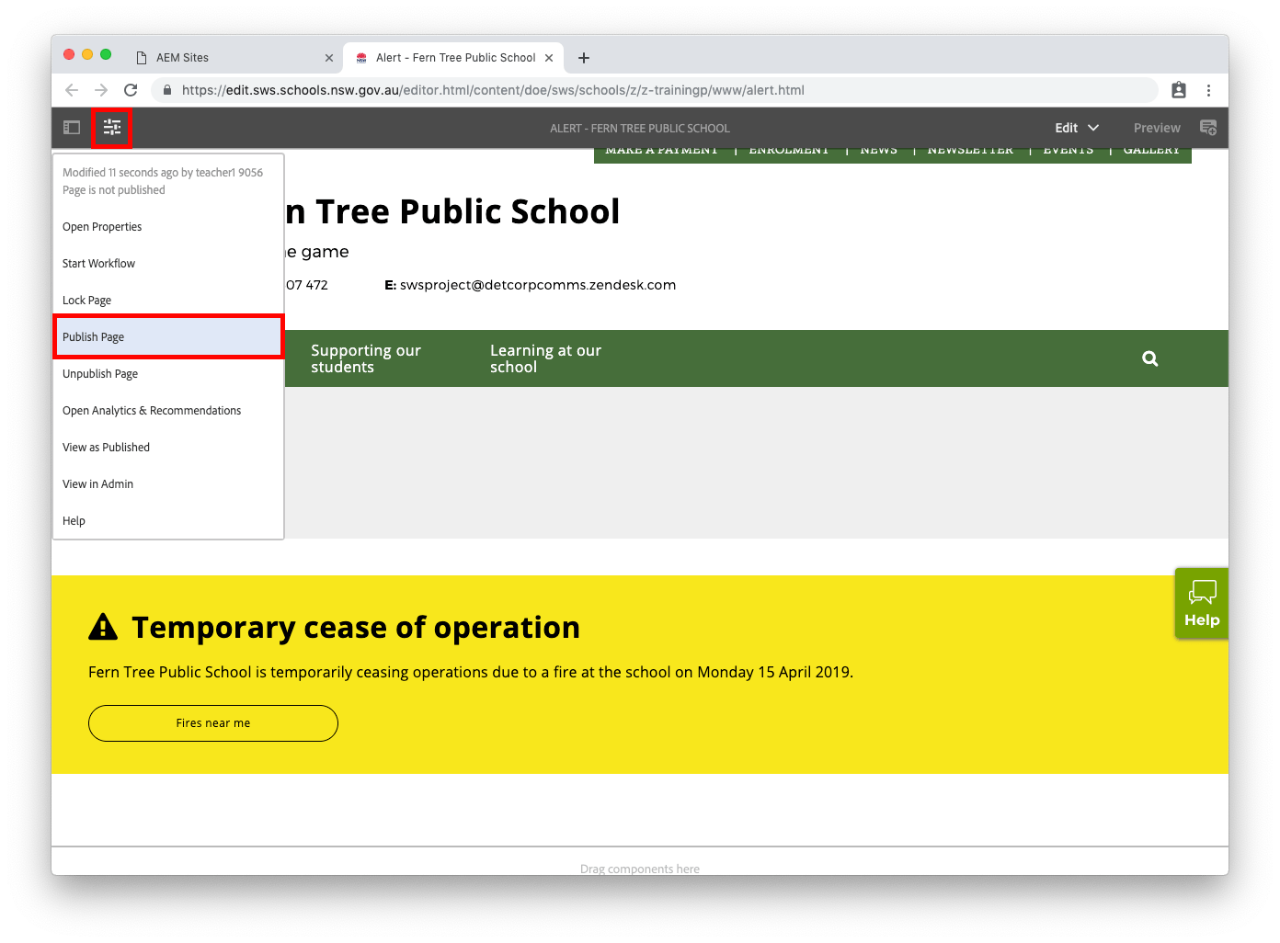
  • For changes to be updated on your live school website you will need to publish the page.
  • Select the slider icon in the top left corner. This is the Page Information button.
  • Select Publish Page from the drop-down. 
  • If you don't see Publish Page you are an Author and will need to select Start Workflow instead. Go to our Author publish a page for more information.

Published alert

Example of the alert on your homepage:

You may also find useful


Related content