School website service training and support logo

School website service training and support

School website service training and support

Banner video

Use this guide to add video on banner. 

Important to note

  • You will need to upload video in Brightcove and not in Assets. 
  • Component is called Schools Video on homepage. 

Step 1: Log in to AEM

Log in to Adobe Experience Manager using the more simpler method;

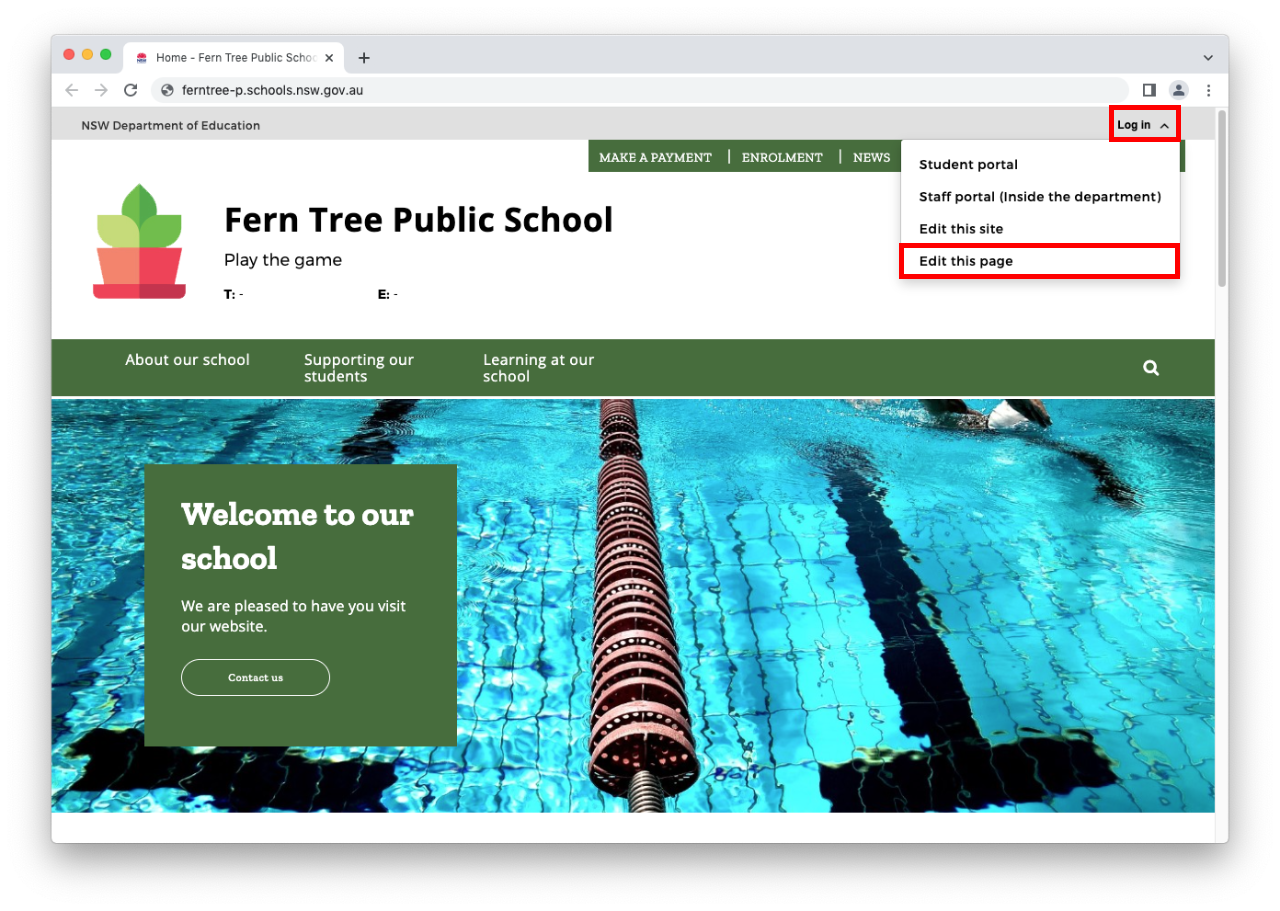
  • Select Log in drop down towards the top right corner.
  • Select Edit this page which will directly open the page you wish to edit.

or use the traditional method;

  • Log in to Adobe Experience Manager and select Sites.
  • Your school's home page will already be selected.
  • Select the icon to the left of Home. The tick will appear and your selection will turn blue.
  • Select Edit in the menu bar that appears across the top of the screen. 

Step 2: Open Schools Video

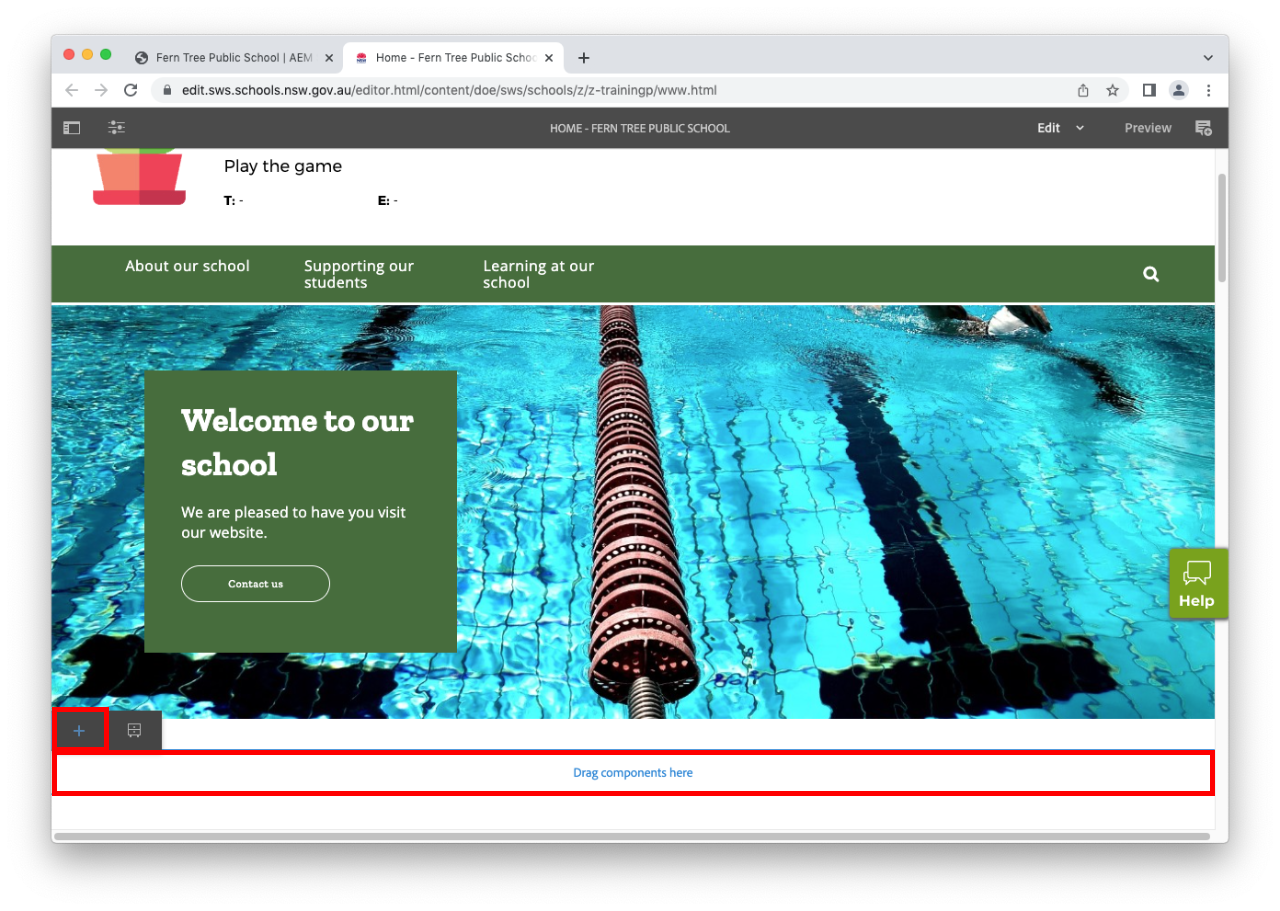
  • Select Edit in the top right of the page. This button is next to Preview
  • Select Drag components here below the existing banner or below the Mega nav then the plus icon.

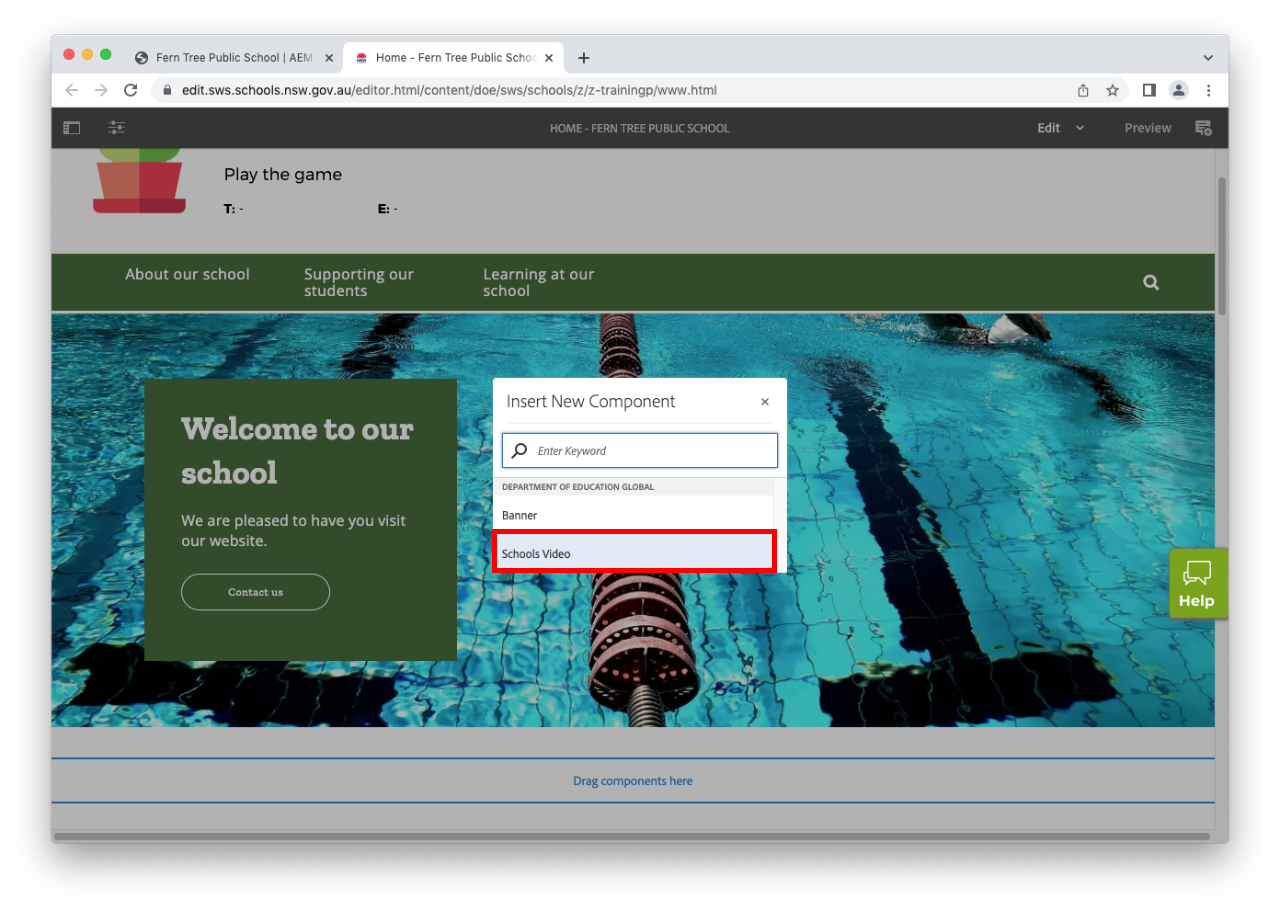
  • Select Schools Video from Insert New Component list. 

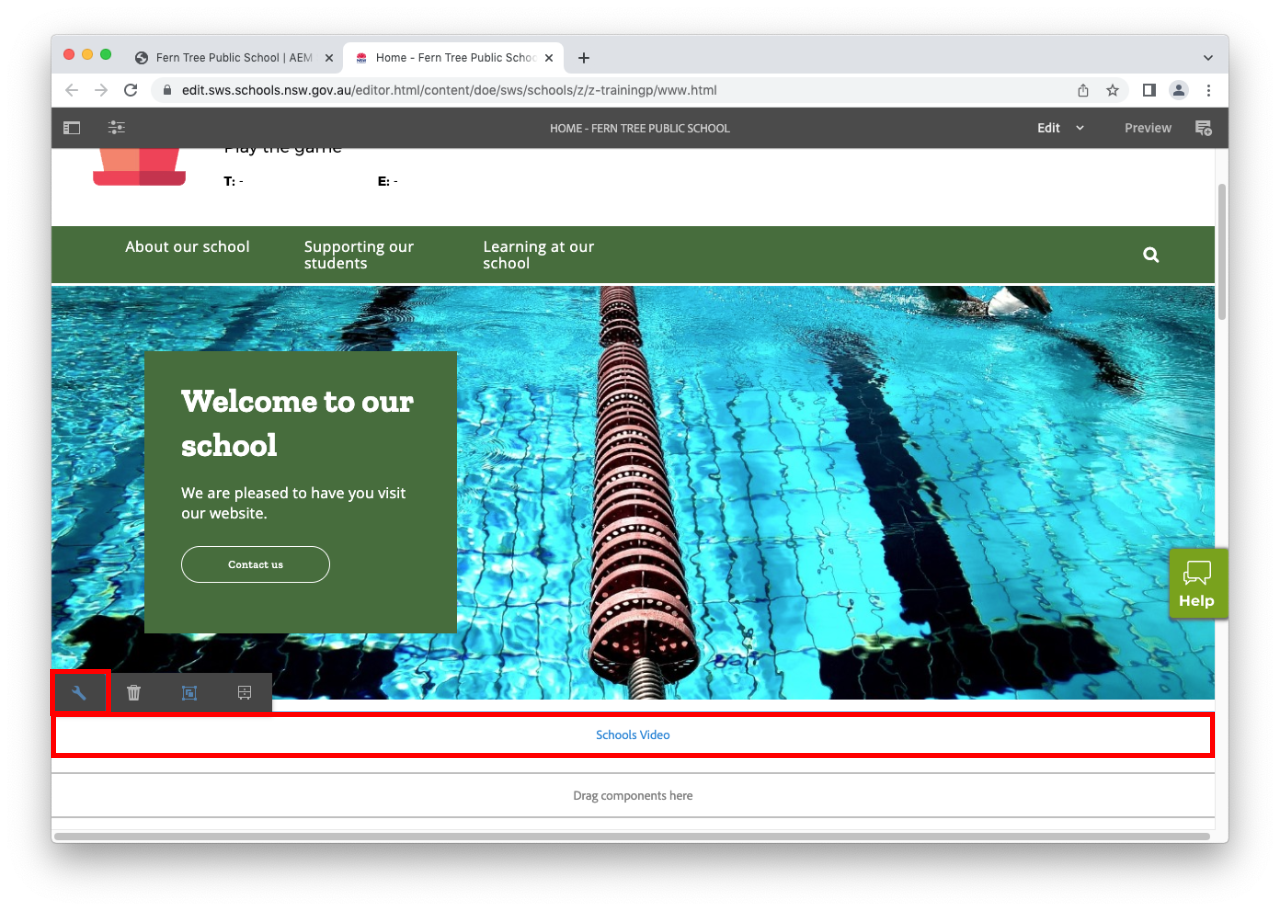
  • Select Schools Video component. 
  • Select the spanner icon to edit Schools Video. This is the Configure button.

Step 3: Select Video

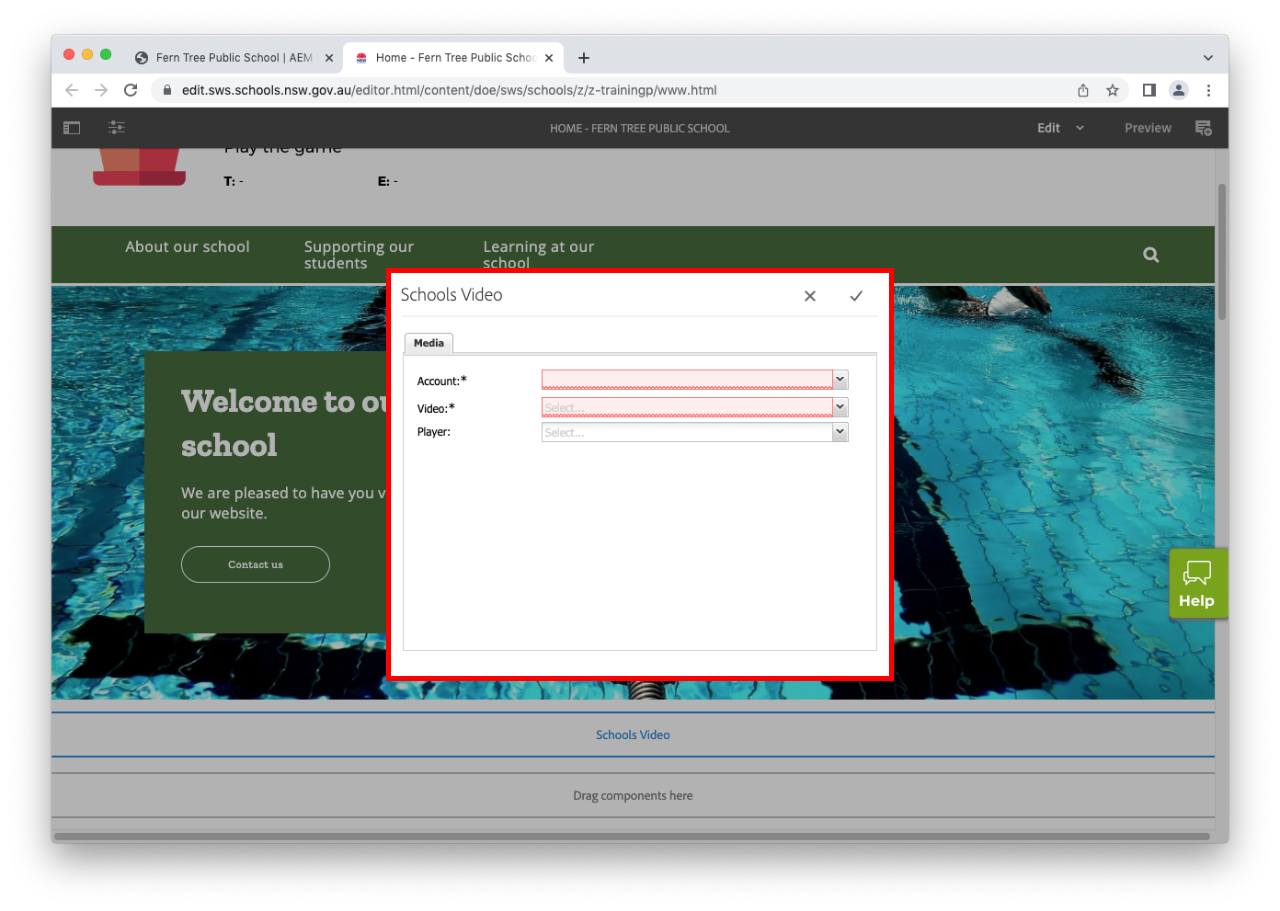
  • In Account field, select the drop down then select your school name. 
  • In Video field, select the drop down then select the video you uploaded previously on Brightcove. 
  • In Player field, select Brightcove Default Player.

Step 4: Apply the changes

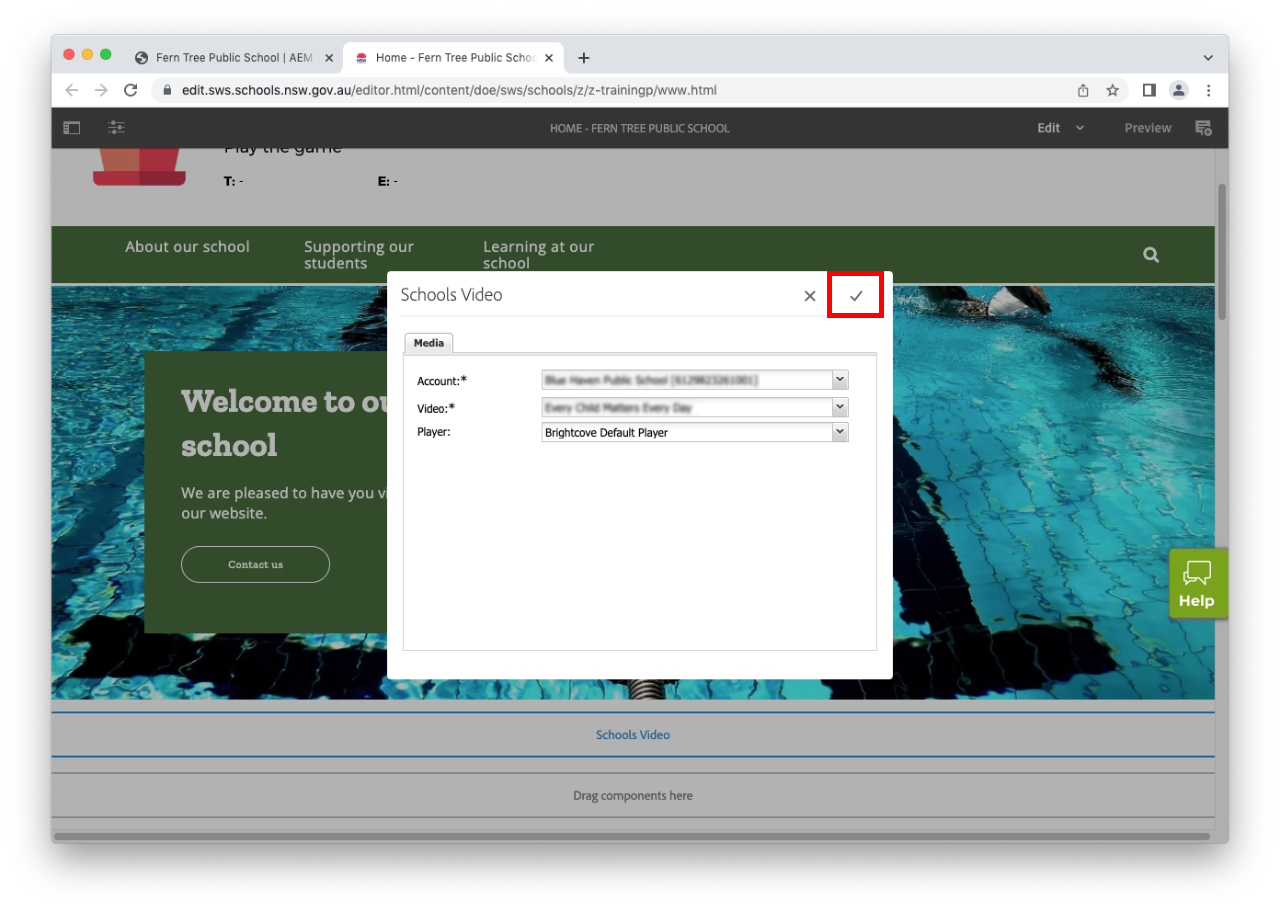
  • Select the tick to apply your changes.
  • View the page in preview mode or view as published to see how it looks. You can resize the browser window to check how your changes look on tablet and mobile device layouts.

Publish your changes

  • For changes to be updated on your live school website you will need to publish the page