School website service training and support logo

School website service training and support

School website service training and support

Upload an image to Assets

Use this page to learn how to upload an image to your website.

Before you start

It is important that you follow the Image guidelines and Image dimensions and file sizes when you add images to your website.

Points to remember 

  • Your images should have a meaningful file name prior to upload. 
  • Organise your images in a meaningful structure within Assets. This will make it easier for you to find them at a later time. 
  • You can upload more than one image at a time to your assets.
  • Images that are uploaded to your assets do not automatically appear on your website. You need to upload them to Assets and then add them to a page in Sites. 
Video guide

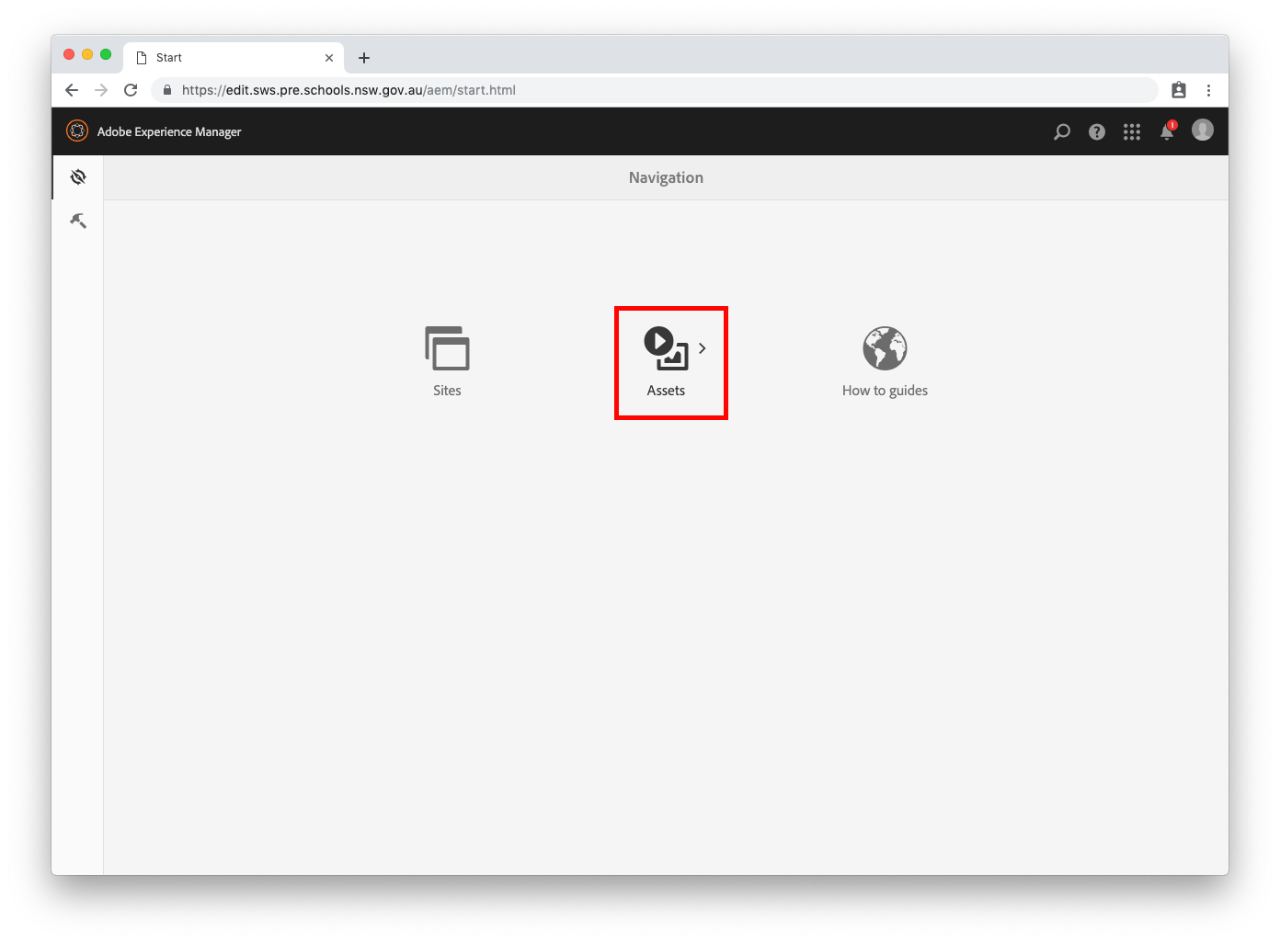
Step 1: Navigate to Assets

Step 2: Change to column view

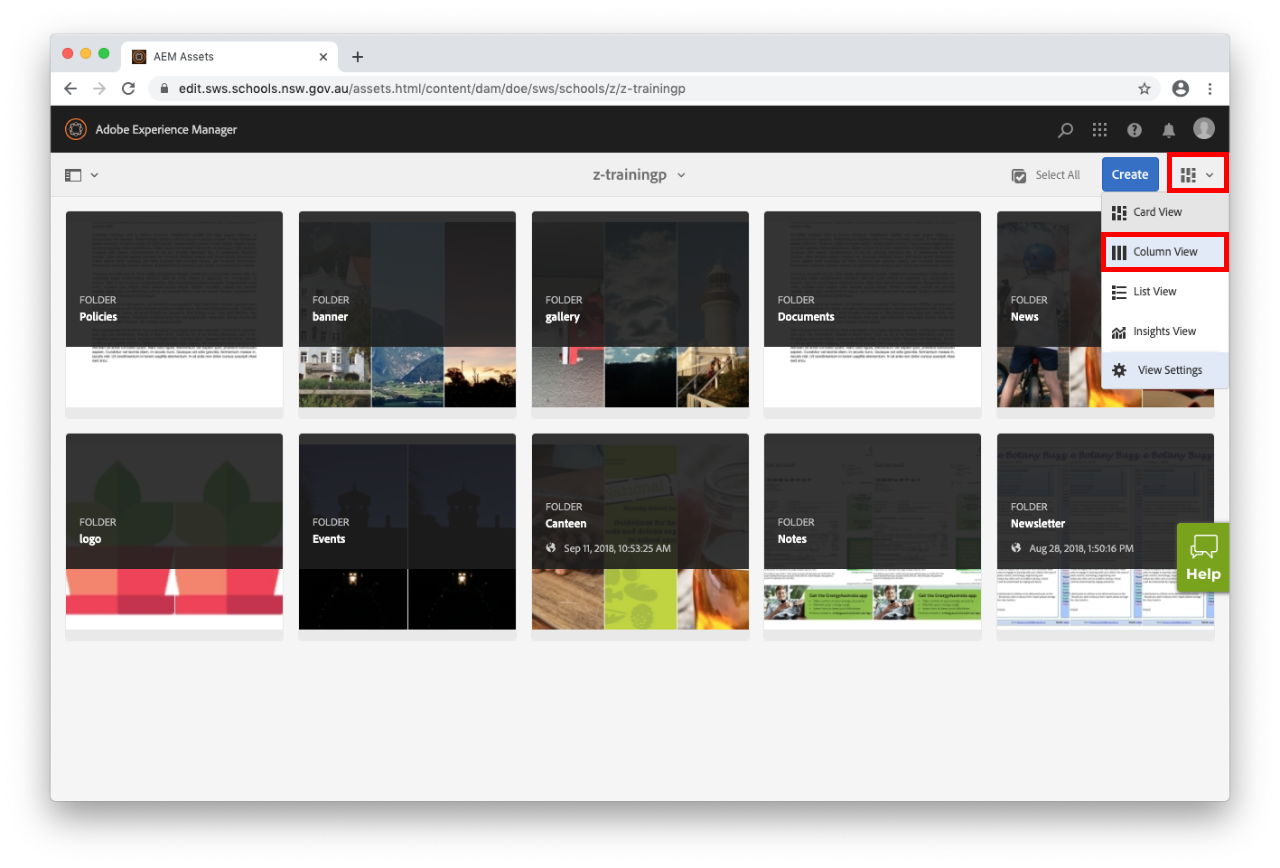
  • If your assets open in Card View, you can change this by selecting the View icon in the top right, below your User icon. Select Column View from the drop-down as this is easiest to use. See our guide on Views for more. 

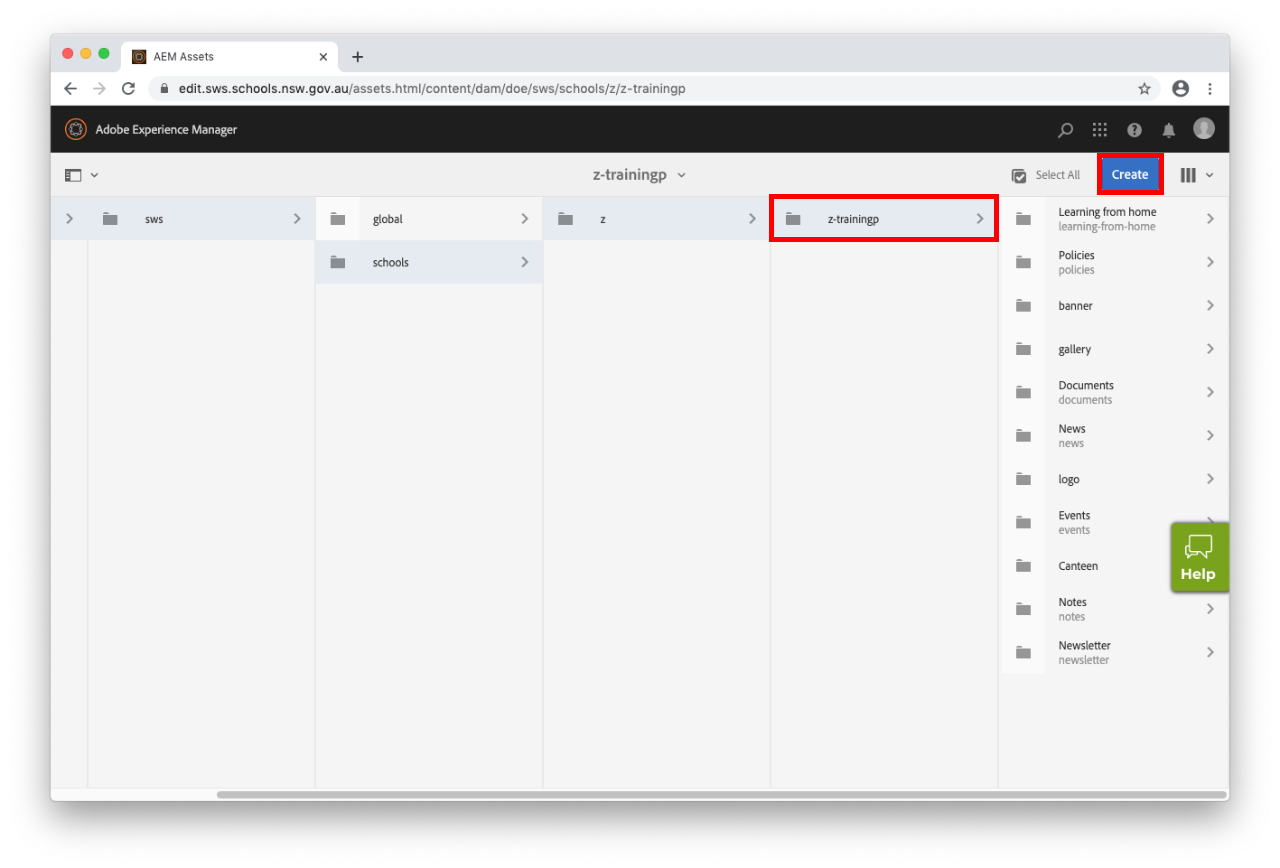
  • Your school's folder will already be selected.
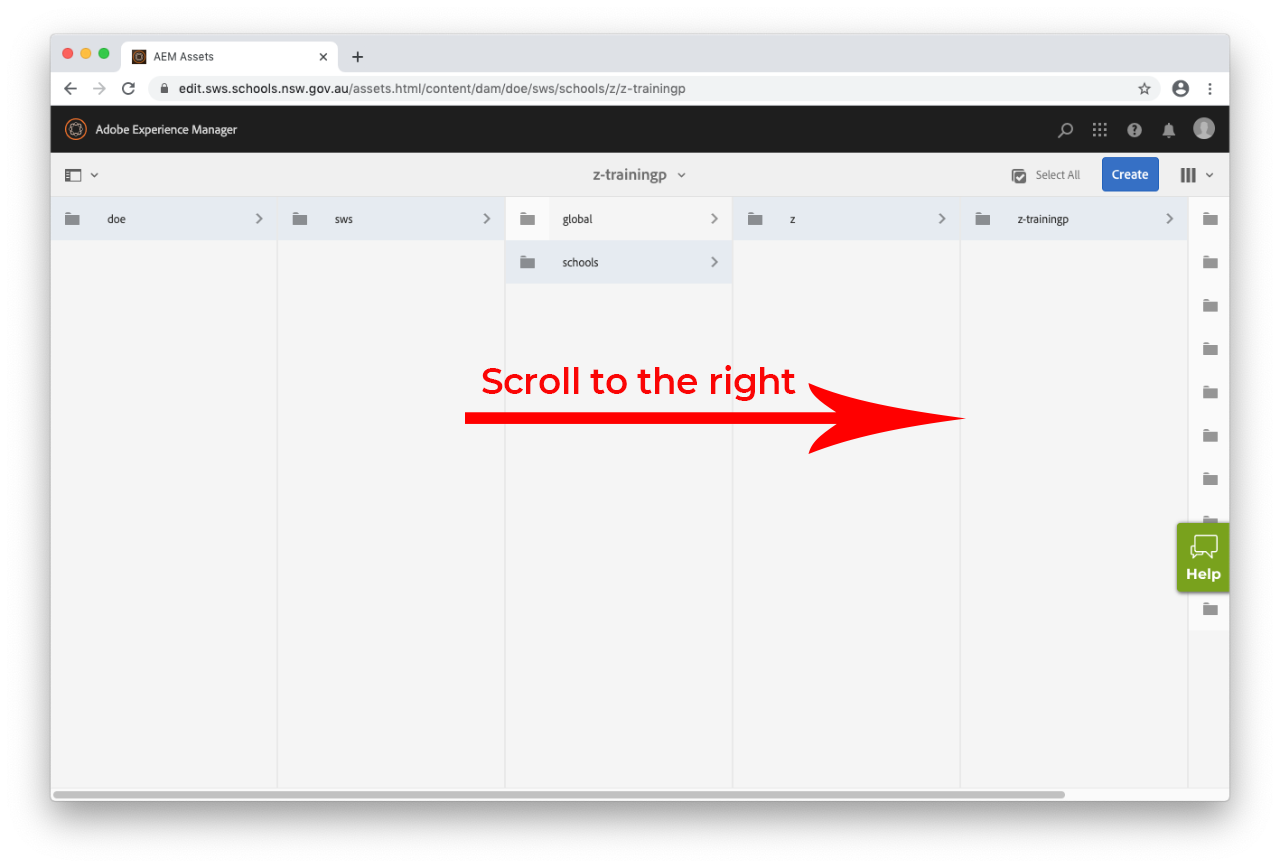
  • Scroll to the right to see your assets.

  • Select the folder wherein you want to save your image.

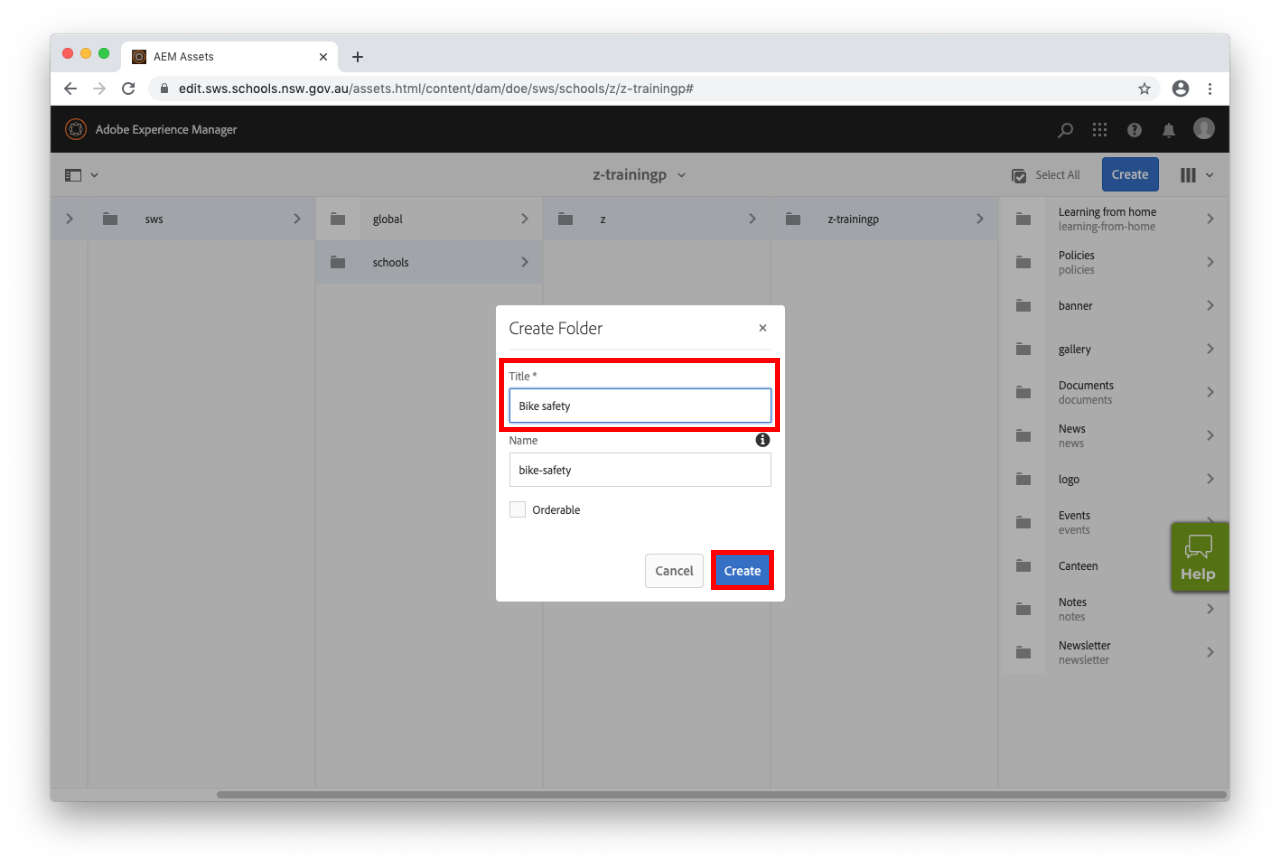
Create a new folder – if required

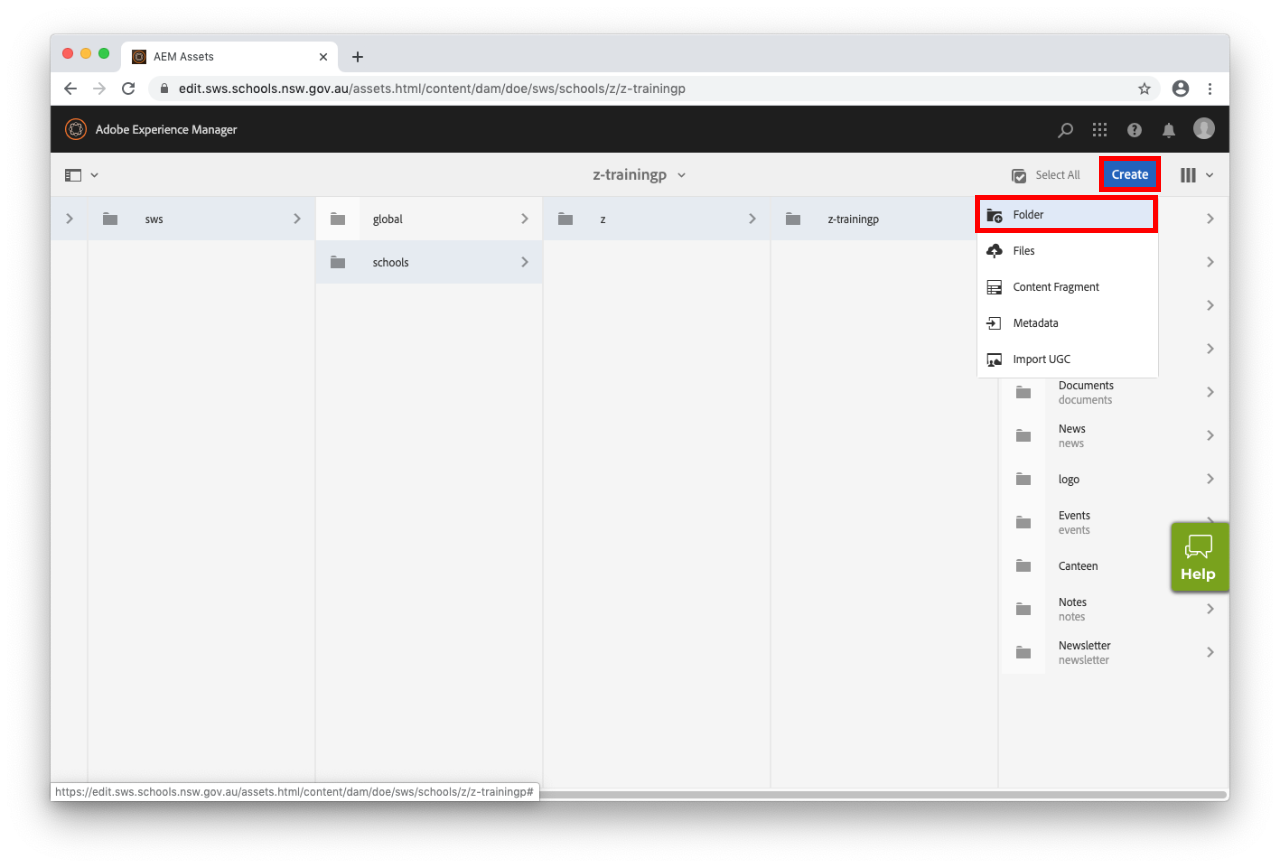
  • If you want to create a new folder select Create in the top right hand corner. 

  • Select Folder from the drop-down menu. 

  • Enter the name of the folder in the Title field.
  • Select Create.
  • Your folder will be created. 

Step 3: Upload your image

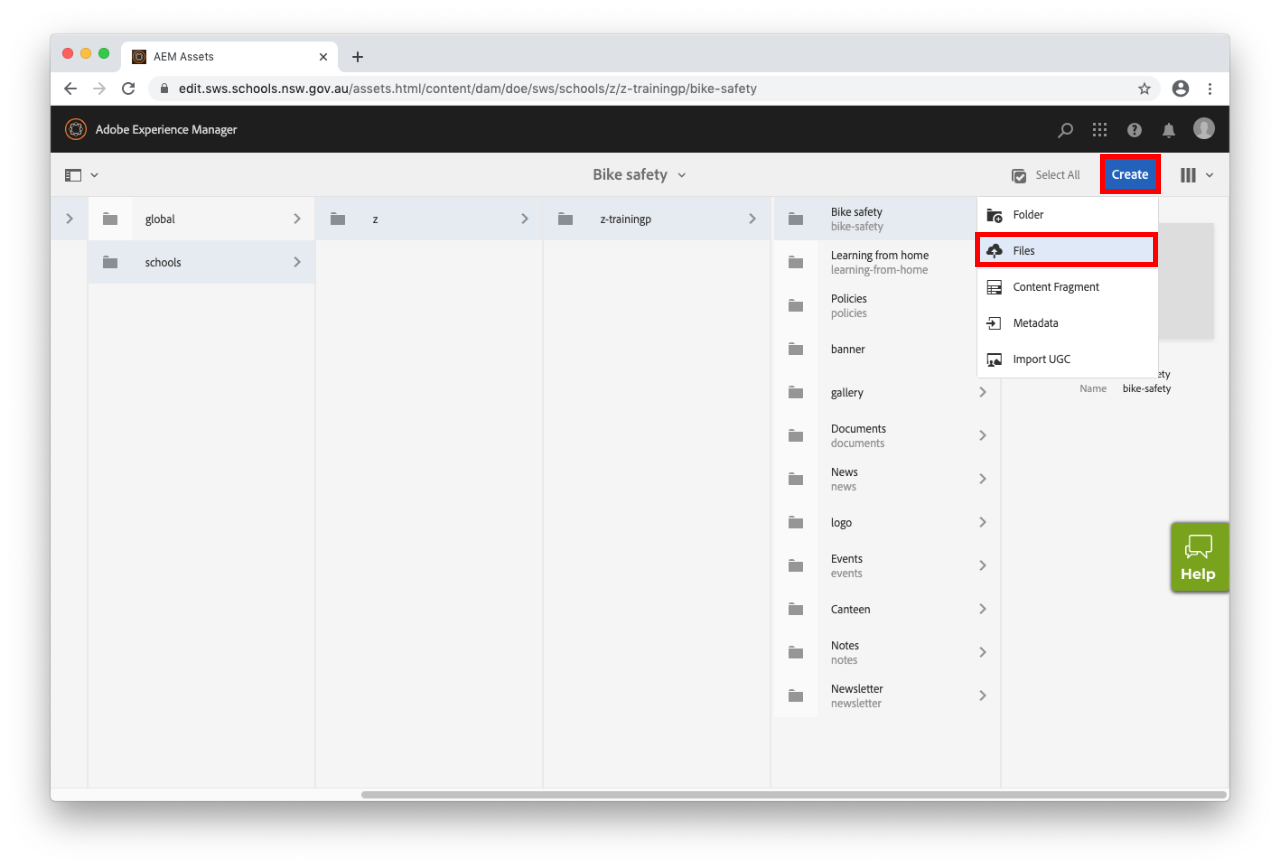
  • Ensure your desired folder is selected.
  • Select the blue Create button on the top right hand corner. 
  • Select Files from the drop-down menu.

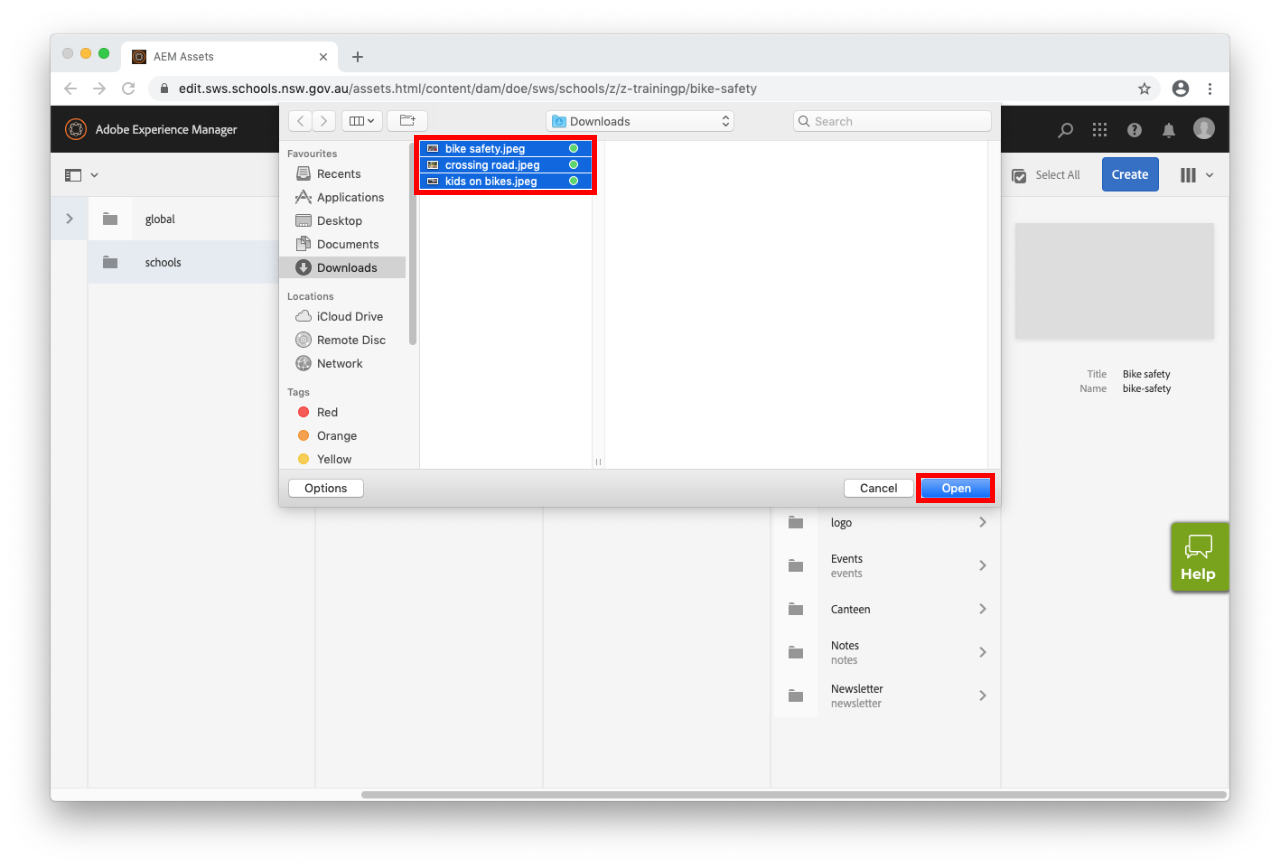
  • Select the image you want to upload to your Assets and then select Open.
  • You can select a number of images at a time and upload them.

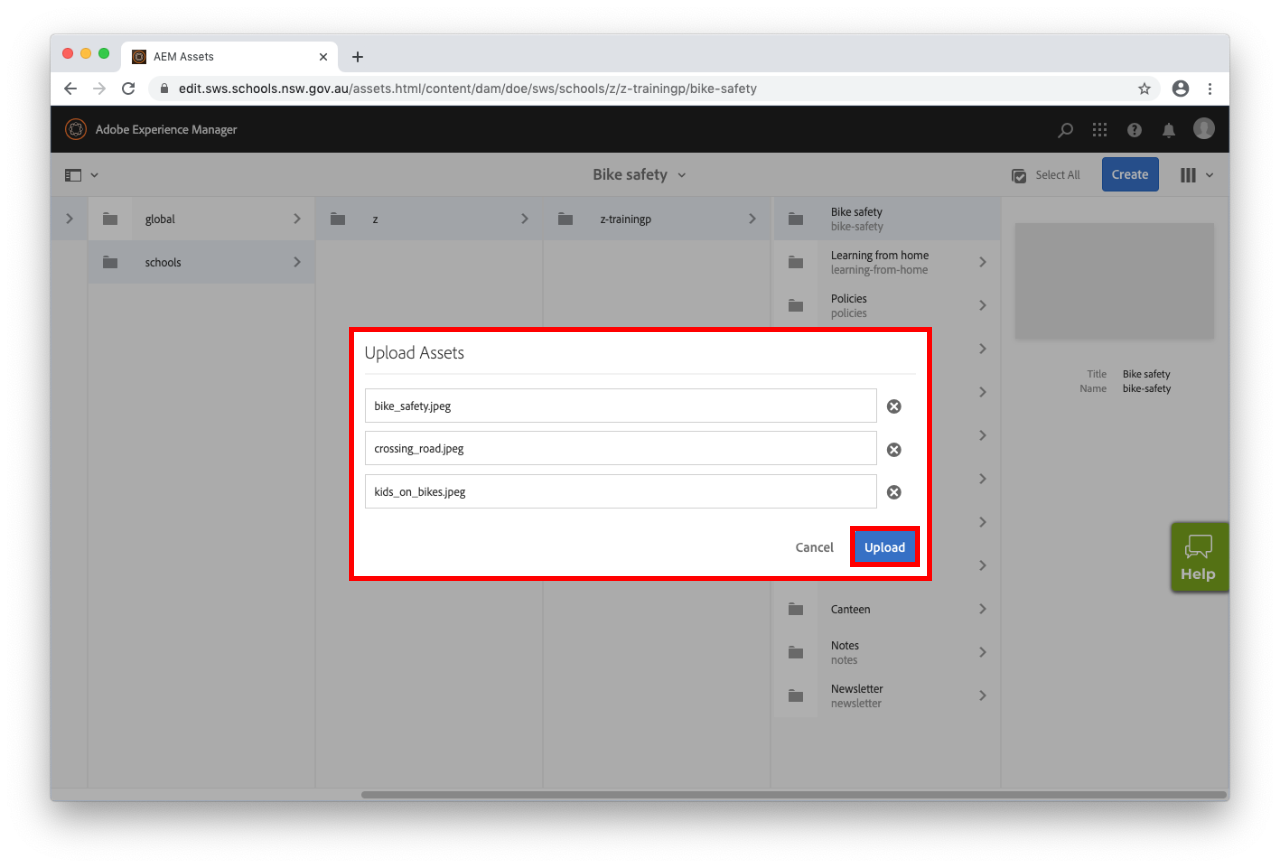
Step 4: Upload your image

  • Select Upload.
  • Your image is now ready to be used on a page. 

Step 5: Use your image on a page

  • Use the image component or banner image to add your image to a page on your school website.
  • You can also add images to an Album.
  • You can now use the image in any component or menu that utilises images.
  • You can also edit the image if you need to crop it.