School website service training and support

Social links

Use this guide to add and edit the Social links component.

Features

The component:

Before you start

Before you can add a Social media component to your website you must first integrate the social media platforms with your website.

Go to our Social links guide to learn how to add or remove social media accounts from your website.

Navigate to the homepage. This is the only page on your website where the Social links component can be added. 

Your social links will still be seen in the footer on all pages of your school website.

Step 1: Add Social links component

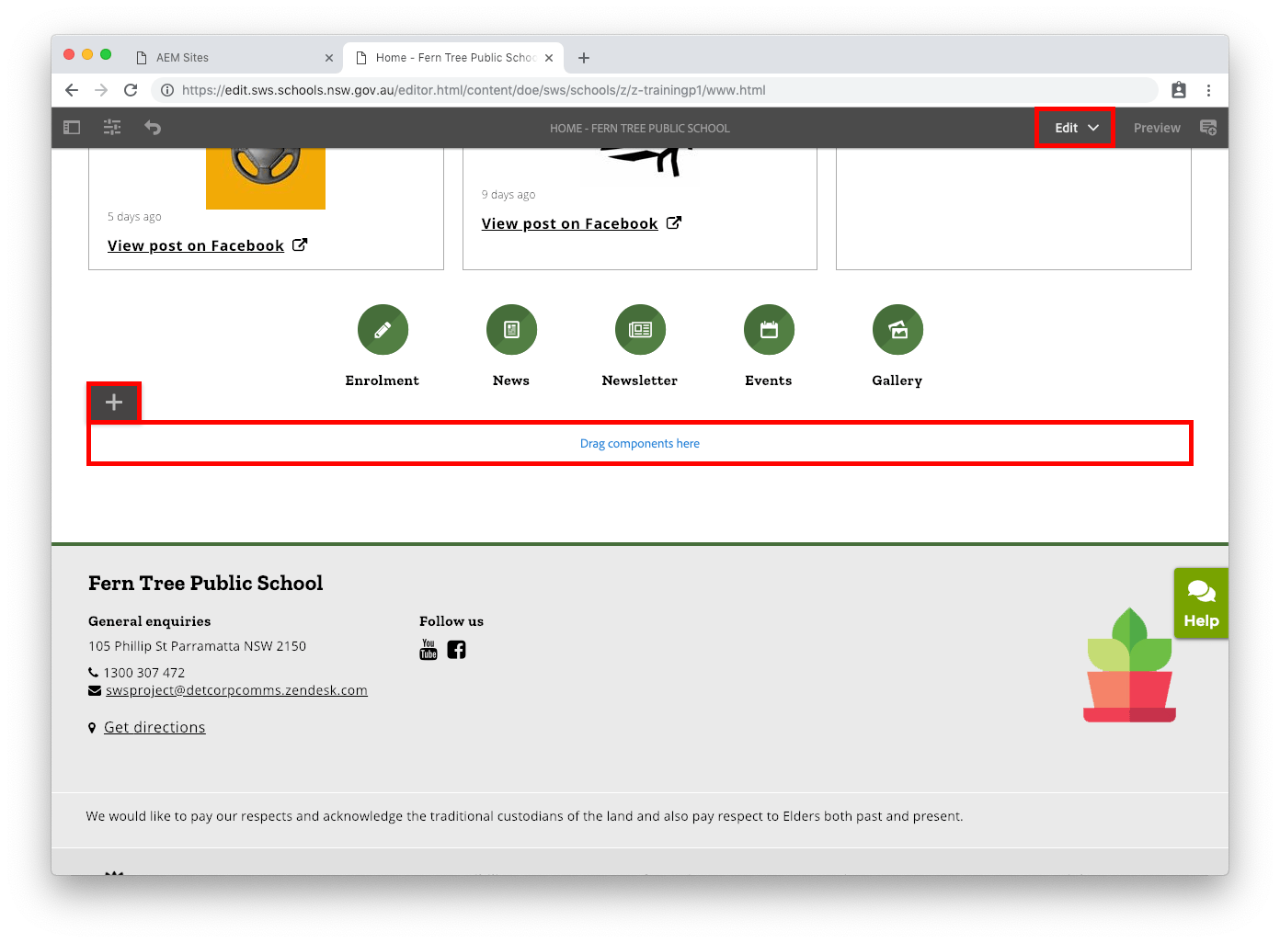
  • Move down to the bottom of the homepage.
  • Select Drag components here.
  • Select the plus icon.

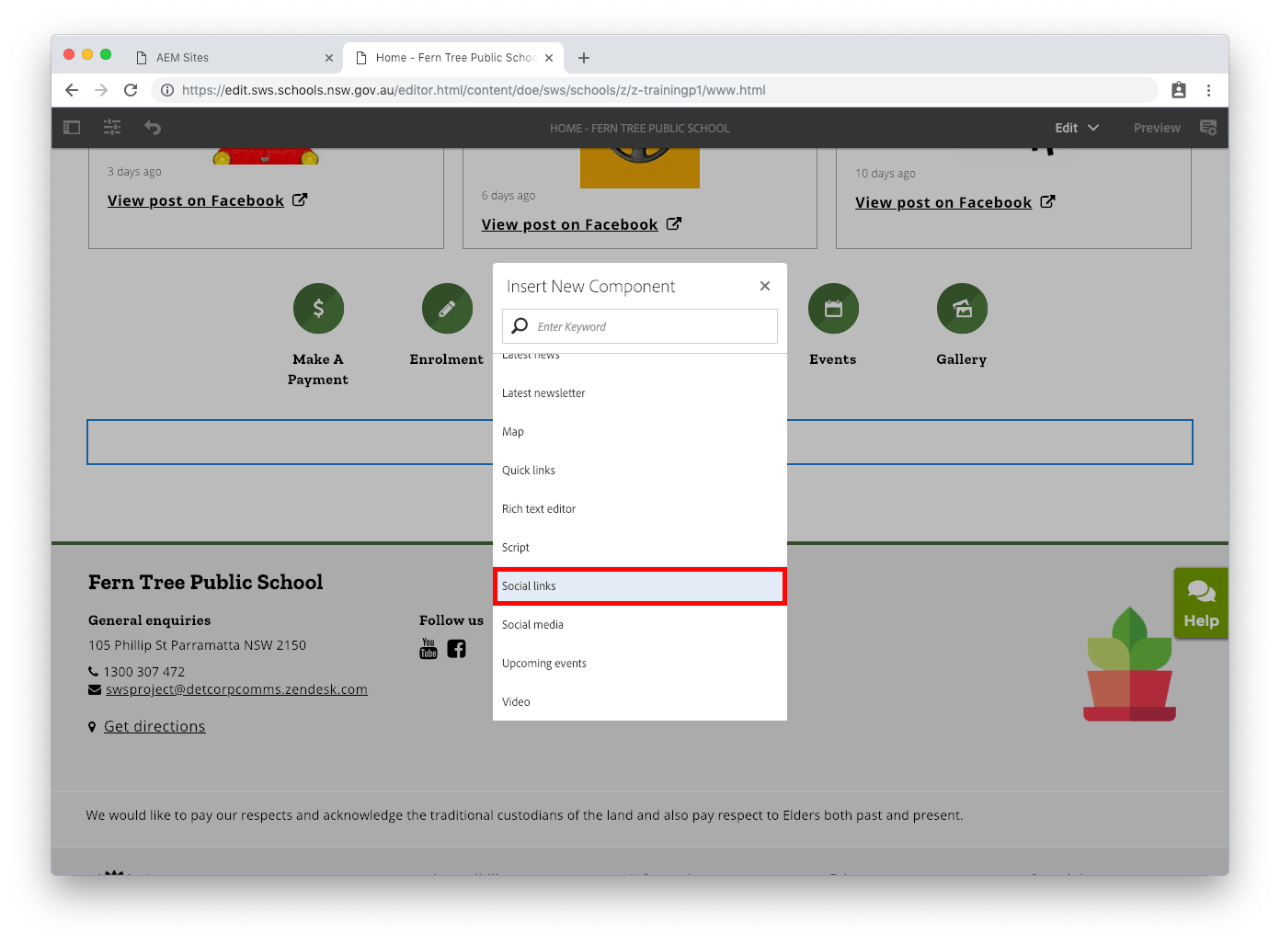
  • Select Social links from the Insert New Component list.

Step 2: Edit the Social links component – optional

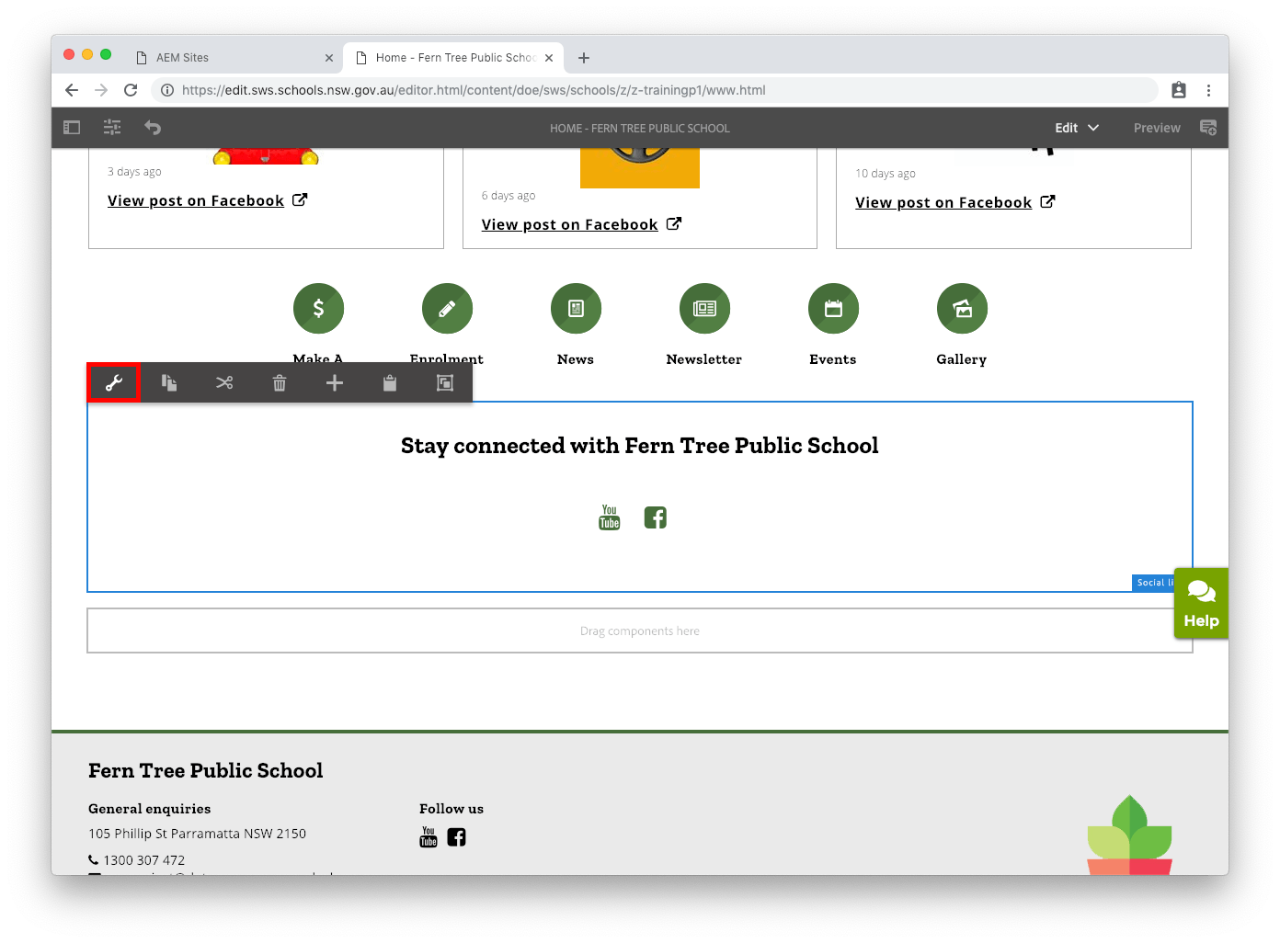
  • Select the Social links component.
  • Select the spanner icon to adjust the Social links component. This is the Configure button.

Step 3: Edit your social links properties – optional

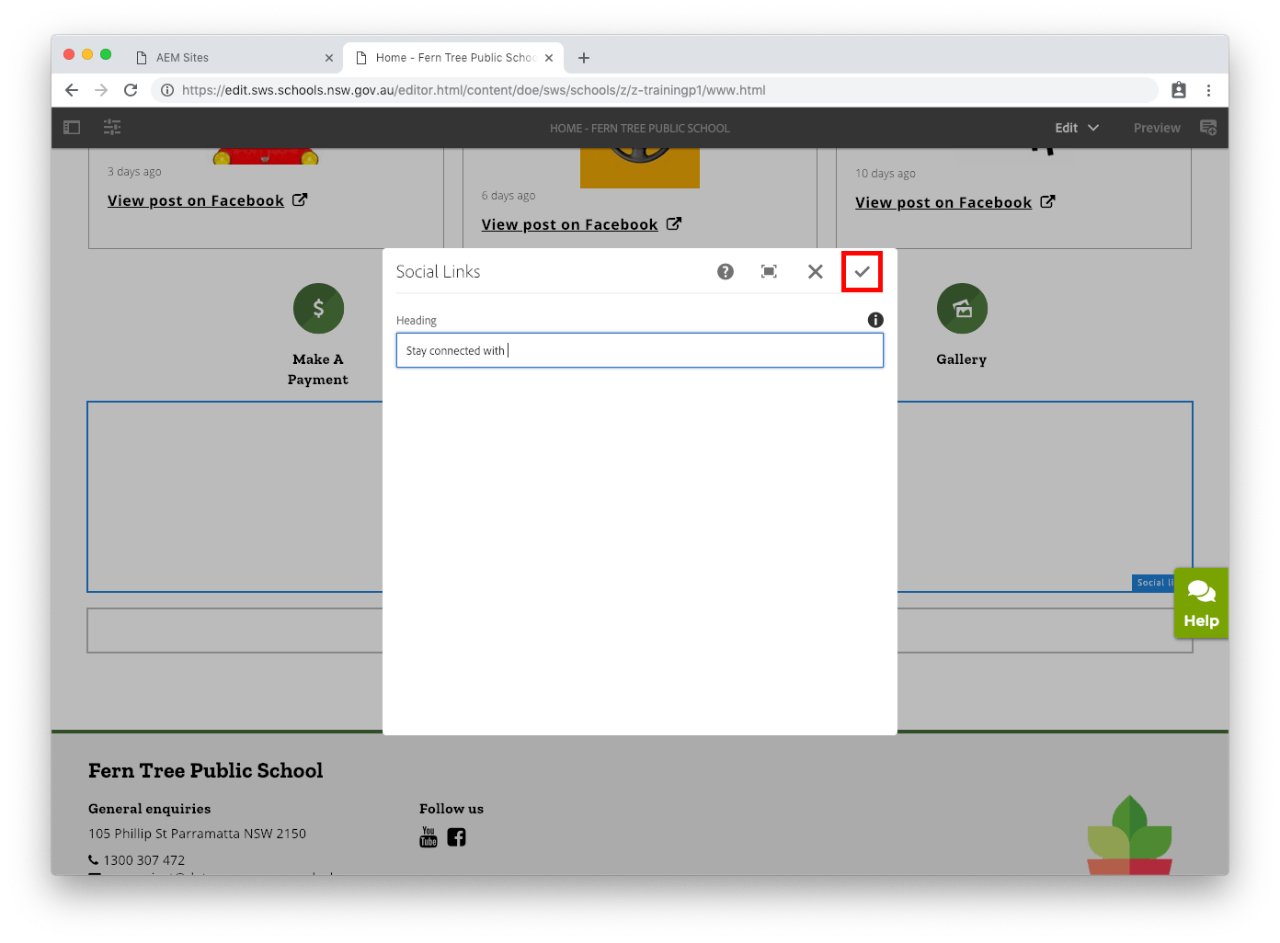
Heading

  • The Heading appears in the top of the component. 
  • Make sure your heading includes a space after the words 'Stay connected with.' 
  • This is because the final version will read: Stay connected with (the name of your school).

Publish your changes

  • For changes to be updated on your live school website you will need to publish the page.


 You may also find useful: