School website service training and support

Edit an album

Use this guide to learn how to edit an album on your school's website. 

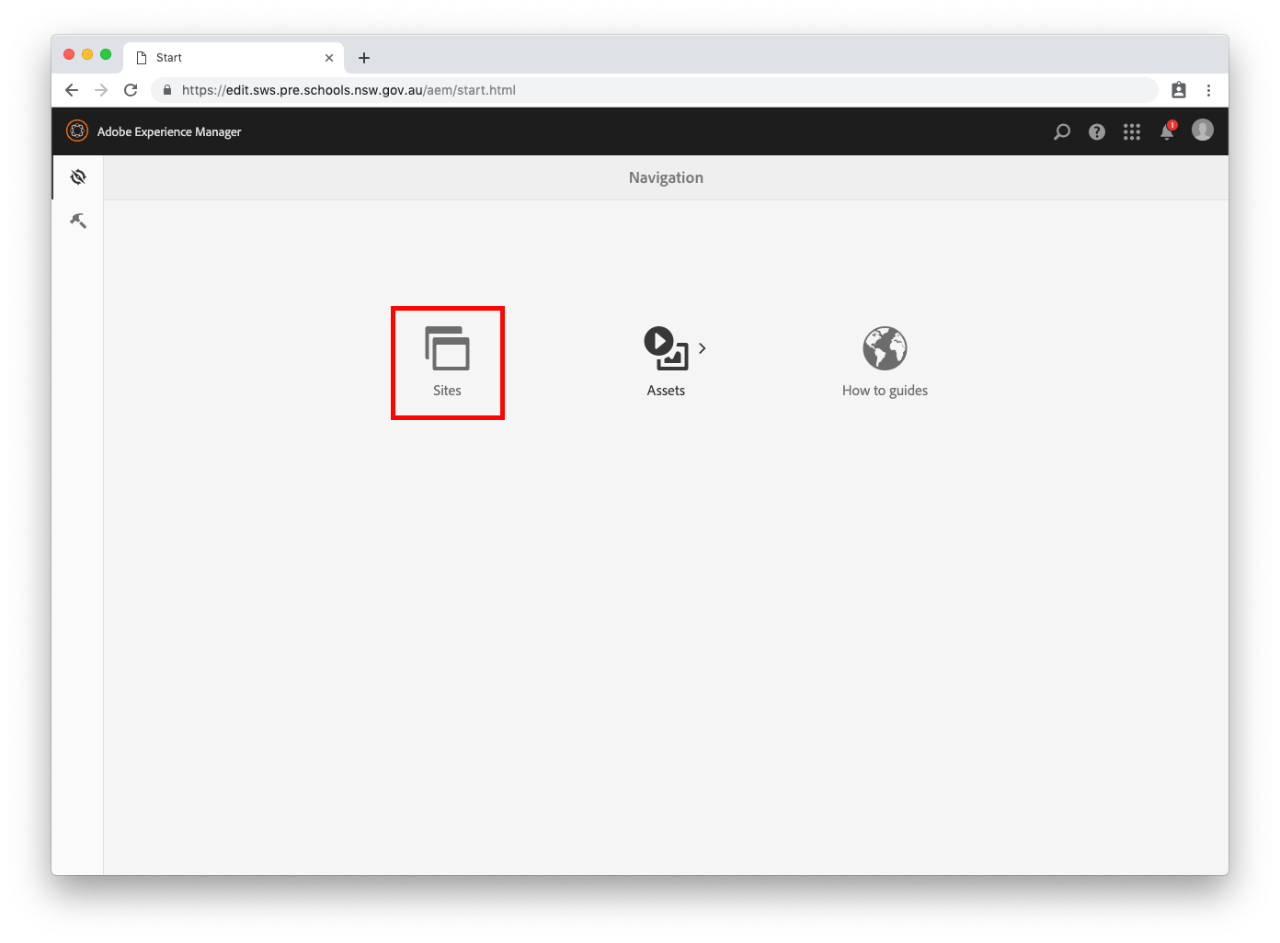
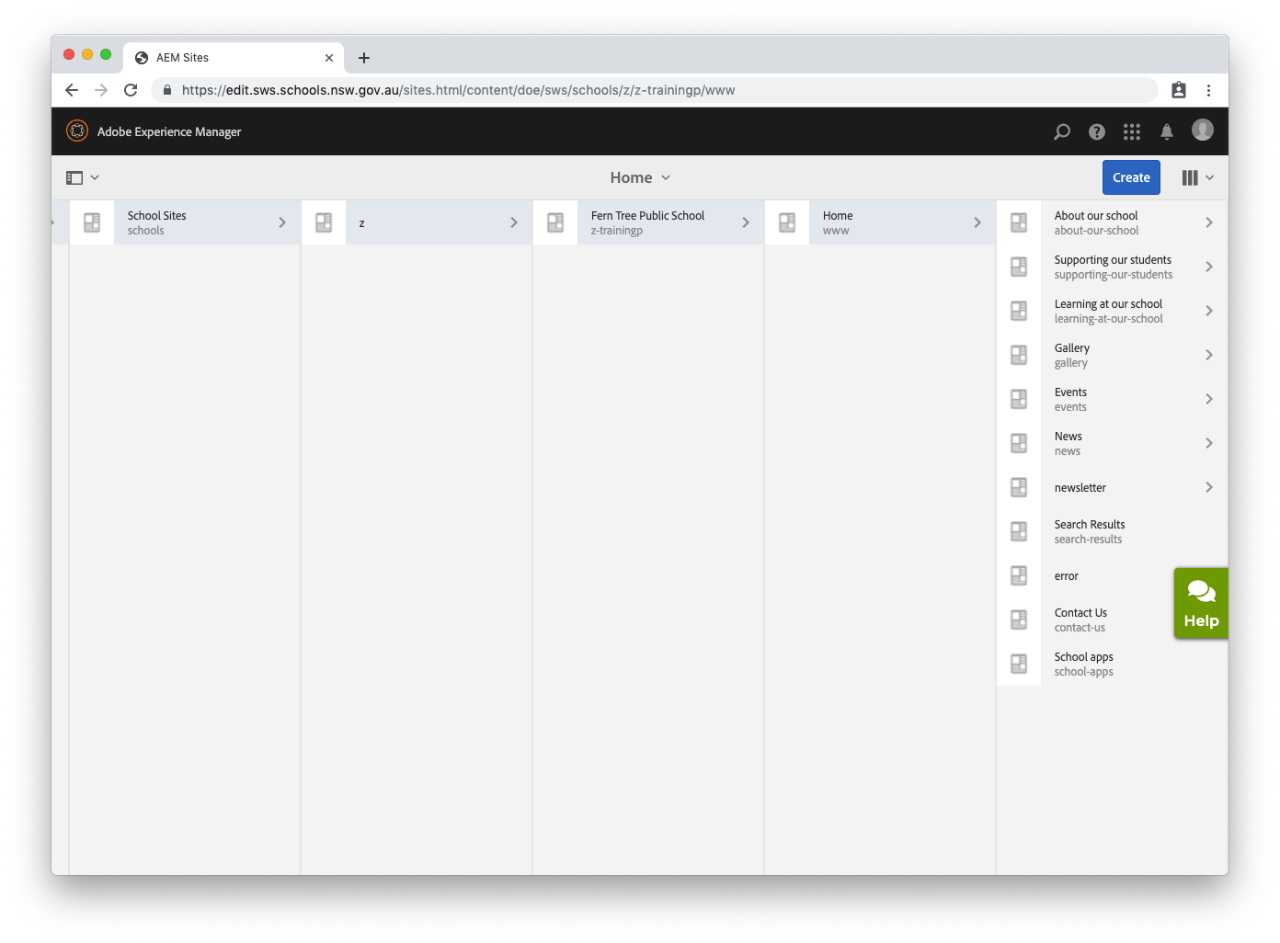
Step 1: Navigate to Home

  • Your school's home page will already be selected.

Step 2: Edit the album page

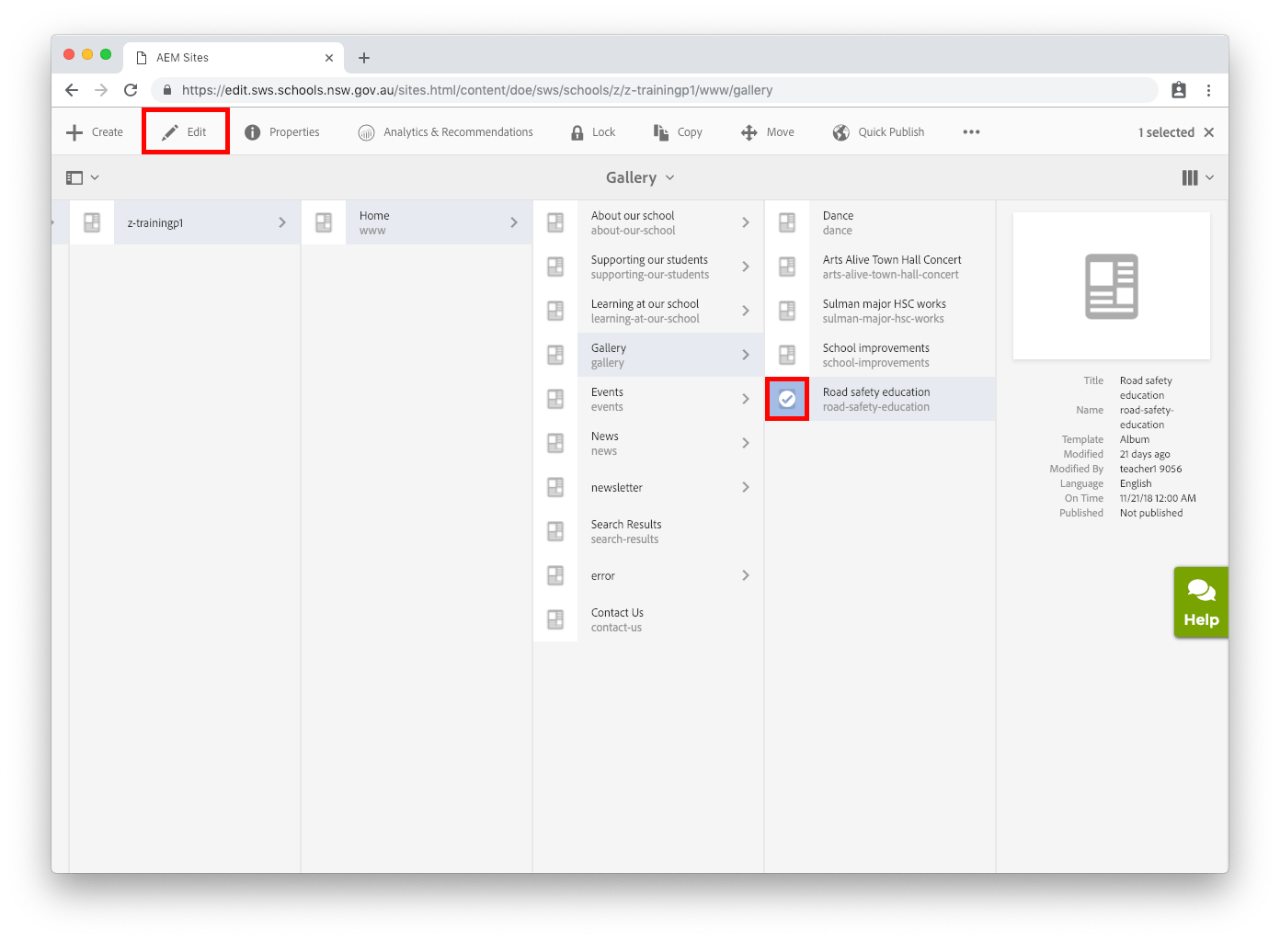
  • Select Gallery.
  • Once you have found your album, select the icon to the left of the file name. The tick will appear and your selection will turn blue. 
  • Select Edit in the menu bar that appears across the top of the screen.

Step 3: Edit your album

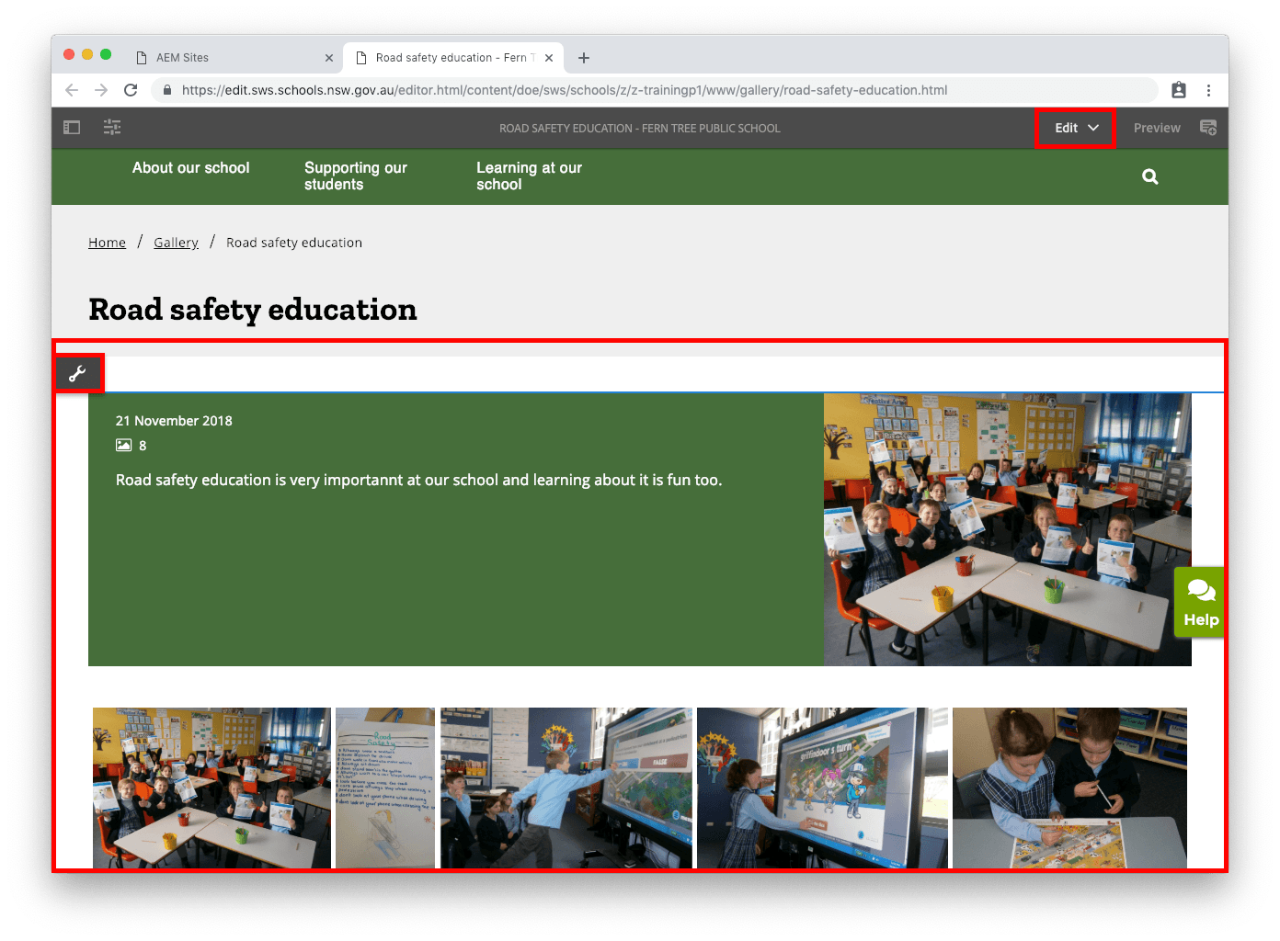
  • Edit should be selected in the top right of the page.
  • Click to activate the album component.
  • Select the spanner icon to edit the album. This is the Configure button. 

Step 4 - optional: Update the album date

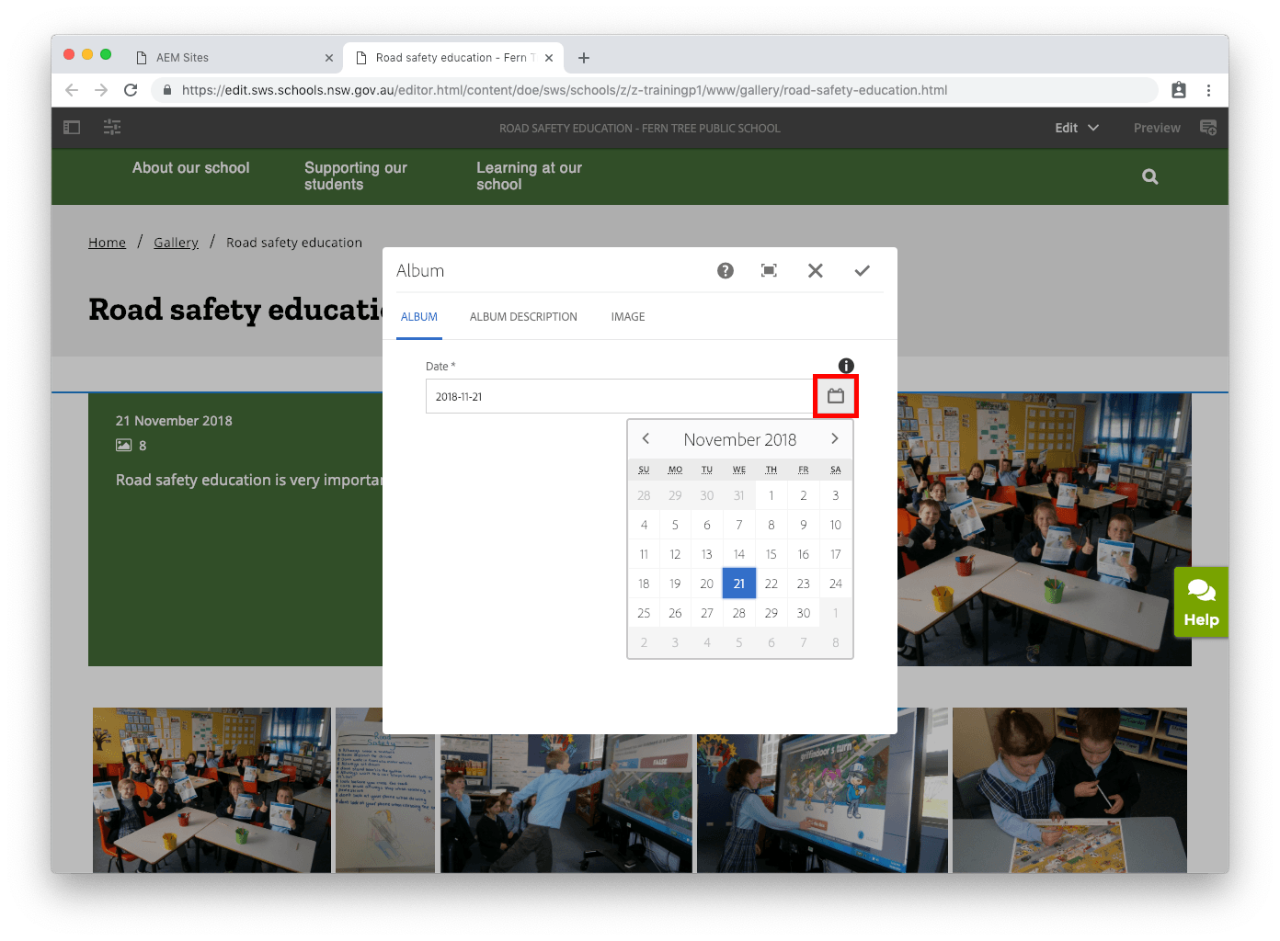
  • Under the Album tab, select the date for your album. This will affect the order it appears. 
  • If you set the date to a day in the future, the album will be hidden until the selected date occurs.

Step 5 - optional: Update the album description

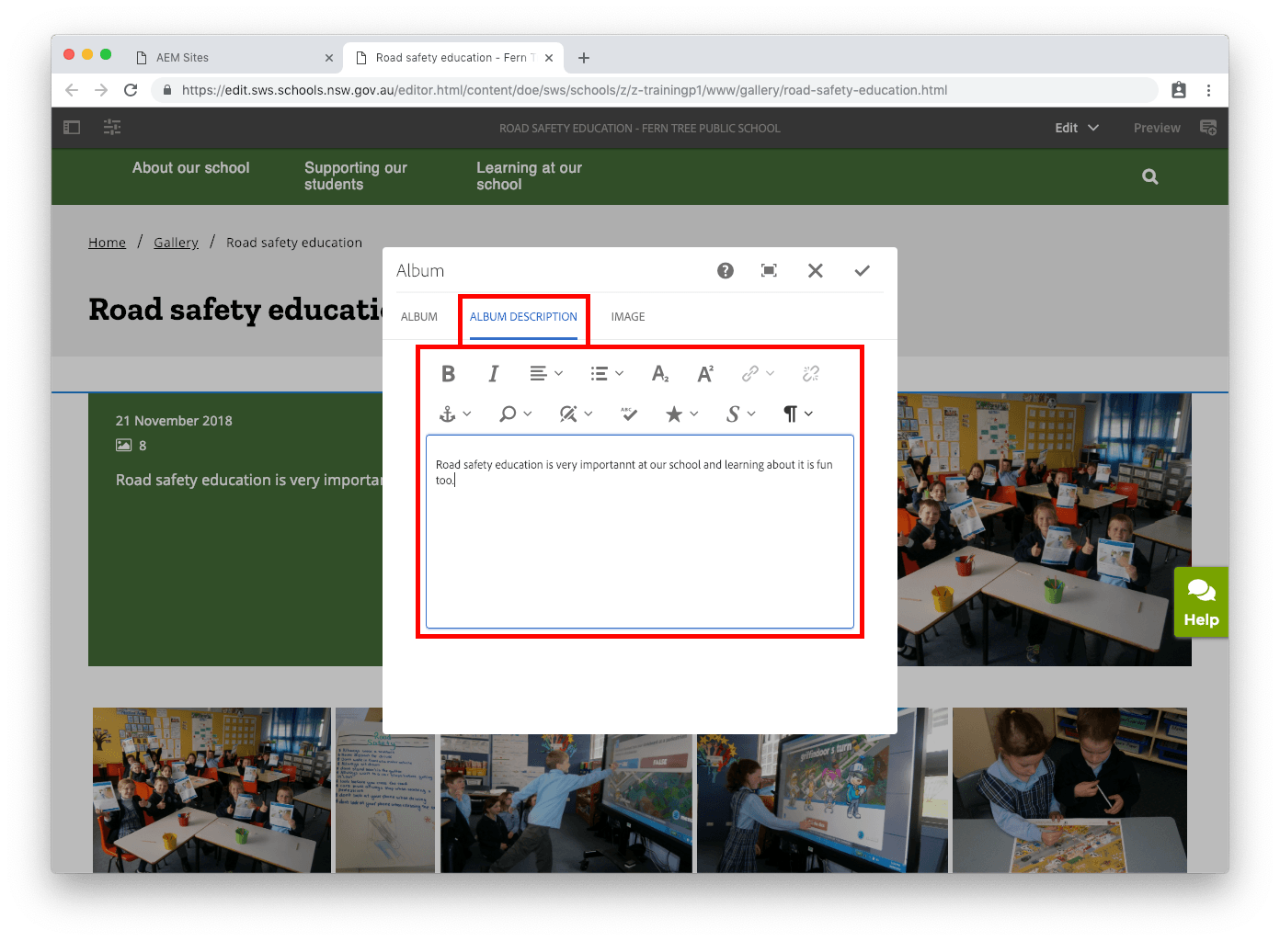
  • Select the Album description tab.
  • Enter a description for your album. This field uses the Rich text editor.

Step 6 - optional: Update the album images

  • Select the Image from local or Image from DAM tab. 
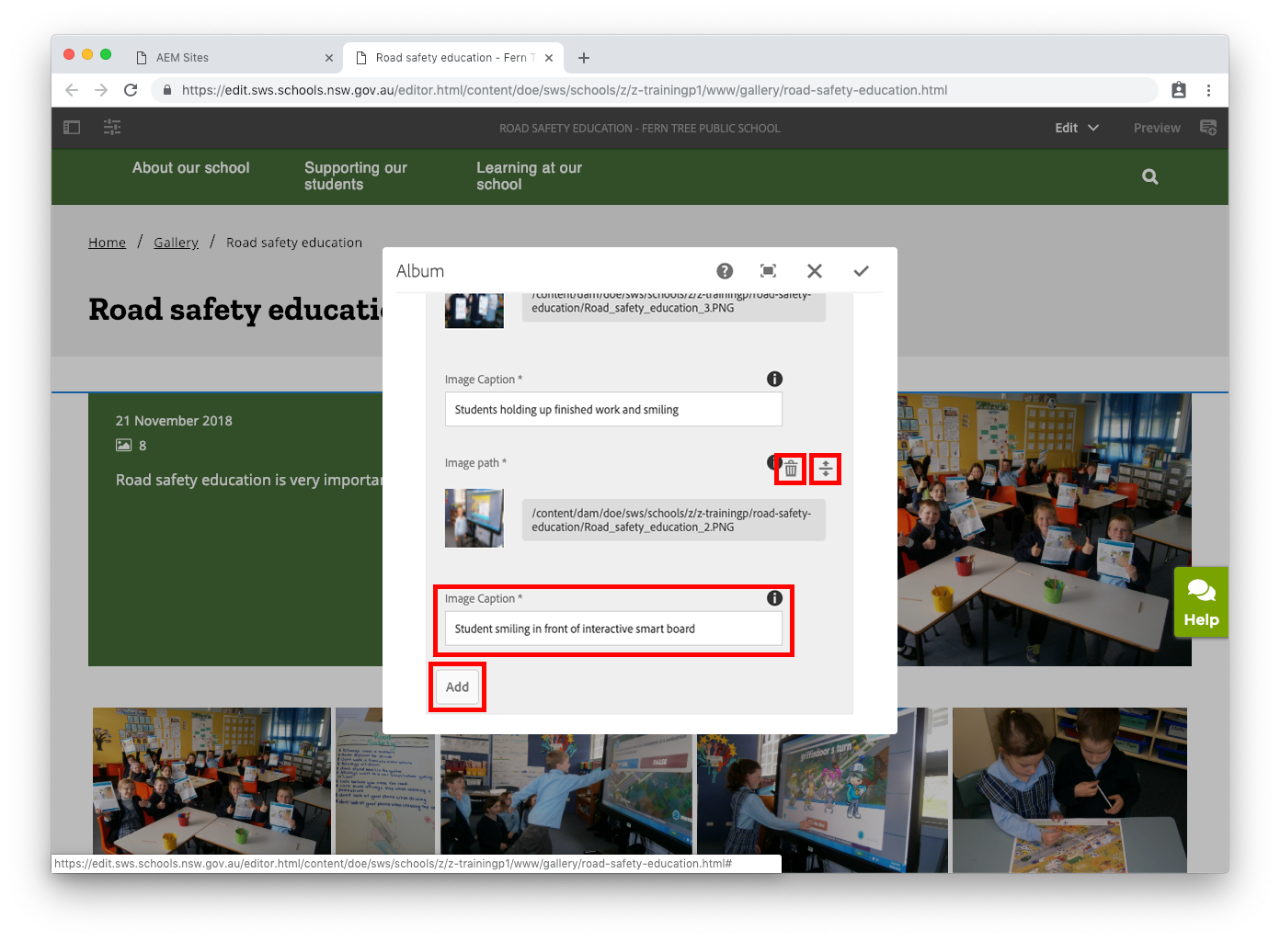
  • Select the Add button to insert more images. The maximum file size is 15MB. Do not exceed 100 photos in an album.
  • If you selected Image from local, you can drag-and-drop or upload images from your computer.
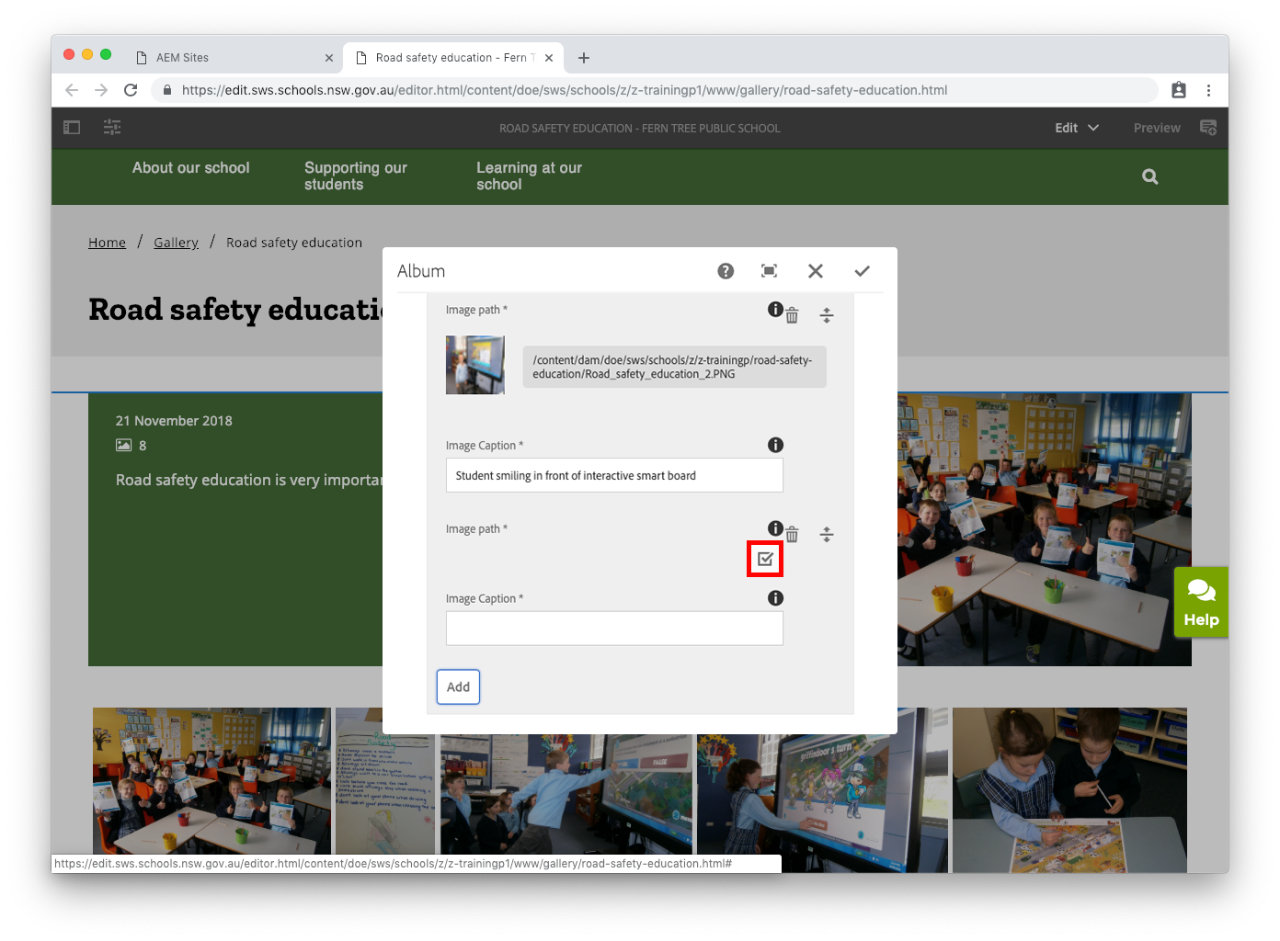
  • If you selected Image from DAM, in the Image path field, select the tick icon to navigate through your Assets to your school's album folder where you previously uploaded your images.
  • Optional: Select Automatically add a caption to all images if you want to add a caption quickly to all of your images. NOTE: We recommend you do not add more than 30 images at a time.

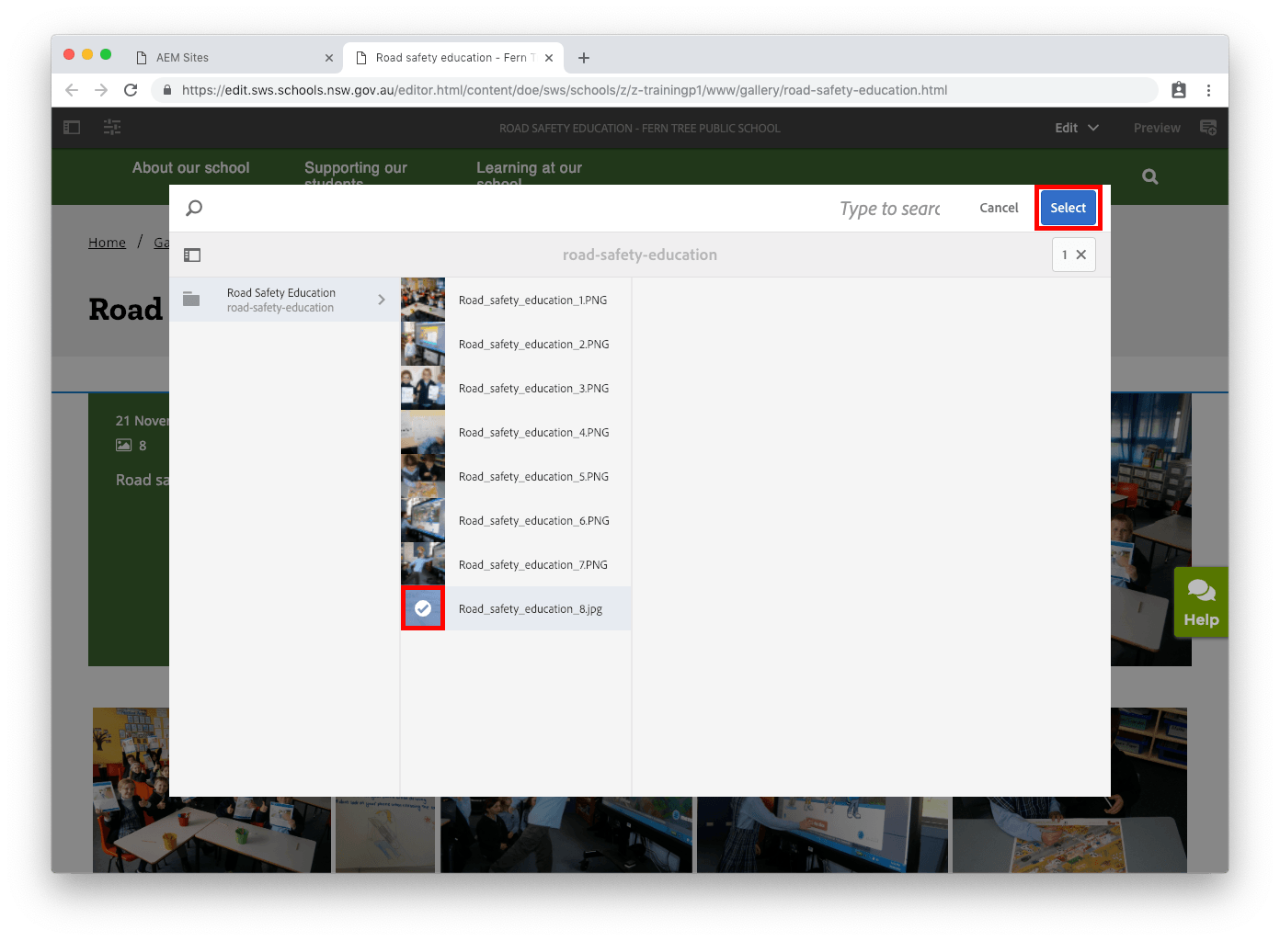
  • Once you have found your image, select the icon to the left of the image name. The tick will appear and your selection will turn blue. You may also choose to select more than one image.
  • Click on the Select button in the top right. 

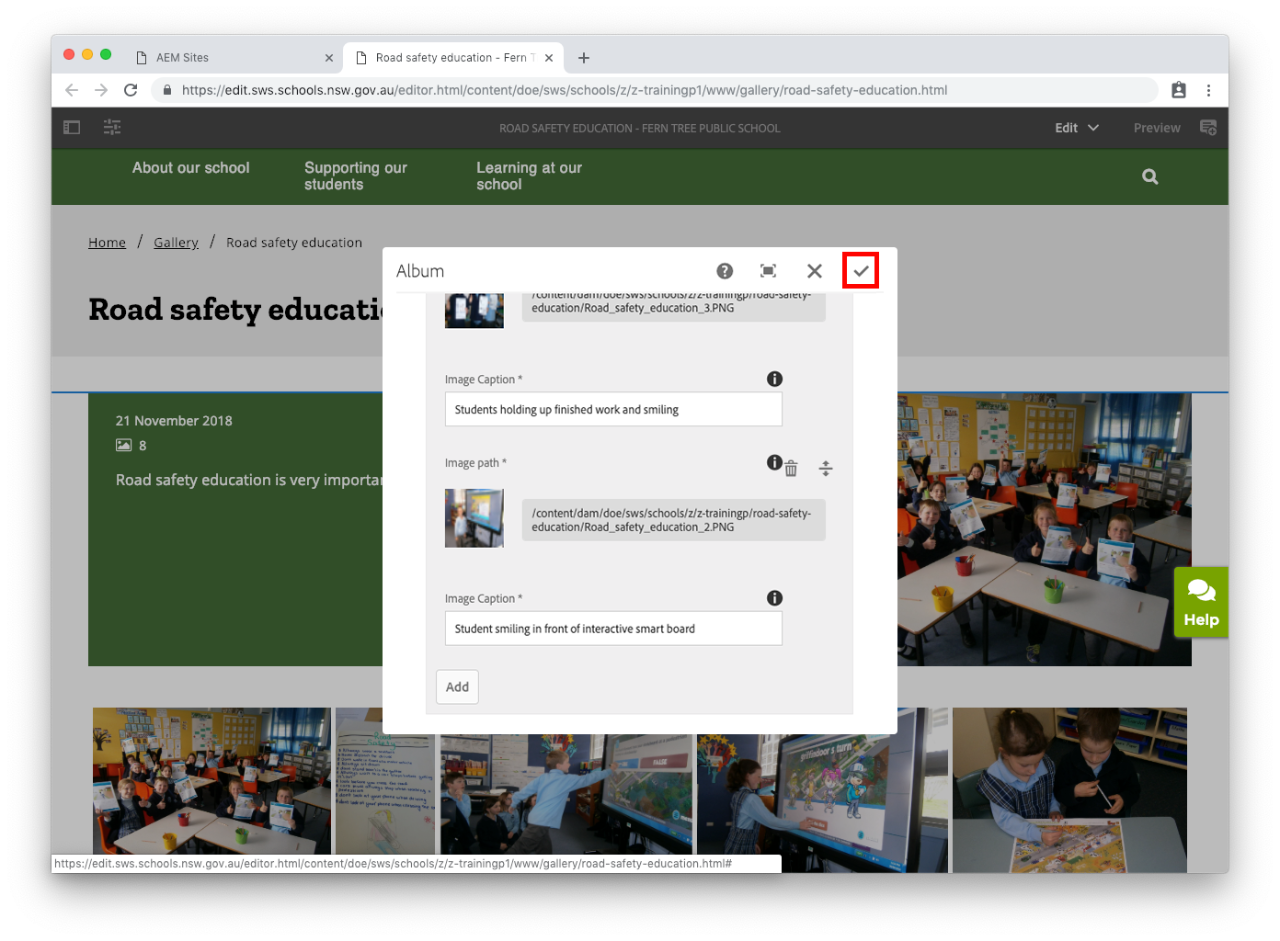
  • Select the tick on the top right of the pop-up to save the settings. 

  • Update the alternative text for your image in the Image Caption field. See the Image guidelines for more information on alt text.

  • To reorder your images, select the arrows and line icon (to the right of the bin icon) to drag-and-drop each image. TIP: Use Toggle fullscreen to expand the view. 
  • The image at the top of the list becomes the thumbnail image for the album on the gallery page and the homepage image gallery component. NOTE: If you have used both 'Image from local' and 'Image from DAM' to add images, the top image under 'Image from DAM' will be used as the thumbnail.
  • To delete an image, select the bin icon.

Step 7: Publish the album

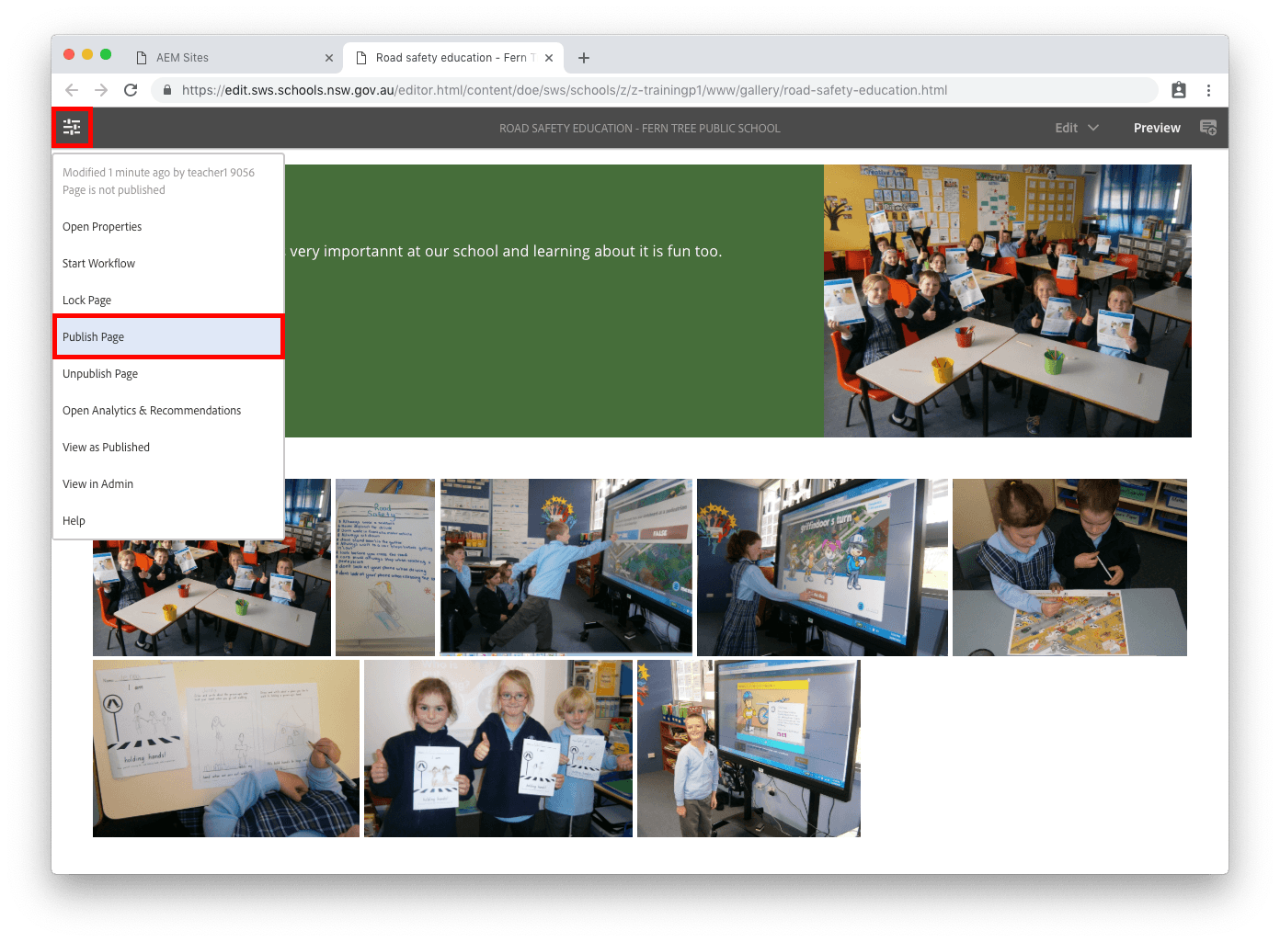
  • Select the slider icon in the top left corner. This is the Page Information button.
  • Select Publish Page from the drop-down. 
  • If you don't see Publish Page you are an Author and will need to select Start Workflow instead. Go to our Author publish a page for more information.

Related content