School website service training and support logo

School website service training and support

School website service training and support

School footer

Use this guide to change what appears in the School footer area on your school's website.

The School footer is the area at the bottom of your school's website that displays information about your school.

Features

The School footer displays your school's:

  • name
  • address
  • telephone number
  • email address
  • get directions link
  • follow us section
  • logo
  • acknowledgement text.

Example School footer: 

Go to our Social Links guide to learn how to add or remove social media accounts from your school's website. This will affect the Follow us section.

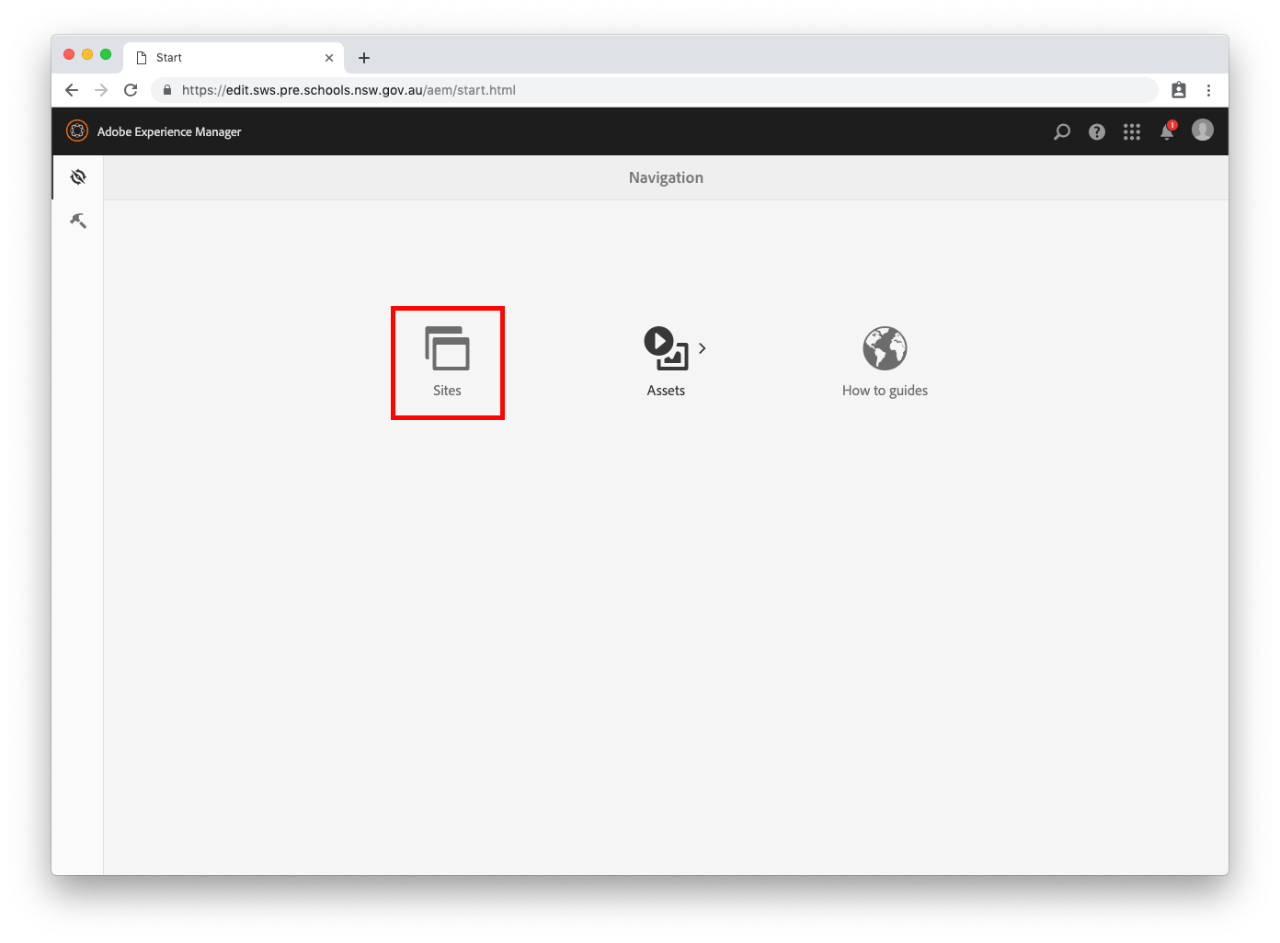
Step 1: Navigate to the homepage

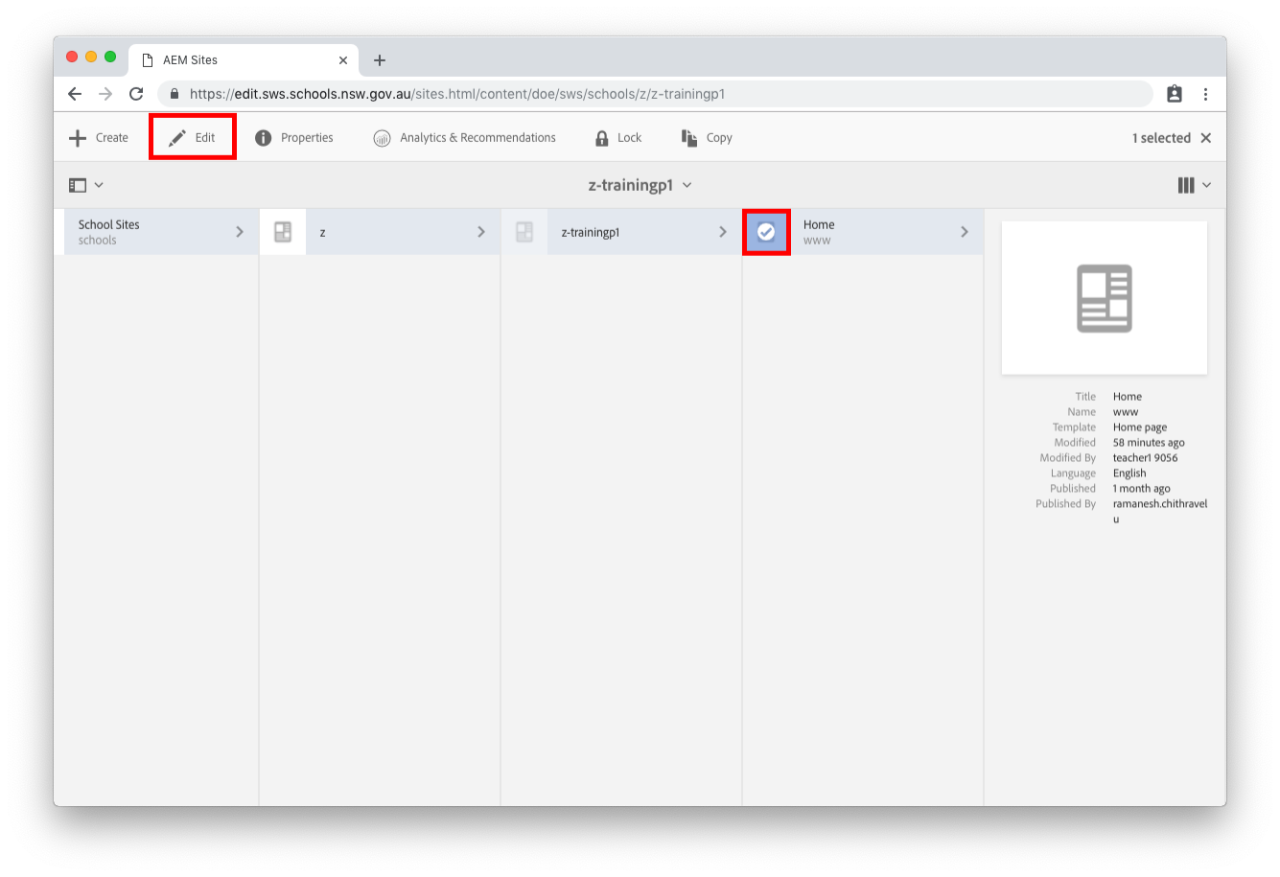
  • Your school's home page will already be selected.
  • Select the icon to the left of Home. The tick will appear and your selection will turn blue.
  • Select Edit in the menu bar that appears across the top of the screen. 

Step 2: Open the properties of the homepage

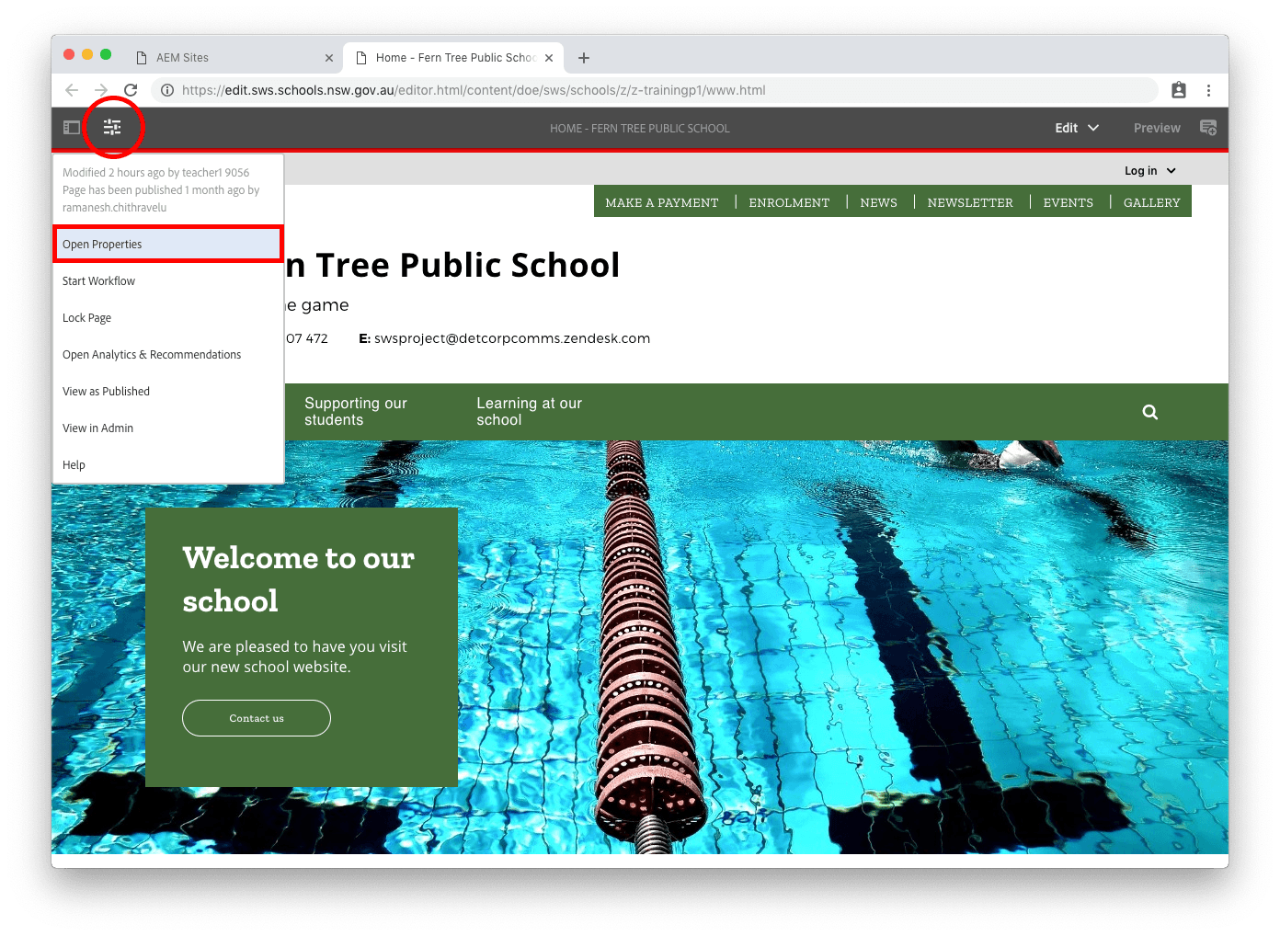
  • Look to the dark grey bar across the top of your page.
  • Select the slider icon in the top left corner. This is the Page Information button.
  • Select Open Properties from the drop-down. 

Step 3: Update School footer information

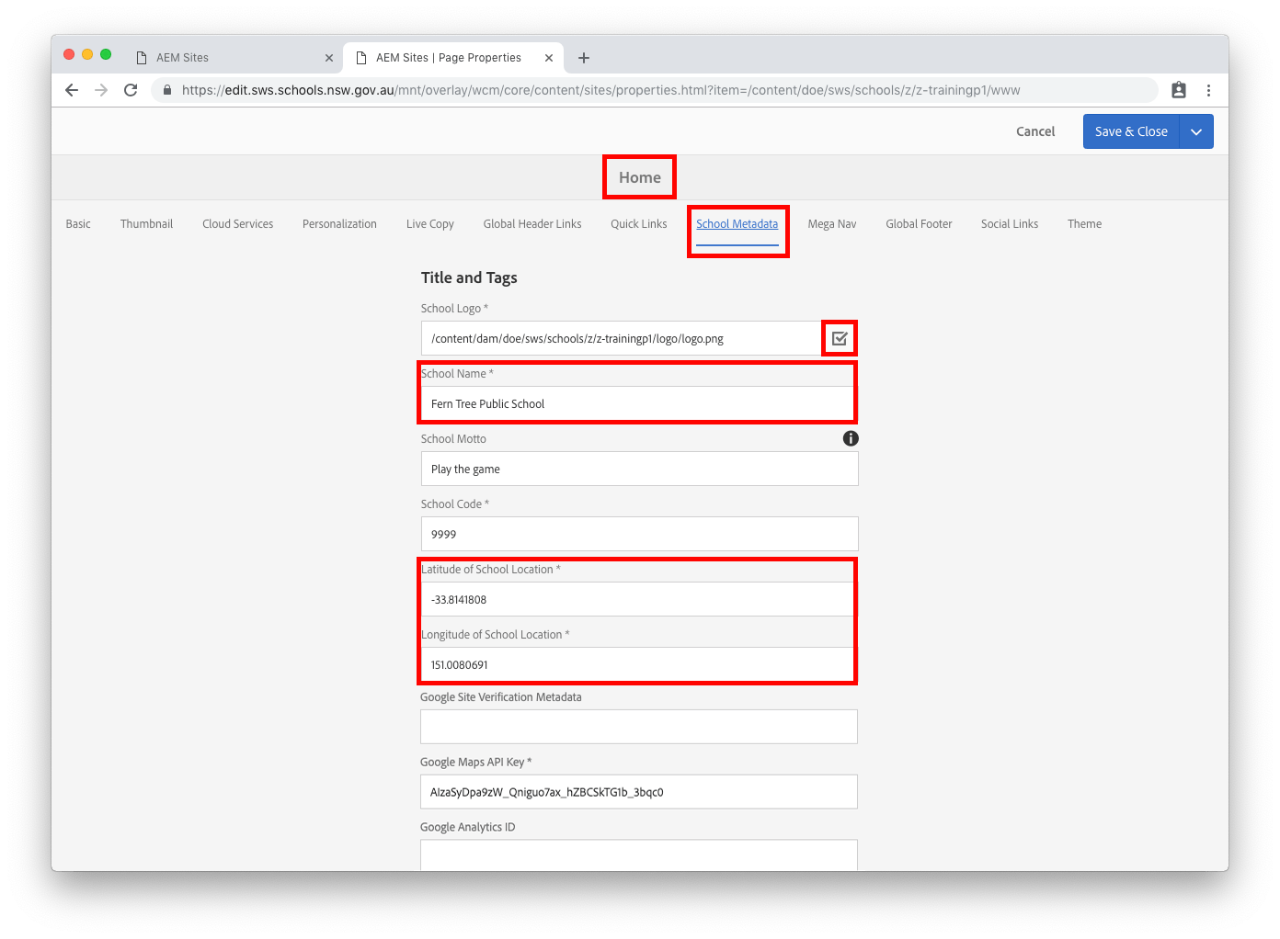
  • Select School Metadata tab to update information in the School footer.
  • Update the school name by changing the text in the School Name field. This will also change the name that appears in the School header.
  • In the Latitude of School Location field and Longitude of School Location field you can update the Get Directions link. Use the Get coordinates from Google Maps guide if you would like to find your school's coordinates.
  • In the School Logo field, select the tick icon to choose a different school logo. Follow step 4.

Step 4: Select a school logo

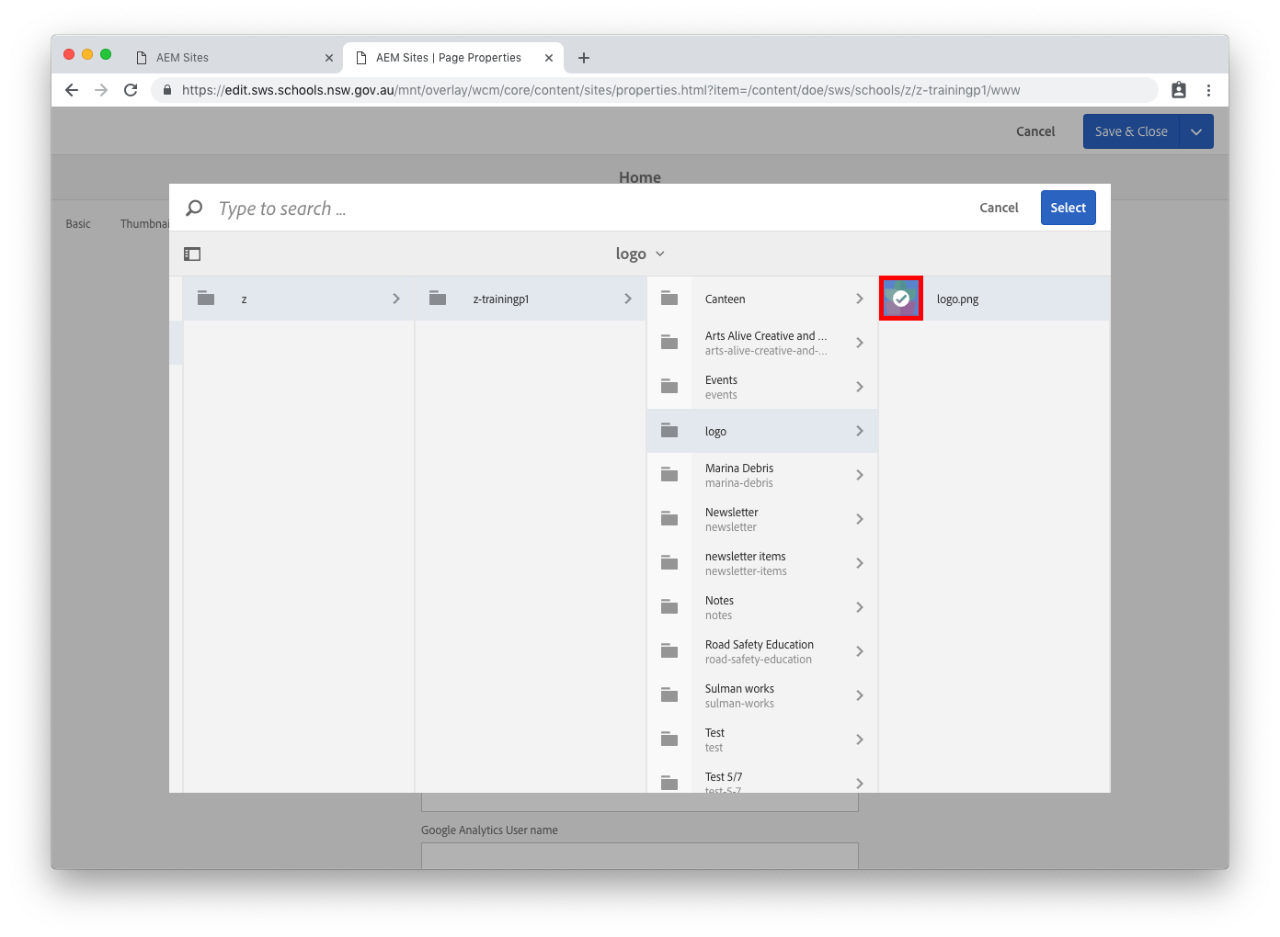
  • Navigate through your assets to folder where you have previously saved your school logo image.
  • Once you have found your logo, select the icon to the left of the file name. The tick will appear and your selection will turn blue.
  • Select the Select button in the top right. 

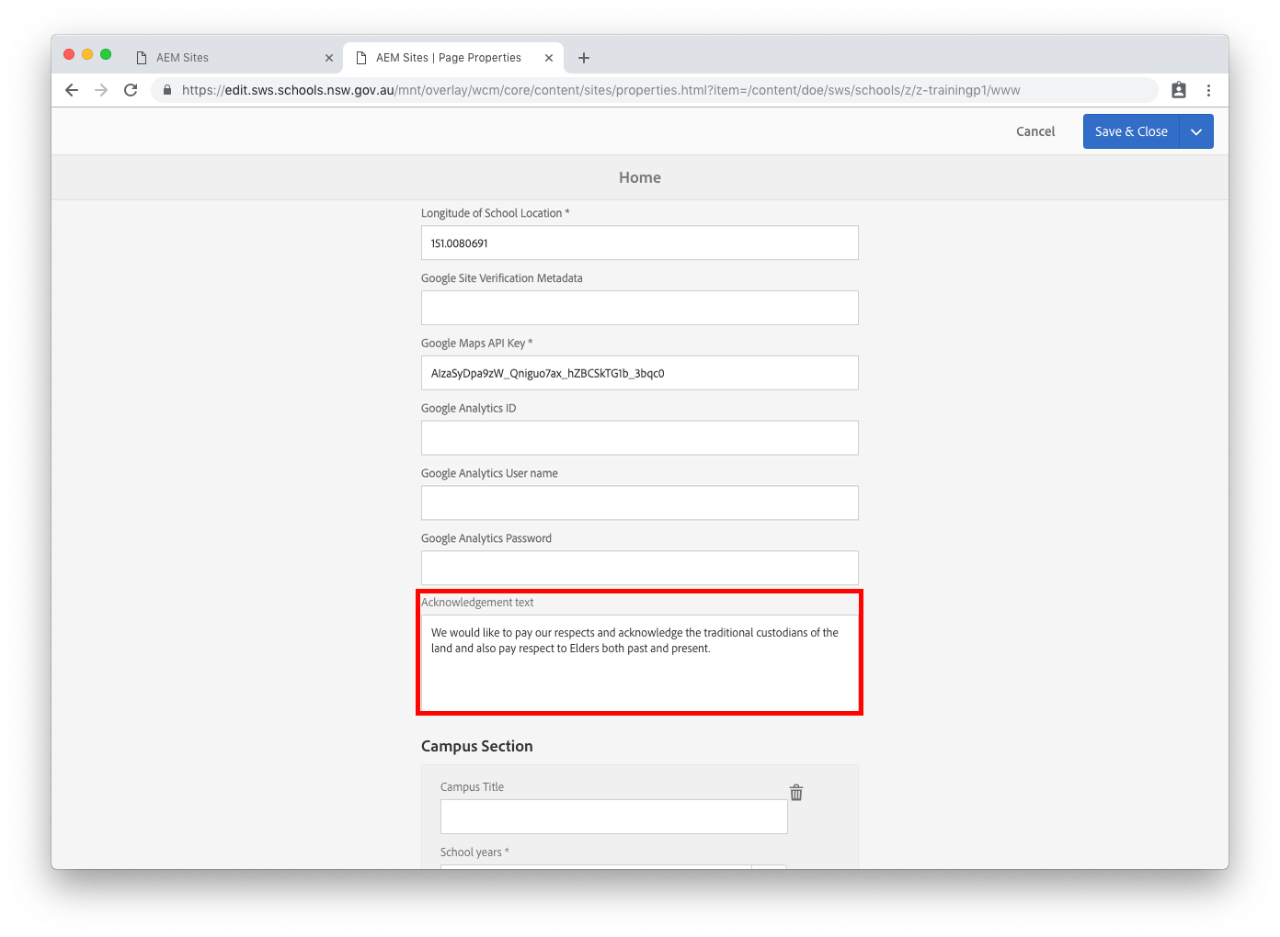
Step 5: Update acknowledgement text

  • Update the acknowledgement of country text by adding or changing the text in the Acknowledgement text field.

Step 6: Campus section

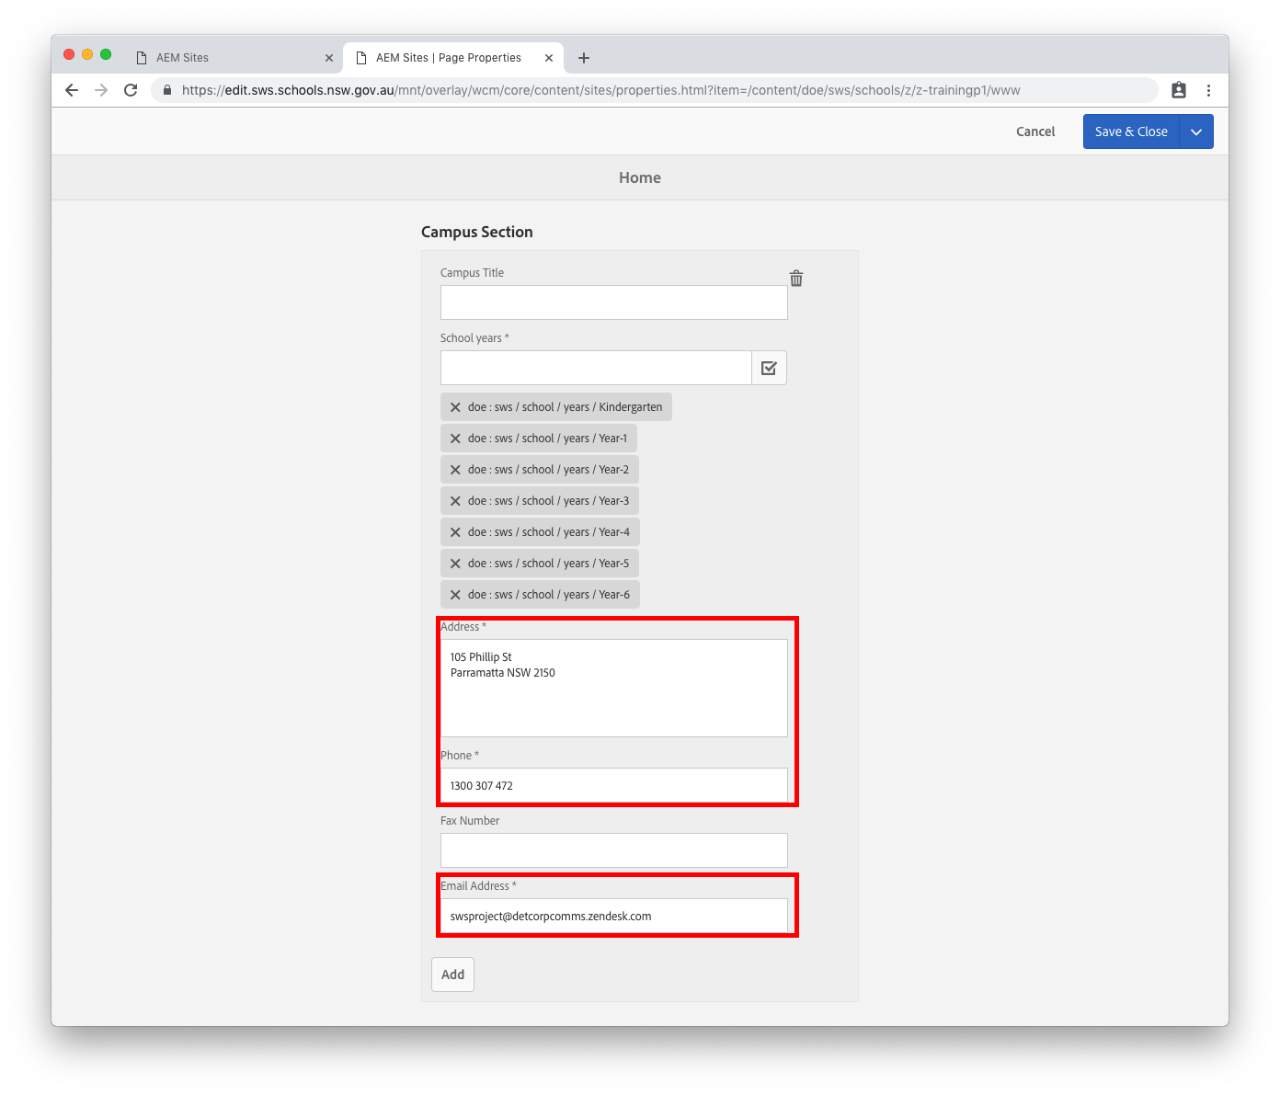
  • In the  Address field you can update the school's address.
  • In the Phone field you can update the school's telephone number. This will also change the telephone number that appears in the School header.
  • In the Email Address field you can update the school's email address. This will also change the email address that appears in the School header.
  • In the website address field you can enter the website address for the campus. This is useful when a school has more than one campus and they have individual websites for each campus.
  • Select Save & Close to save and view your changes.

Step 7: Publish the homepage

  • For changes to be updated on your live school website you will need to publish the page.
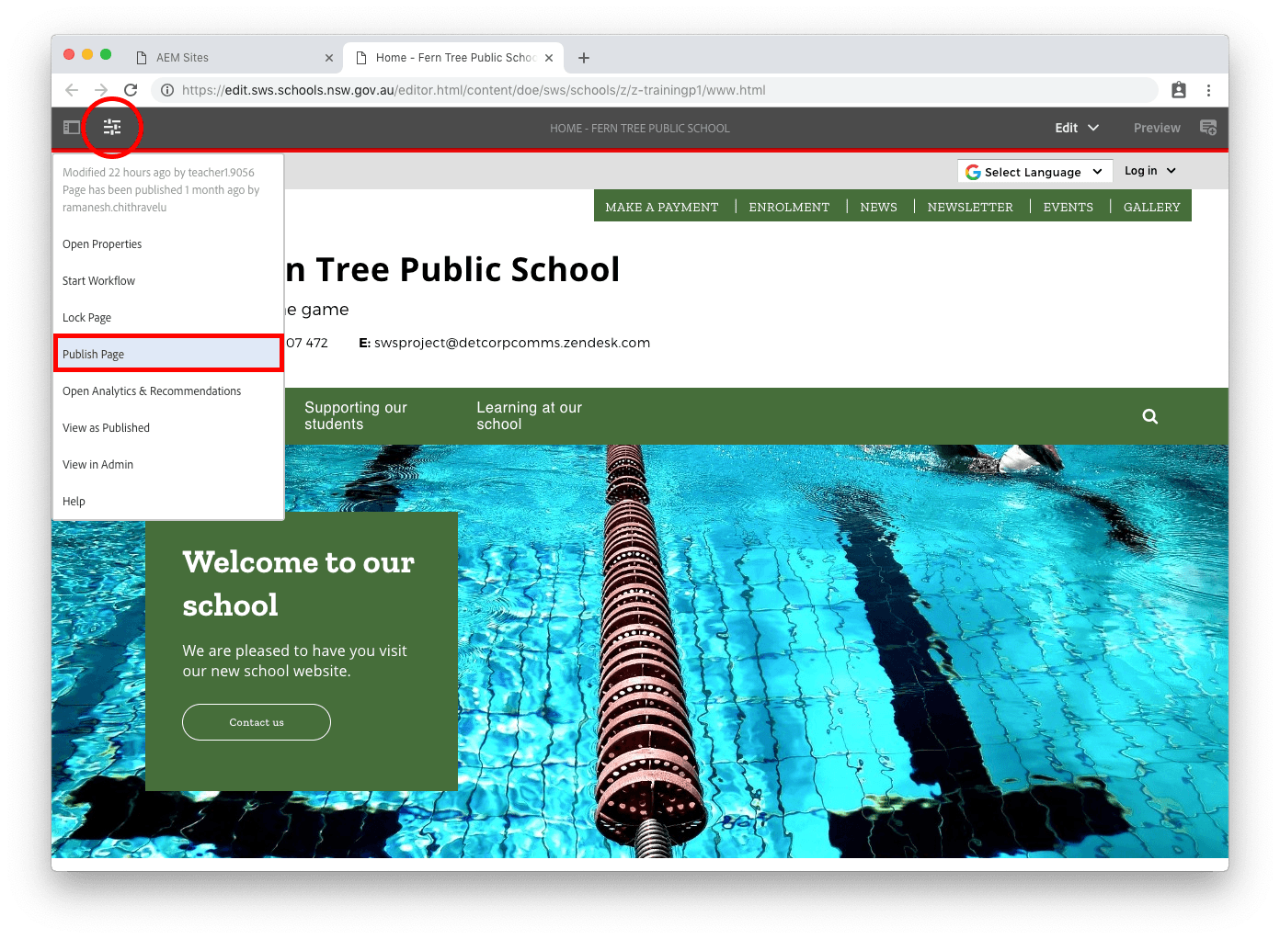
  • Select the slider icon in the top left corner. This is the Page Information button.
  • Select Publish Page from the drop-down. 
  • If you don't see Publish Page you are an Author and will need to select Start Workflow instead. Go to Author publish a page for more information.