School website service training and support logo

School website service training and support

School website service training and support

Article

Use this guide to add and edit the article component.

Features

The component:

  • allows you to write an article description
  • displays a single image
  • allows your displayed image to align left or right
  • wraps article description text around the image
  • can be used on the homepage, content page, and inside the column control on these pages.

Before you start

You will need to have an image for your article.

When you add images to your website it is important that you follow the Image guidelines

You need to upload the image to Assets before you can add it to an article component. Go to our Upload an image to assets guide.

Navigate to the page where you want to add an article and you are ready to begin. 

Step 1: Add article component

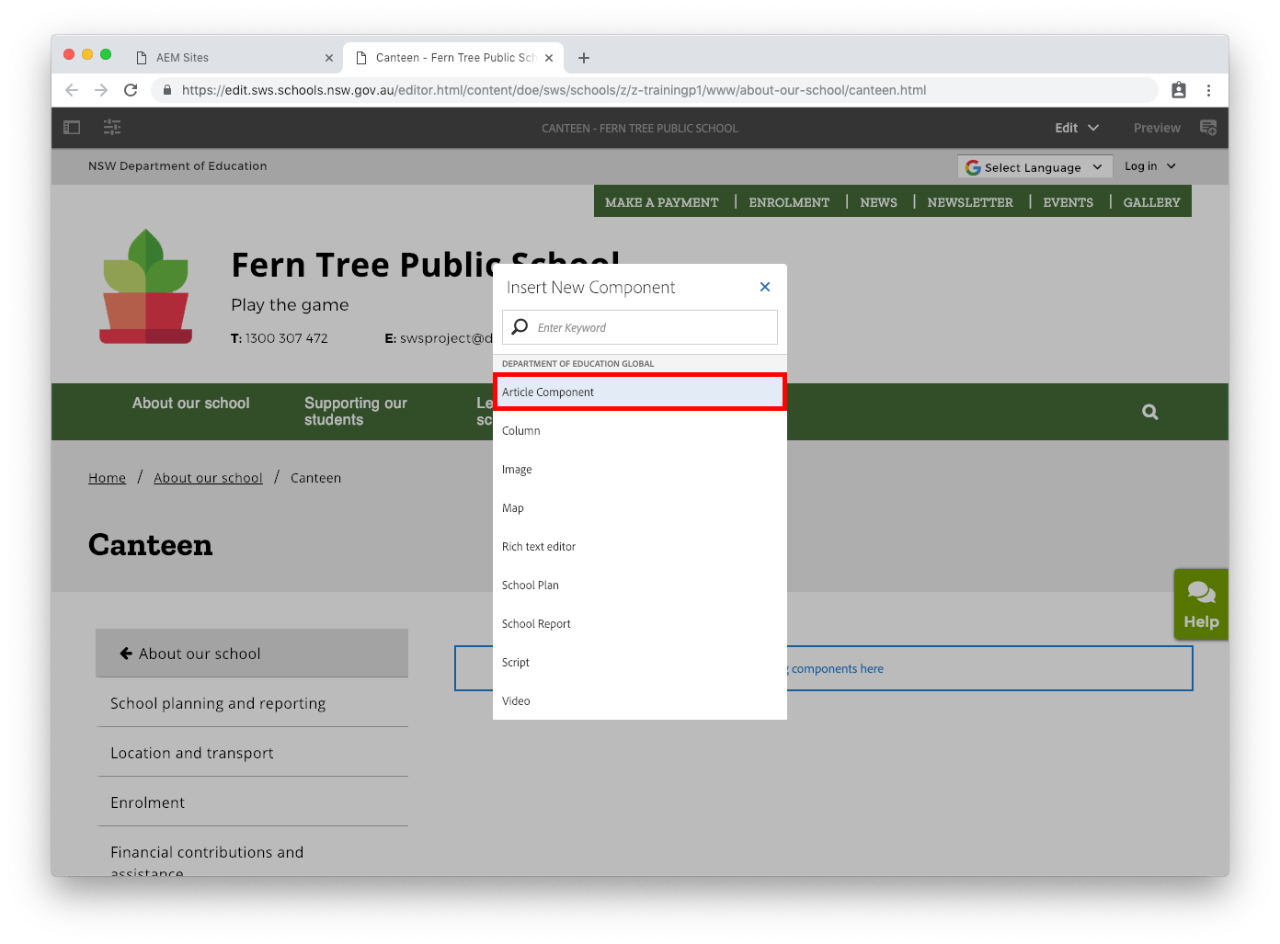
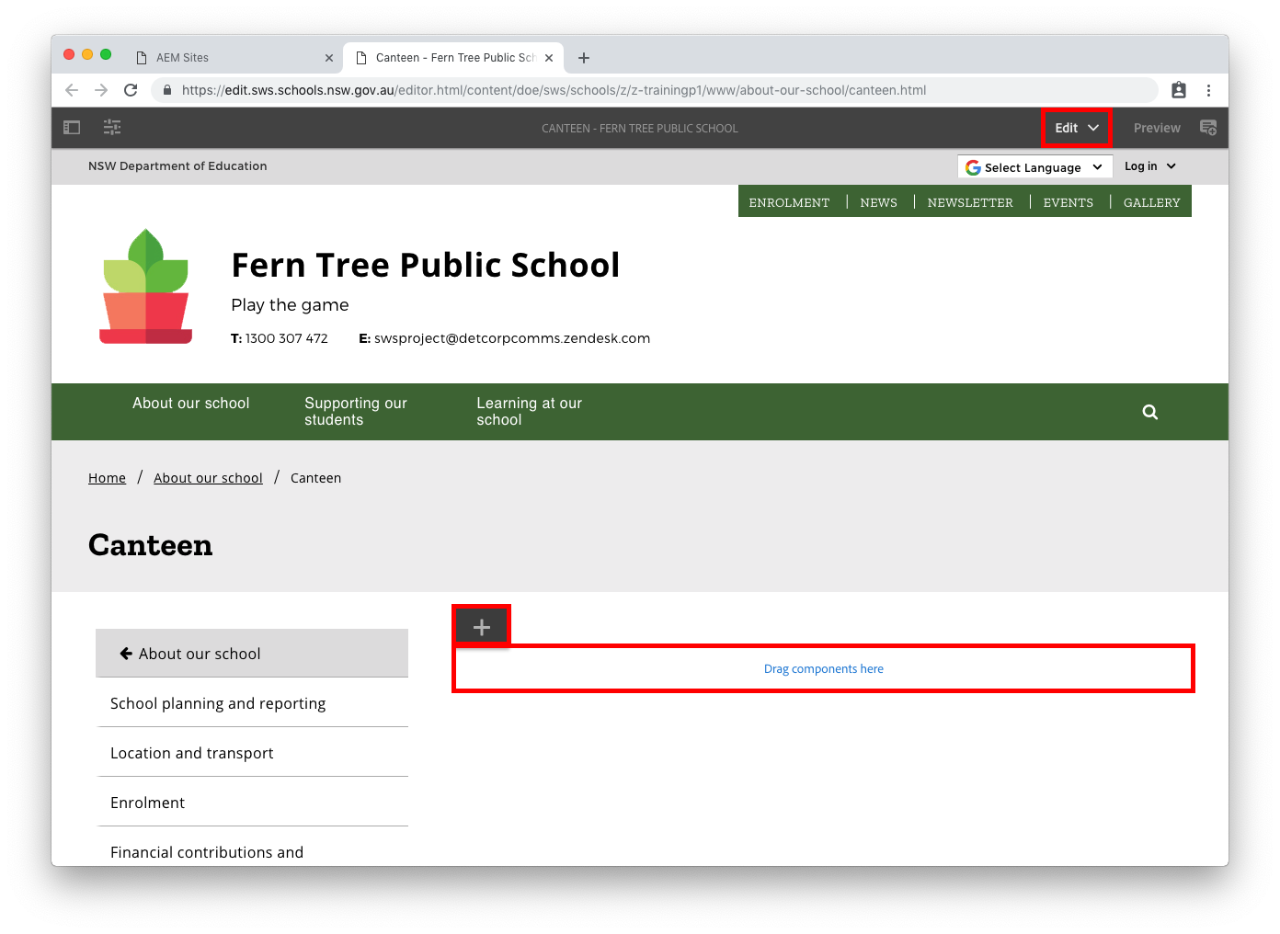
  • Select Drag components here.
  • Select the plus icon.

  • Select Article Component from the Insert New Component list.

Step 2: Edit the article component

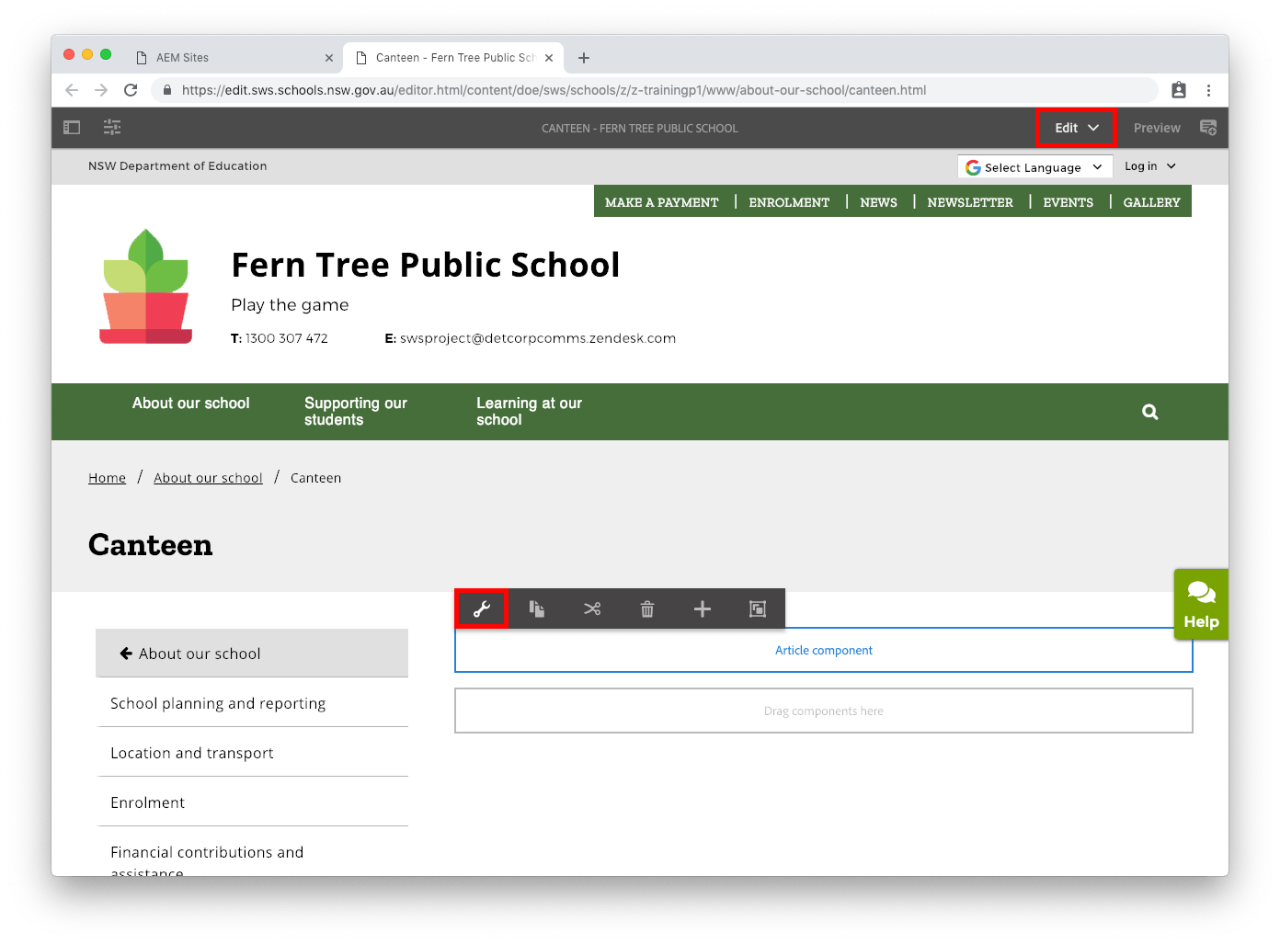
  • Select the Article component.
  • Select the spanner icon. This is the Configure option. 

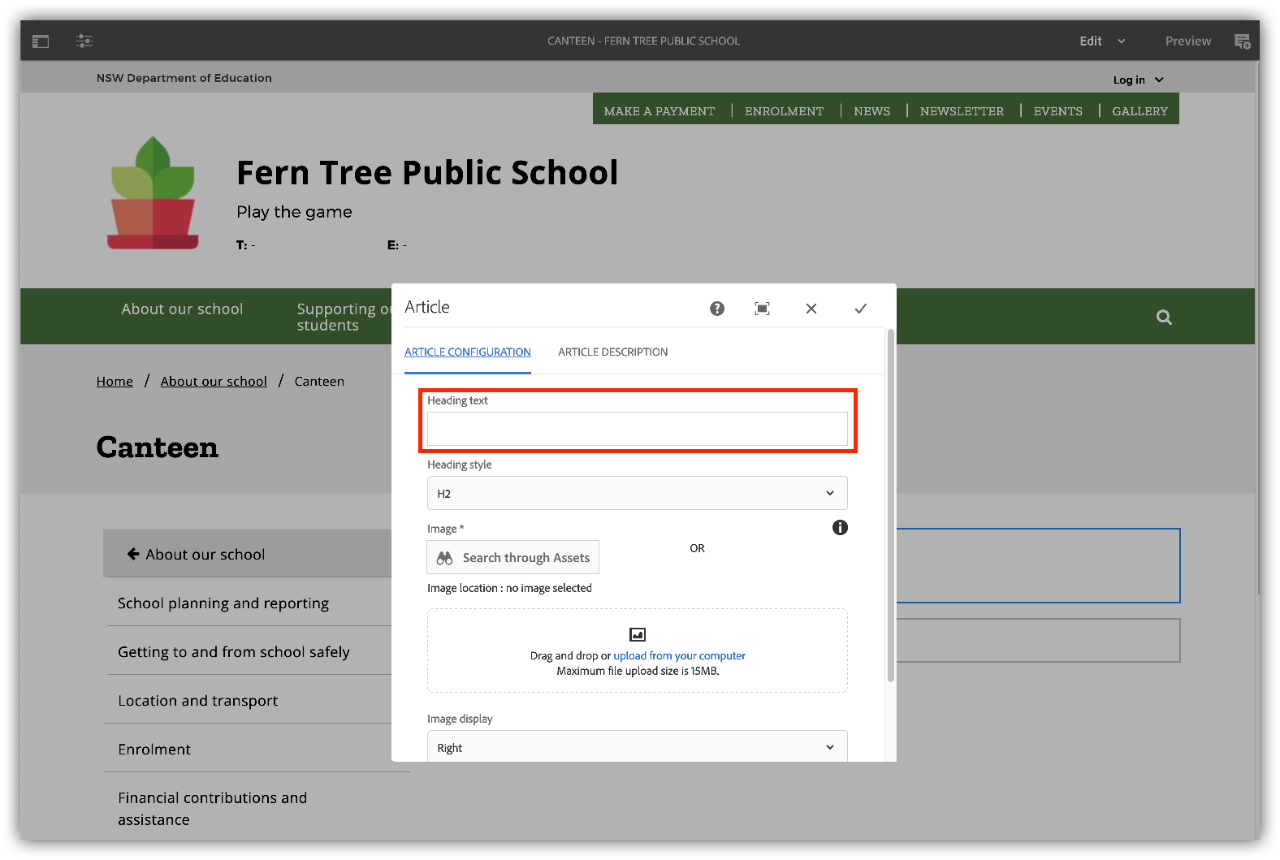
Step 3: Enter the article title

  • In the Heading text field, enter the title of your article. For example: Bike safety education.

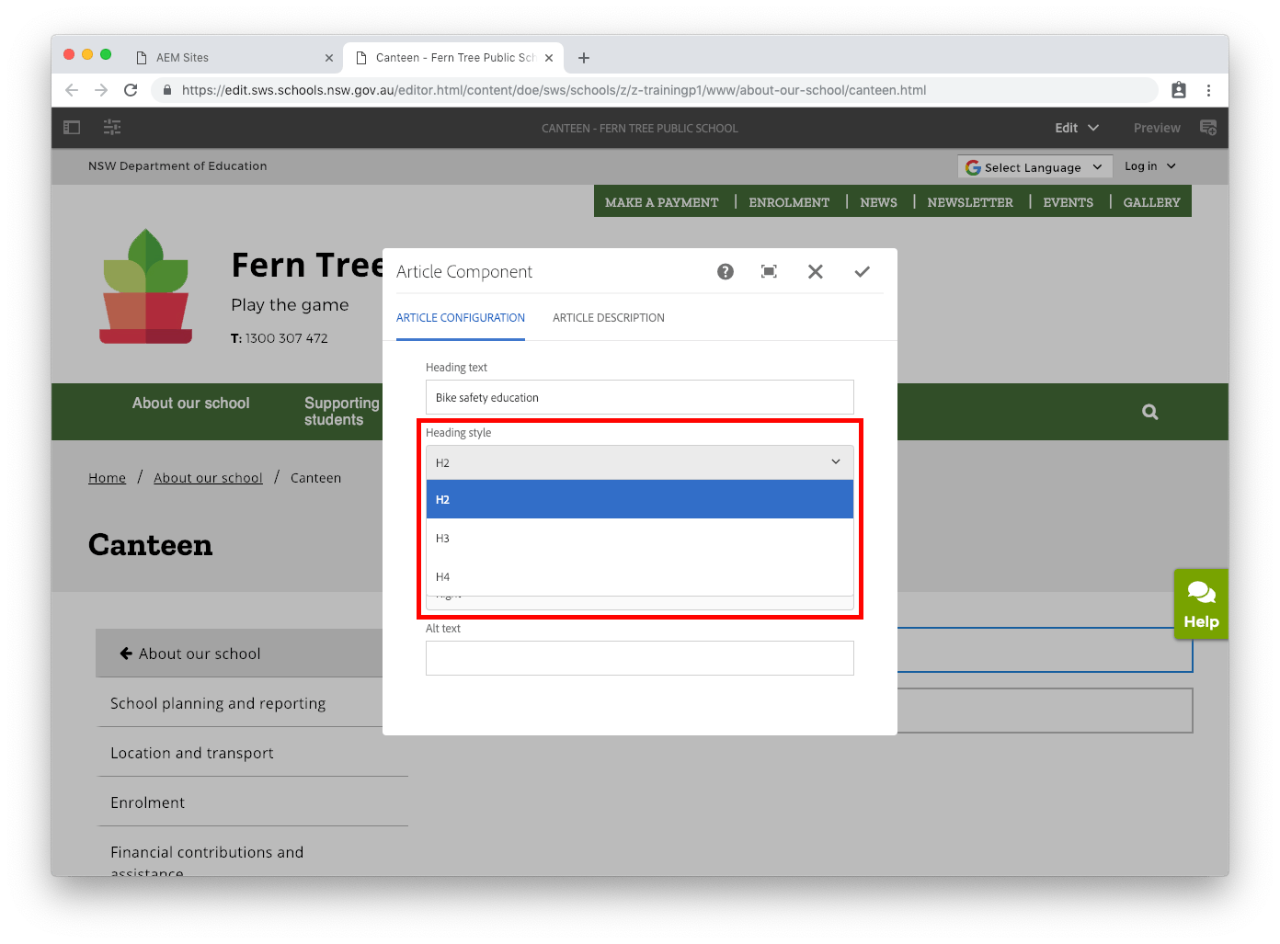
  • Select the Heading style of your article. A drop-down will appear with the heading levels that you can choose from.
  • Remember to follow heading structure and not skip a heading. For example, do not follow a Heading 2 with a Heading 4. Use Heading 3. For more information on heading levels, see the accessibility guidelines.

Step 4: Add an image to your article 

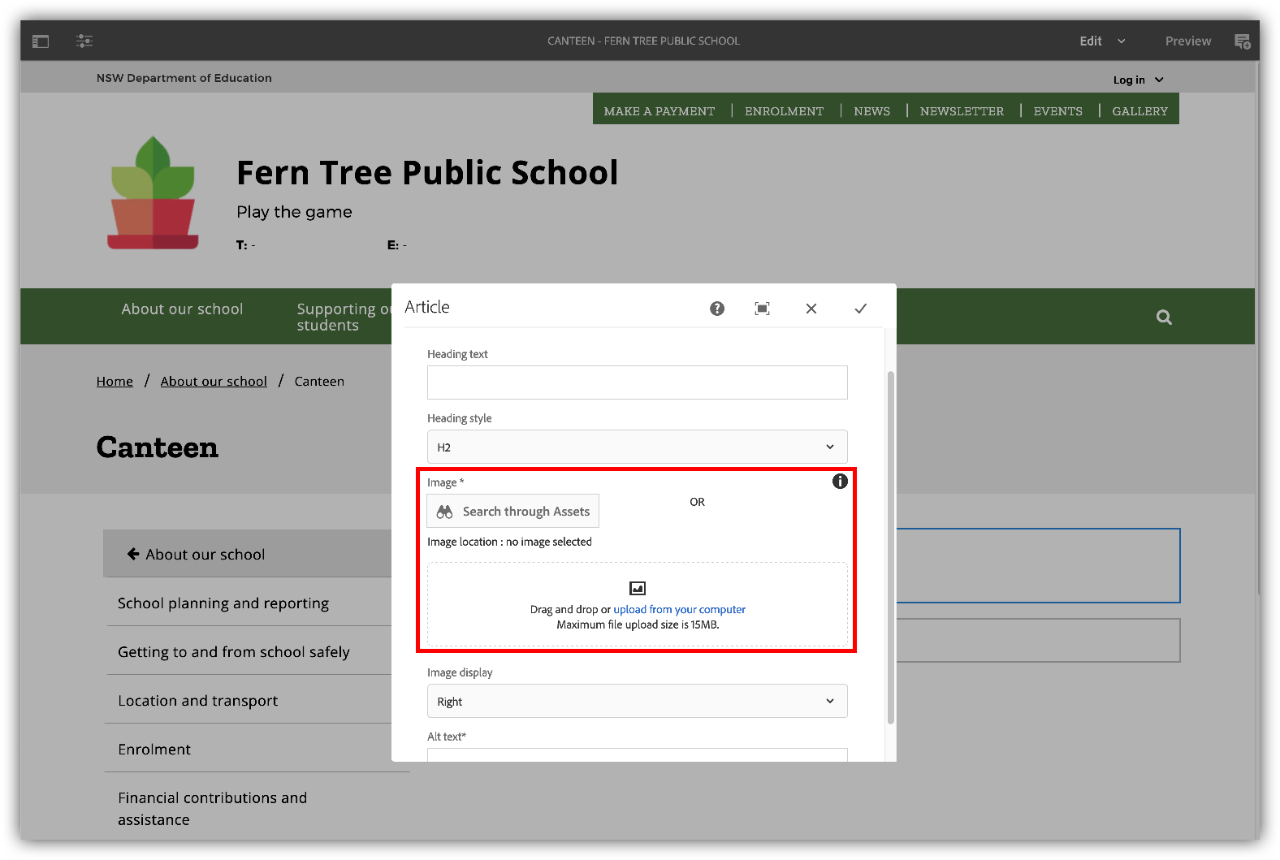
  • Your article must have an image. You can add a news article image to the Image field.

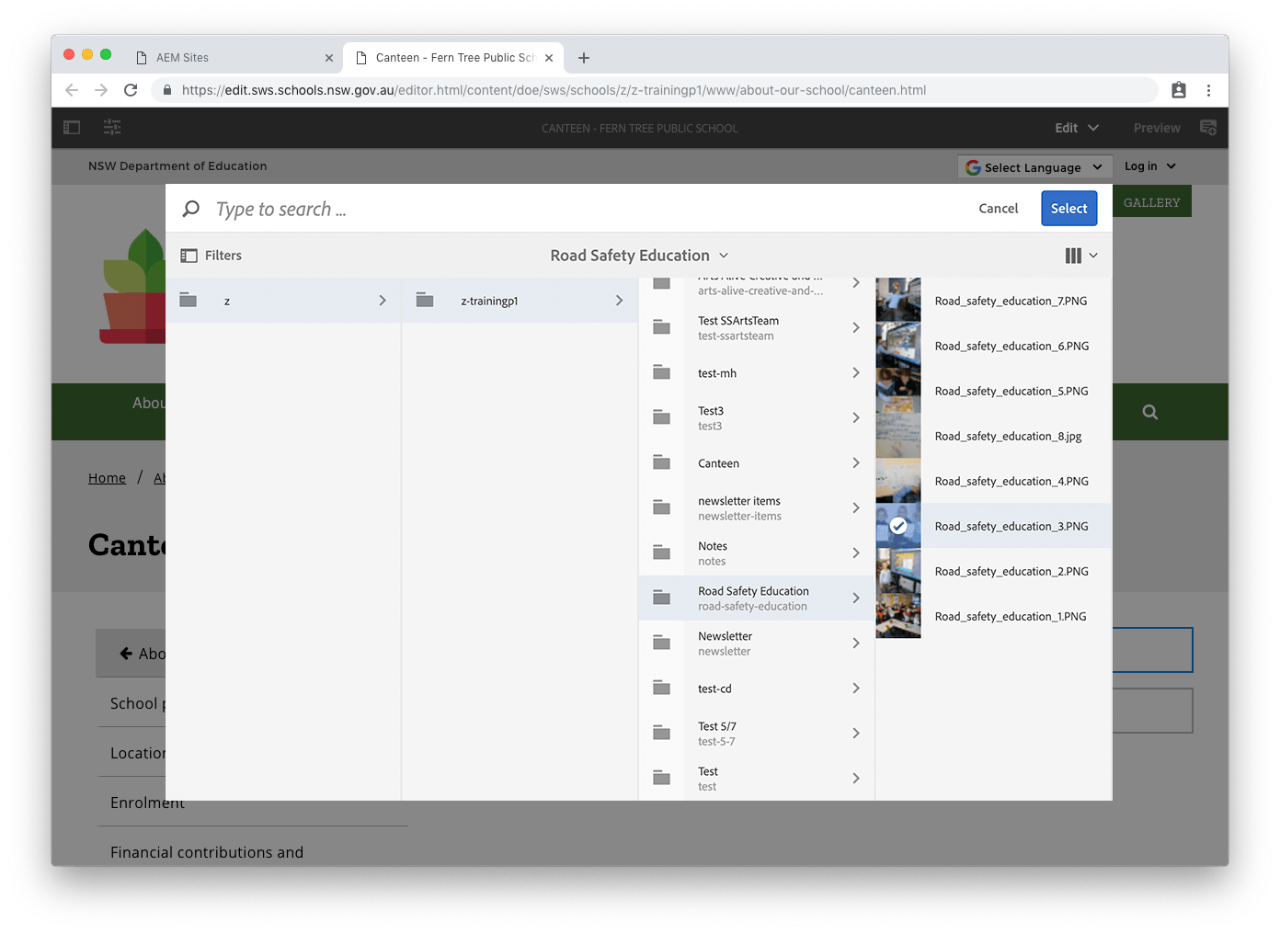
  • In the Image path field, select the binoculars (Search through assets) to navigate through your image and document assets to where you have previously saved your image.
  • Once you have found your image, select the icon to the left of the image name. The tick will appear and your selection will turn blue.
  • Select the Select button in the top right.

Alternatively:

  • Drag and drop your image into the area on the component, or choose the upload from your computer link to upload the file directly without searching through assets. The maximum file size using this method is 15MB.

  • The image path appears in the Image path field.
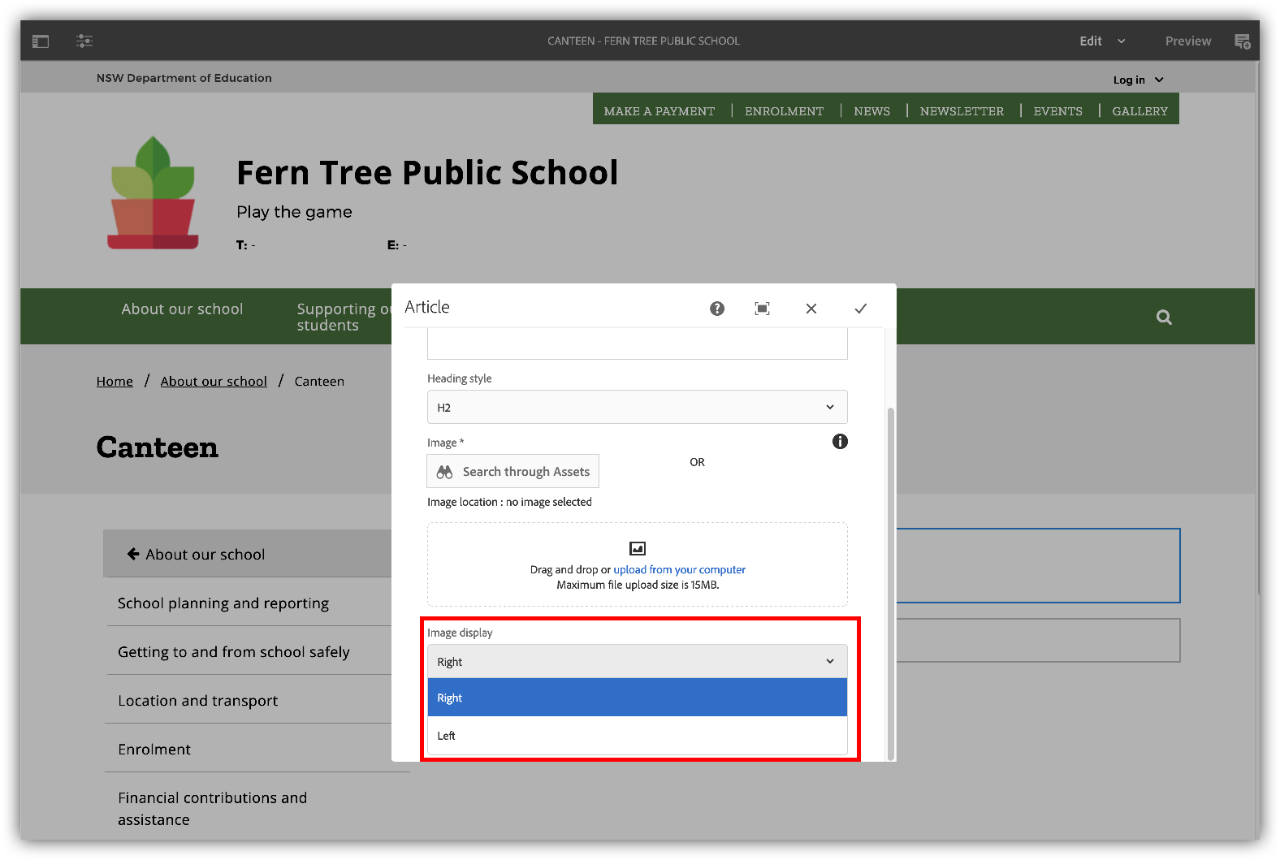
  • Select Image display. A drop-down will appear and you can select left or right. This will allow your text to wrap around the image on the side not selected. For example, if you choose right the image will display on the right, and the text will wrap around on the left.

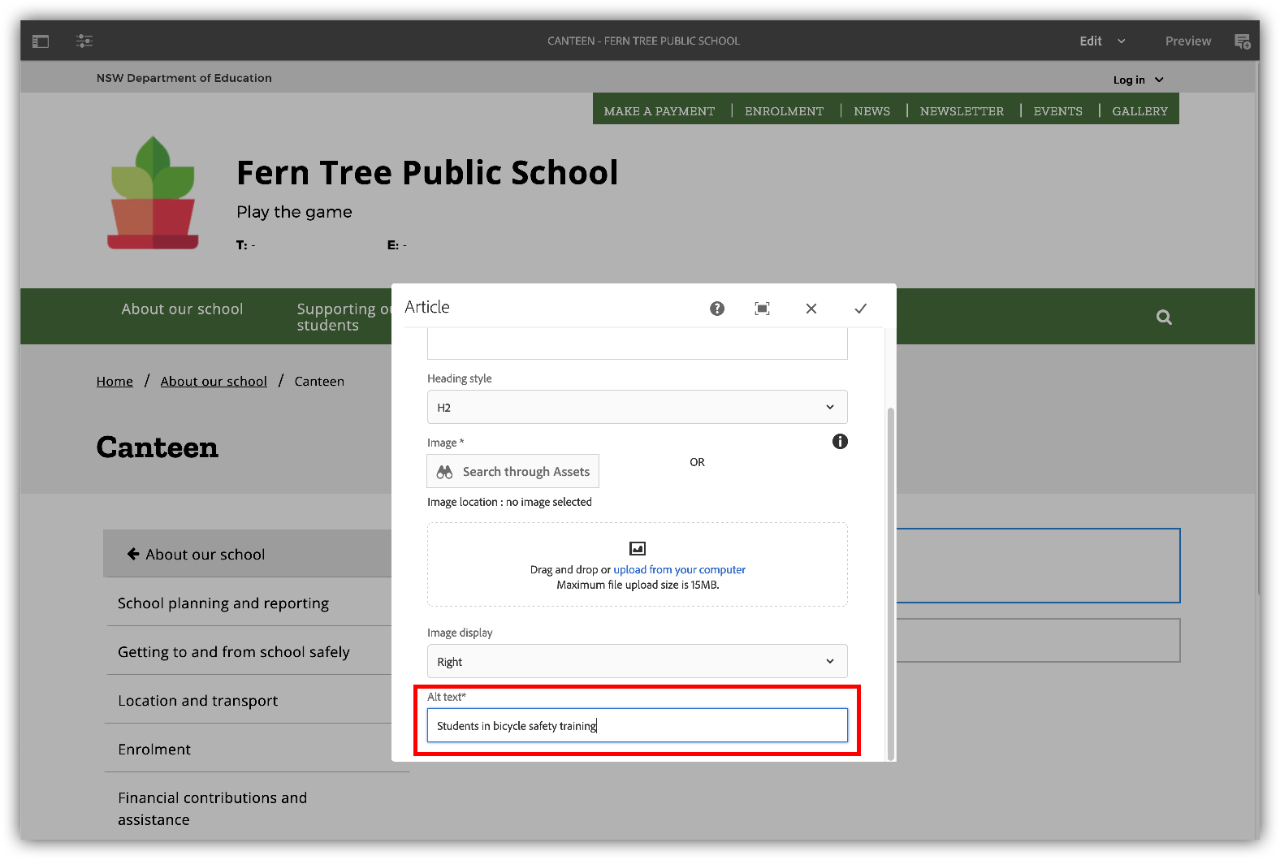
  • Enter the alternative text for your image into the Alt text field.
  • See the Image guidelines for more information on alt text.

Step 5: Write your article

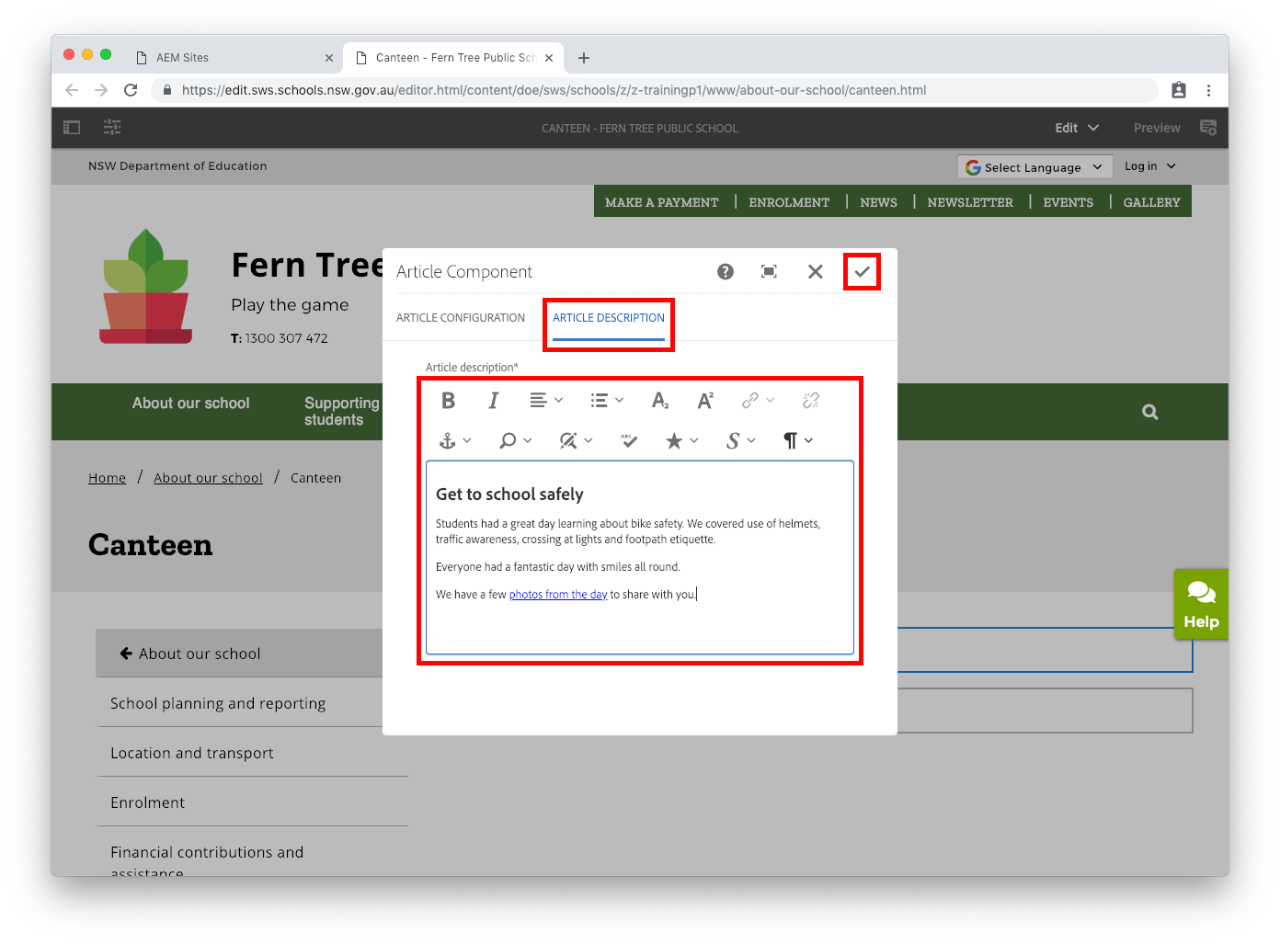
  • Select Article description tab. 
  • Enter your article content. You can use the rich text editor to format your article. See Rich text editor to learn more.
  • Select the tick on the top right of the pop-up to save the article component.

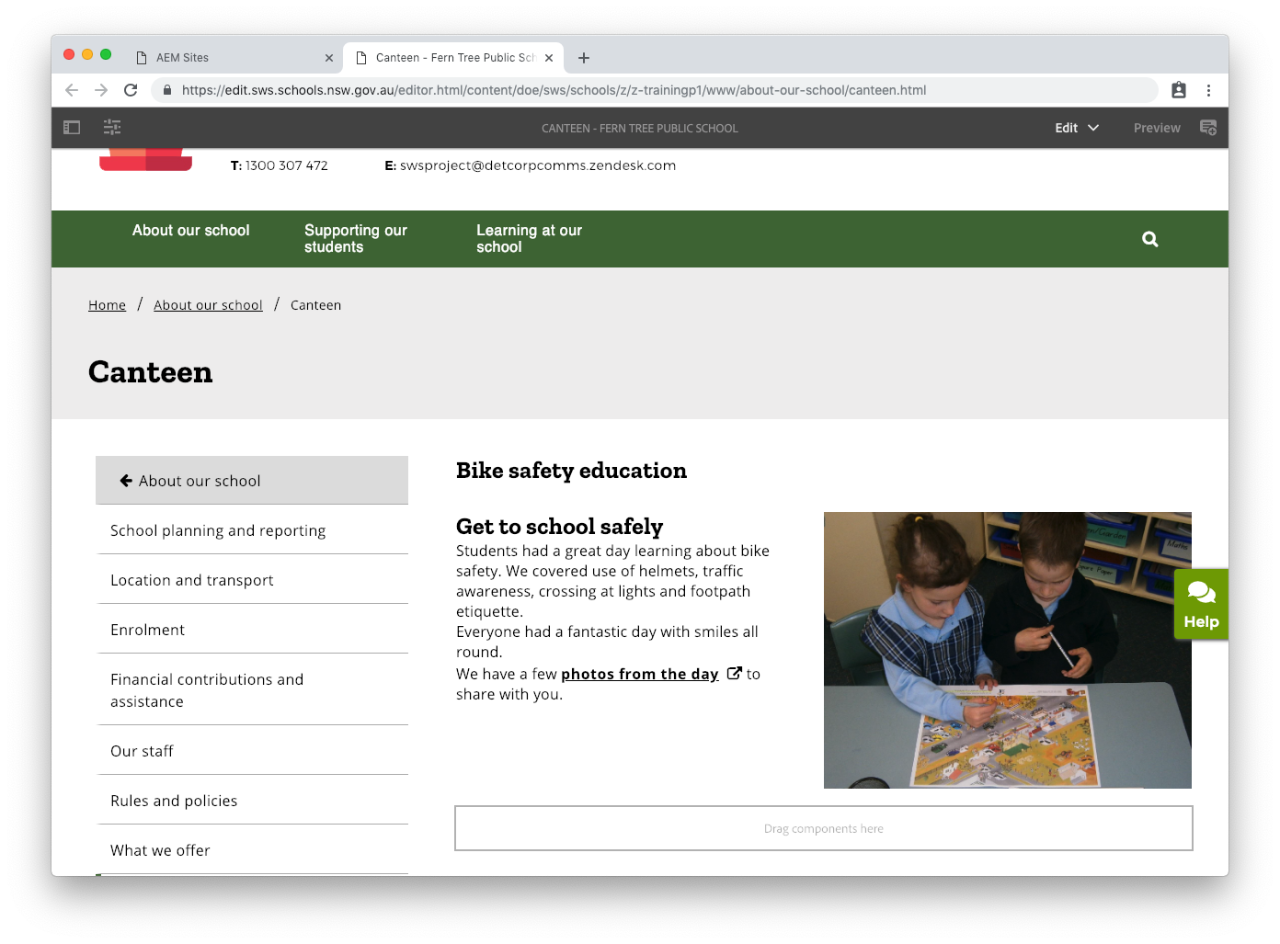
Completed article component

Example of an article on a web page: 
Publish your changes

  • For changes to be updated on your live school website you will need to publish the page