School website service training and support logo

School website service training and support

School website service training and support

Use this guide to learn how to create and edit tables in rich text editor.

Before you start

  • Make sure you have inserted a rich text editor component on the page.
  • It is better to have your tables in a completely separate rich text component.
  • Tables are only used to display data that belongs naturally in a grid.
  • The easiest way to know if you should use a table is if it makes sense to track the data in a spreadsheet.
  • We recommend taking a look at the W3C website in respect to tables. They have useful information on accessibility, an important aspect of tables.
  • Please note: Table is only available in rich text editor component and cannot be used in gallery, events and news components. 
Step 1: Edit the rich text editor component

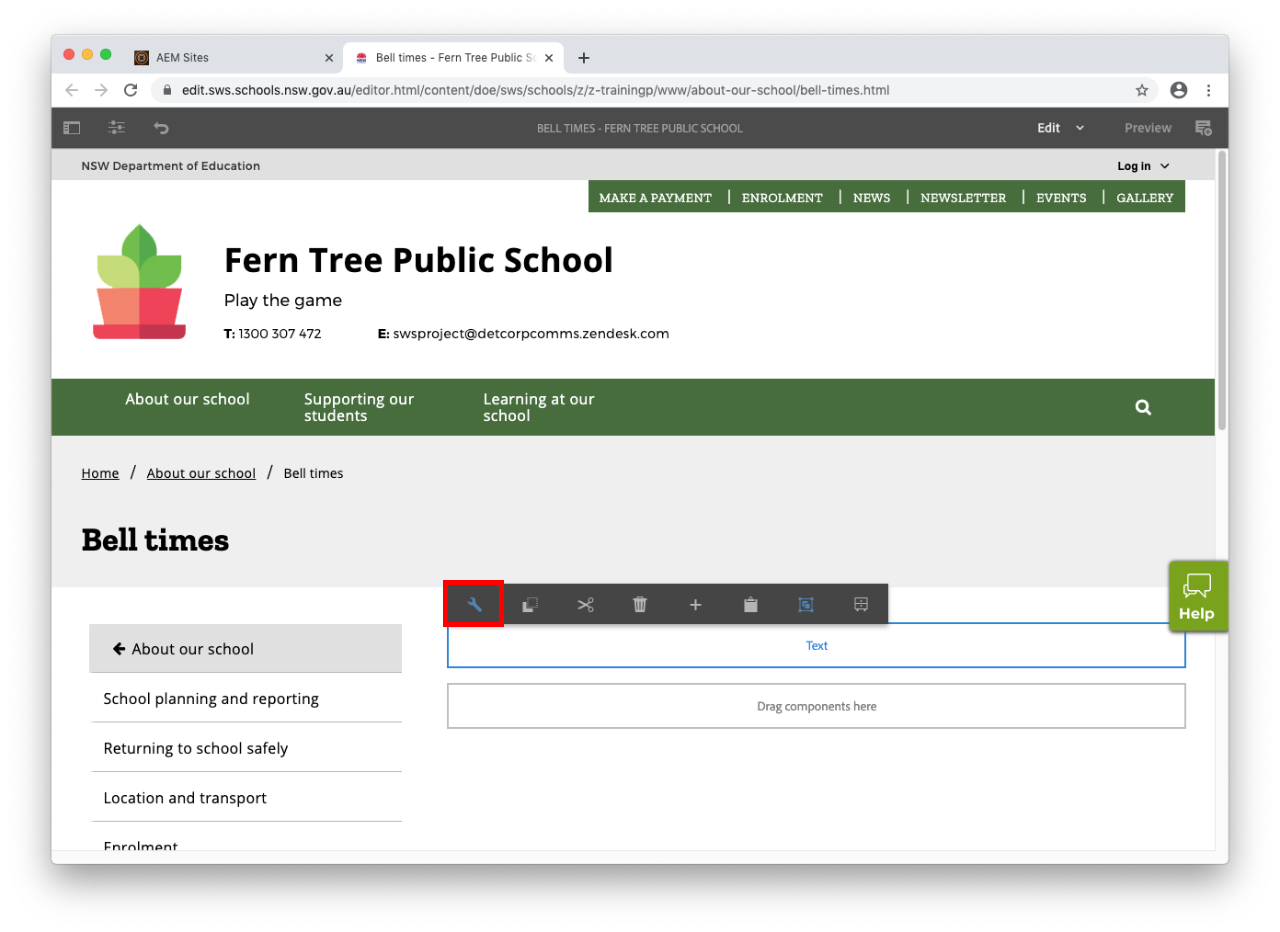
  • Select rich text editor component.
  • Select the spanner icon. 

Step 2: Insert and edit the table

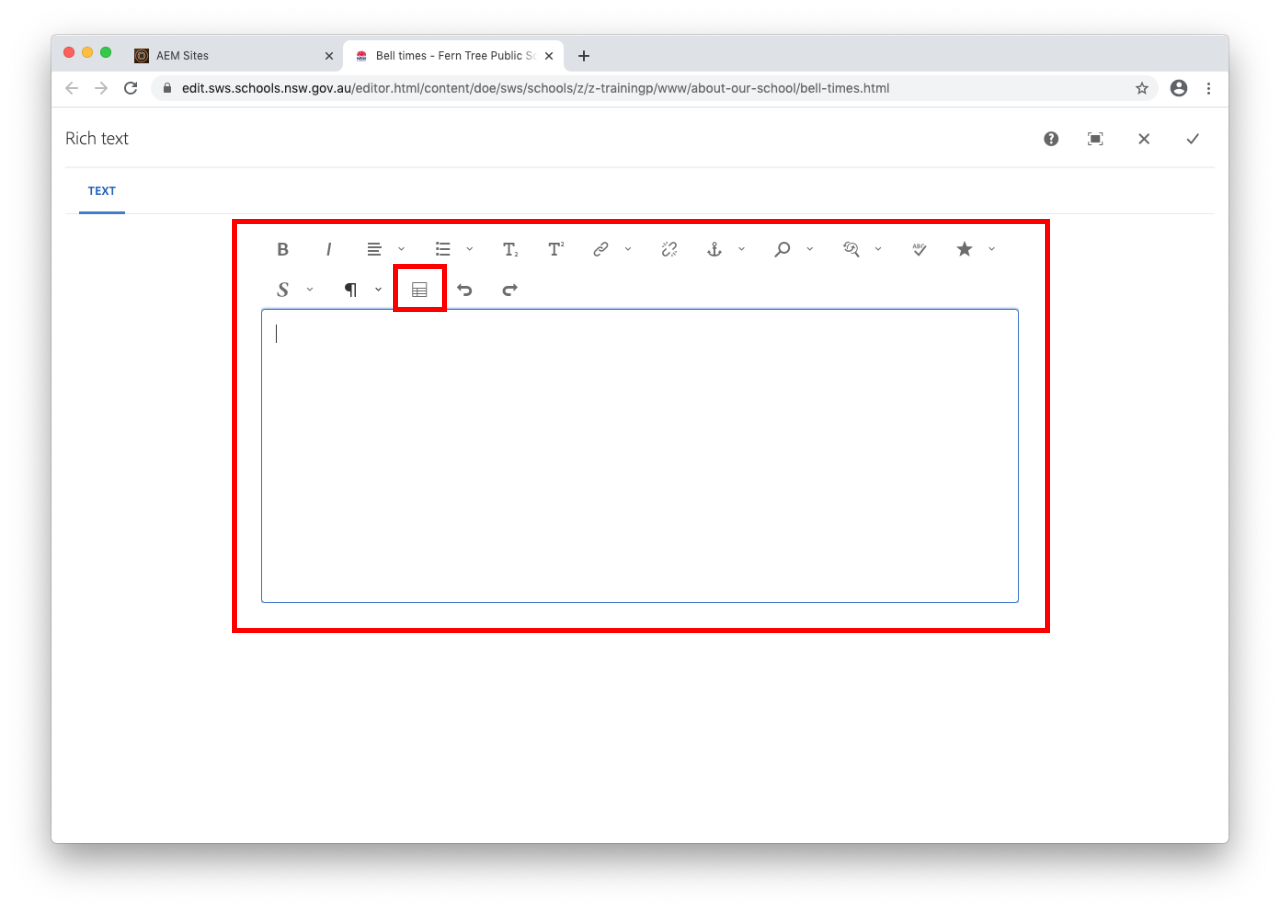
  • Place your cursor inside the Text box and then select the Table icon. This will insert the table.

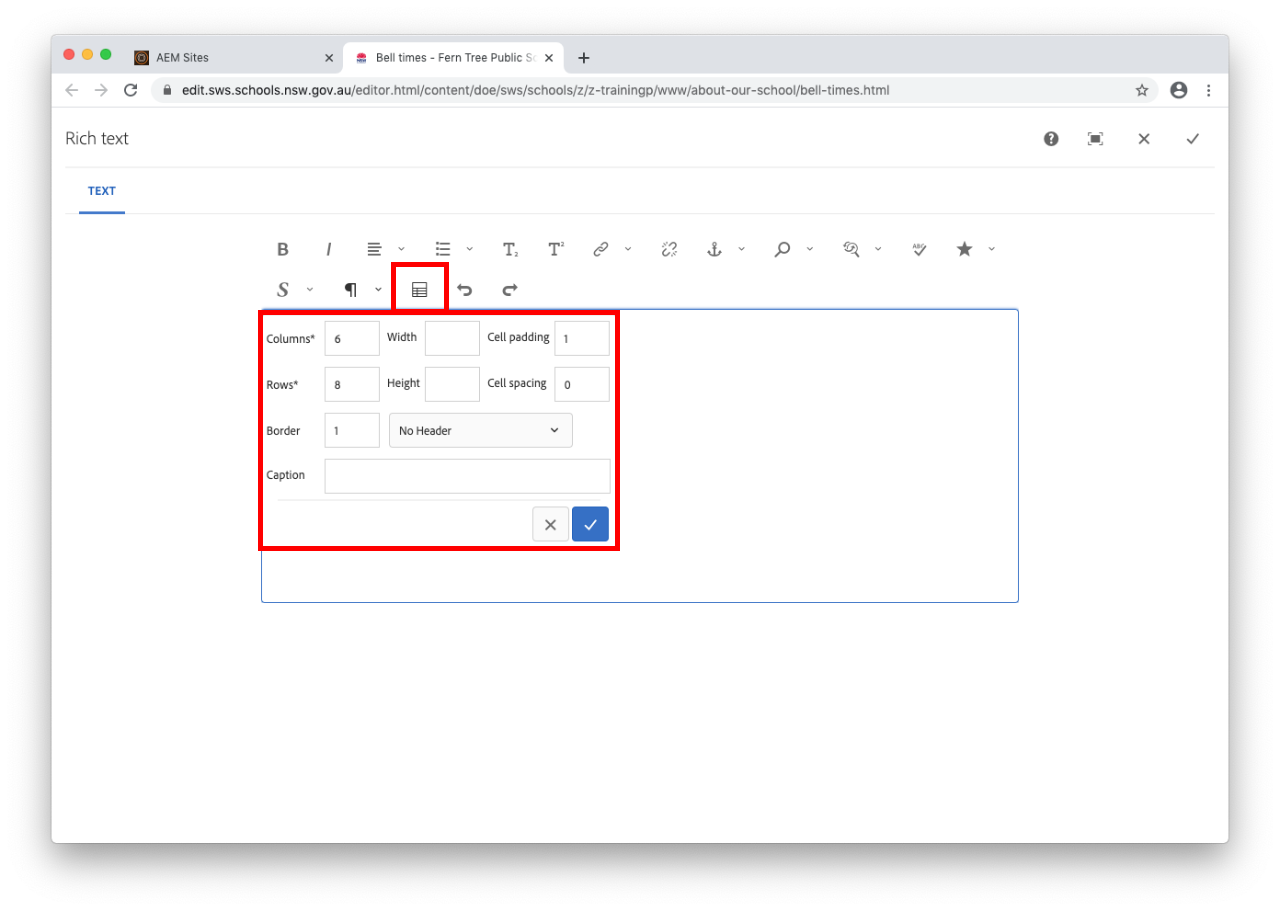
  • Enter the number of columns and rows you would like in your table.
  • Leave Cell padding and Border as 1 and, Cell spacing as 0.

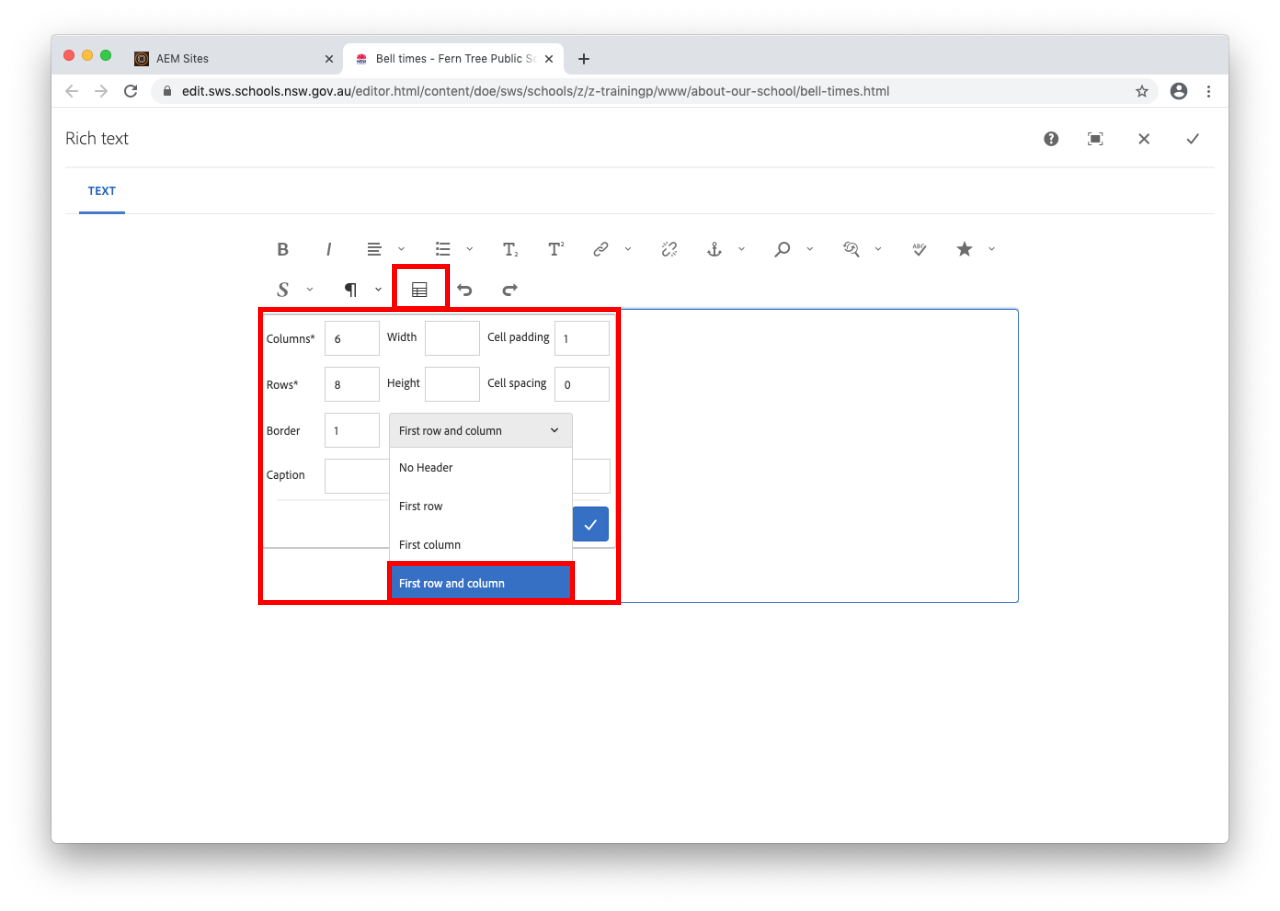
  • Select First row and column from the Border option if you would like the headers to be the top row and the first column of the table and so on depending on the content in your table.
  • Leave Width and Height as blank.
  • Place appropriate Caption for your table - optional.
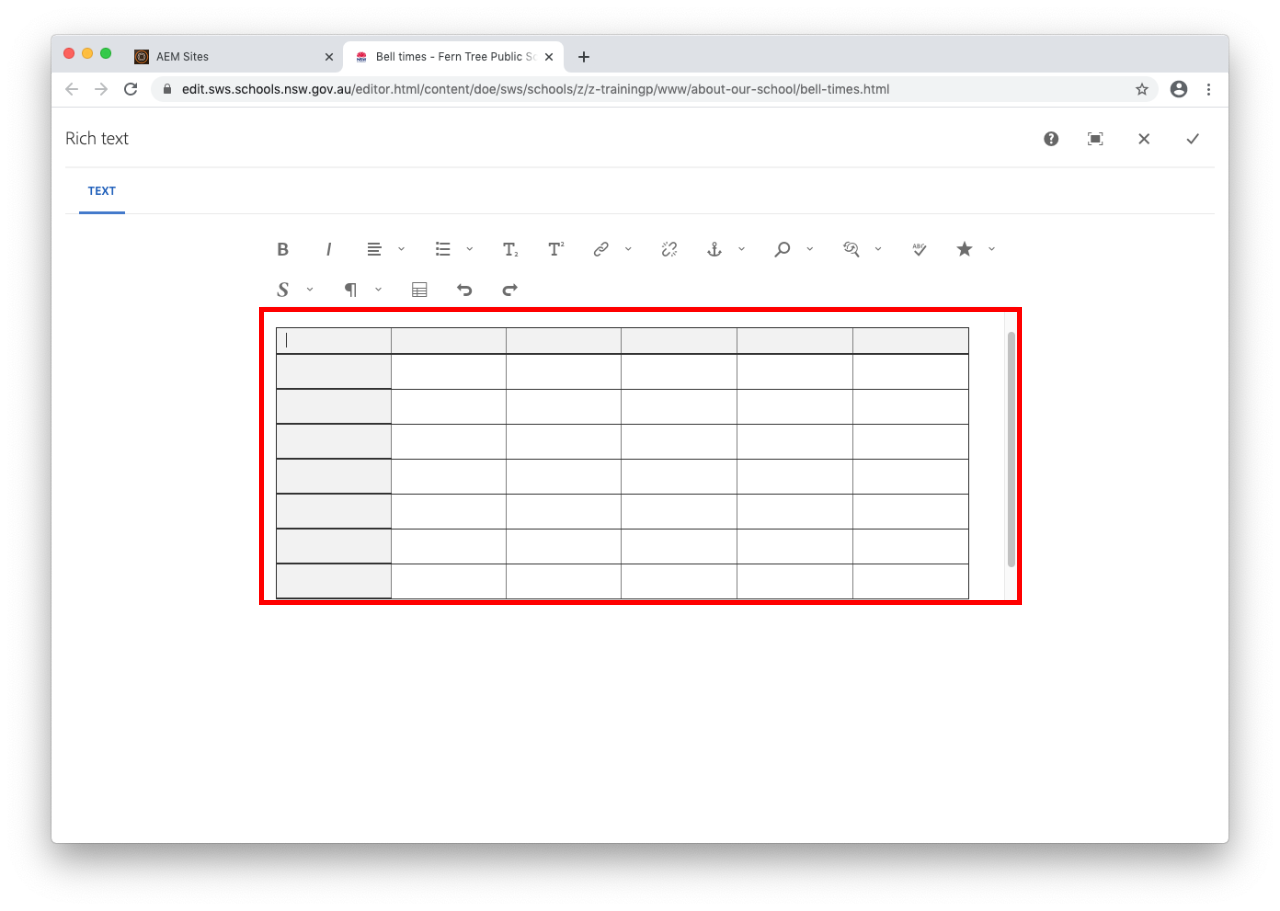
  • Select the blue tick at the bottom and your table will be created. 

  • Enter the information in your table.
  • The cell sizes are responsive and will change based on how much text you enter in each cell.

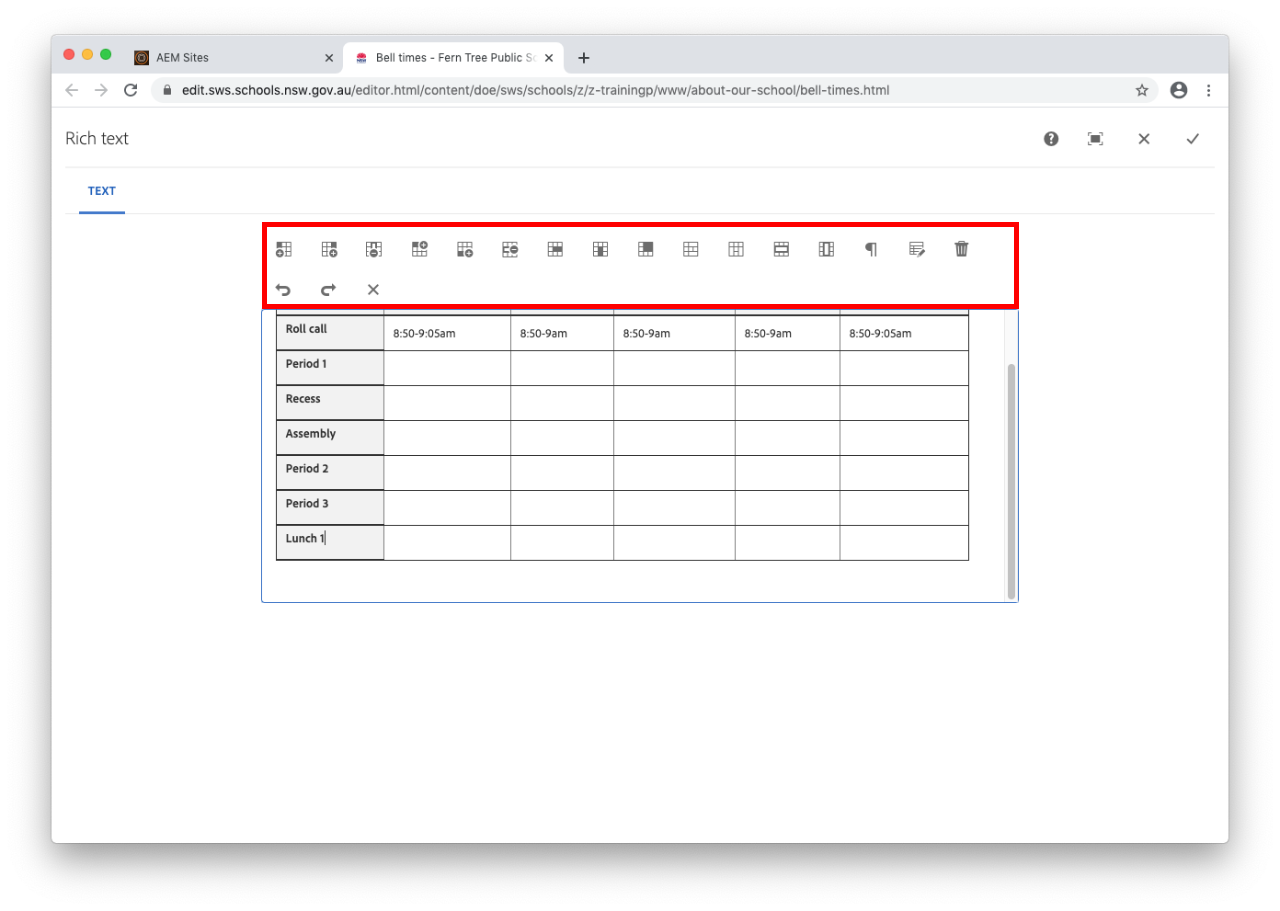
  • Select the table icon again to open the Table editing options.

  • Table editing allows you to:
    • insert a column on the left
    • insert a column on the right
    • delete a whole column
    • insert a row above
    • insert a row below
    • delete a whole row
    • Merge right
    • Merge down
    • Merge a few cells
    • split cells horizontally
    • split cells vertically
    • select an entire row
    • select an entire column
    • ensure paragraph after the table
    • remove the table
    • exit table editing

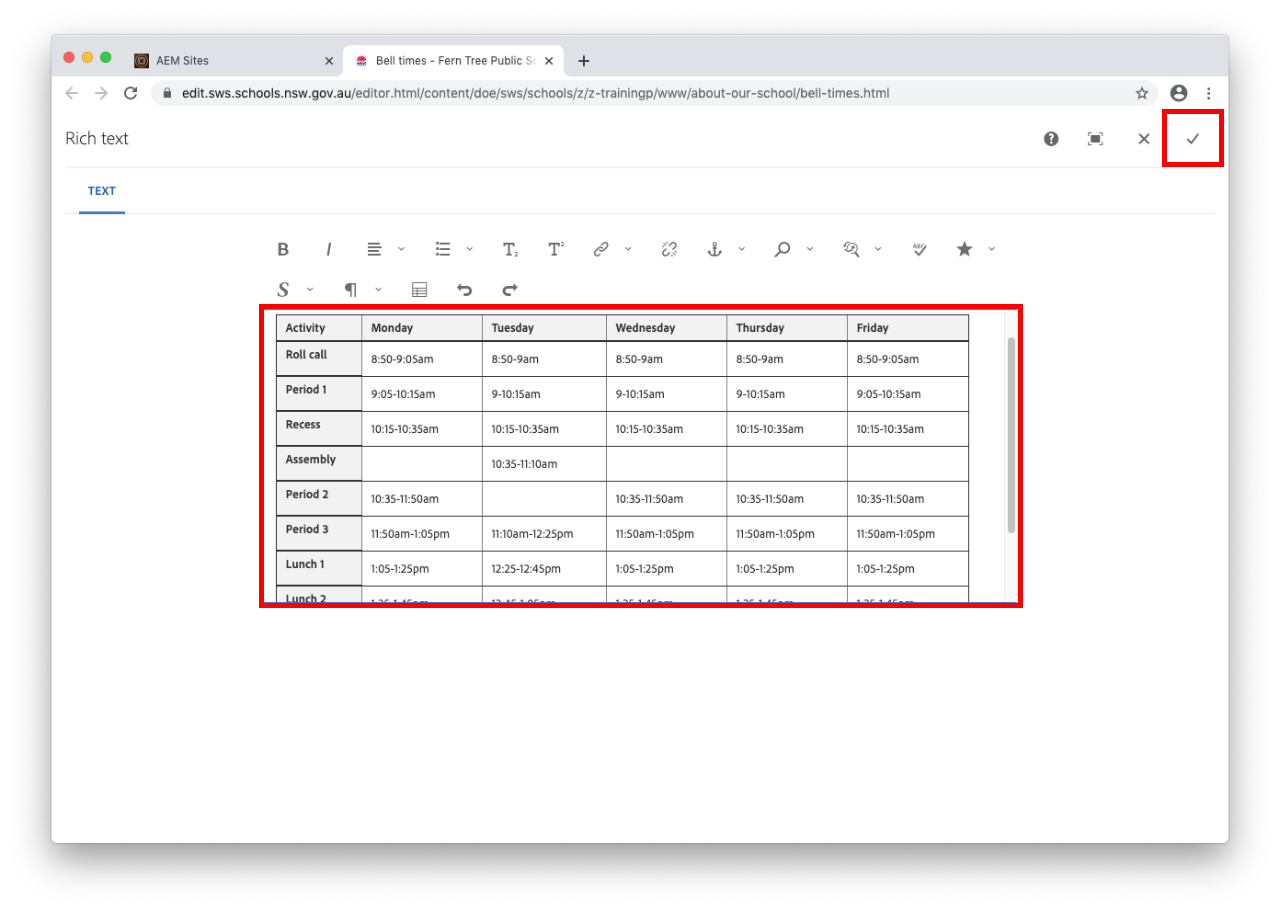
  • Select tick in the top right to save all changes. 

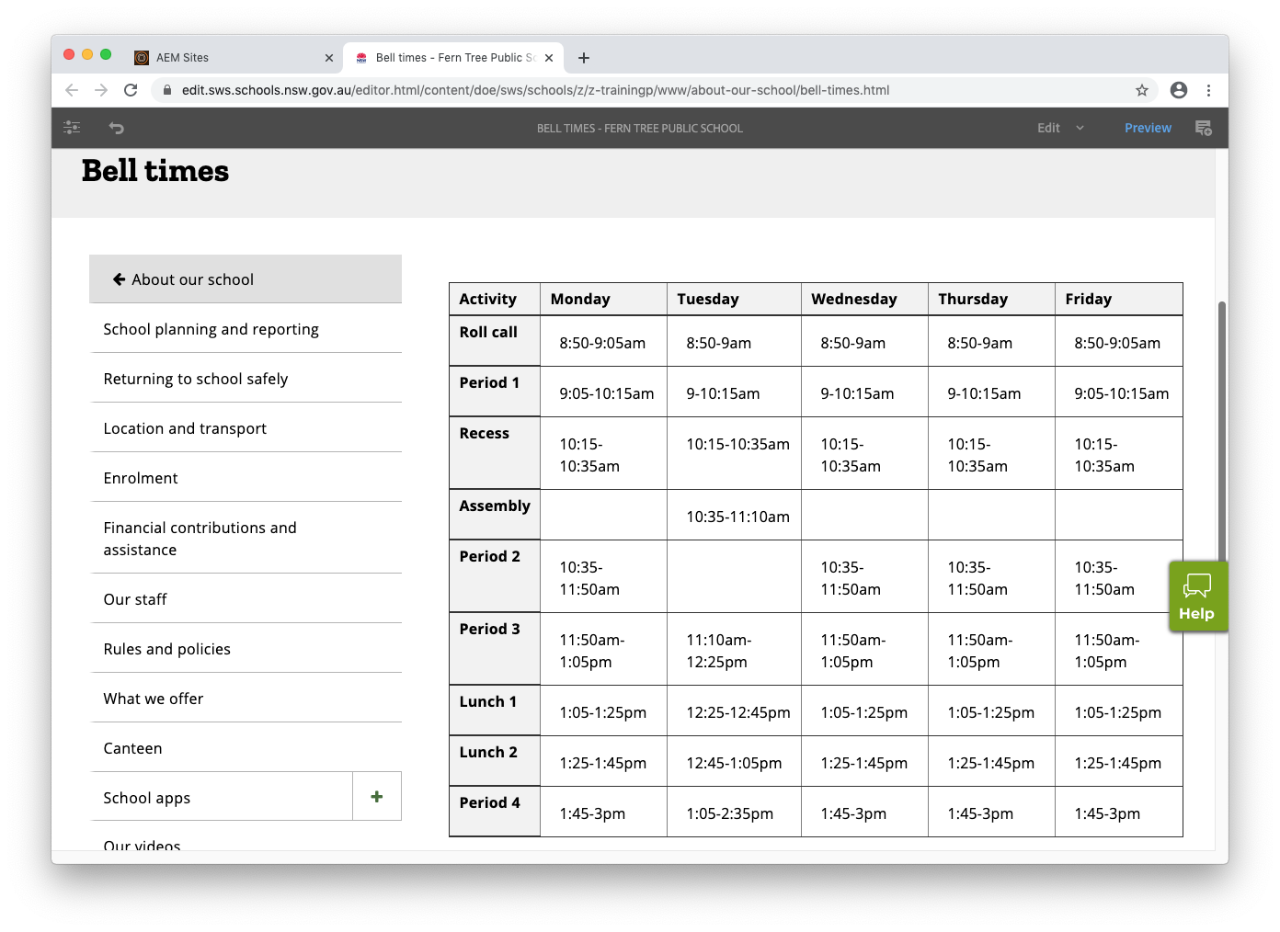
  • Example of a completed table.

Optional: Inserting a new paragraph after your table

  • Place your cursor after the last cell of the table and select enter from your keyboard. 
  • Add your content and select the tick in the top right to save all changes. 

Publish your changes

  • For changes to be updated on your live school website you will need to publish the page

Related content