School website service training and support logo

School website service training and support

School website service training and support

Edit images

Use this page to learn how to edit images in your Assets. 

Before you start 

  • Make sure you create a copy of your original image before you make any edits. Once you save your edit to the image, the original version is overwritten by the new version and you can not undo the change. 
  • Before editing an image also check where it is being used as any edit will affect all locations the image appears in. What looks good in one location may not look so good in another so you may need to make a copy for your location. Make sure you clearly identify copies to make site maintenance easier.

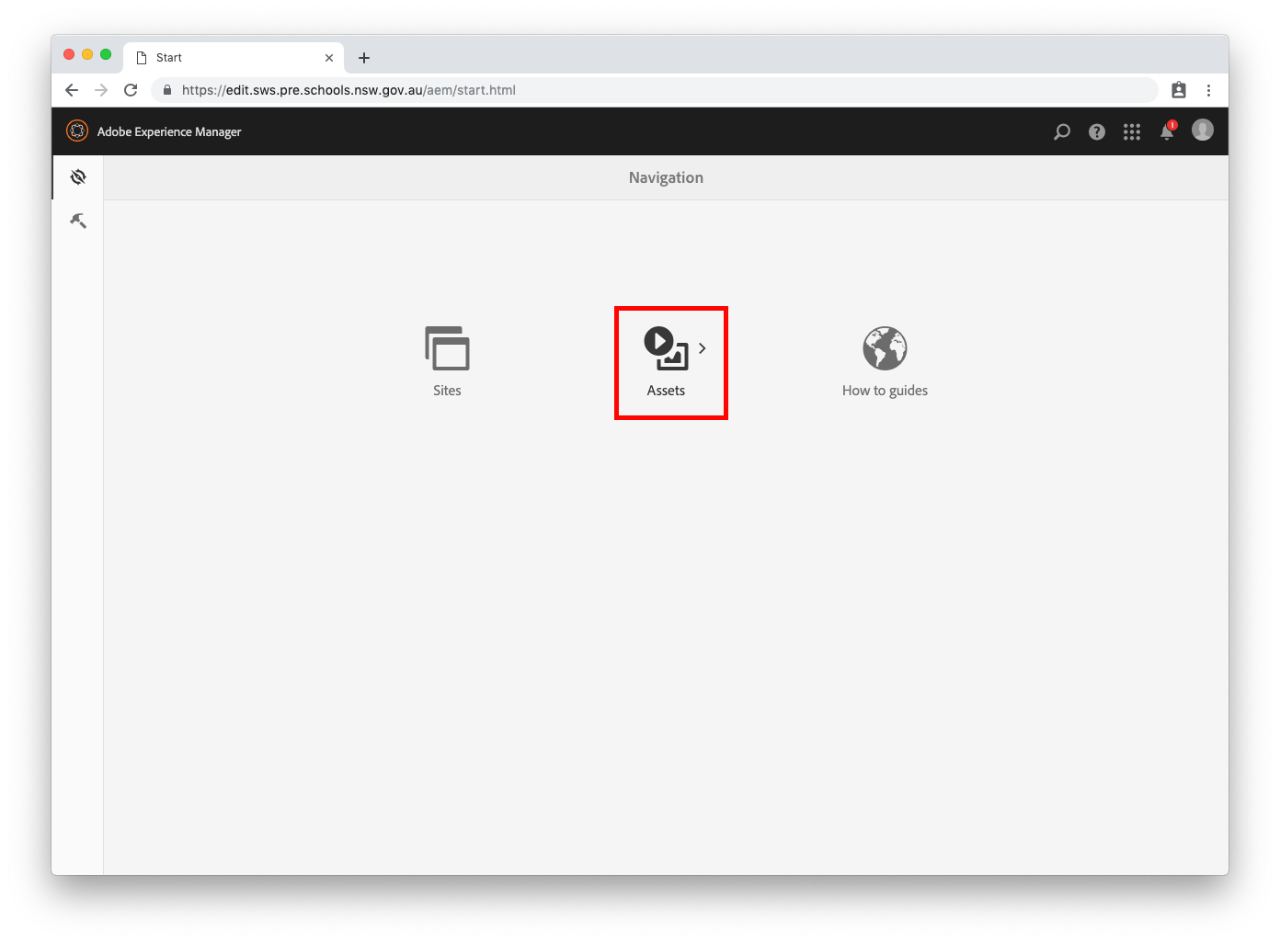
Step 1: Navigate to Assets

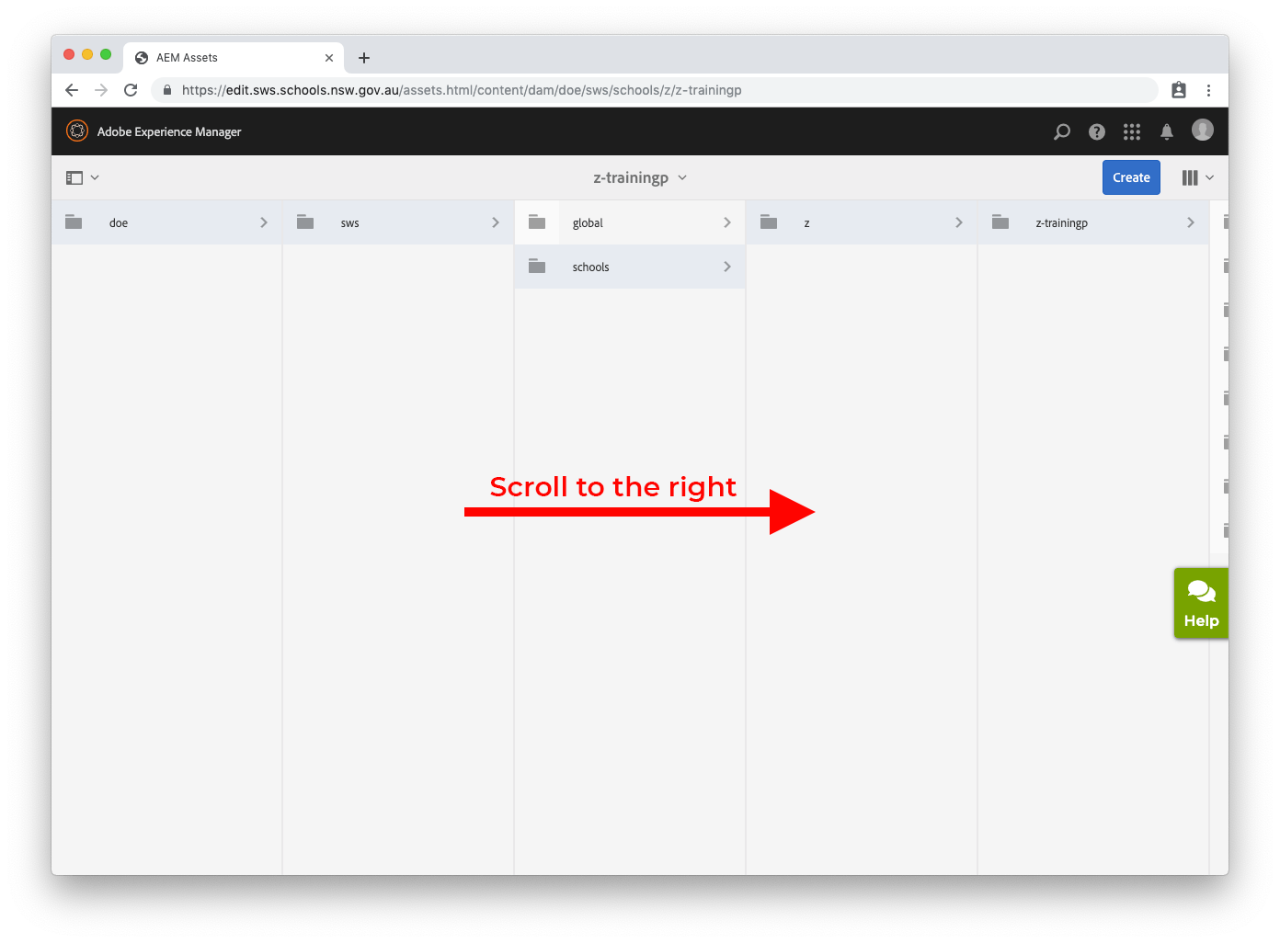
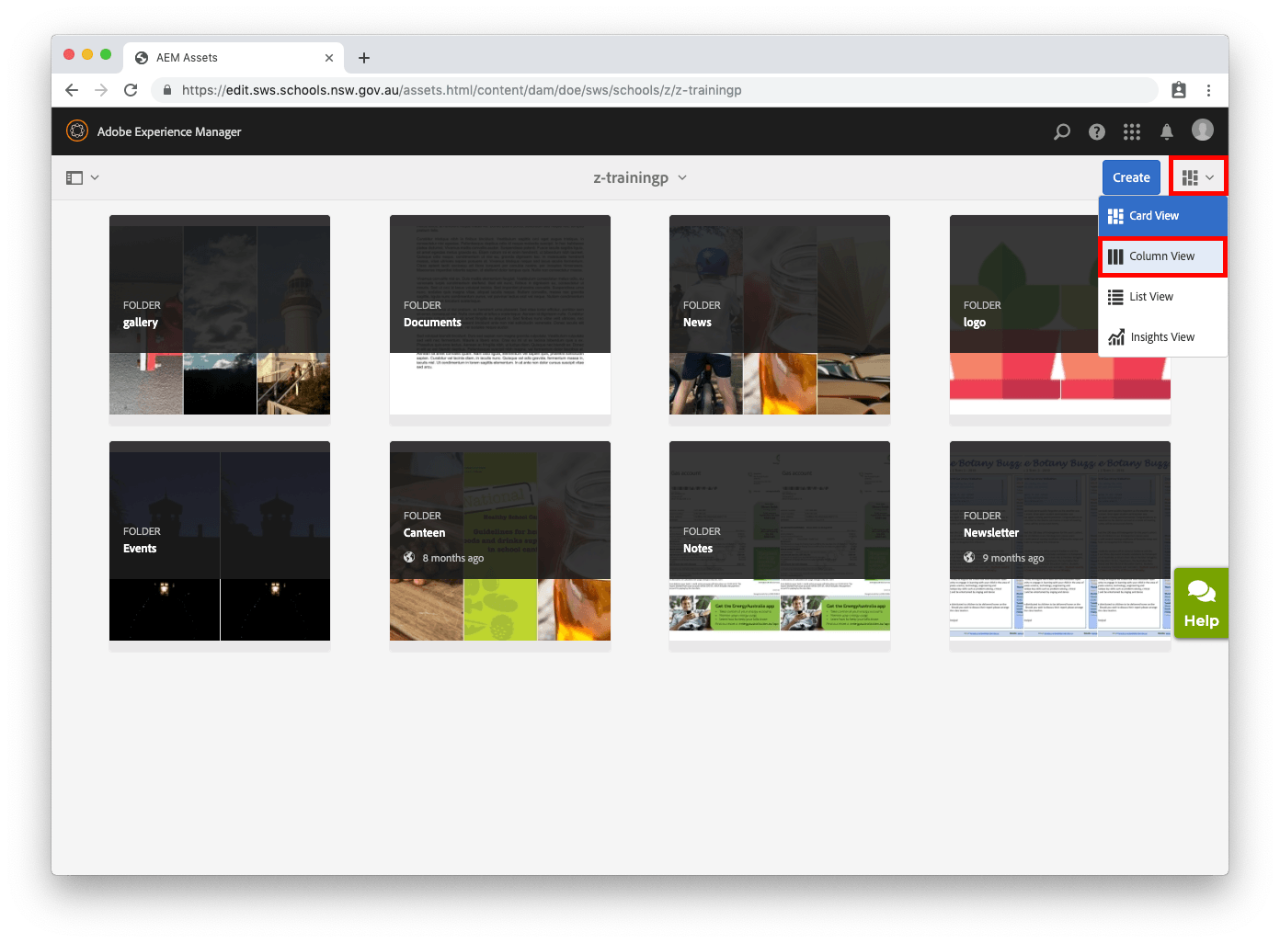
Step 2: Change to column view

  • If your assets open in Card View, you can change this by selecting the View icon in the top right, below your User icon. Select Column View from the drop-down as this is easiest to use. See our guide on Views for more.

  • Your school's folder will already be selected.
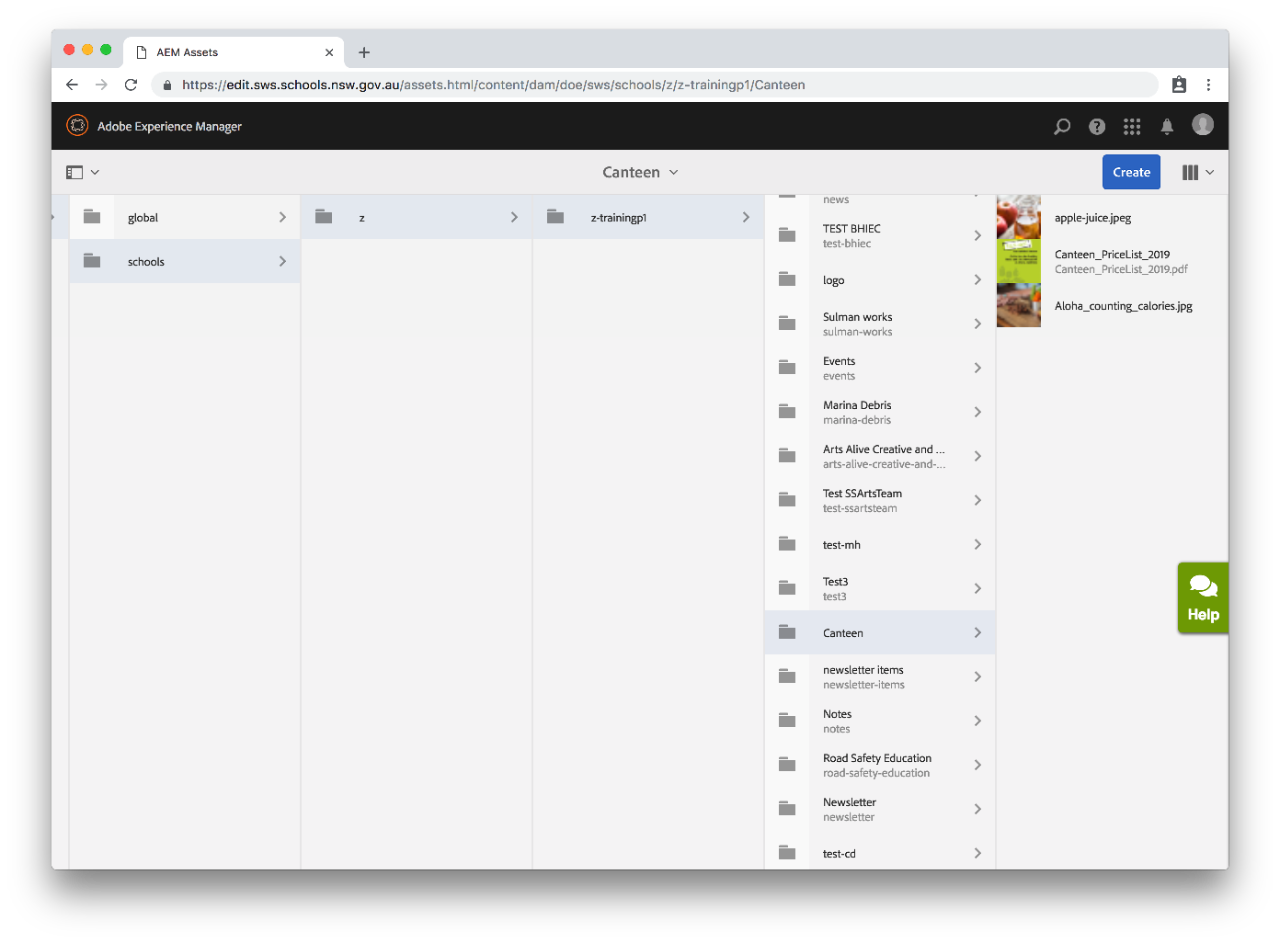
  • Scroll to the right to see your assets.

  • Select the folder in which your image is stored.

Step 3: Open your image

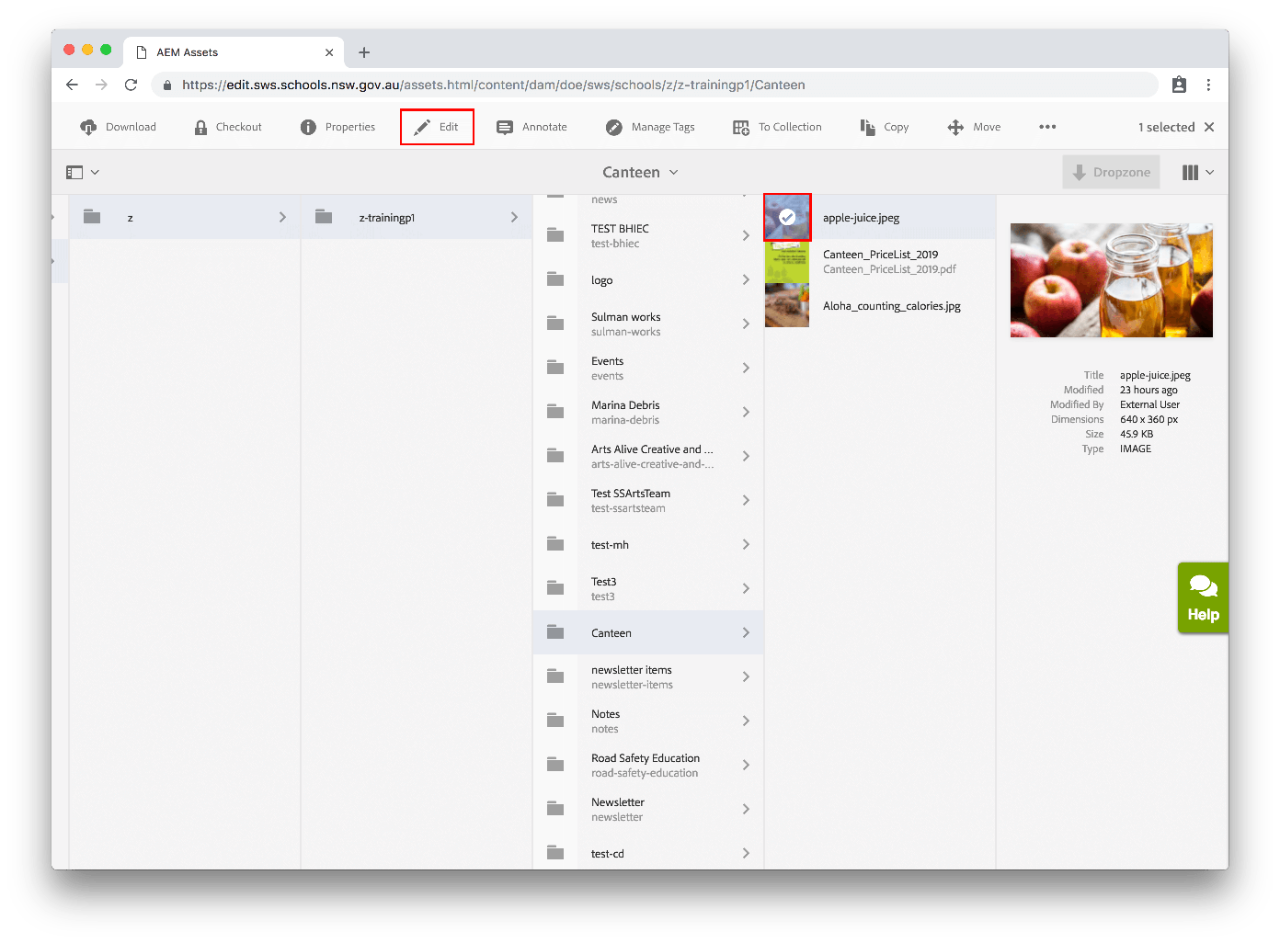
  • Once you have found your image, select the file name. Your selection will turn blue.
  • You can see details of your file on the right below the picture mentioning Title, Modified time, Modified by, Dimensions, Size and Type. 
  • Select Edit in the menu bar that appears across the top of the screen. 
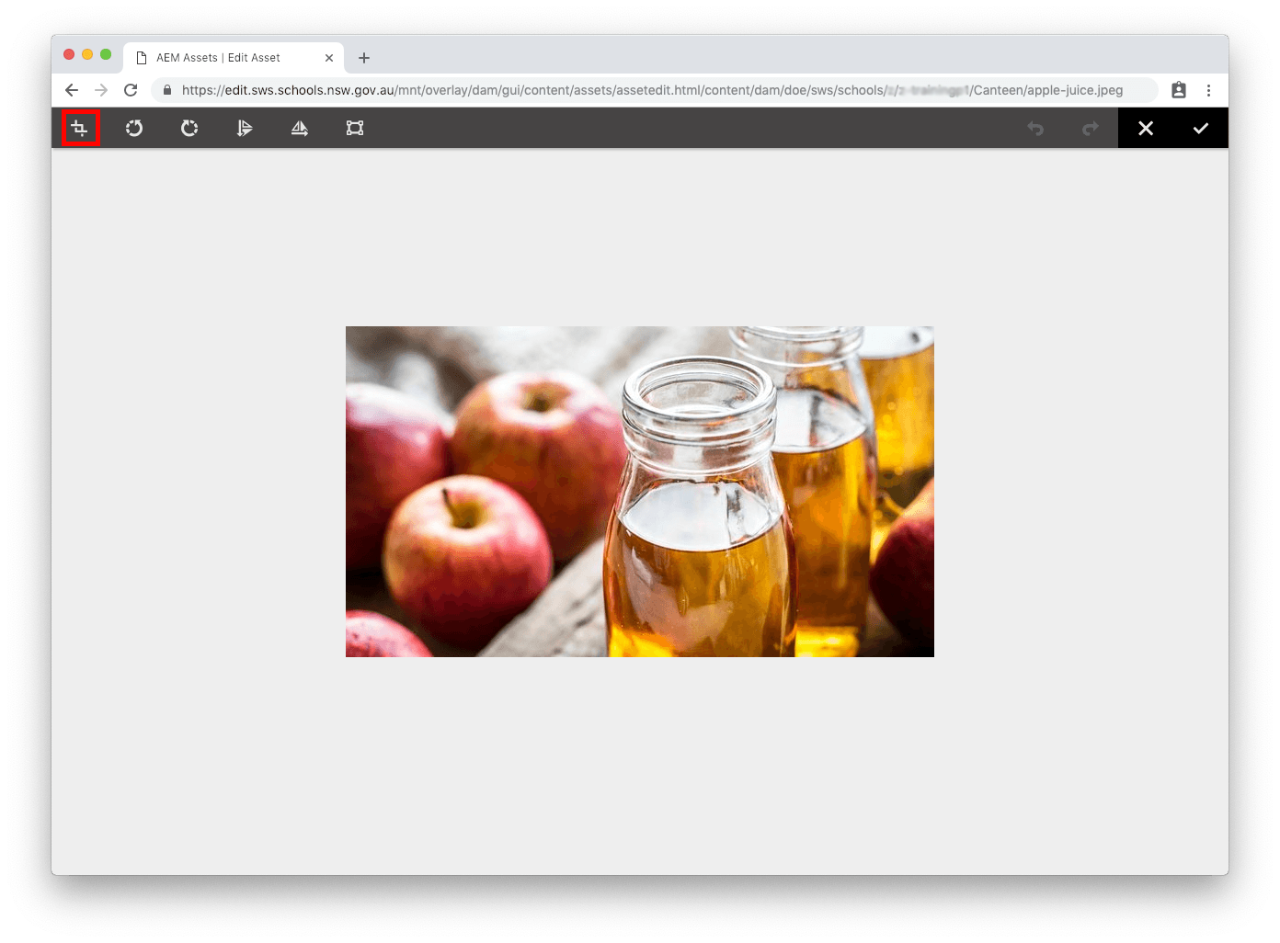
  • Your image will open and is now ready to edit. 

Step 4: Edit your image

  • Use the toolbar in the top left of your screen to edit your image.
  • The icons in order of appearance, left to right, allow you to:

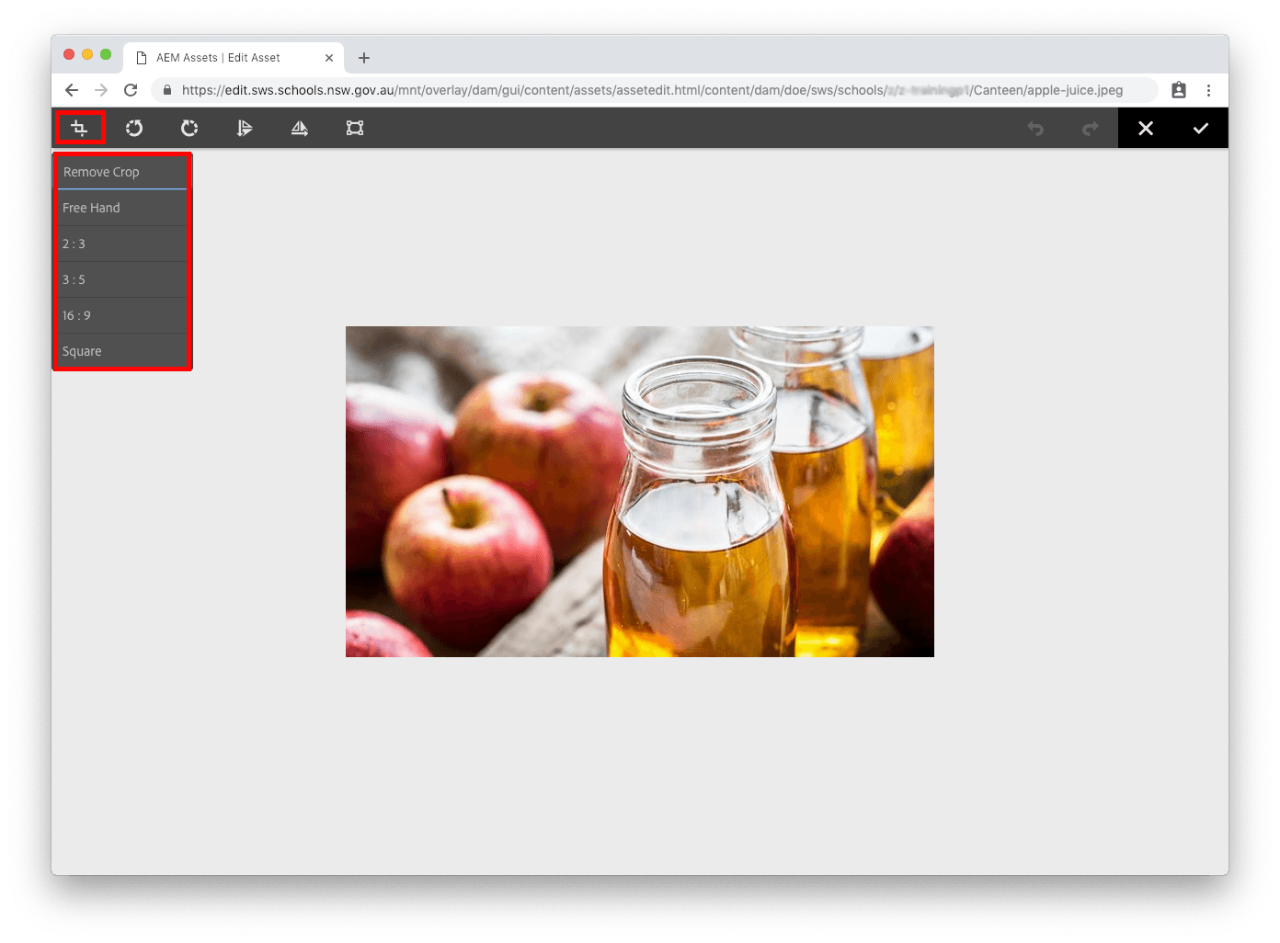
Crop

  • You can use this to crop your image to get a better display in the view. For example: if you have a portrait image that you want to use for a thumbnail where a landscape image should be used you may be able to crop it so it displays better.

When you select crop choose a crop setting:

  • Remove Crop - allows you to remove a crop if you do not like it but can only be used if you have not saved the edit.
  • Free Hand - allows you to size your crop manually.
  • 2 : 3 - two to three locked ratio you drag one side the others will resize automatically to keep the same ratio.
  • 3 : 5 - three to five locked ratio you drag one side the others will resize automatically to keep the same ratio.
  • 16 : 9 - sixteen to nine locked ratio you drag one side the others will resize automatically to keep the same ratio.
  • Square - all sides are equal locked ratio you drag one side the others will resize automatically to keep the crop square.
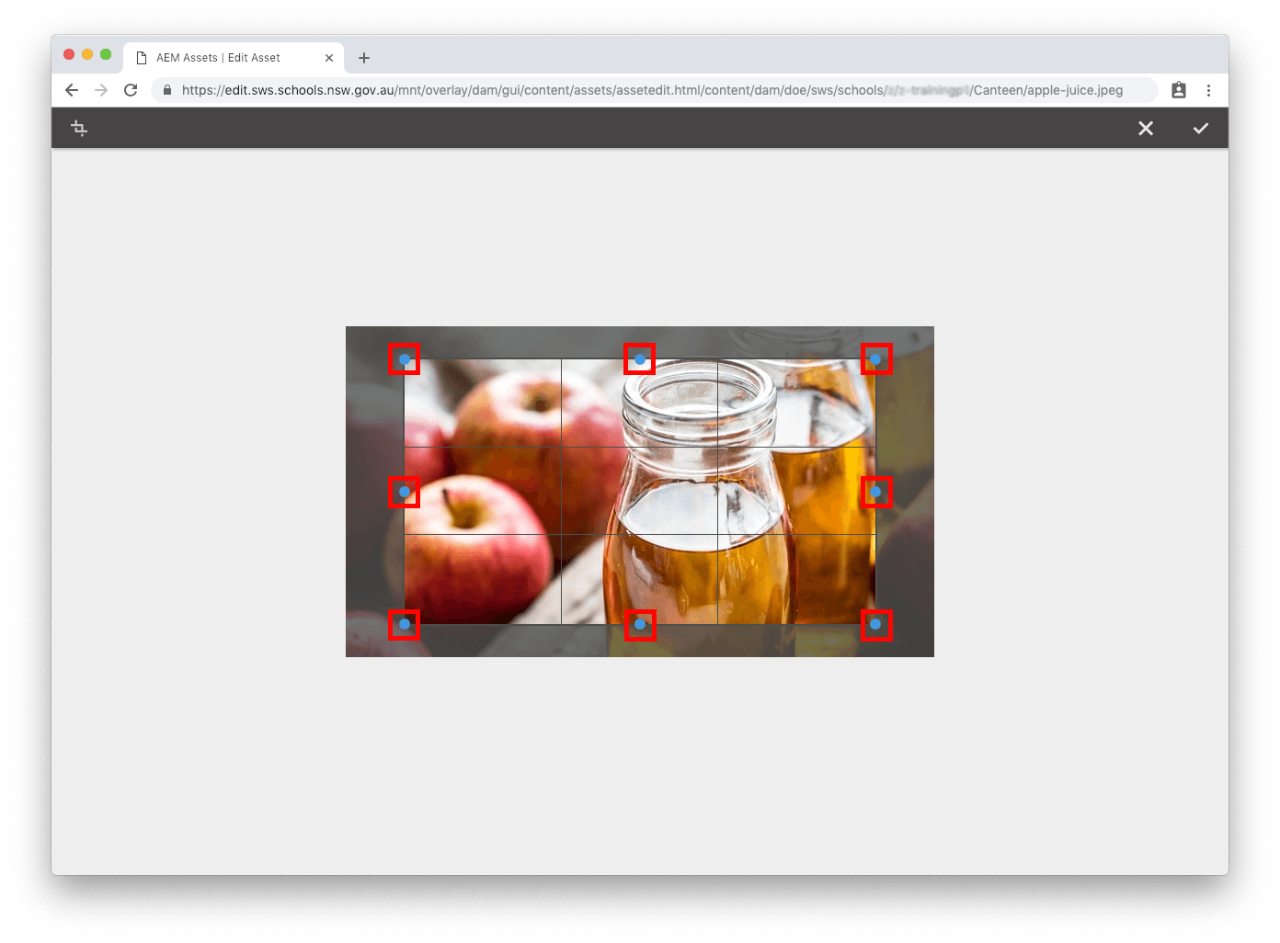
  • When you have selected a crop option, crop handles will be overlayed on your image. There are 9 in the free hand option and only four in all the other options.
  • Move the crop handles to reveal what part of the image you want to keep.

  • When you want to crop select the tick in the top right. At this point you can still use the remove crop to undo the crop and revert your image to what it was before the crop.

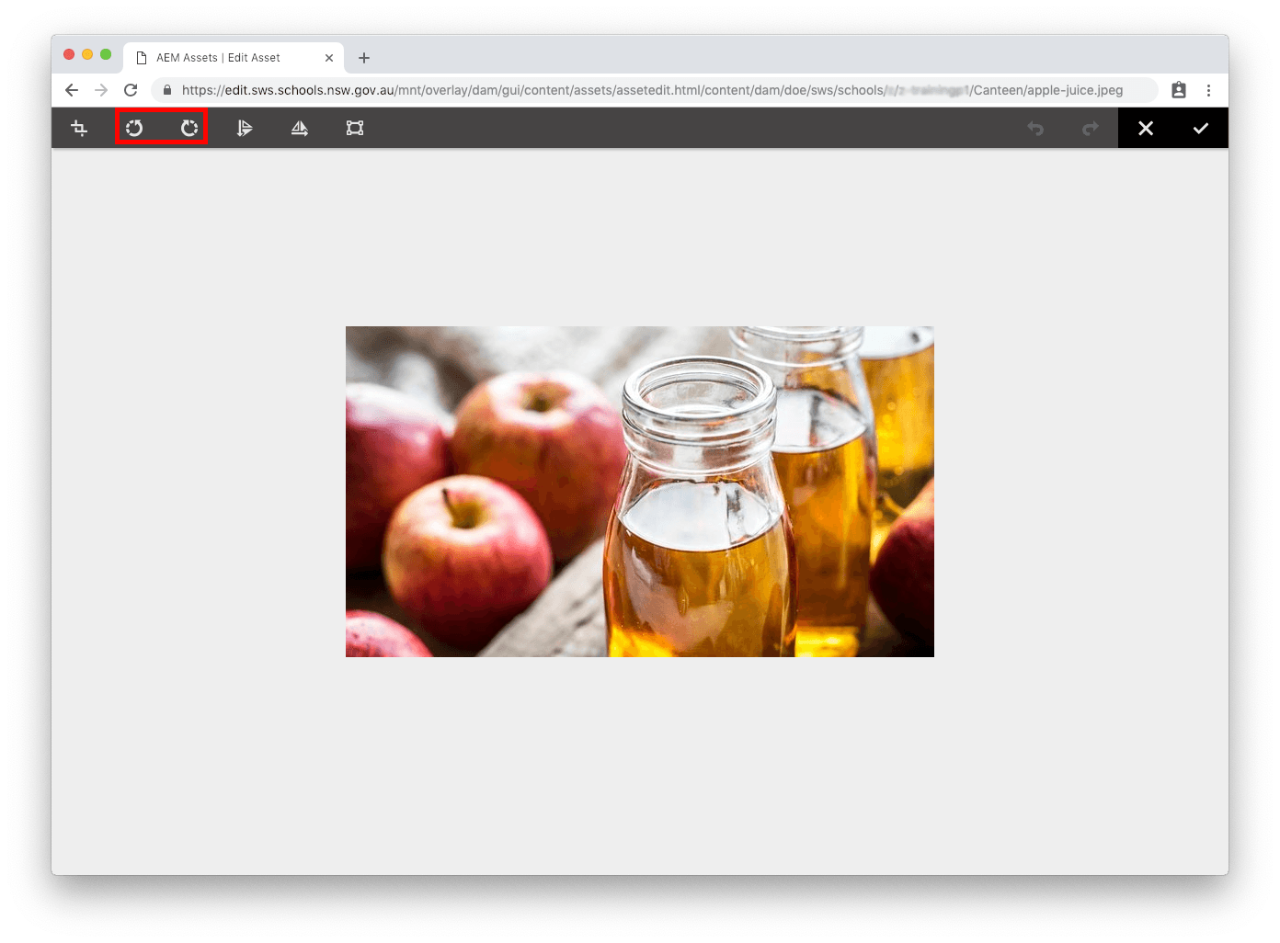
Rotate left and rotate right

  • Select one of these options to turn your image if your image is not displaying the correct way up. Depending on how the image is displaying you will select either rotate left or rotate right. 
  • Pick the option that needs the least rotation. For example: one 90 degree rotation. Upside down images will require two rotations no matter which option you choose.

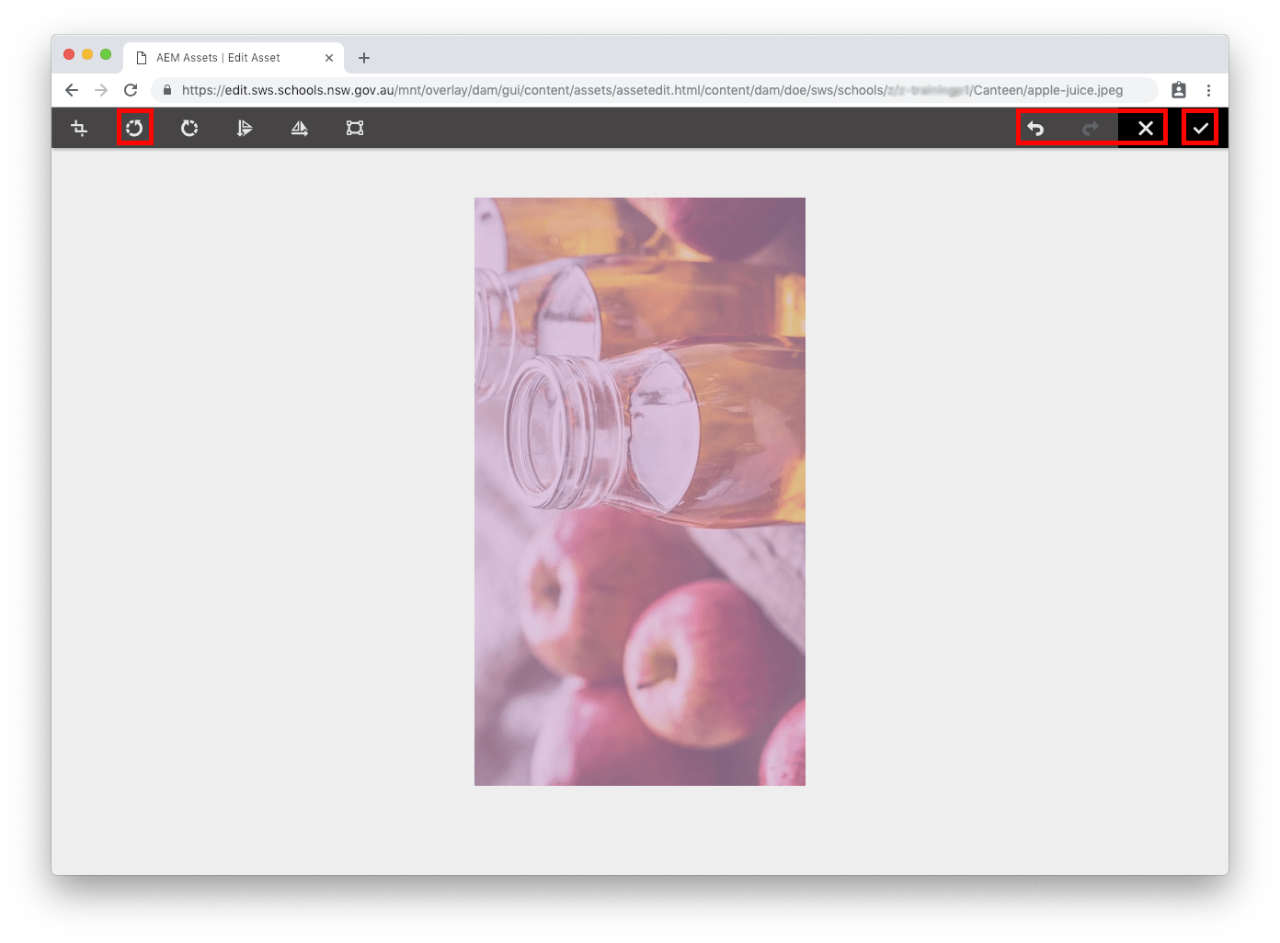
  • In our example we have selected the left (anti clockwise) rotation.
  • When you have reviewed the rotation you can select:
    • The left curved arrow to undo or the X to discard the change.
    • Select the tick to save your change.

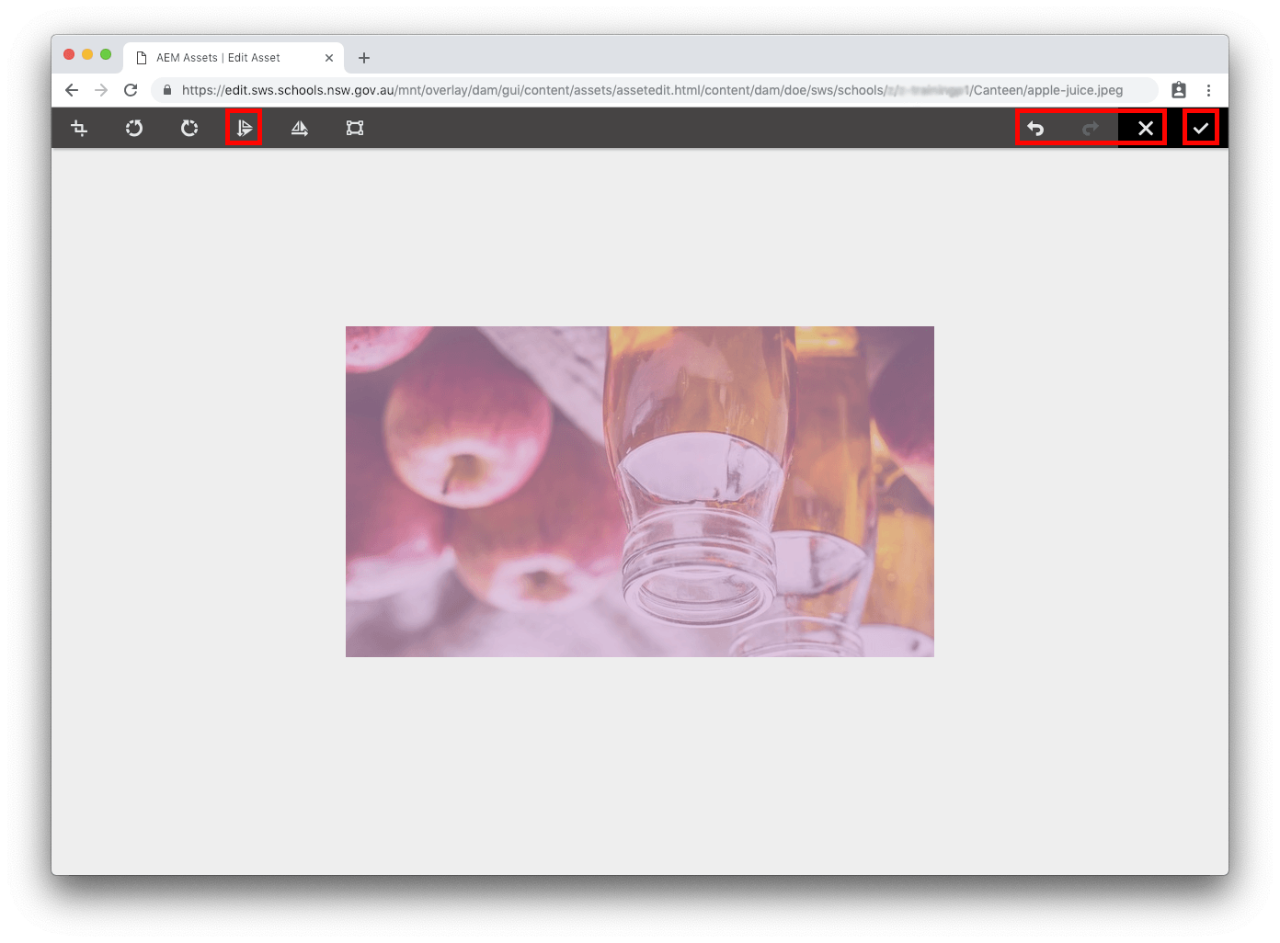
Flip vertically

  • Select the flip vertically option if your image is upside down and you would like to turn it up the right way.

  • When you have reviewed the flip vertical you can select:
    • The left curved arrow to undo or the X to discard the change.
    • Select the tick to save your change.

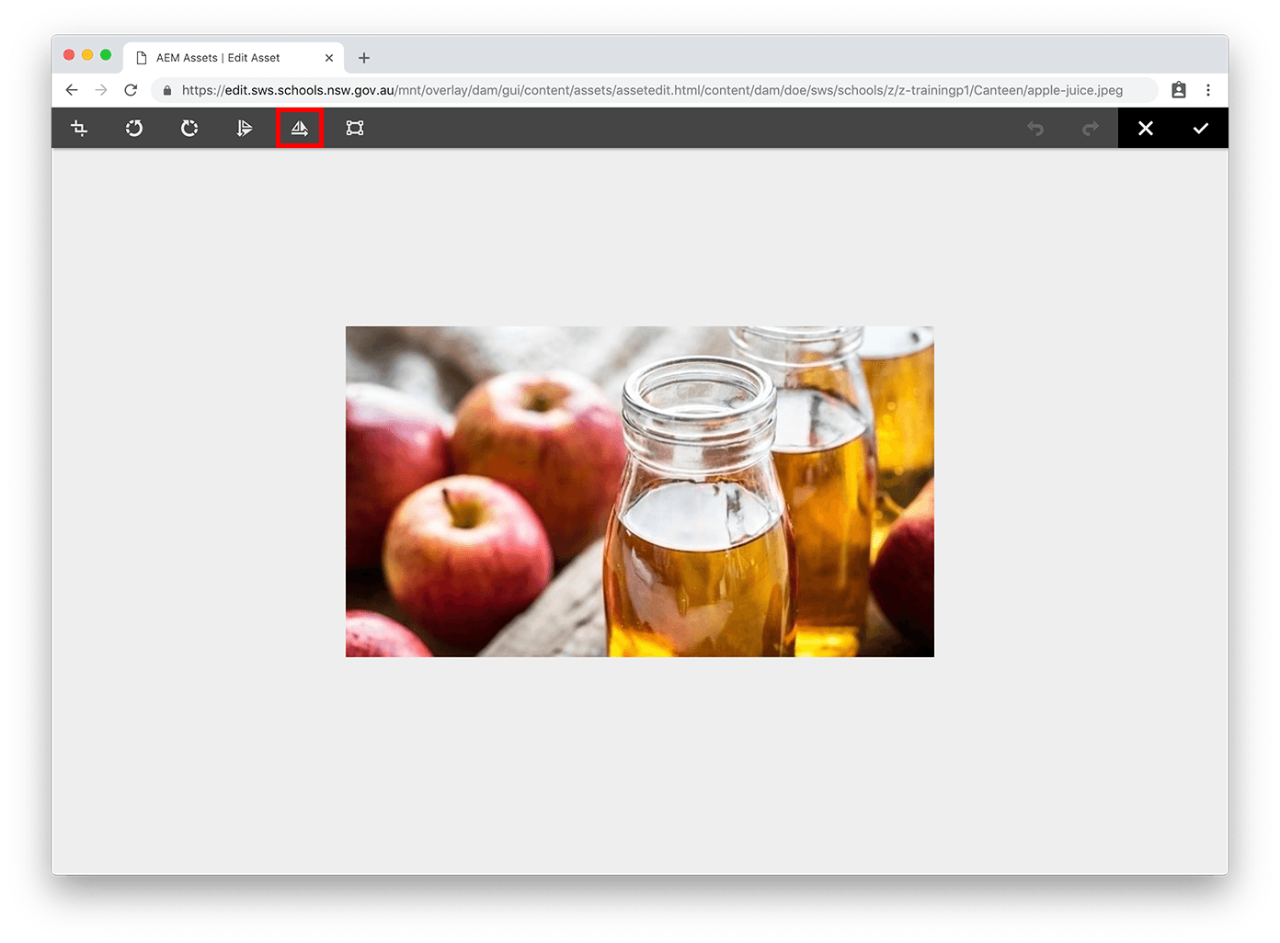
Flip horizontally

  • Select the flip horizontally option if you would like to flip the image from left to right.

  • When you have reviewed the flip horizontal you can select:
    • The left curved arrow to undo or the X to discard the change.
    • Select tick to save your change.

Launch map

  • Launch map is not used by users at this time.

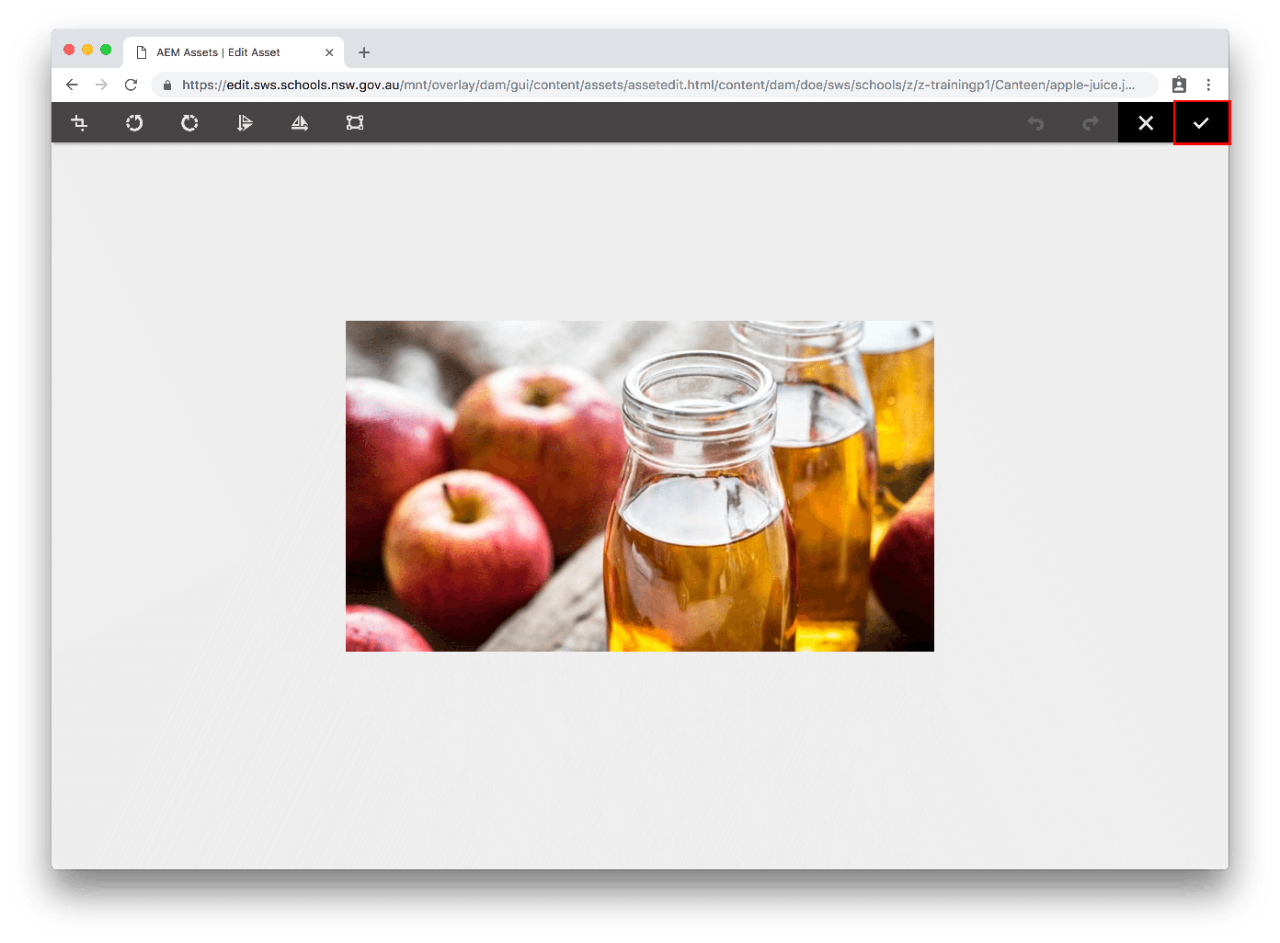
Step 5: Save your image

  • Once your image is ready, select the tick in the top right of the screen to save your new image and return to Assets. 
  • After this action, you no longer have the remove crop option for the image because any crop becomes its new size.