School website service training and support logo

School website service training and support

School website service training and support

Images with links

Use this guide to add an image with a link that redirects your user to another web page. This changes an image into a button.

Before you start

It is important that you follow the Image guidelines when you add images to your website. 

Navigate to the page where you want to add an image and you are ready to begin. 
Step 1: Add image component

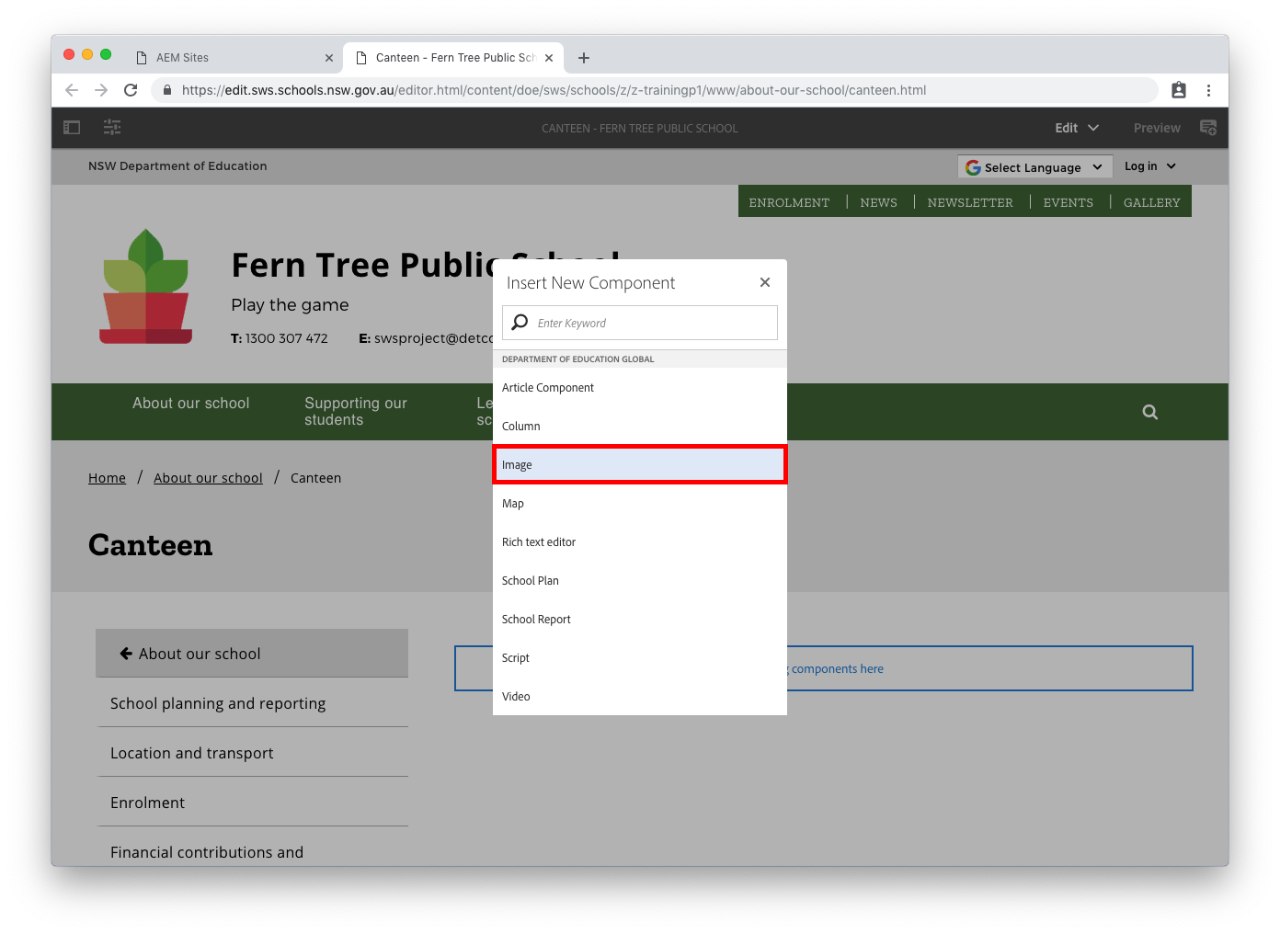
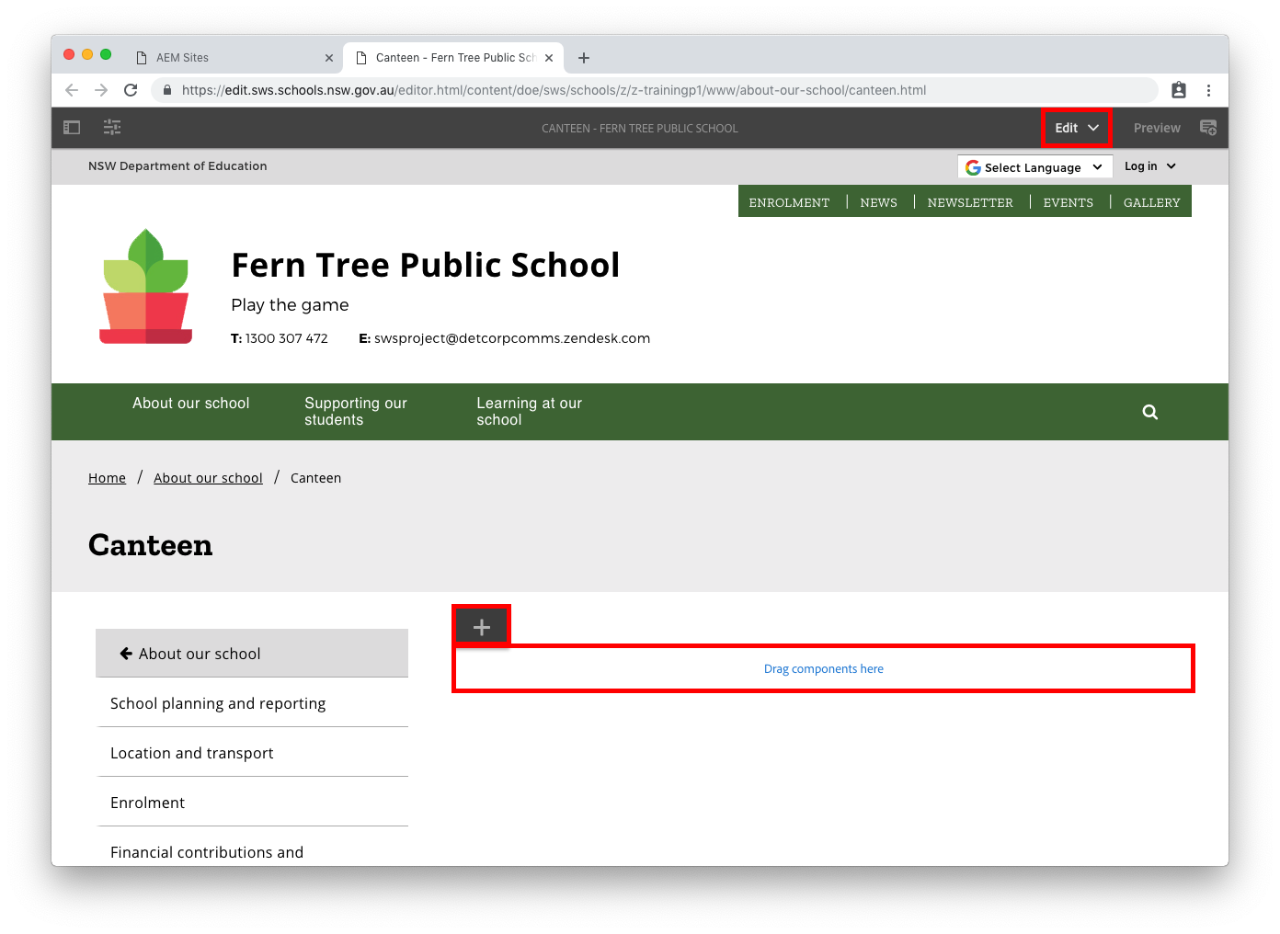
  • Select Drag components here.
  • Select the plus icon.

  • Select Image from the Insert New Component list.

Step 2: Edit the image component

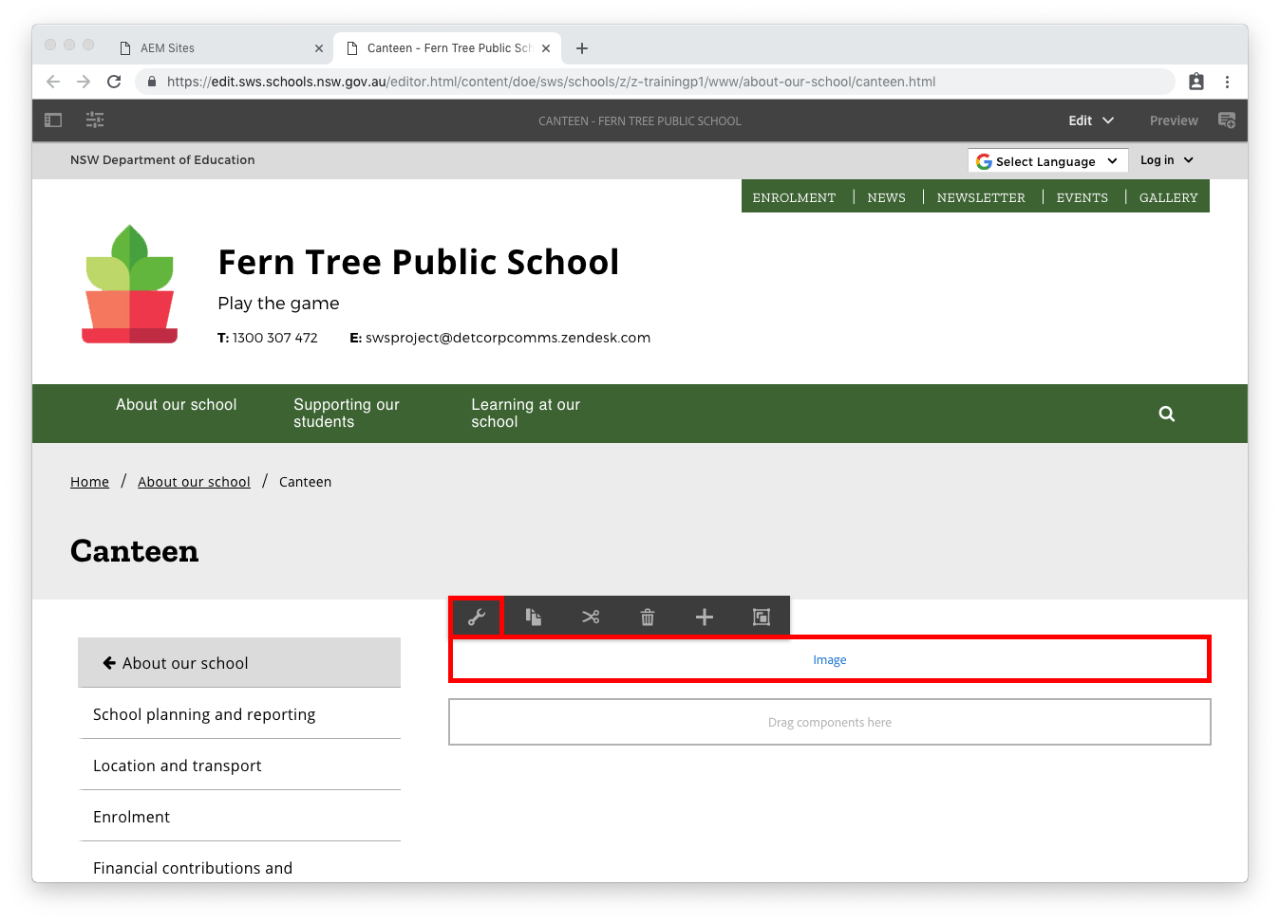
  • Select the Image component.
  • Select the spanner icon to add your image to the page. This is the Configure button. 

Step 3: Upload the image

  • In the Image location field, you can either Drag and drop the image or upload from your computer.

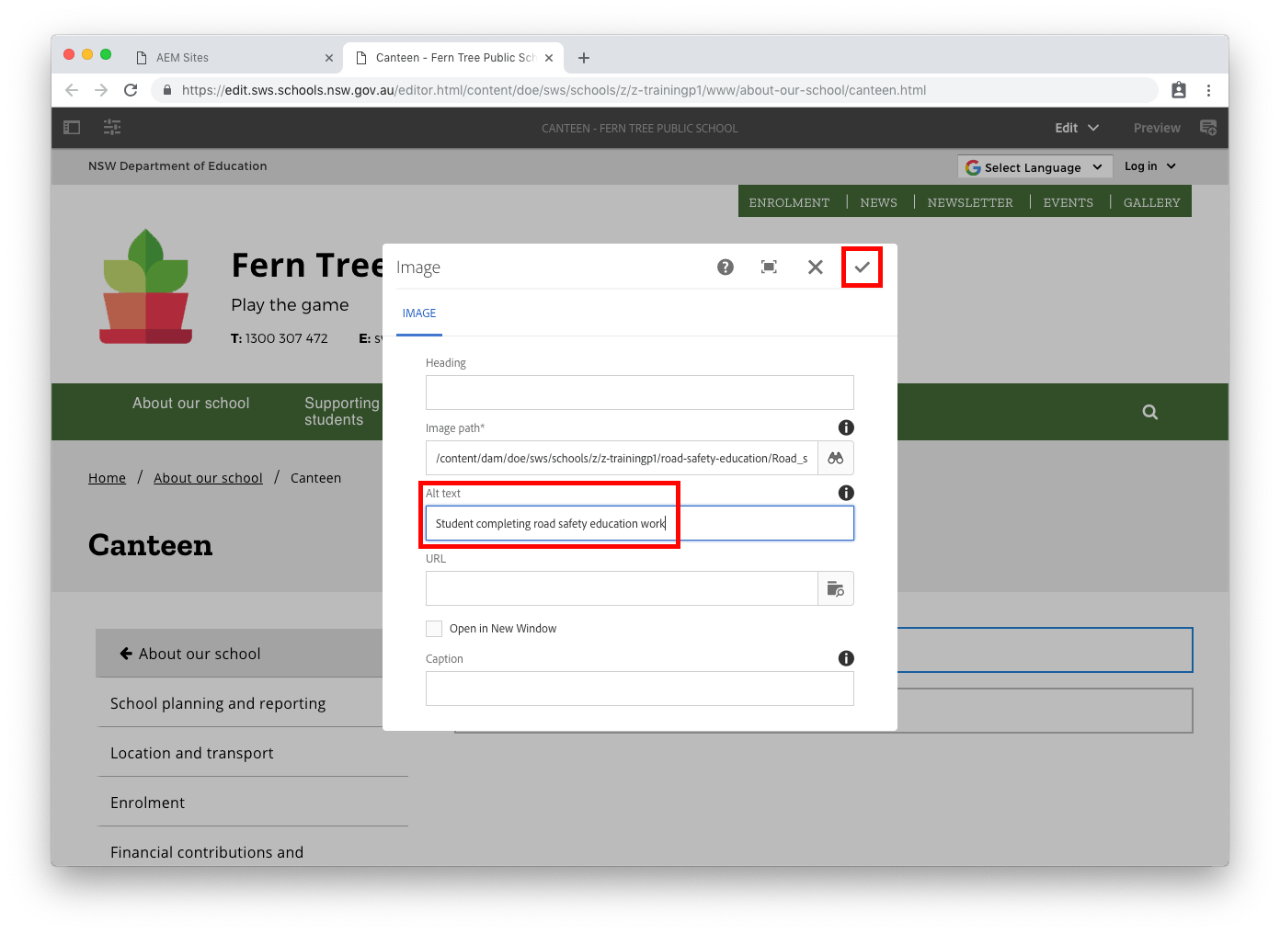
  • Enter alternative text for the image in the Alternative text for screen readers field. Go to the the Image guidelines for help with this. 

Step 4: Insert a link

Option 1: Add a link to an external page 

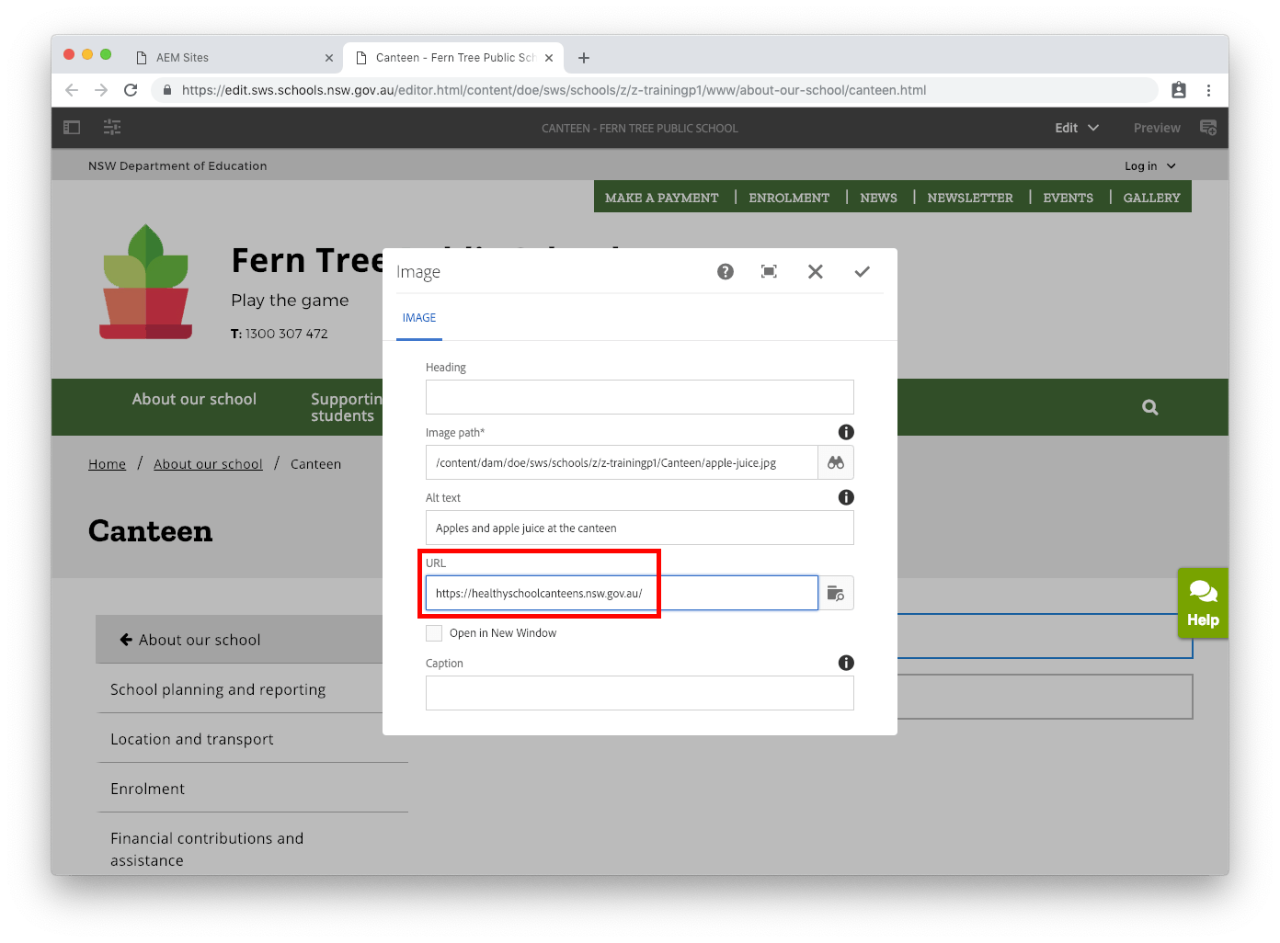
  • In the Add a link to this image (URL) field, enter the full URL of the web page you want to direct your users to. 

Option 2: Add a link to an internal page 

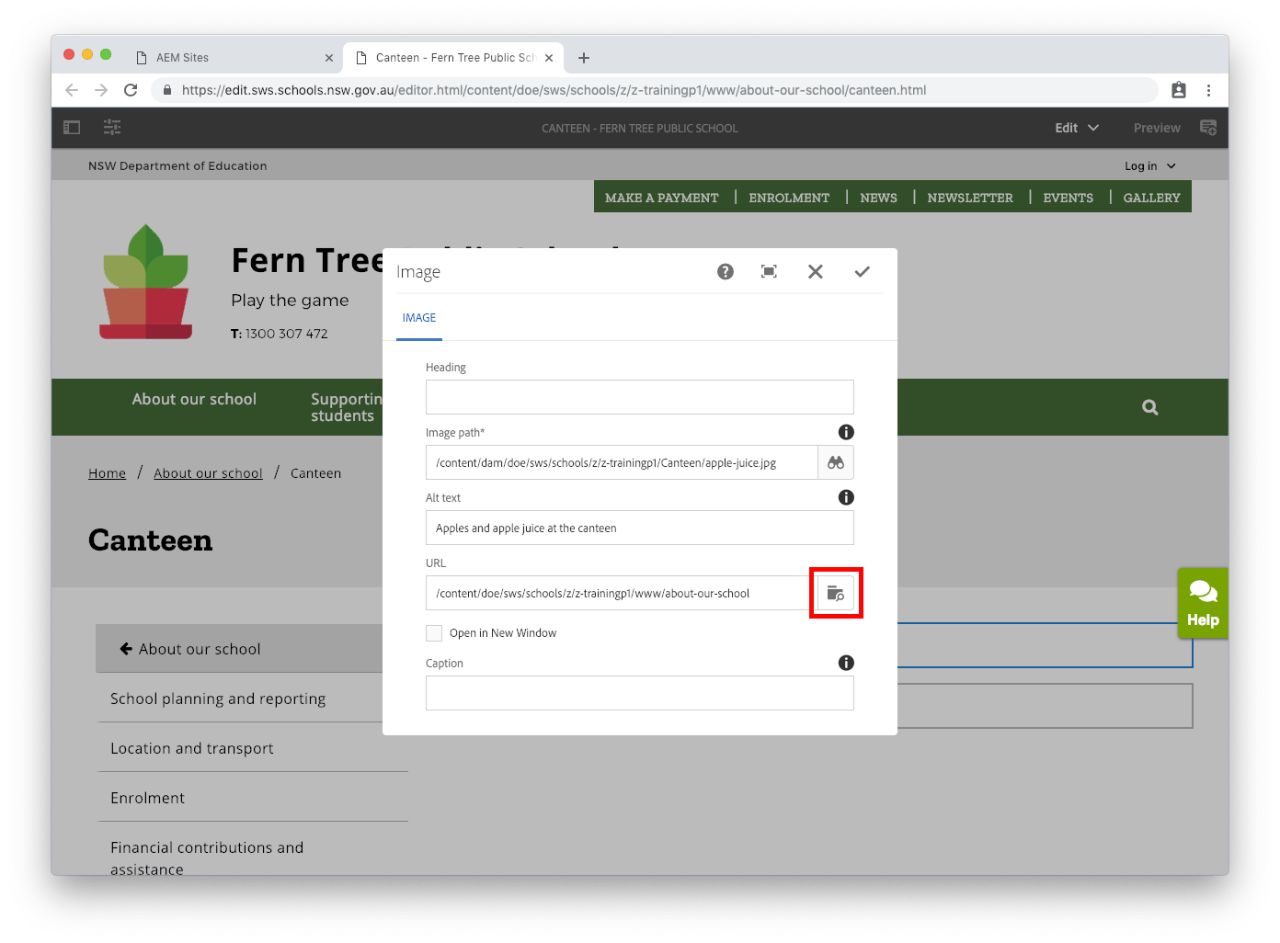
  • In the URL field, select the folder icon to navigate through your web pages to an existing internal page. 
  • Once you have found your page, select the page name. Your selection will turn blue.
  • Select the tick in the top right of the pop-up to confirm. 

  • Select the tick on the top right of the pop-up to save the image component.

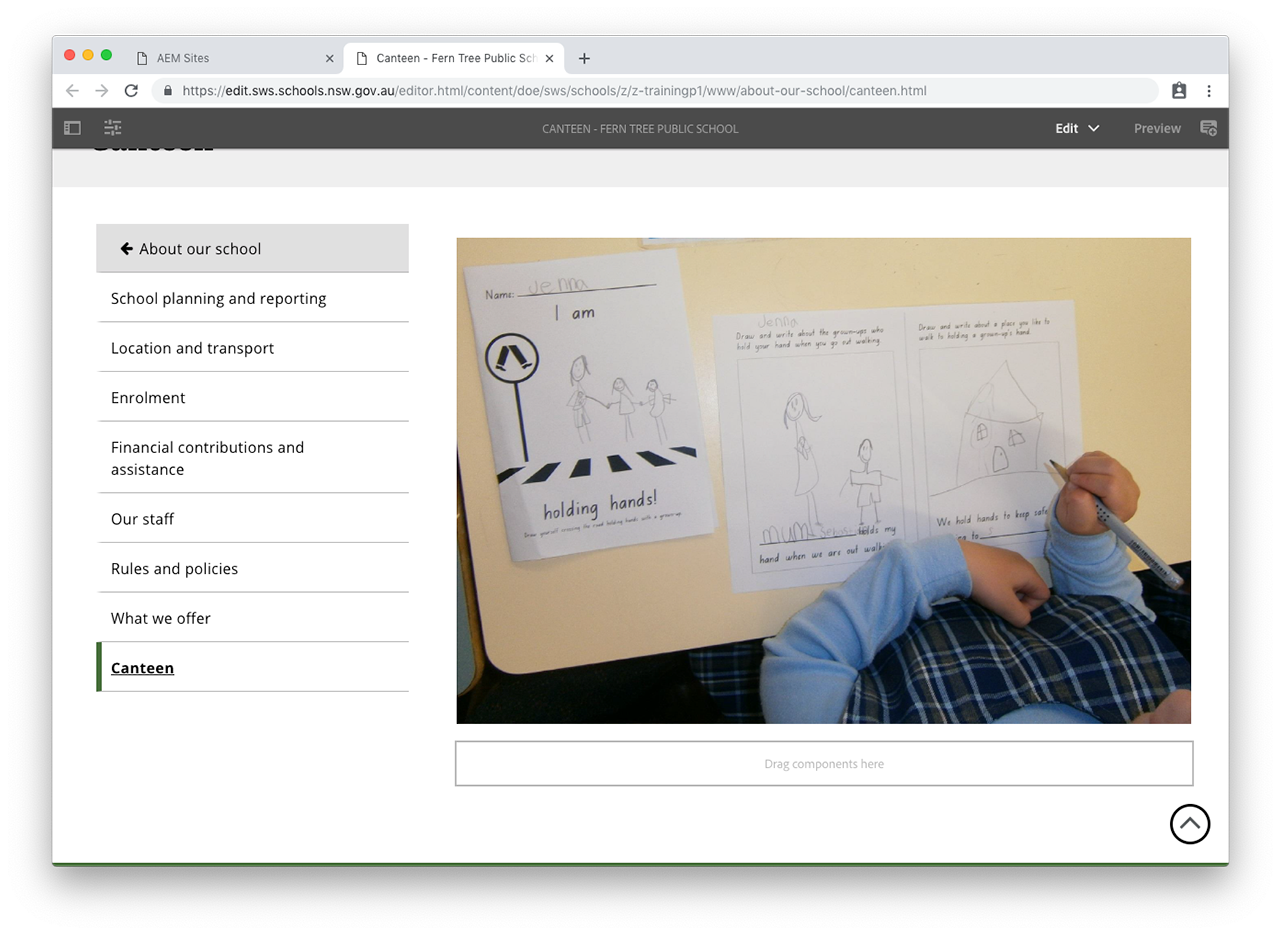
Completed image component

Example of an image on a web page: 
Publish your changes

  • For changes to be updated on your live school website you will need to publish the page