School website service training and support logo

School website service training and support

School website service training and support

Publish a document or image

Use this guide to publish a document or image in Assets. 

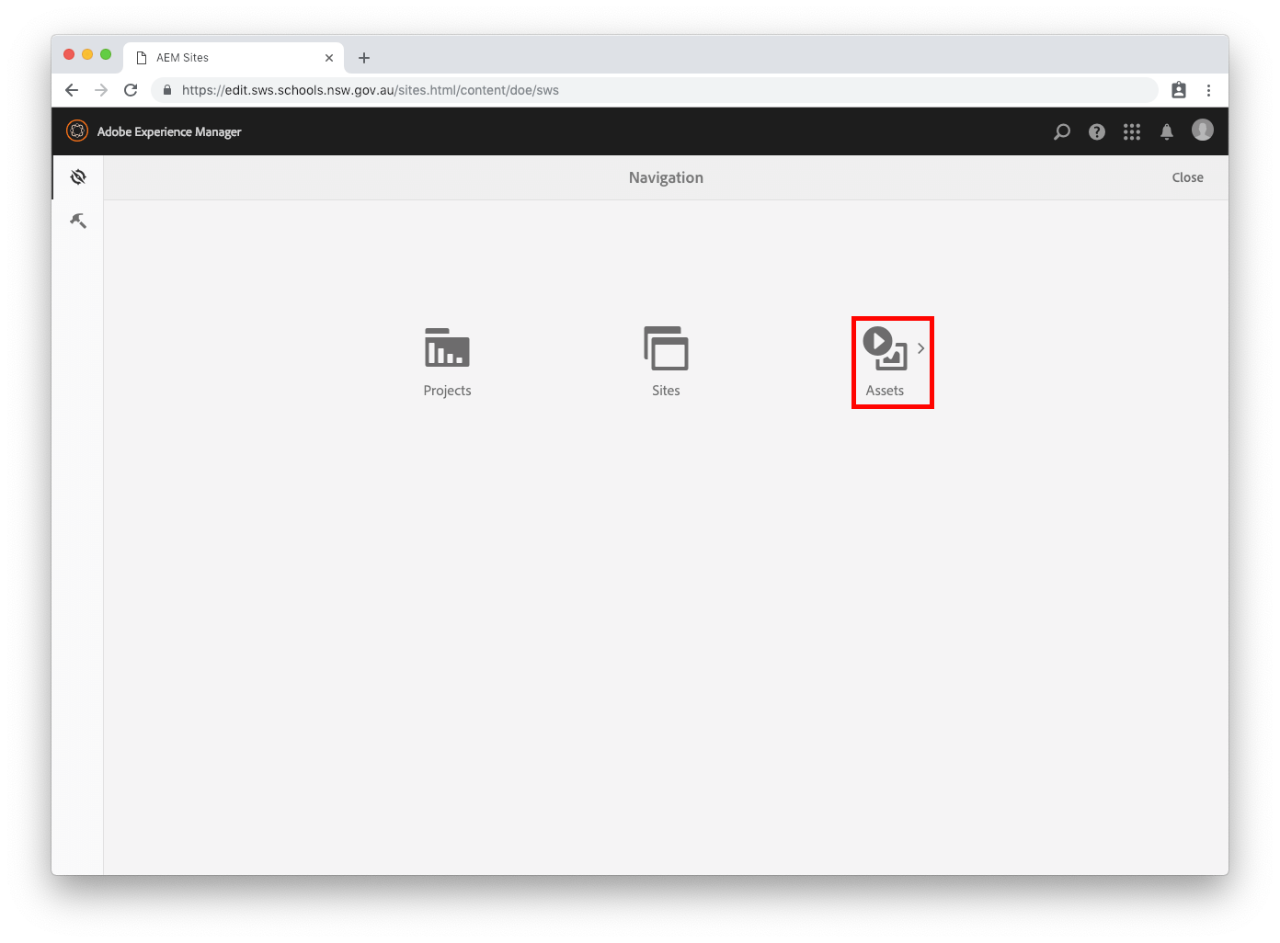
Step 1: Navigate to Assets

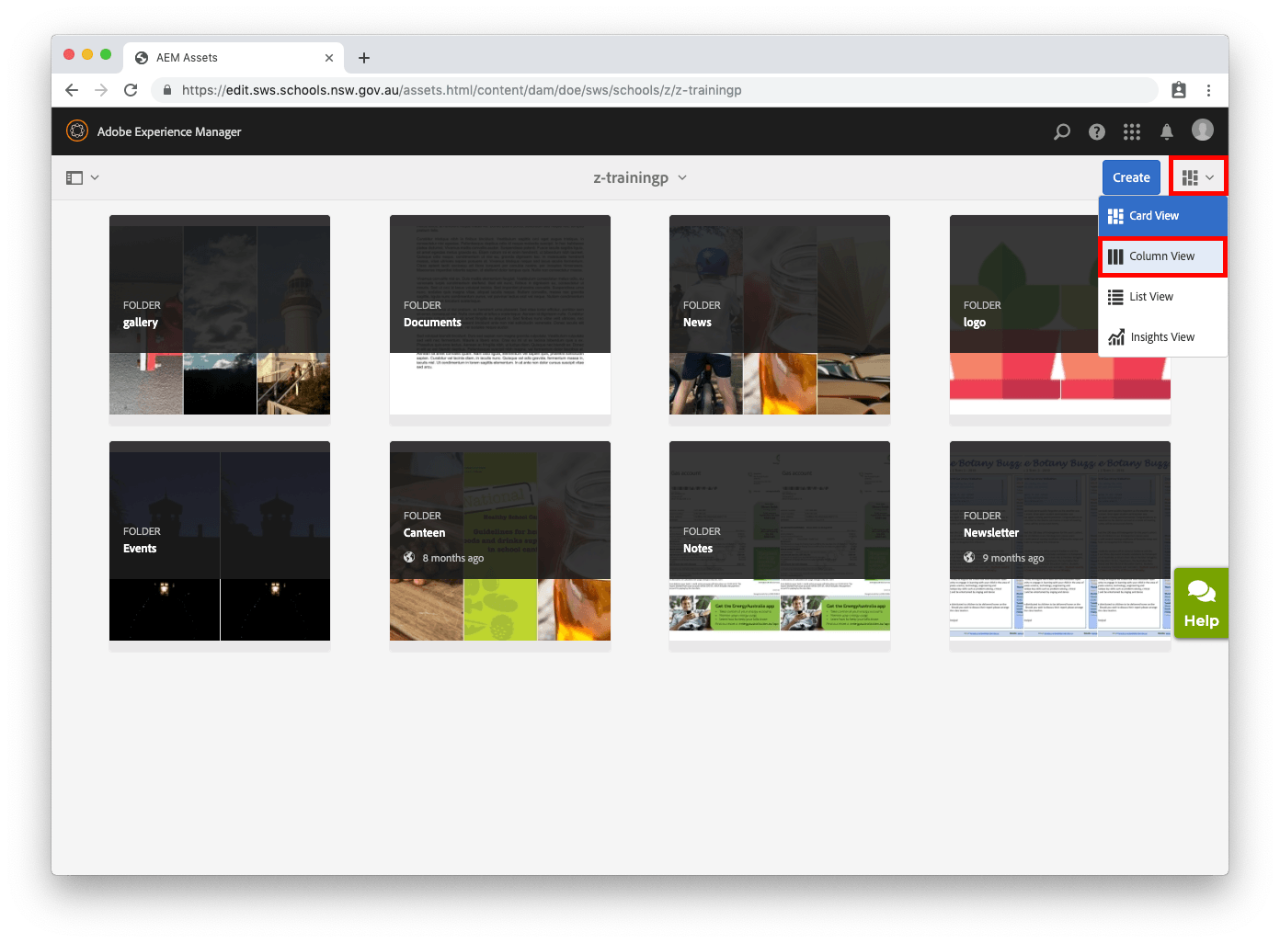
Step 2: Change to column view

  • If your assets open in Card View, you can change this by selecting the View icon in the top right, below your User icon. Select Column View from the drop-down as this is easiest to use. See our guide on Views for more. 

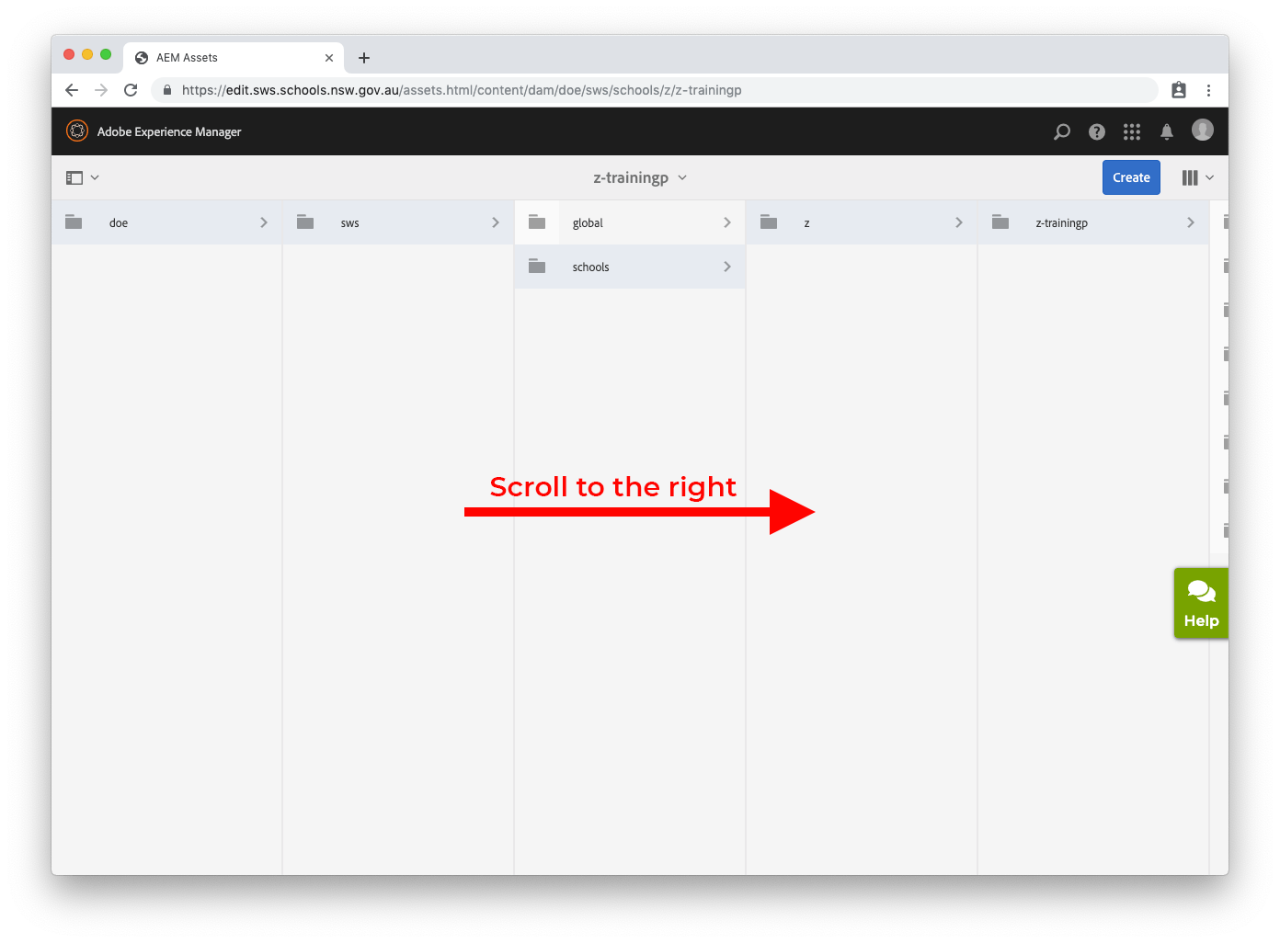
  • Your school's folder will already be selected.
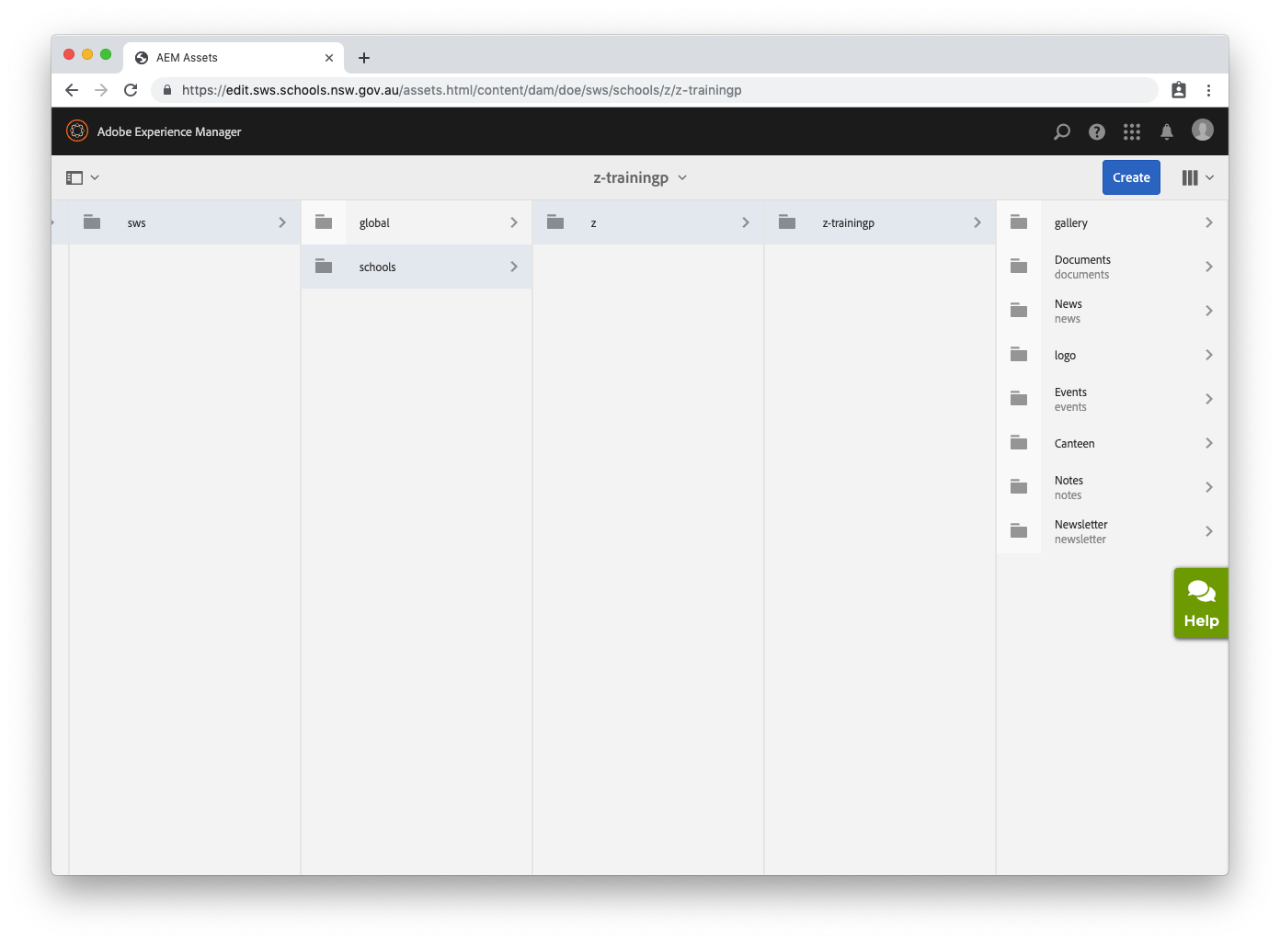
  • Scroll to the right to see your assets.

  • Select the folder in which your document or image is stored.

Step 3: Publish the document or image

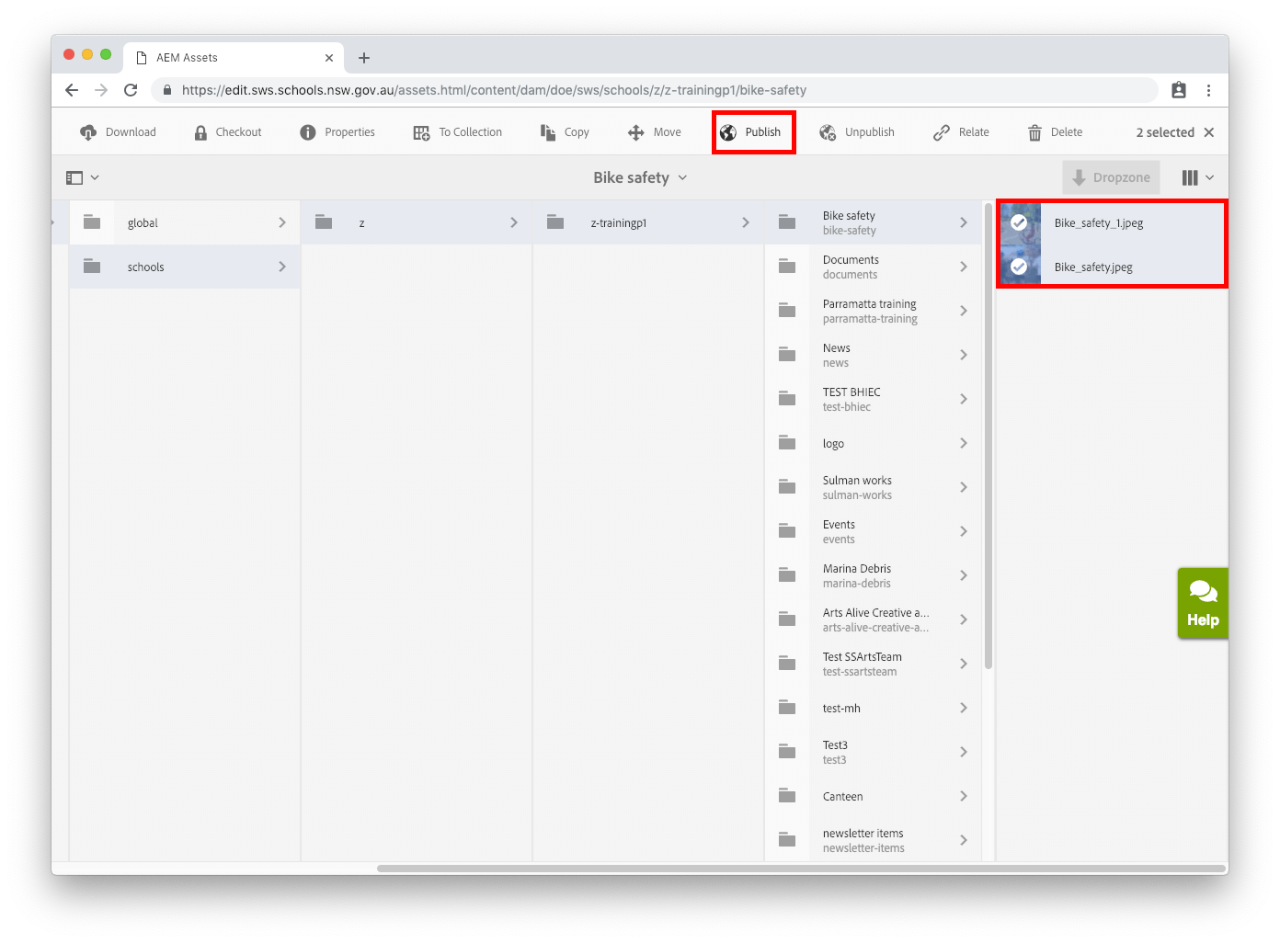
  • Once you have found your document or image, select the icon to the left of the file name. The tick will appear and your selection will turn blue.
  • Select Publish in the menu bar that appears across the top of the screen.

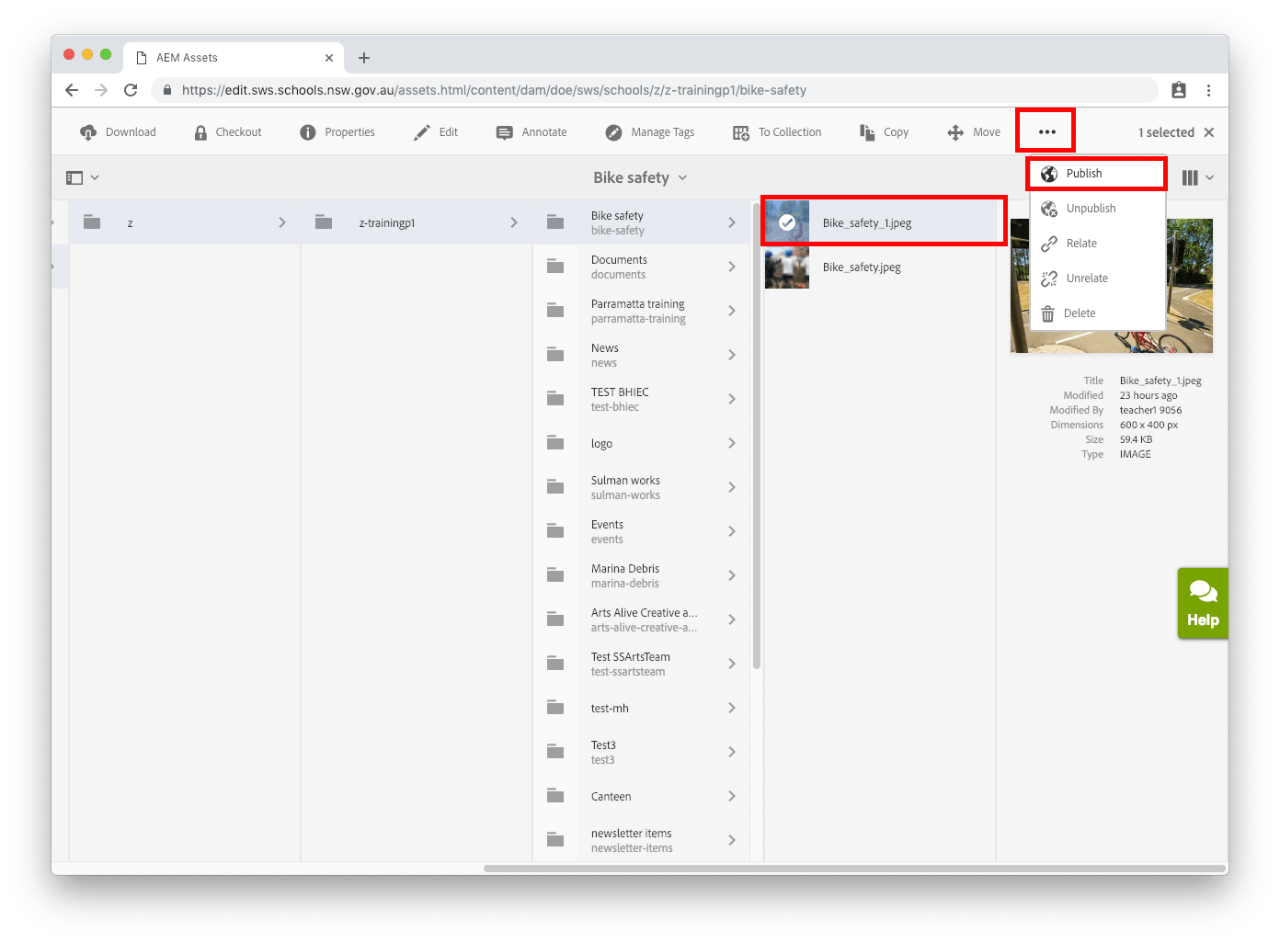
  • If you don't see Publish, select the ellipsis in the menu bar. Select Publish from the drop-down option. 

  • If you still don't see Publish it is because you are an Author. You will need to request the asset to be published by an approver.
  • Select Publish in the pop-up to confirm you want to publish the document or image.